
Q3; What Did We Do?
Welcome to Q4 of 2015. The following is an edited version of the quarterly report that we are required to submit to the City of Calgary. Turns out it is also a pretty complete list of what we have accomplished in the past three months. A big thanks goes out to all those who contribute to our success.
Volunteer Hours
For the third quarter of 2015 board members of the Mosquito Society worked a total of 295 hours on administration, banking, communication, website and meetings. Additionally, members of the society worked 811.75 hours on the Mosquito and 441.5 hours on the Hurricane engine over the same period on 23 separate occasions in Calgary and in Nanton.
Volunteer hours for this quarter total 1548.25. This is up 82 hours over the previous quarter and is 443 hours more than for the same quarter last year. The following chart shows the number of hours invested by CMS board and volunteers per quarter since July 2013.
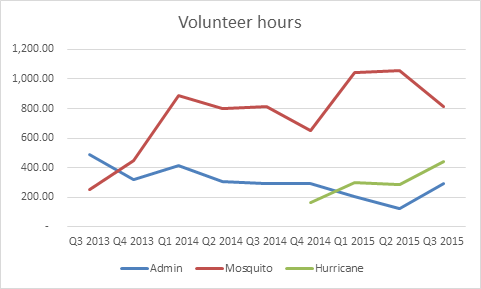
Volunteer Hours.
Fundraising
We successfully held our first fundraising casino on August 27 and 28 at Calgary Casino on Meridian Road NE. We have not yet seen the money nor been told by Alberta Gaming and Liquor what the expected profit is, though our advisors put it at +$65,000. We should see the money in the next sixty days. Our sincere thanks to Barry D. who managed this process and to all of the volunteers who put in the long hours. Special thanks to Paul D. for putting in four shifts in two days and to the Collins clan who made it a family affair.
Hurricane
The focus during the past quarter continues on the restoration of the fuselage and center section. As of the end of this quarter, Historic Aviation Services Inc. (HASI) estimates that they are at the 45% completion mark on Phase 4 of the project, with completion of the entire project by May 2017. We conducted our onsite inspection for this quarter on September 28th.
In addition to working on the fuselage and center section, HASI focussed on a rough assembly of the airplane so as to determine in a comprehensive fashion what parts were missing from the project. With a list in hand, Byron Reynolds visited Vintage Wings of Canada in Gatineau, PQ over the Labour Day weekend and came back with a collection of bits and pieces. As generous as Vintage Wings was, there are still many parts yet to be acquired in order to complete and make the aircraft run-able. We will be forwarding our first shopping list to Hawker Restorations in the UK over the next week.
 |
| A table full of Hurricane parts courtesy of our friends at Vintage Wings of Canada in Gatineau, Quebec. This organization has a restored and flying British built Hurricane IV and is currently restoring a Canadian built Hurricane XII to represent the aircraft flown by Calgary ace F/O William L. McKnight. Check them out at: www.vintagewings.ca |
In this quarter there has been a great deal focus and energy on the paint scheme and markings for the Hurricane.
Board member Bert Furlong produced a draft outline for the colours and markings based on many hours of research. We have also engaged researchers, historians and archivists across Canada, the UK and the United States in order to insure that the finished product is as accurate and realistic as possible. A few details are yet to be settled on, but we have agreement on the big issues.
As was stated in the contract with the City, Hurricane 5389 will be painted as it served with 133 Squadron from July 1942 to July 1943. This will mean being painted in the "A" camouflage scheme of Dark Earth and Dark Brown with Sky Type S undersides. We continue to research paint suppliers for the proper shades and finishes. Hampering our efforts is the fact that we have yet to uncover a single photograph of our aircraft while it was in service during the war.
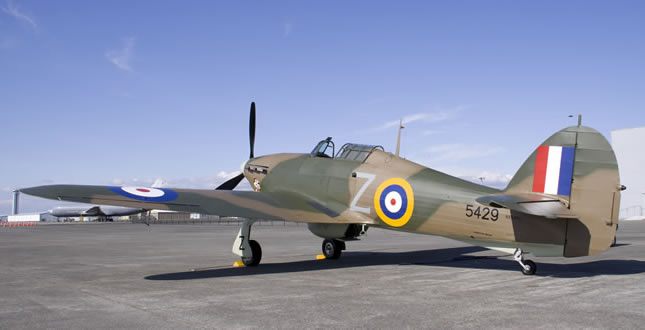
Calgary's Hurricane will be finished much like this example operated by the Flying Heritage Collection out of Paine Field, WA. Ours was likely coded "M" not "Z".
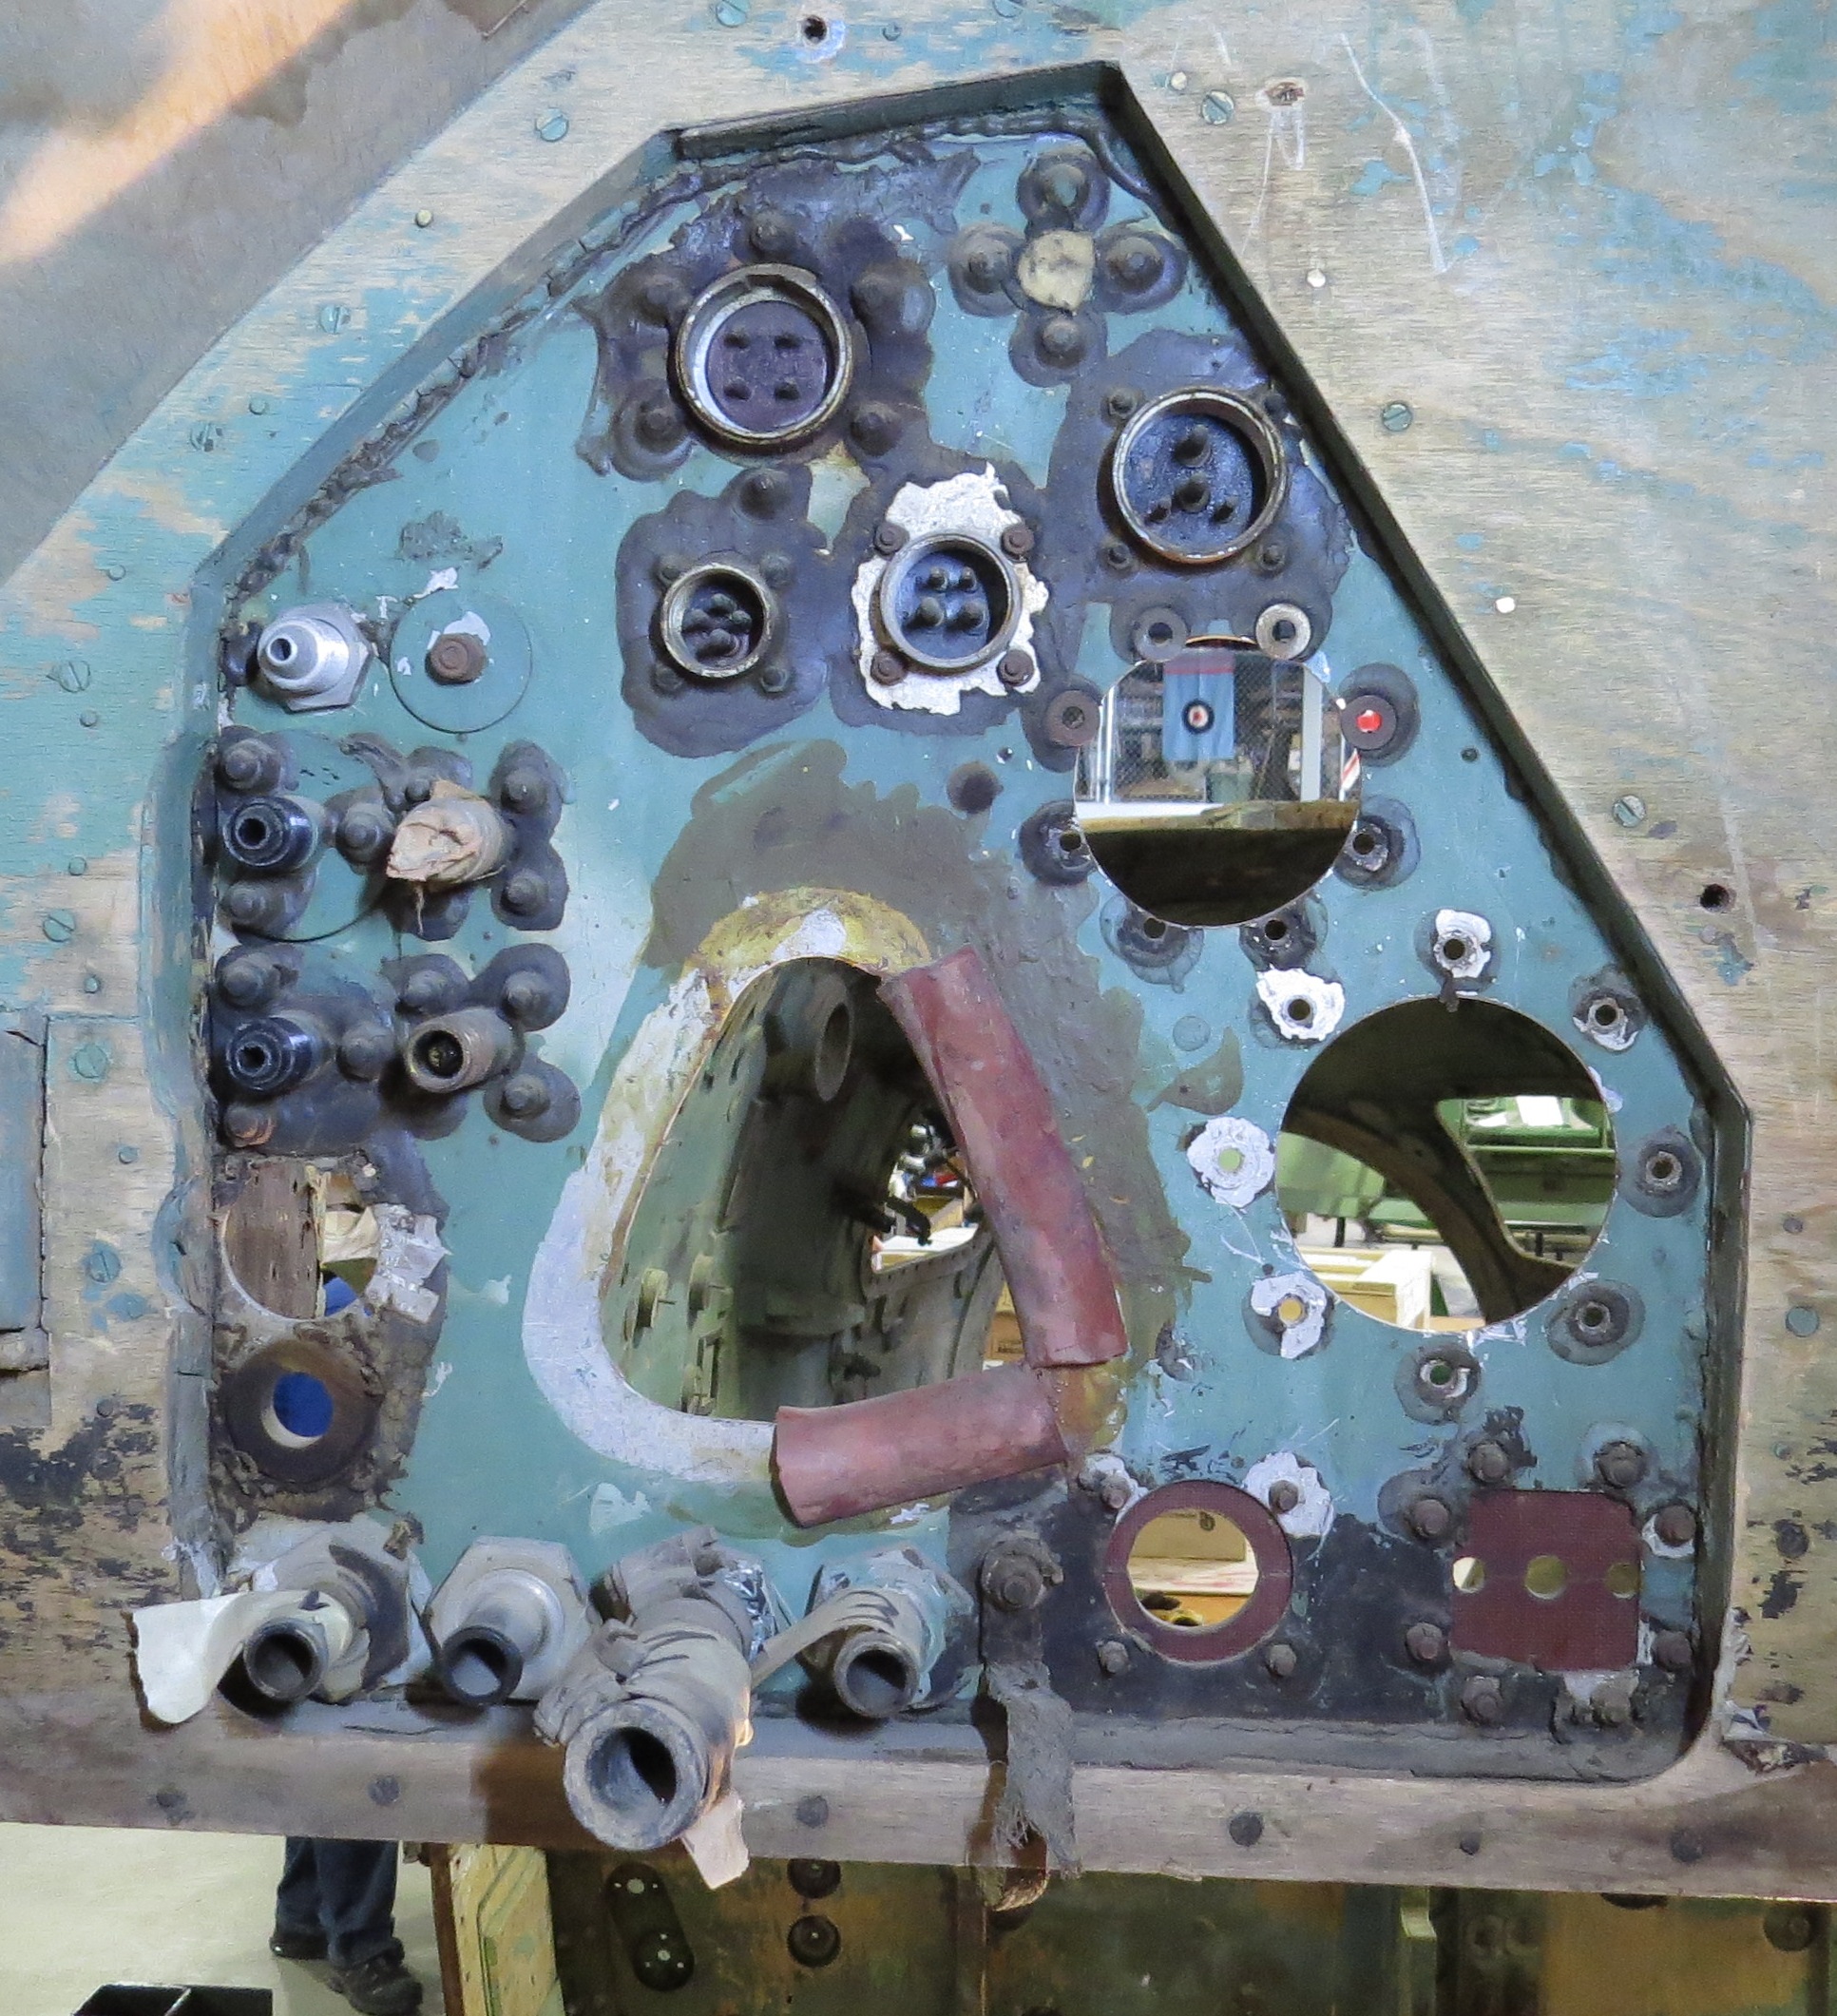
As part of the documenting and research process, we photographed any original skins that still had their wartime colours on them. We used an 18% grey card and colour wheel in the photos to give us a standard reference against which to compare the actual colours which may not be accurately reproduced by digital photography and computer monitors.
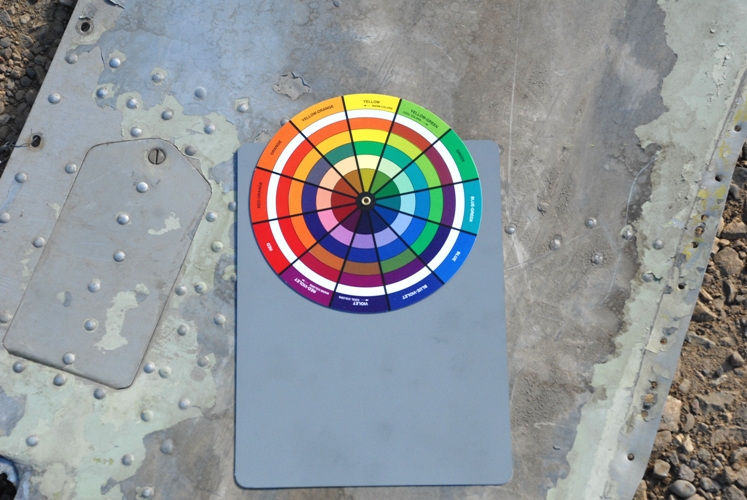
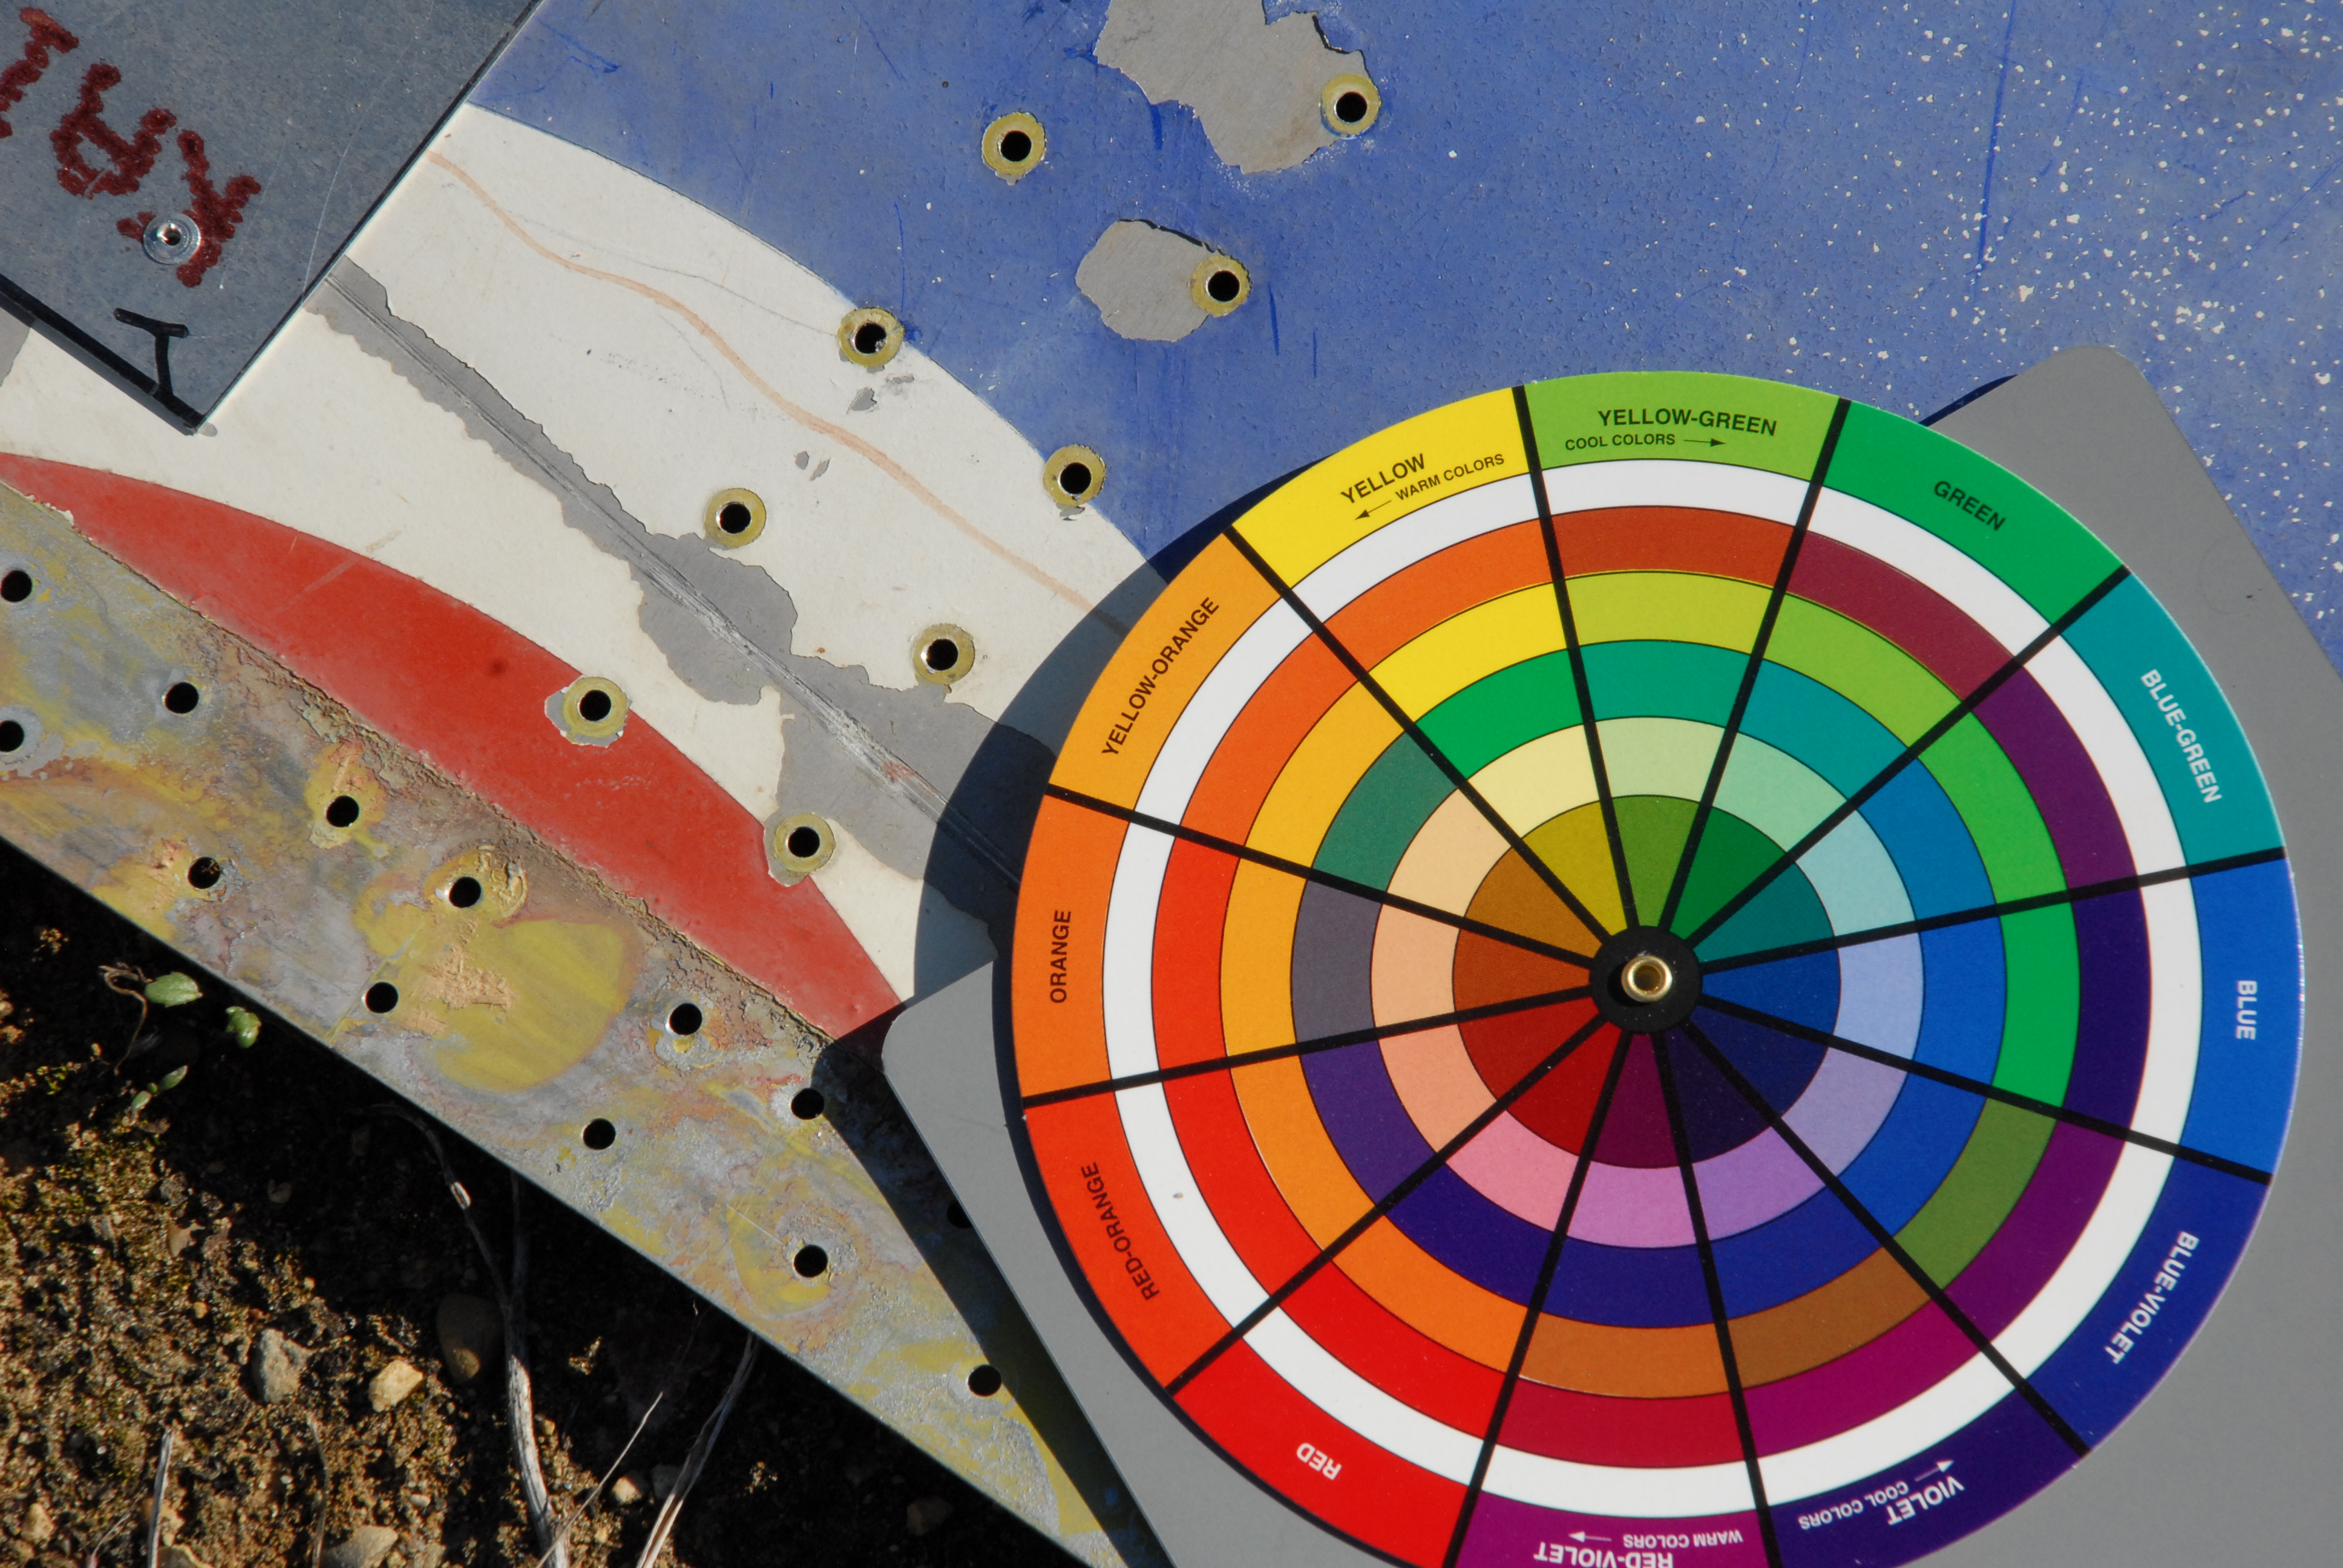
Original wartime paint on skins from the underside of the Hurricane wings. They show that the underside colour used when the airplane was in service was neither grey nor blue, but a light green known as Sky Type S. The picture on the right shows the original roundel colours as applied to the lower surface of the wing after the airplane was sent for repairs in July 1943. Though these will have faded with time, they do point us in the right direction as to style, colour, shade and finish.
Propeller, Radiator and Engine
The Hurricane's Hamilton Standard propeller has been with Aero Propeller of Calgary for some time awaiting our go ahead for the overhaul, which we have recently given.
Gord Thompson of Aero has agreed to donate their labour and charge for parts only. They anticipate having the prop completed within six weeks.
HASI asked us to find a radiator shop in Calgary that could clean and test the radiator and oil cooler for the Hurricane. On the advice of Bomber Command Museum engineers, we dropped it with City Wide Radiators on Blackfoot Tr. Their initial assessment identified a great deal of corrosion in the radiator. In part this is due to the very soft grade of copper used in 1942. They continue to work on it, but have some concerns about its serviceability. We hope that it can be used as new radiators, though available in New Zealand, runs upwards of $50,000.
In the last quarter we were able to finish masking, priming and painting the Merlin engine block. Though not necessary for the serviceability of the engine, it was decided to go the extra mile to make it look good as new. Even some of our critics expressed their admiration for the finished result.
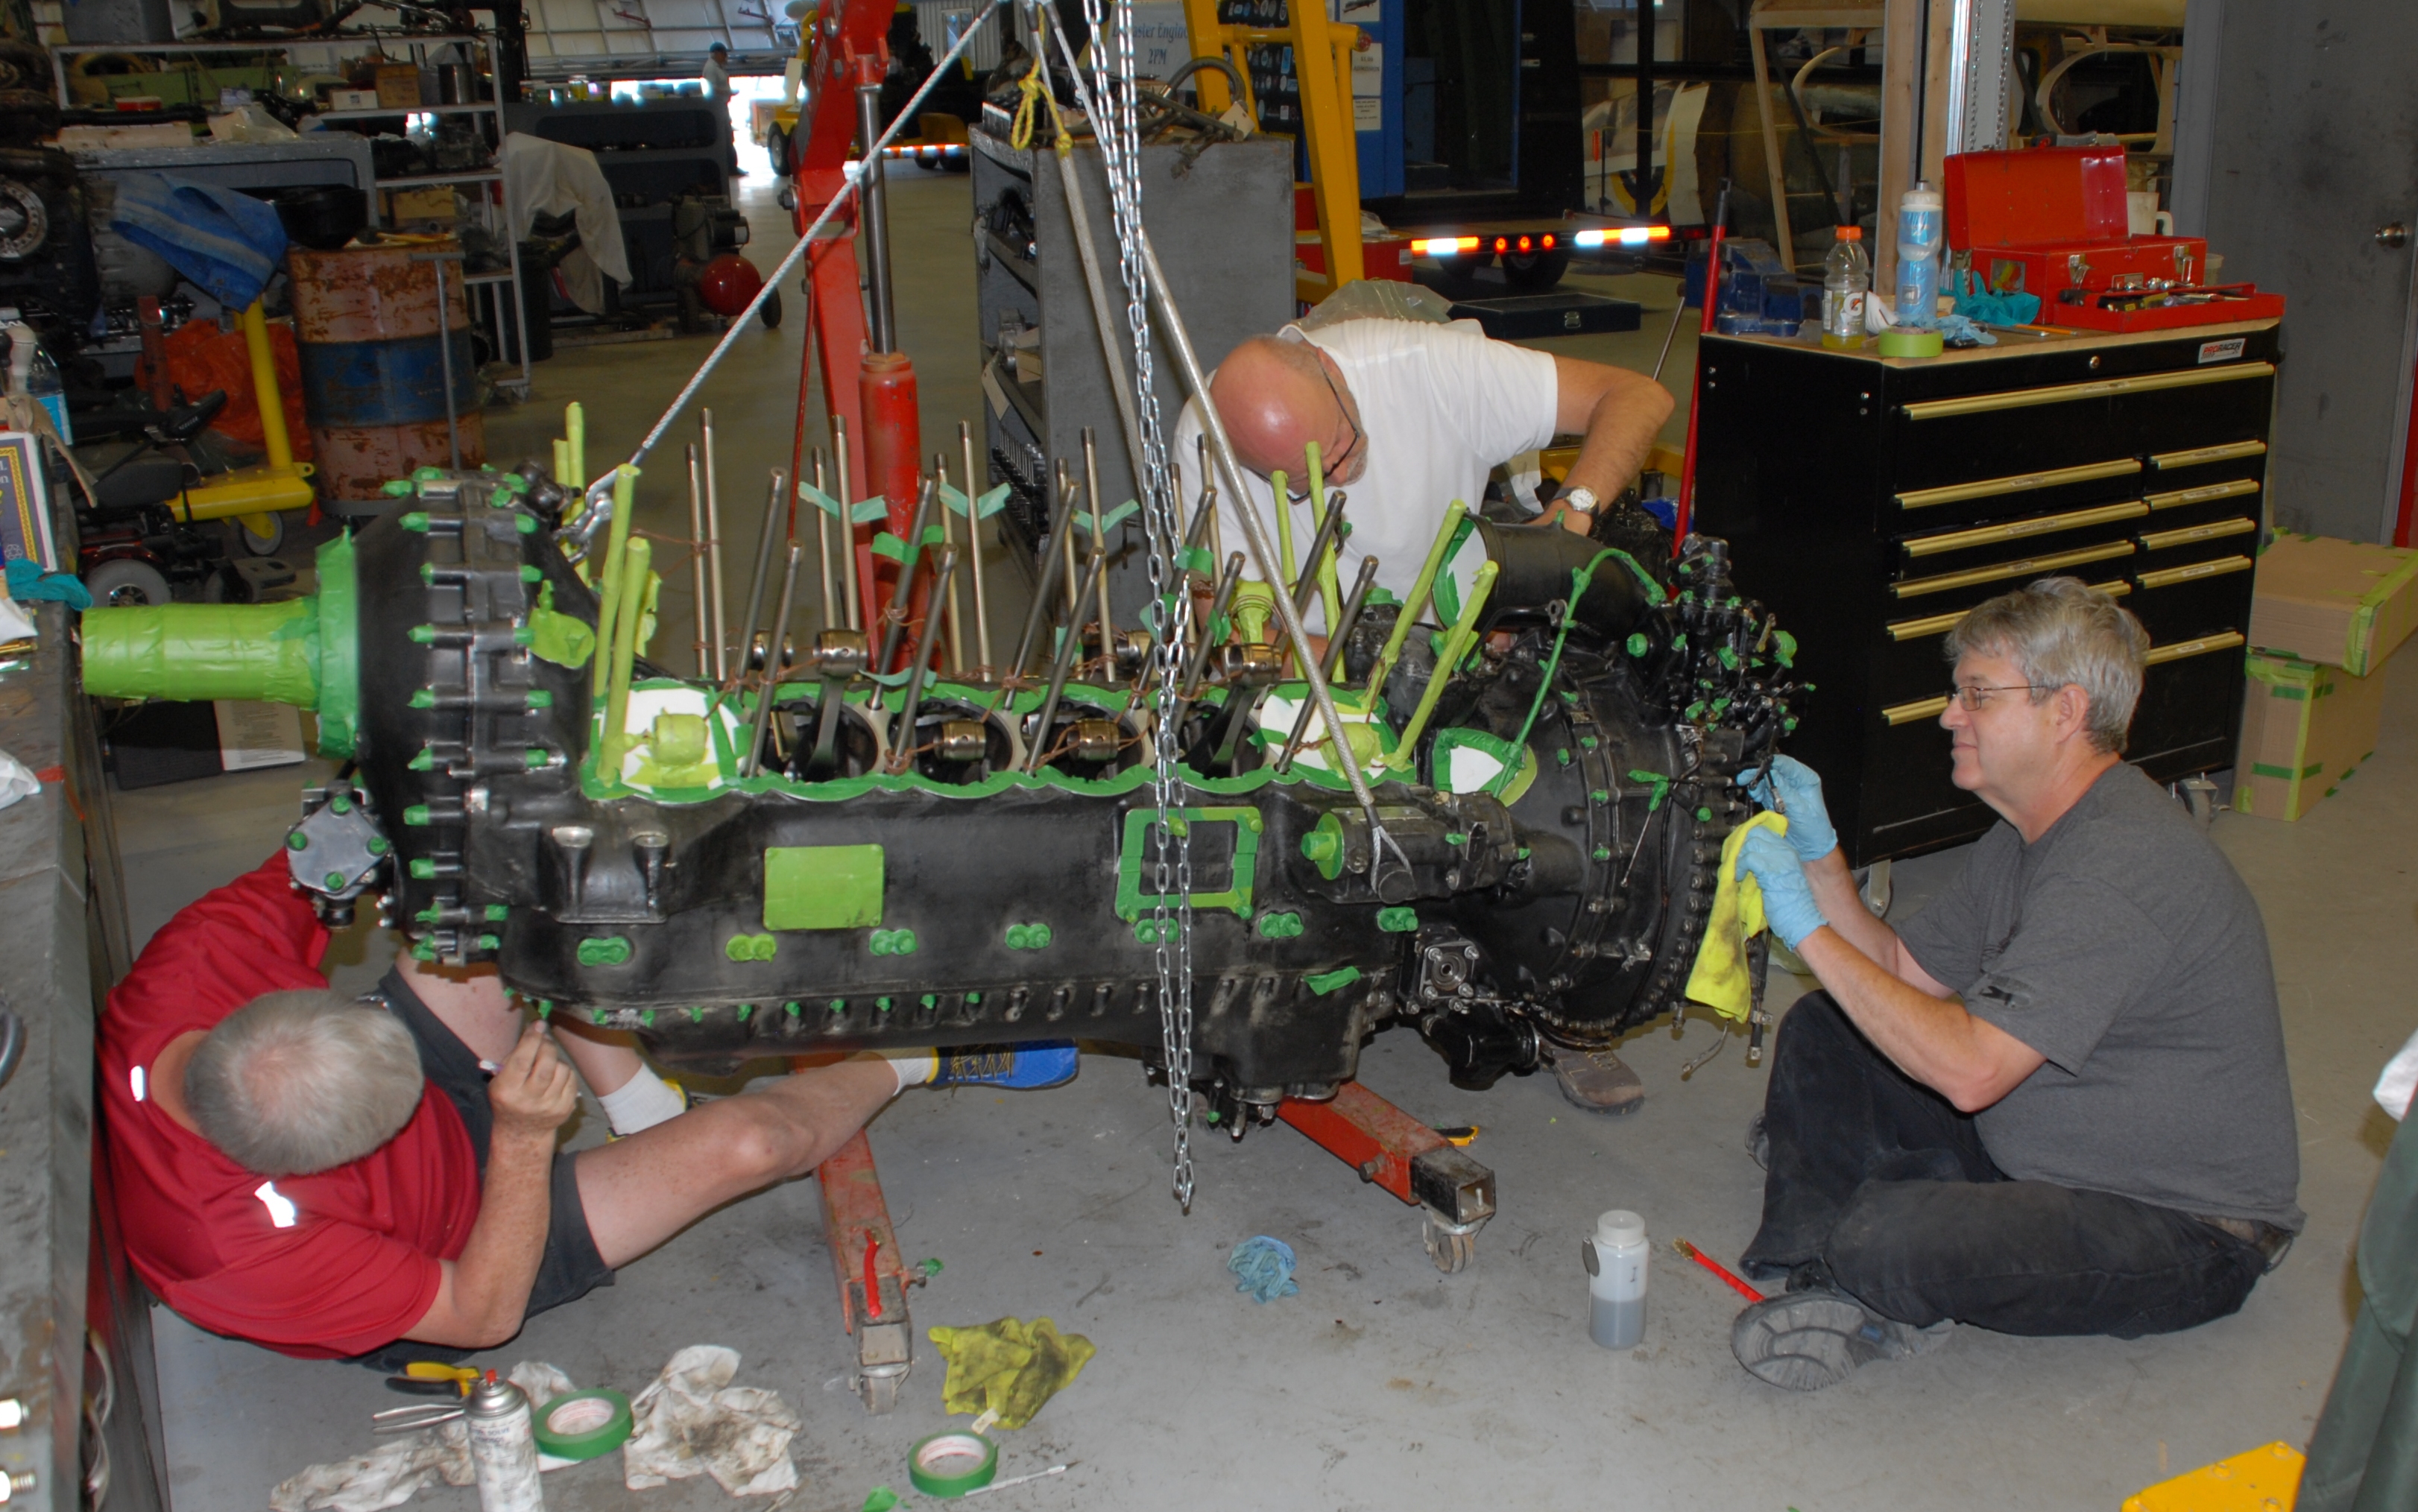
Masking and then painting the Hurricane's Packard Merlin engine. Cam, Andy and Brian apply endless green painter's tape to mask the engine prior to painting. As well, every square centimeter, nook and cranny of the entire engine was cleaned with toothbrush sized brass brushes and isopropyl alcohol.
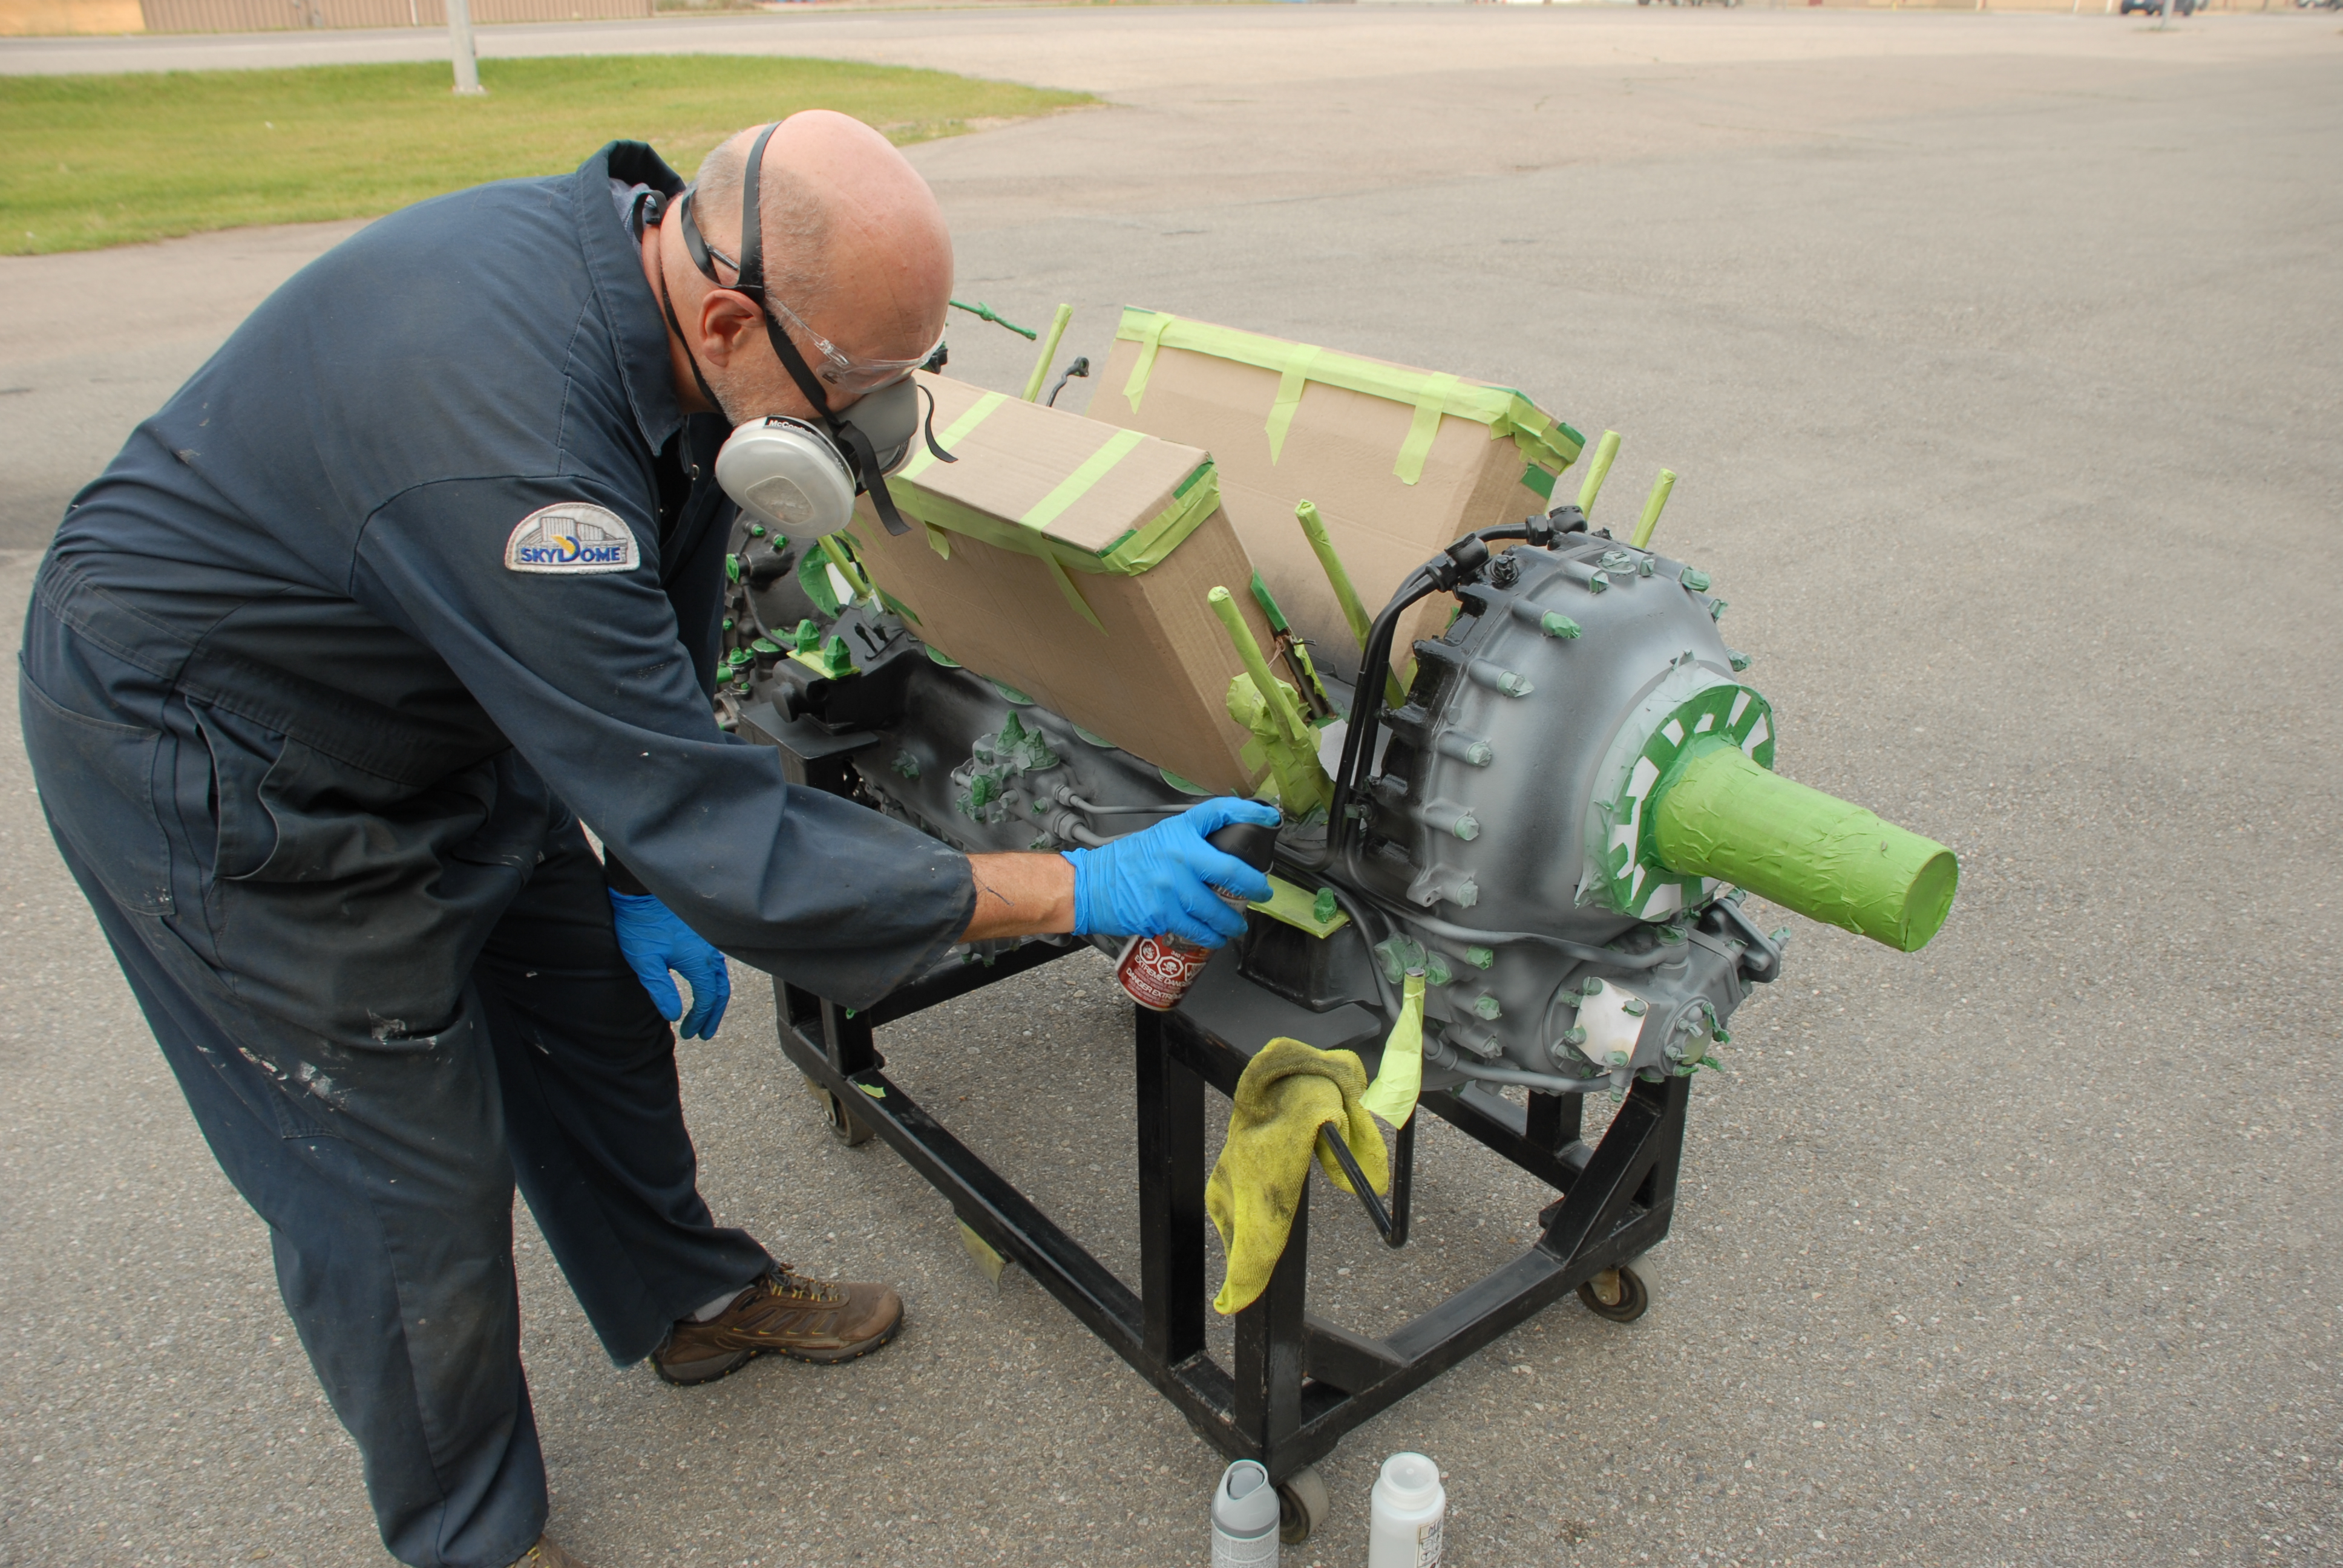
Over two evenings, Andy applied a primer coat and then a black finish to give her that 'like new' look. We are very pleased with the result and proud to have gone the extra mile. It took two months to clean and mask the engine and less than an hour to strip off all of the tape once the paint was dry.
With that step behind us, we have begun the reassembly process with all valves reinstalled in the heads, new gaskets being cut for various areas and new 0-rings being applied to the coolant transfer tubes.
We are working to have the engine complete and ready for delivery to HASI in Wetaskiwin by the end of this year.
Airframe: Historic Aviation Services
Centre Section
- Clean, inspect, repair as necessary, centre section, lower front spar bulkhead assembly. Primed, butyrate doped same and installed in position.
- Clean, inspect, repair as necessary port and starboard "centre section to fuselage" fairing support longerons. Primed, butyrate doped same and installed in position.
- Started clean up, inspection and repair of centre section and wheel well closure panels (several missing).
- Clean, remove large quantity of bird/mouse nests; inspect port and starboard centre section fuel tanks. *Note these tanks are riddled with "pin holes" due to mouse urine and condensation build up between the outer aluminum surface and rubberized "bullet proof" membrane.
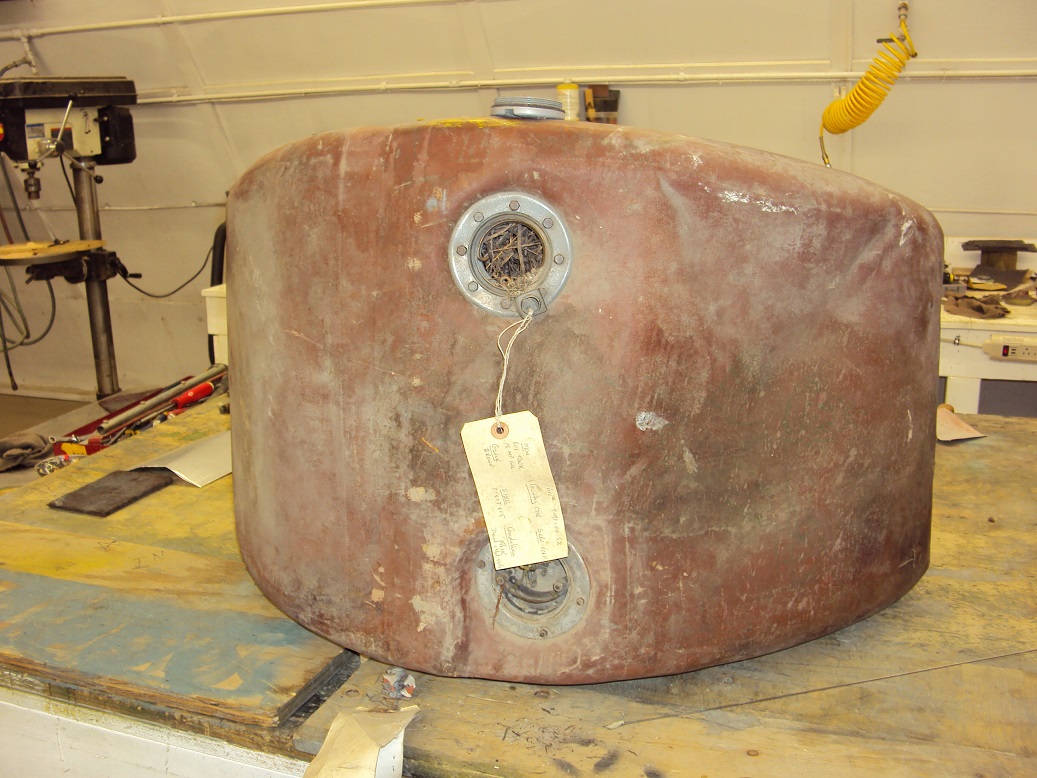

The Hurricane's fuselage fuel tank, filled with bird and mouse nest material. Note the quantity of material removed from the tank in the photo on the right. As a result, all three tanks are badly corroded.
- Supplied (HASI stock) and installed missing starboard inner fuel tank bay torque tube fitting.
Fuselage
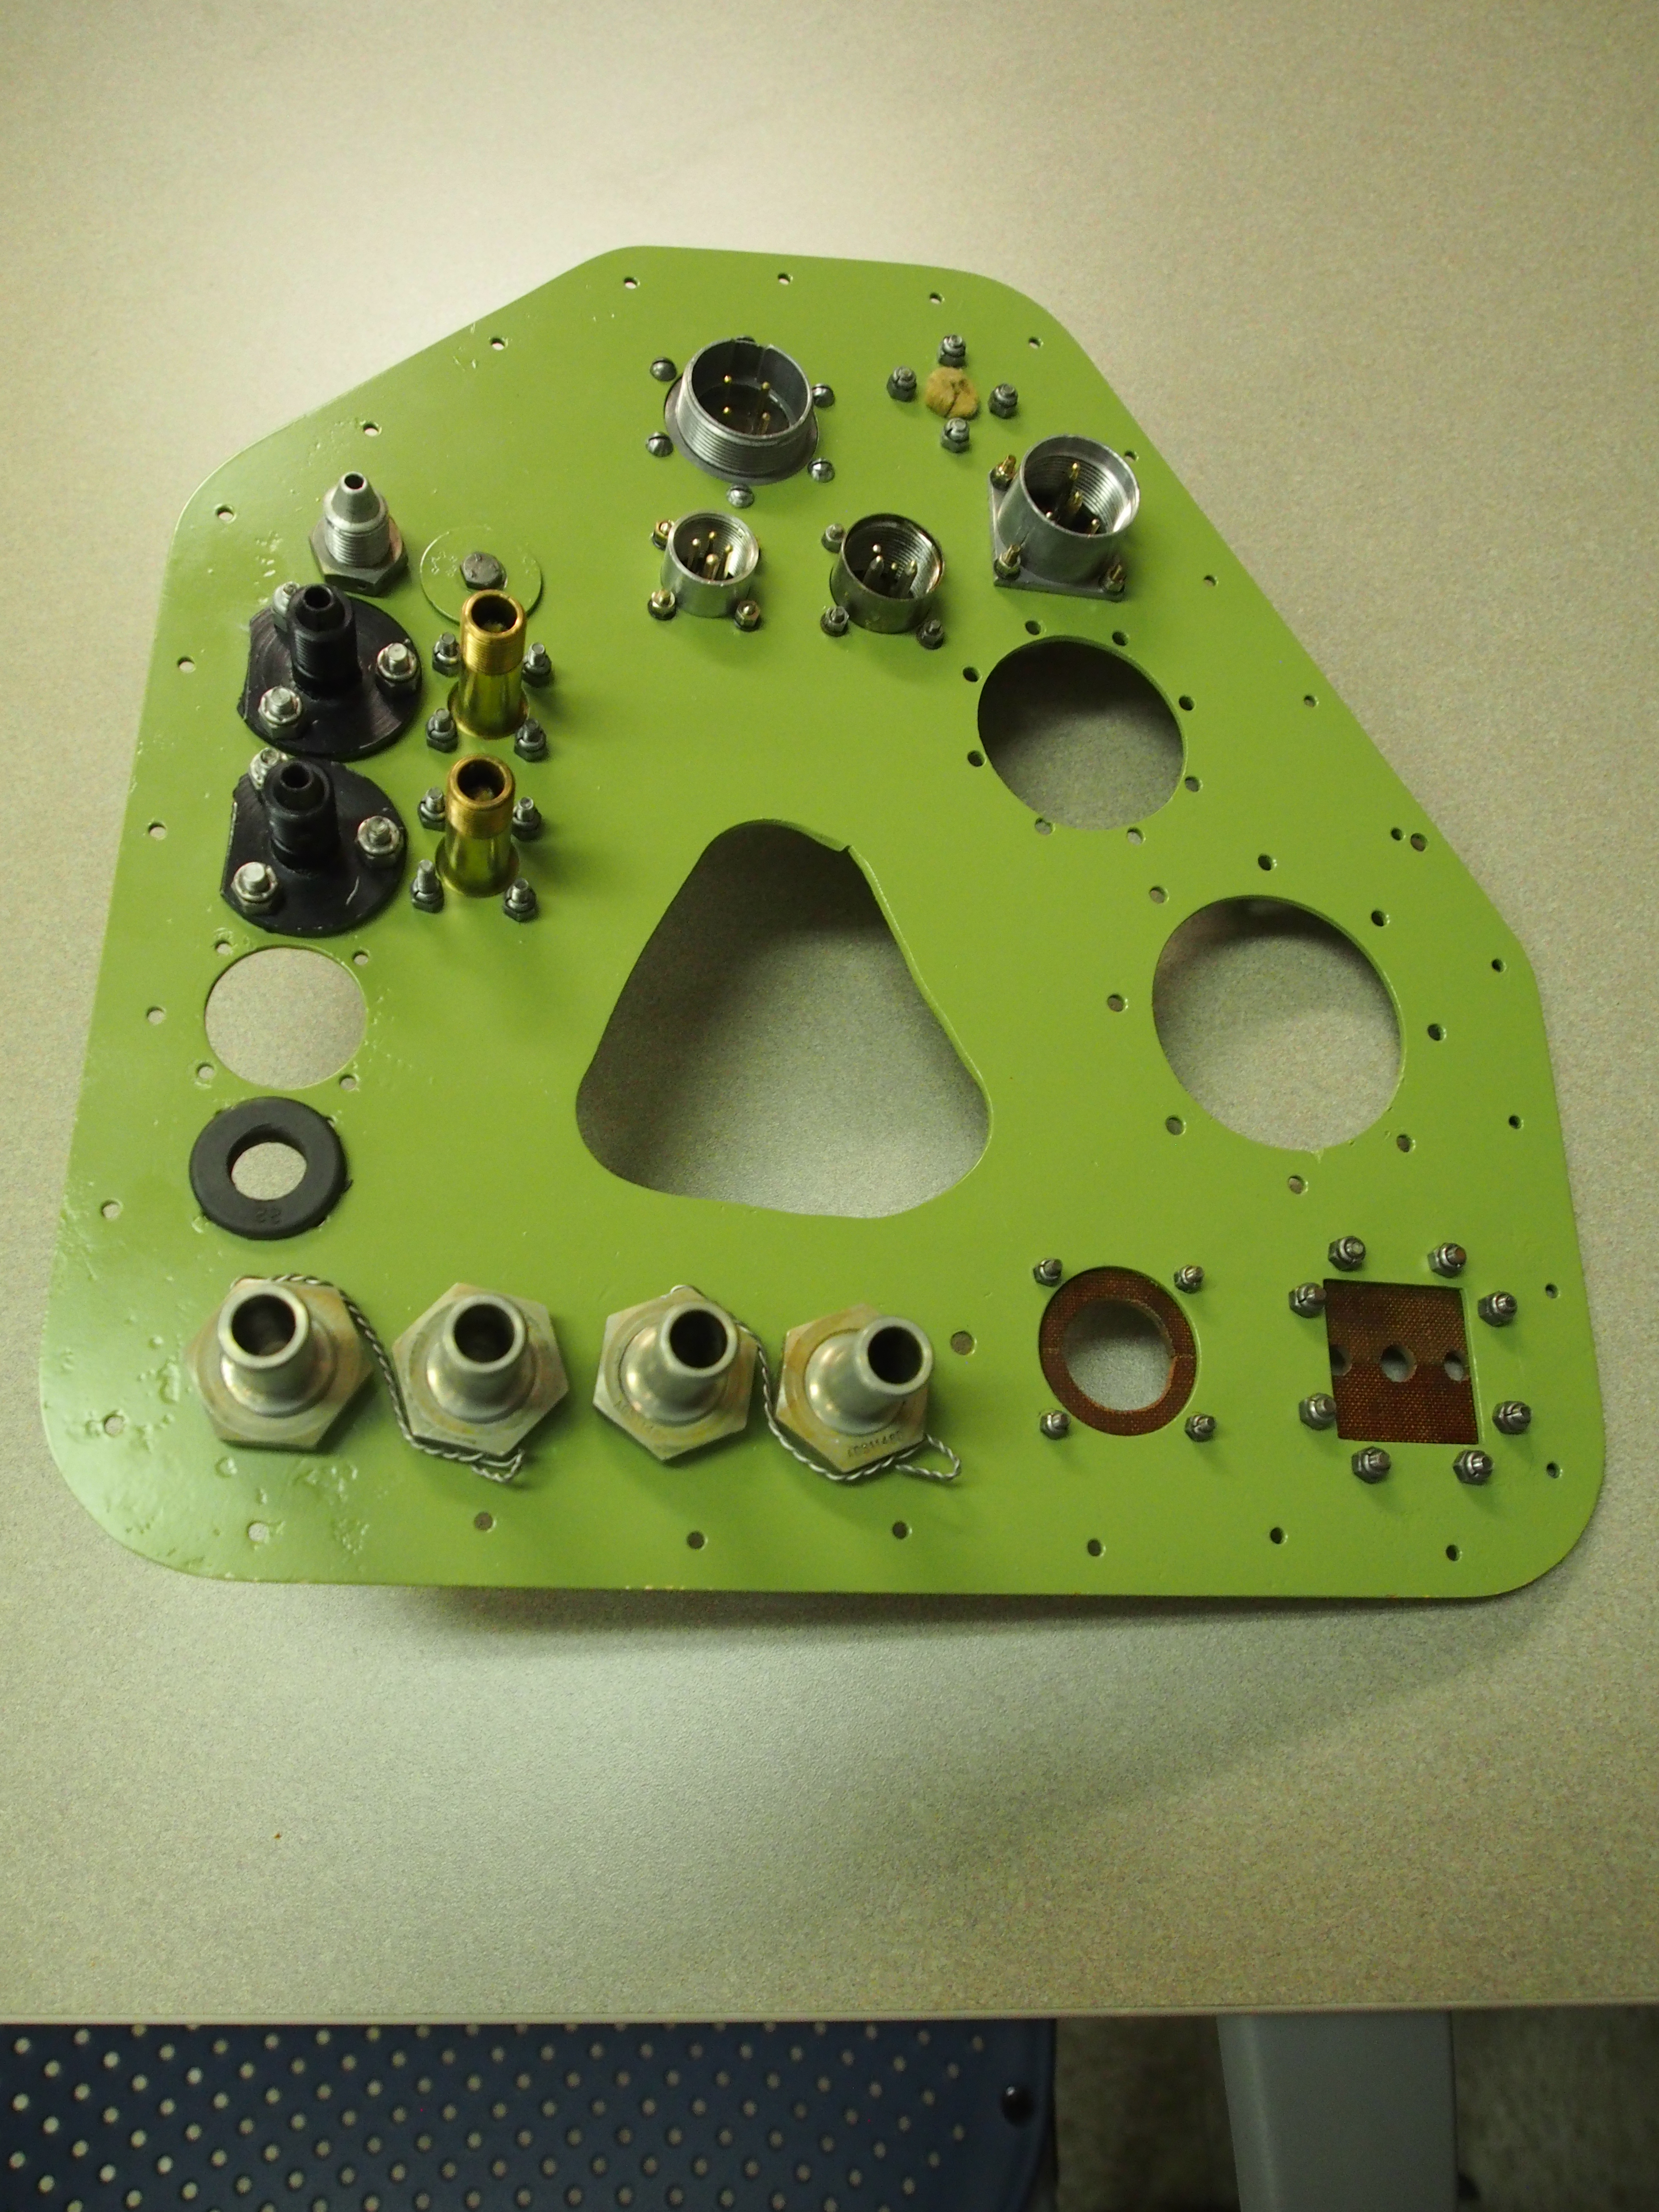
- Finished, clean, inspect repair as necessary, firewall assembly. Primed, butyrate doped firewall and installed same on forward fuselage.
- Located, serviced as required, various firewall fittings, grommets and connectors, installed same in proper locations.
- Clean, inspect, repair as necessary, fuselage fuel tank firewall surround diaphragm. Primed, butyrate doped and installed in position.
- Dismantle, clean, inspect, repair motor mount assembly components as required, determine parts missing, reassemble motor mount as able and reinstall on forward fuselage. *Note all motor mount mounting hardware missing.
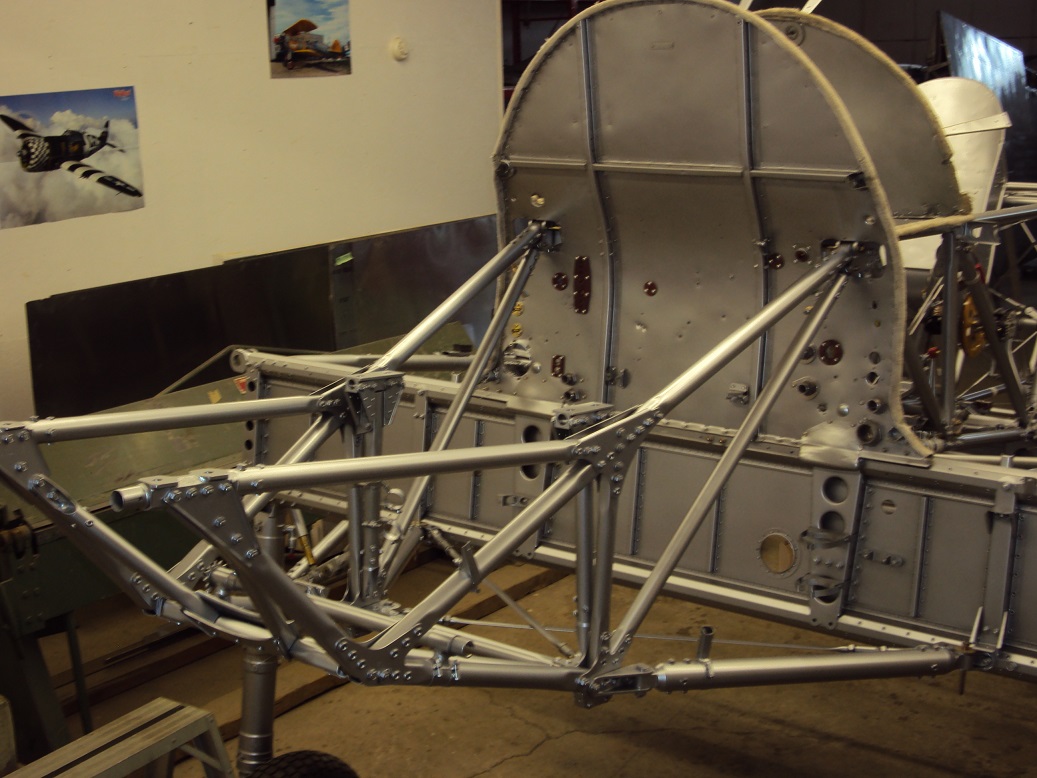
Engine bearer now restored, but minus all mounting hardware, and lower engine cowling and nose cowling, both in relatively good condition.
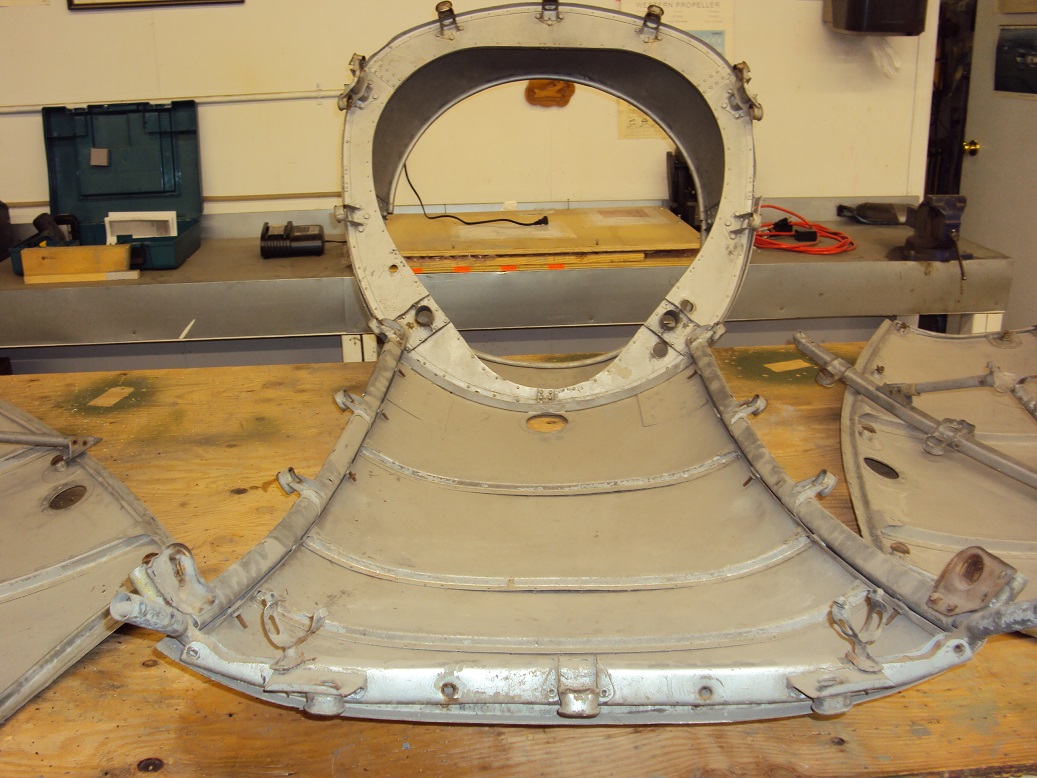
- Cleaned, inspected, and repaired as required, primed, butyrate doped port and starboard upper cowling support longerons and cowling nose bowl. Assembled same to motor mount and forward fuselage.
- Clean, remove large quantity of bird/mouse nests; inspect port and starboard centre section fuel tanks. *Note this tank is also riddled with "pin holes" the same as the centre section tanks. In addition it is severely dented and deformed.
- Trial fit fuselage fuel tank in firewall surround diaphragm.
- Continued cowling panel repairs.
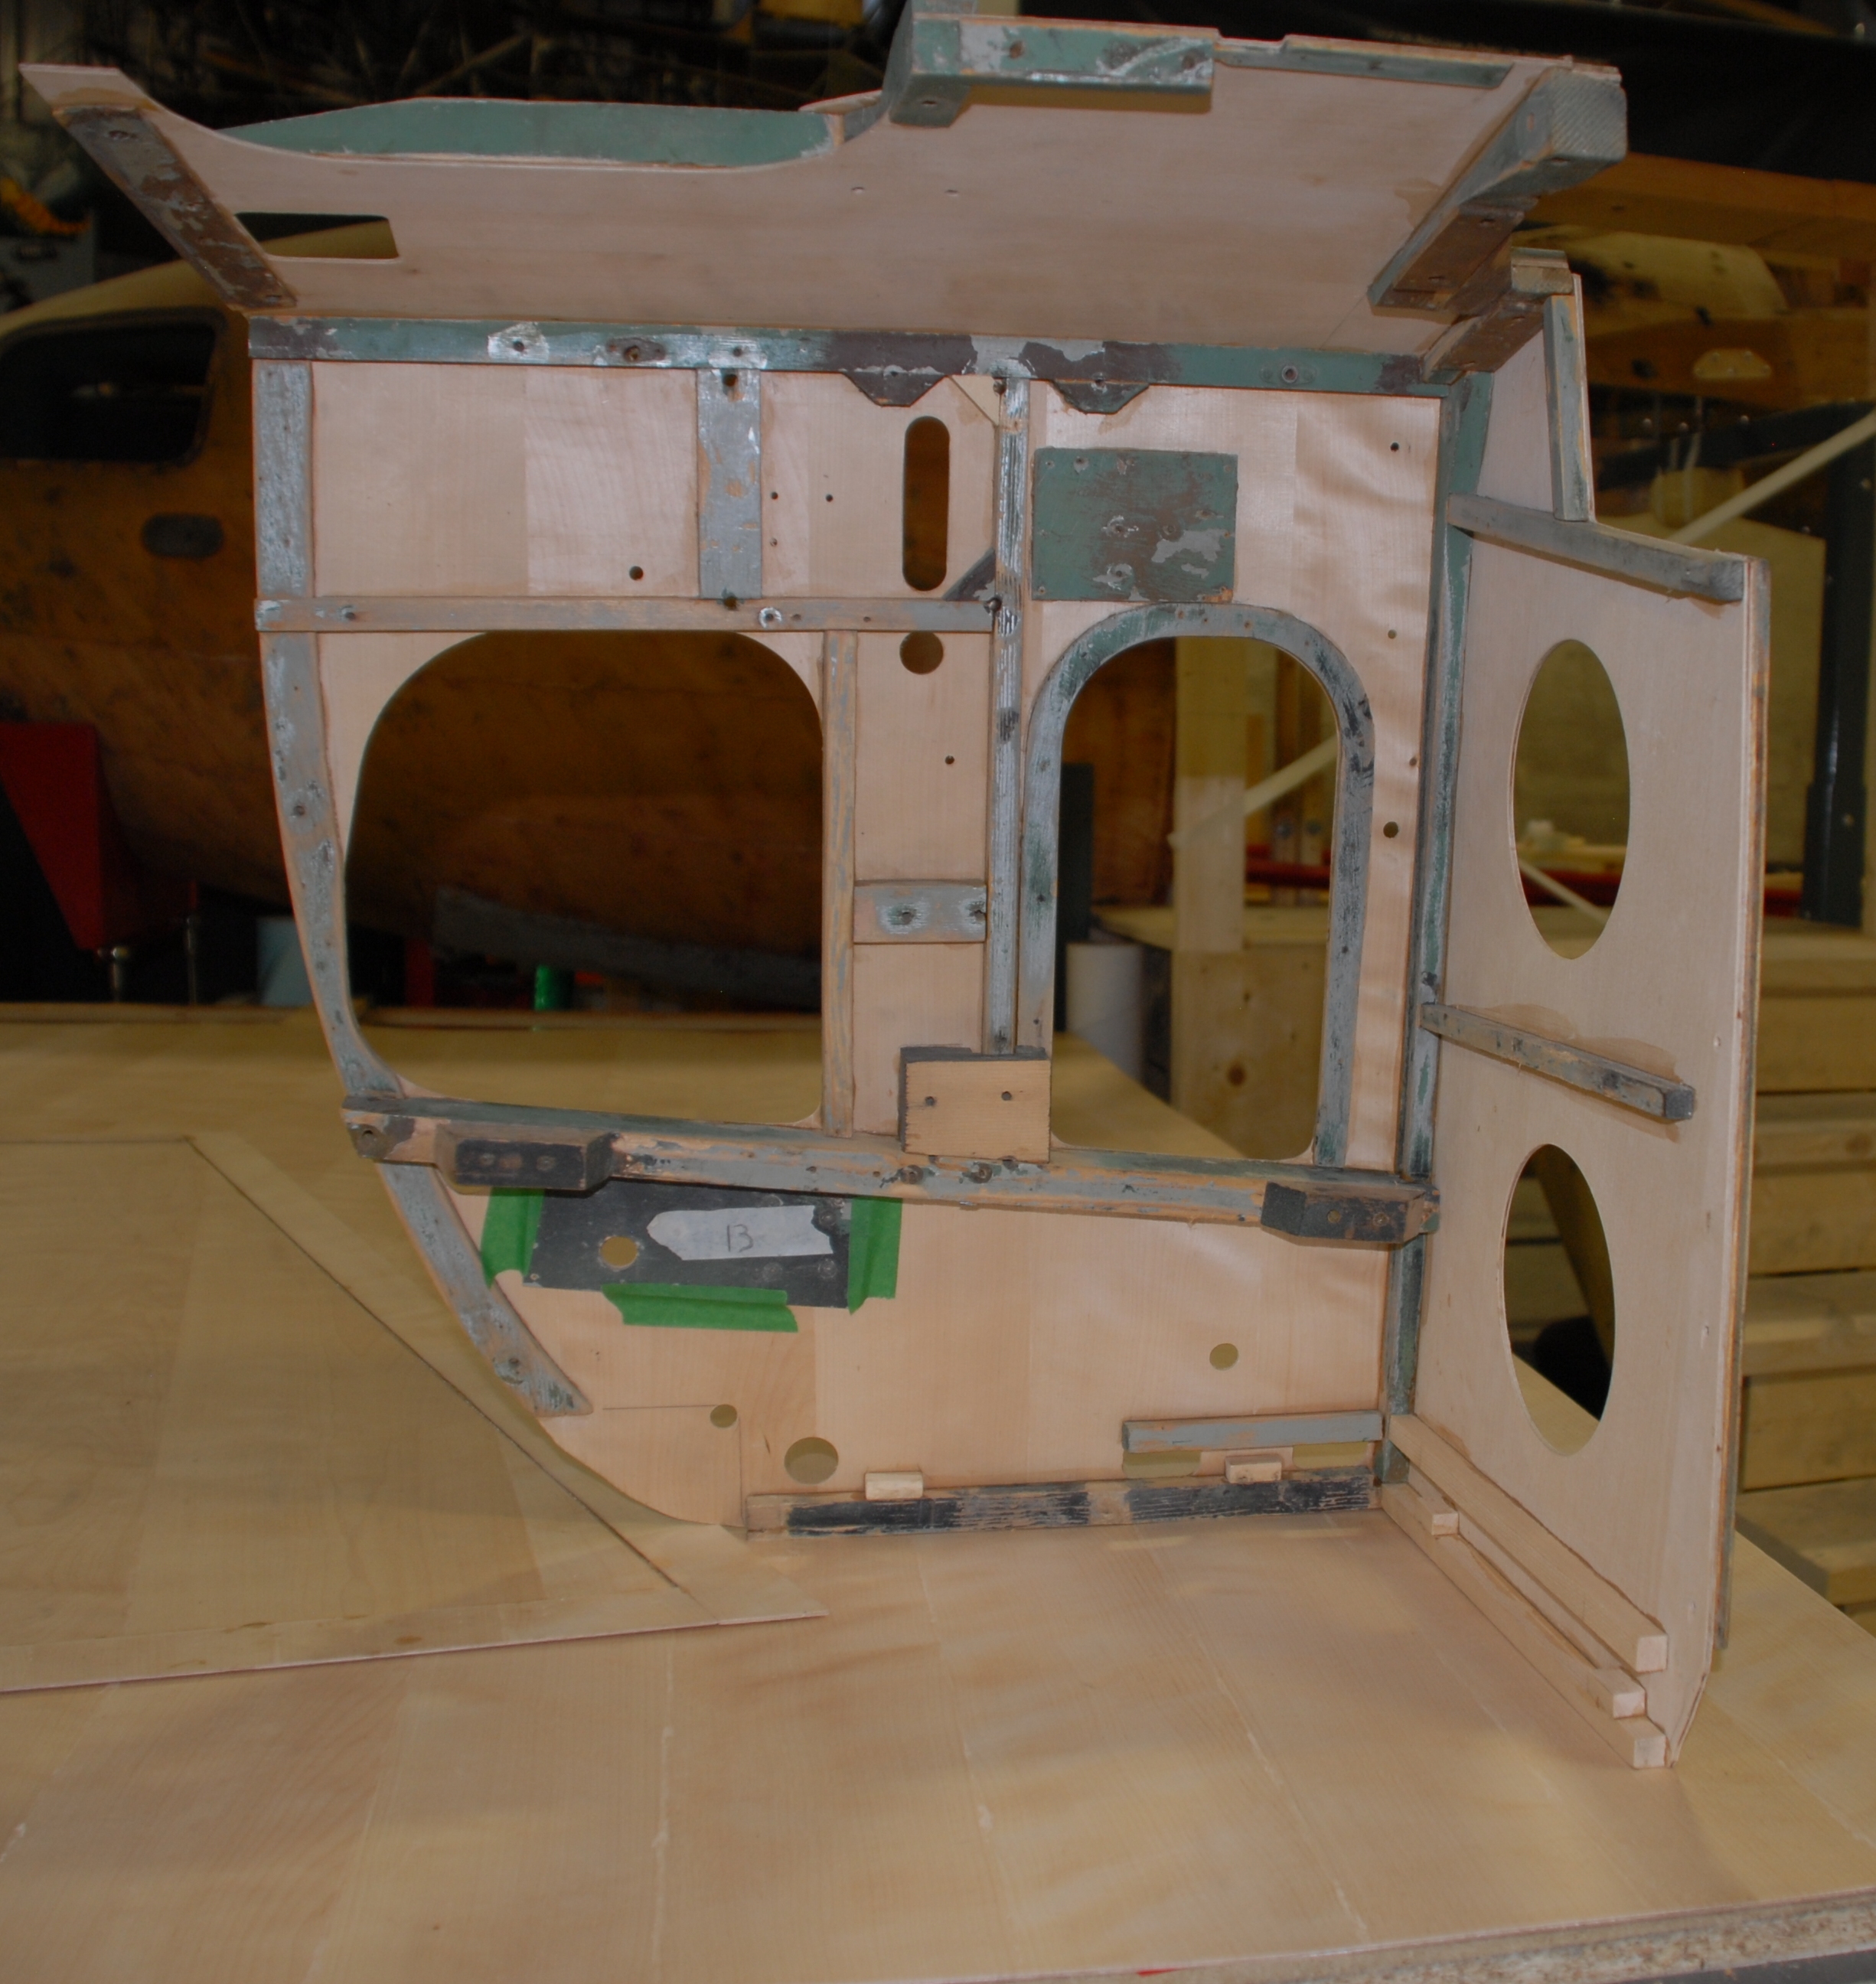
- Trial fit windscreen support bulkhead assembly to upper forward fuselage.
*By "pure luck" we located a Hurricane axle nut in a box of our own miscellaneous bits and pieces. We removed the temporary nut (original missing) from 5389 and installed the proper example in place.
Mosquito
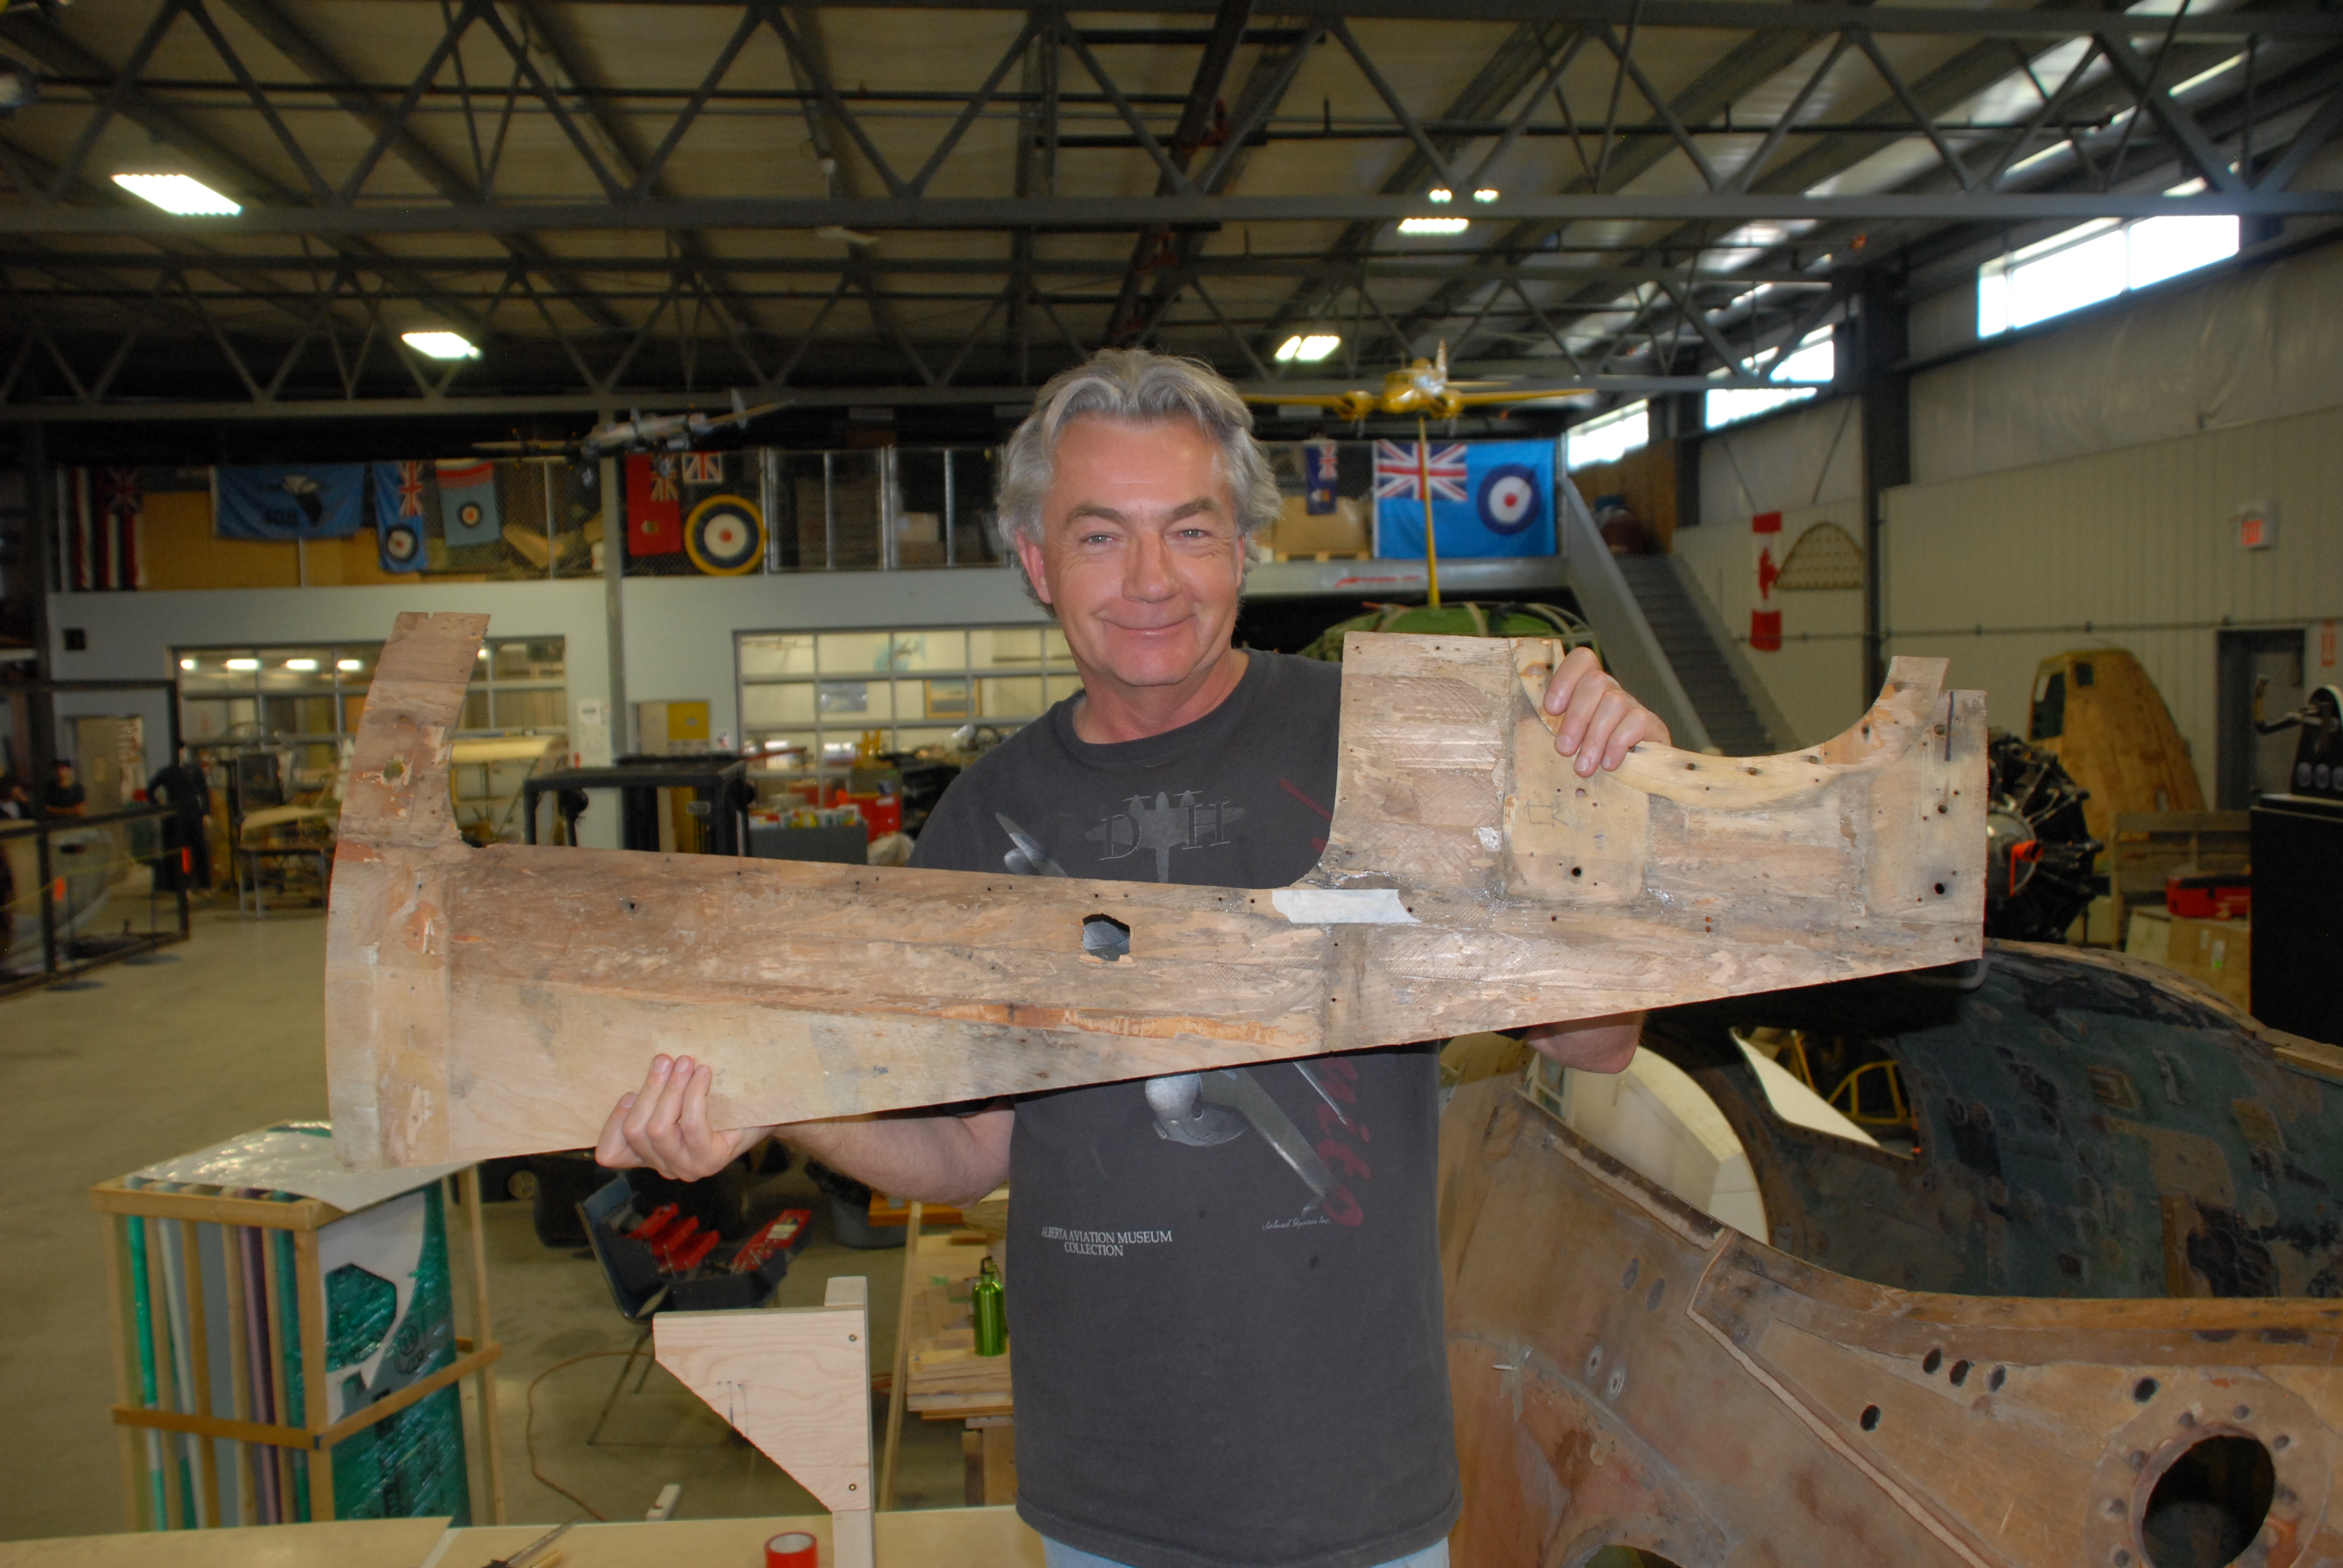
Proud president with first skin removed from the Mosquito fuselage.
The headline here is that have begun to cut out damaged fuselage skins and have added our first new wood skins, ribs and stringers.
One of our members has completed his weekday 'at home' project in rebuilding the rudder pedal doghouse, retaining as much of the original wood as possible.
We have also received from Harwood Custom Composites of North Saanich, BC, a full set of new Plexiglas panels for the Mosquito canopy.
That said, we have some concerns about quality issues and
Outside and inside of the rudder pedal doghouse restored by Gary T. as an 'at home' project. All green pieces are original material. For future reference and for posterity, all new material is stamped with permanent ink as having been added by the "CMS 2009".
will be returning three of the seven panels because of joint crazing and small internal cracks. Pending a satisfactory outcome, we will use Harwood to mould and cast a new nose blister as well. While we have an excellent original bomber nose for the airplane, Spartan removed this style and replaced it with the photo recon style single piece nose blister.
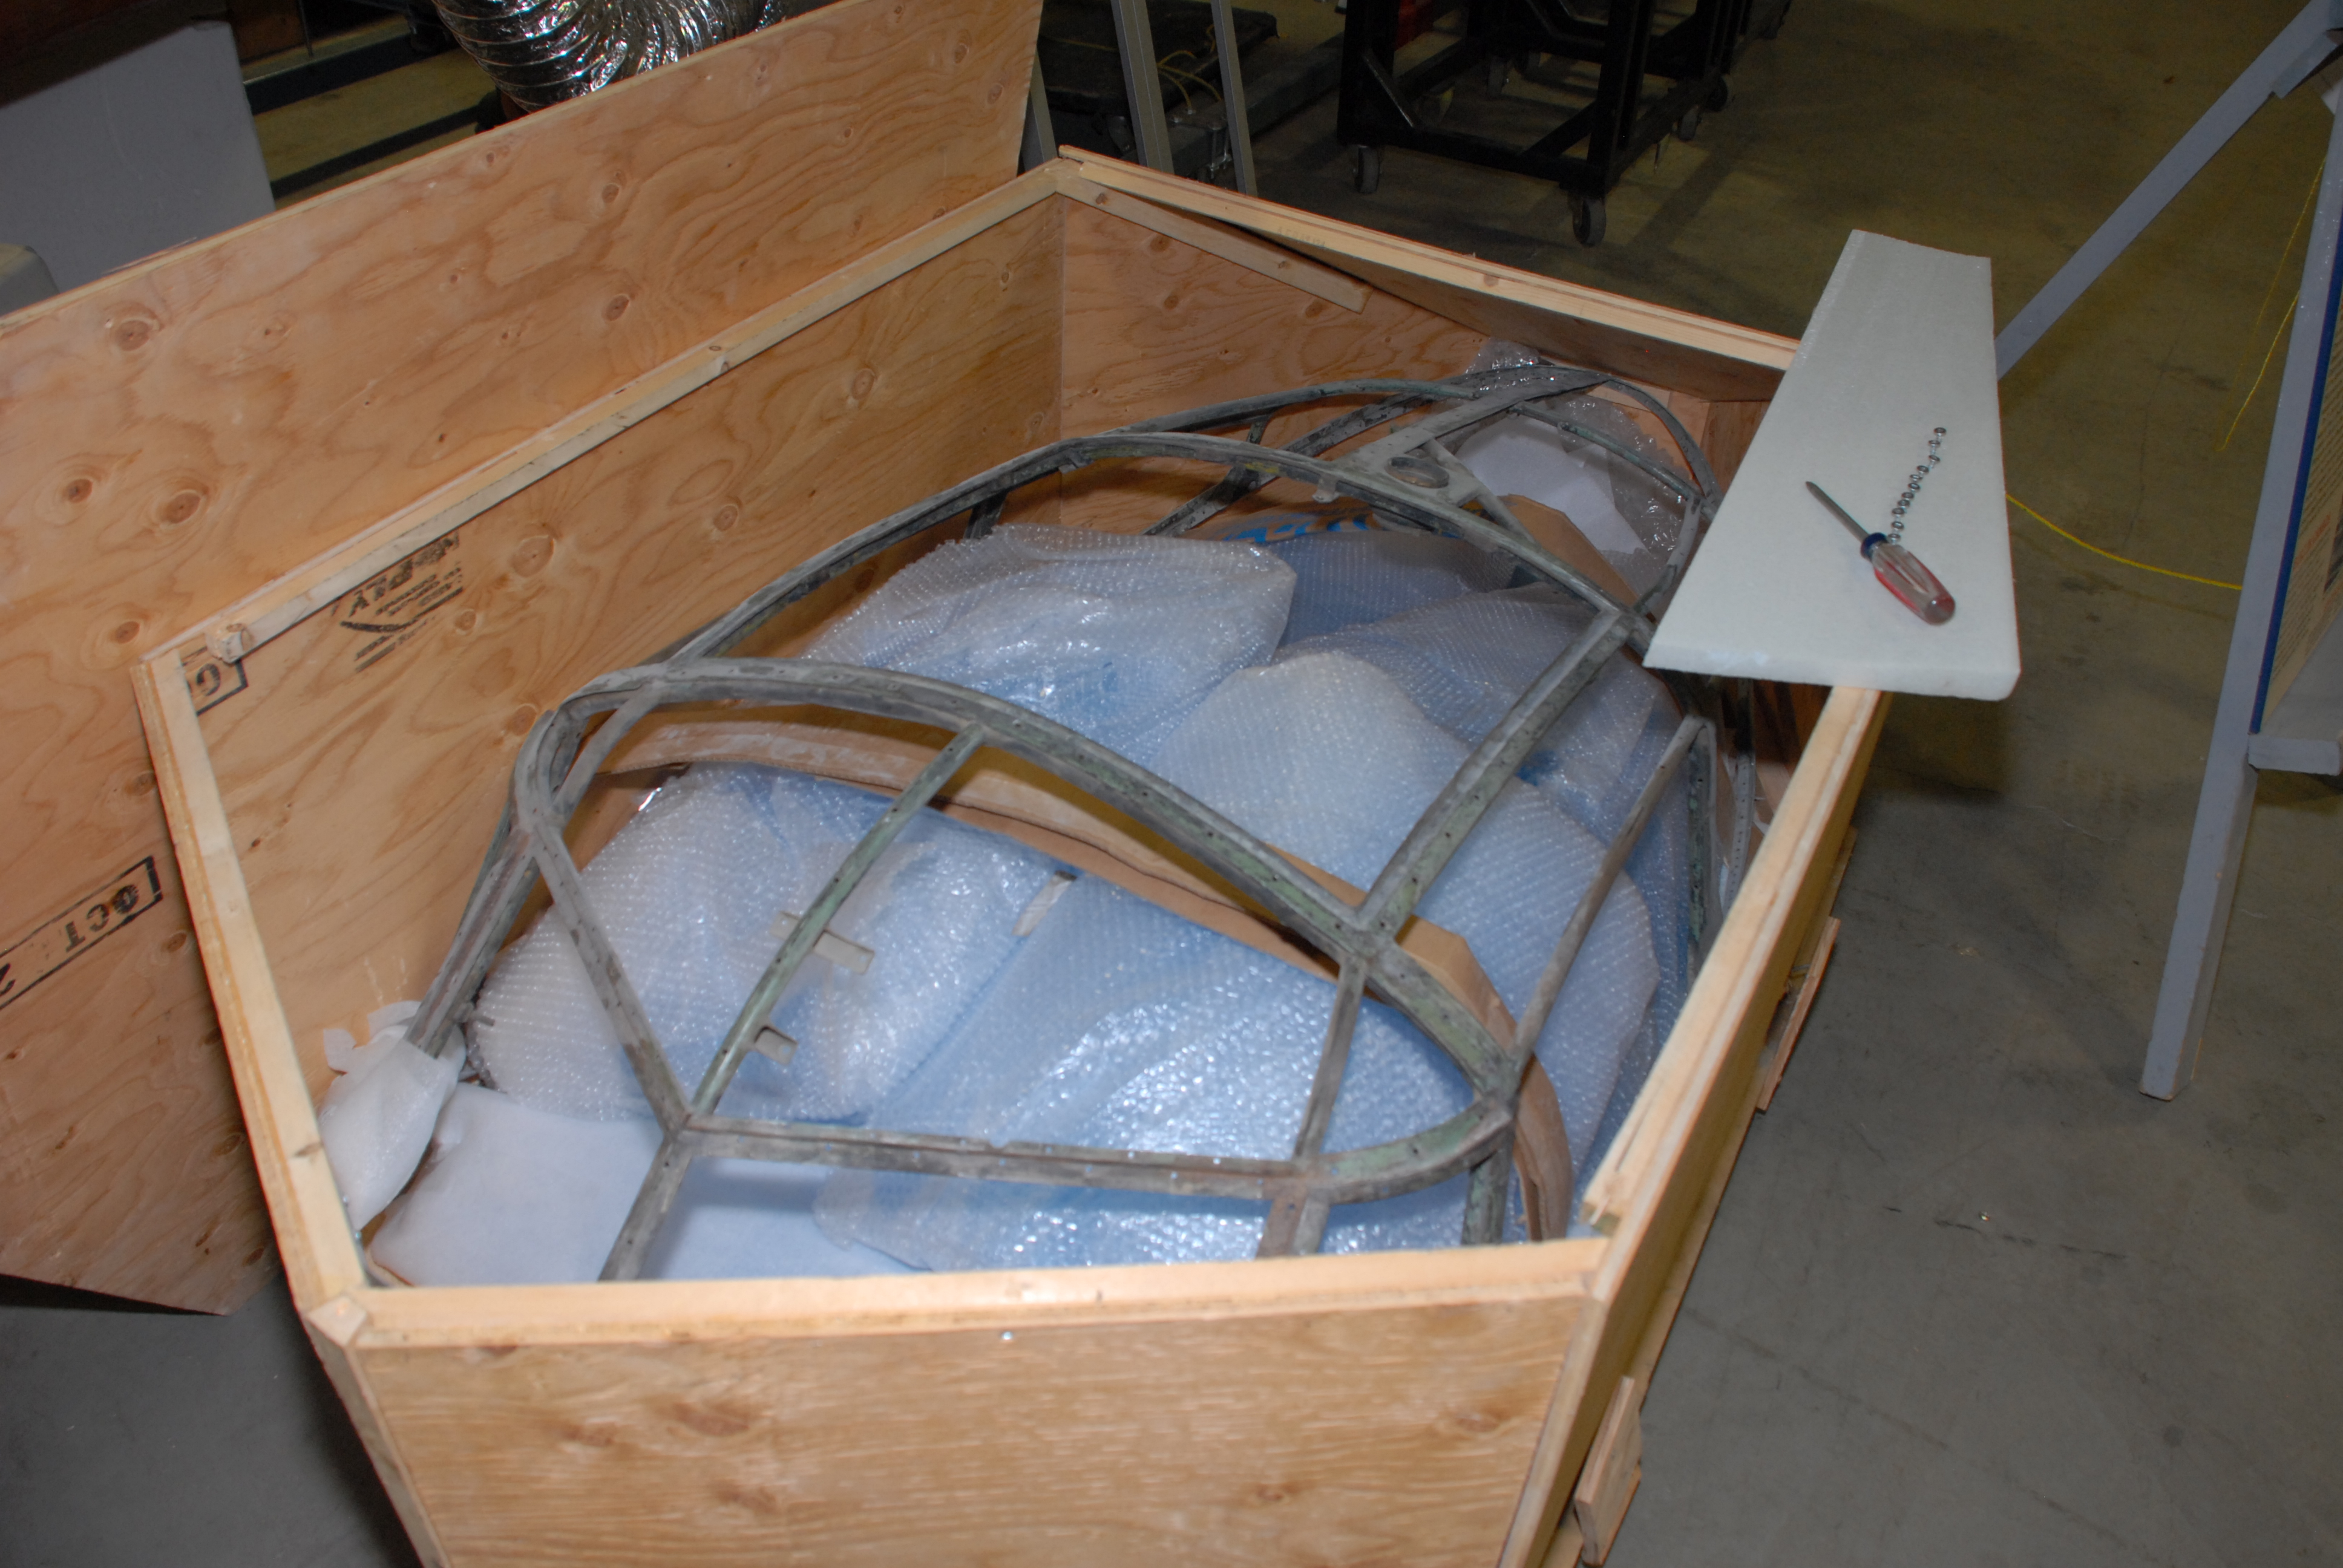
Mosquito canopy frame sitting atop a full set of new Plexiglas panels moulded by Harwood Custom Composites.
Jack McWilliam
We continue to develop and improve our work space so that we have the essentials we need at our finger tips. We have converted some of our benches into lay-out tables that we can cut on. We have added air regulators for the staplers and constructed steps which ring the current work area of the upper fuselage.
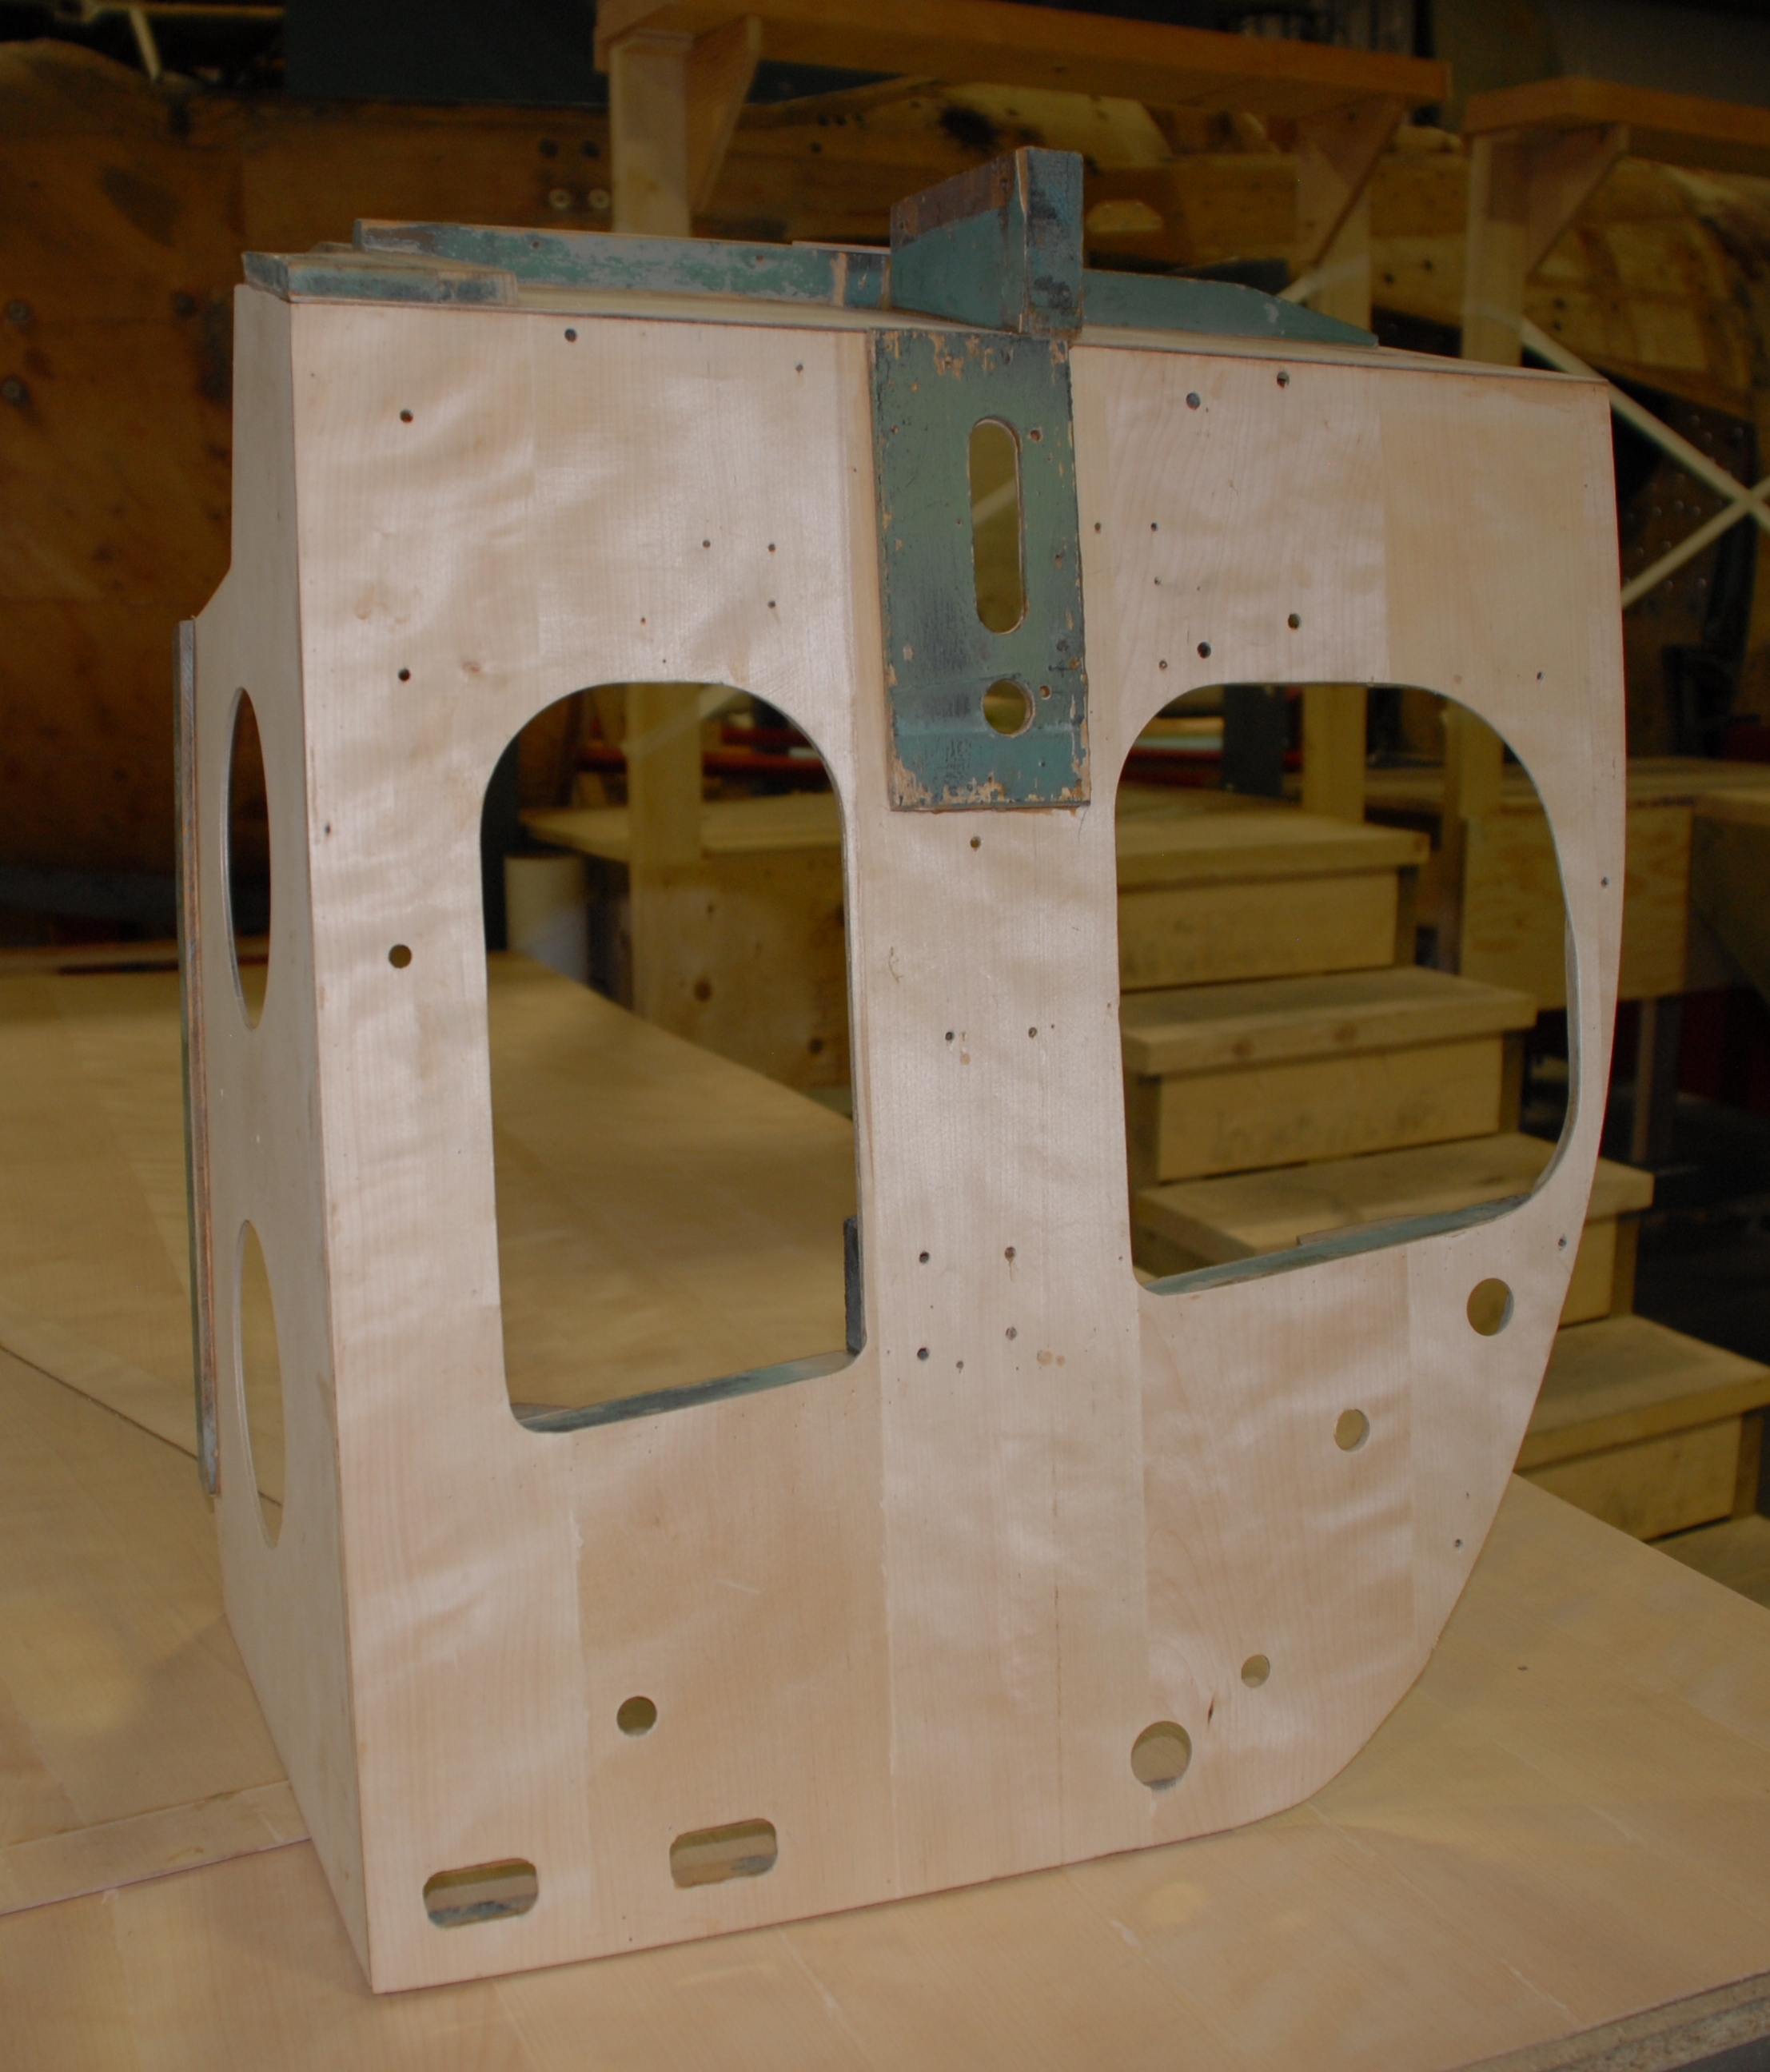
Fuselage bulkhead 2.5 has aluminum plates on each side to hold various connectors, fittings and cable fairleads. The plates were removed and dismantled for cleaning, stripping and painting. We noticed that the sealant originally used had started to corrode the base plates. The plates were washed, prepped and painted with primer-sealer. The components on the bulkheads were dismantled, washed and corrosion was polished out using chemical and mechanical methods.
Before and After. Another 'at home' evening project. The aforementioned aluminum panel in situ on fuselage bulkhead 2.5 and after restoration. Note corrosion on lower left corner of the panel; the result of the sealant used when built in 1946 and required because of the pressurized cockpit.
At this point we have elected not to install new sealant, to facilitate ease of work. Shellac was applied to a couple of connectors and pins to observe its effectiveness as a protective coating.
We have also begun work on fuselage bulkhead 2 and started restoration of the components attached to it. On the wood side of bulkhead 2.5, templates are going through final finish for reinstallation to the bulkhead.
Aft of bulkhead 2.5 is another rib which made up the support for the dingy box. This was removed for rebuilding due to damage and loose joints. To digress a little, in the last report we mentioned the area around the top of the fuselage between bulkhead 2 & 3 that was damaged by shoddy and improper repairs. Strips of cedar were attached across the top of the fuselage covering the dingy box opening, with 1.5" nails into the primary structure. The nails and broken off screws split the structure open to expose the internal structure to rot. We removed this rib in order to facilitate repairs to the upper surface.
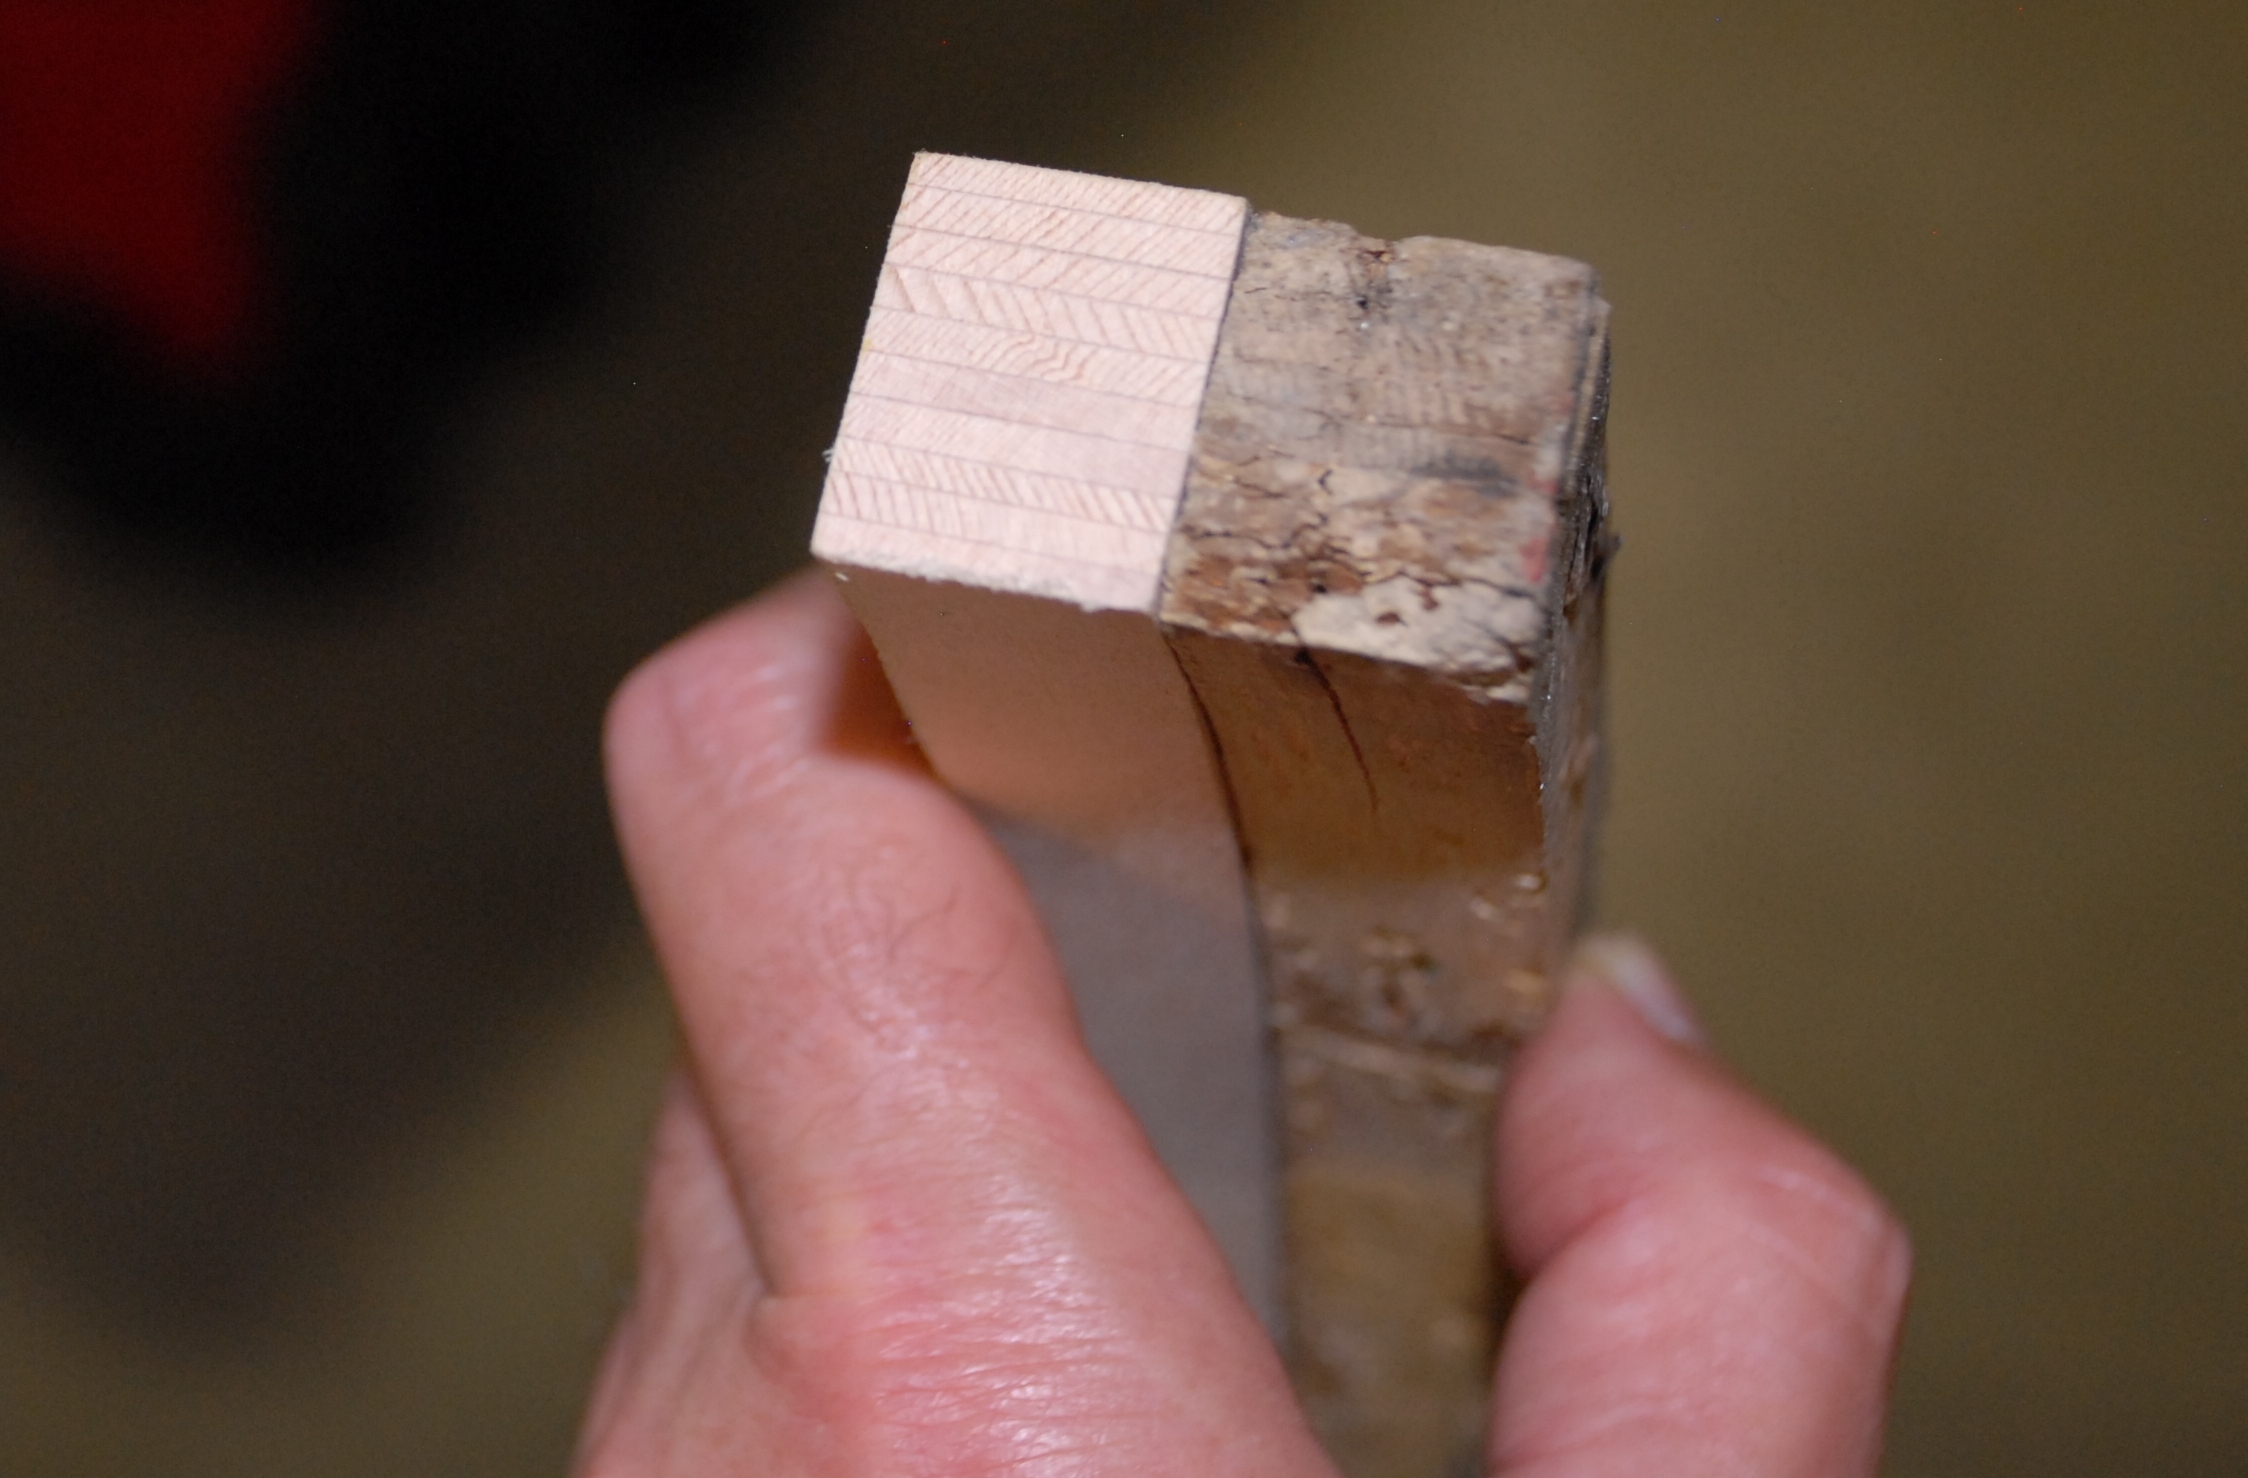
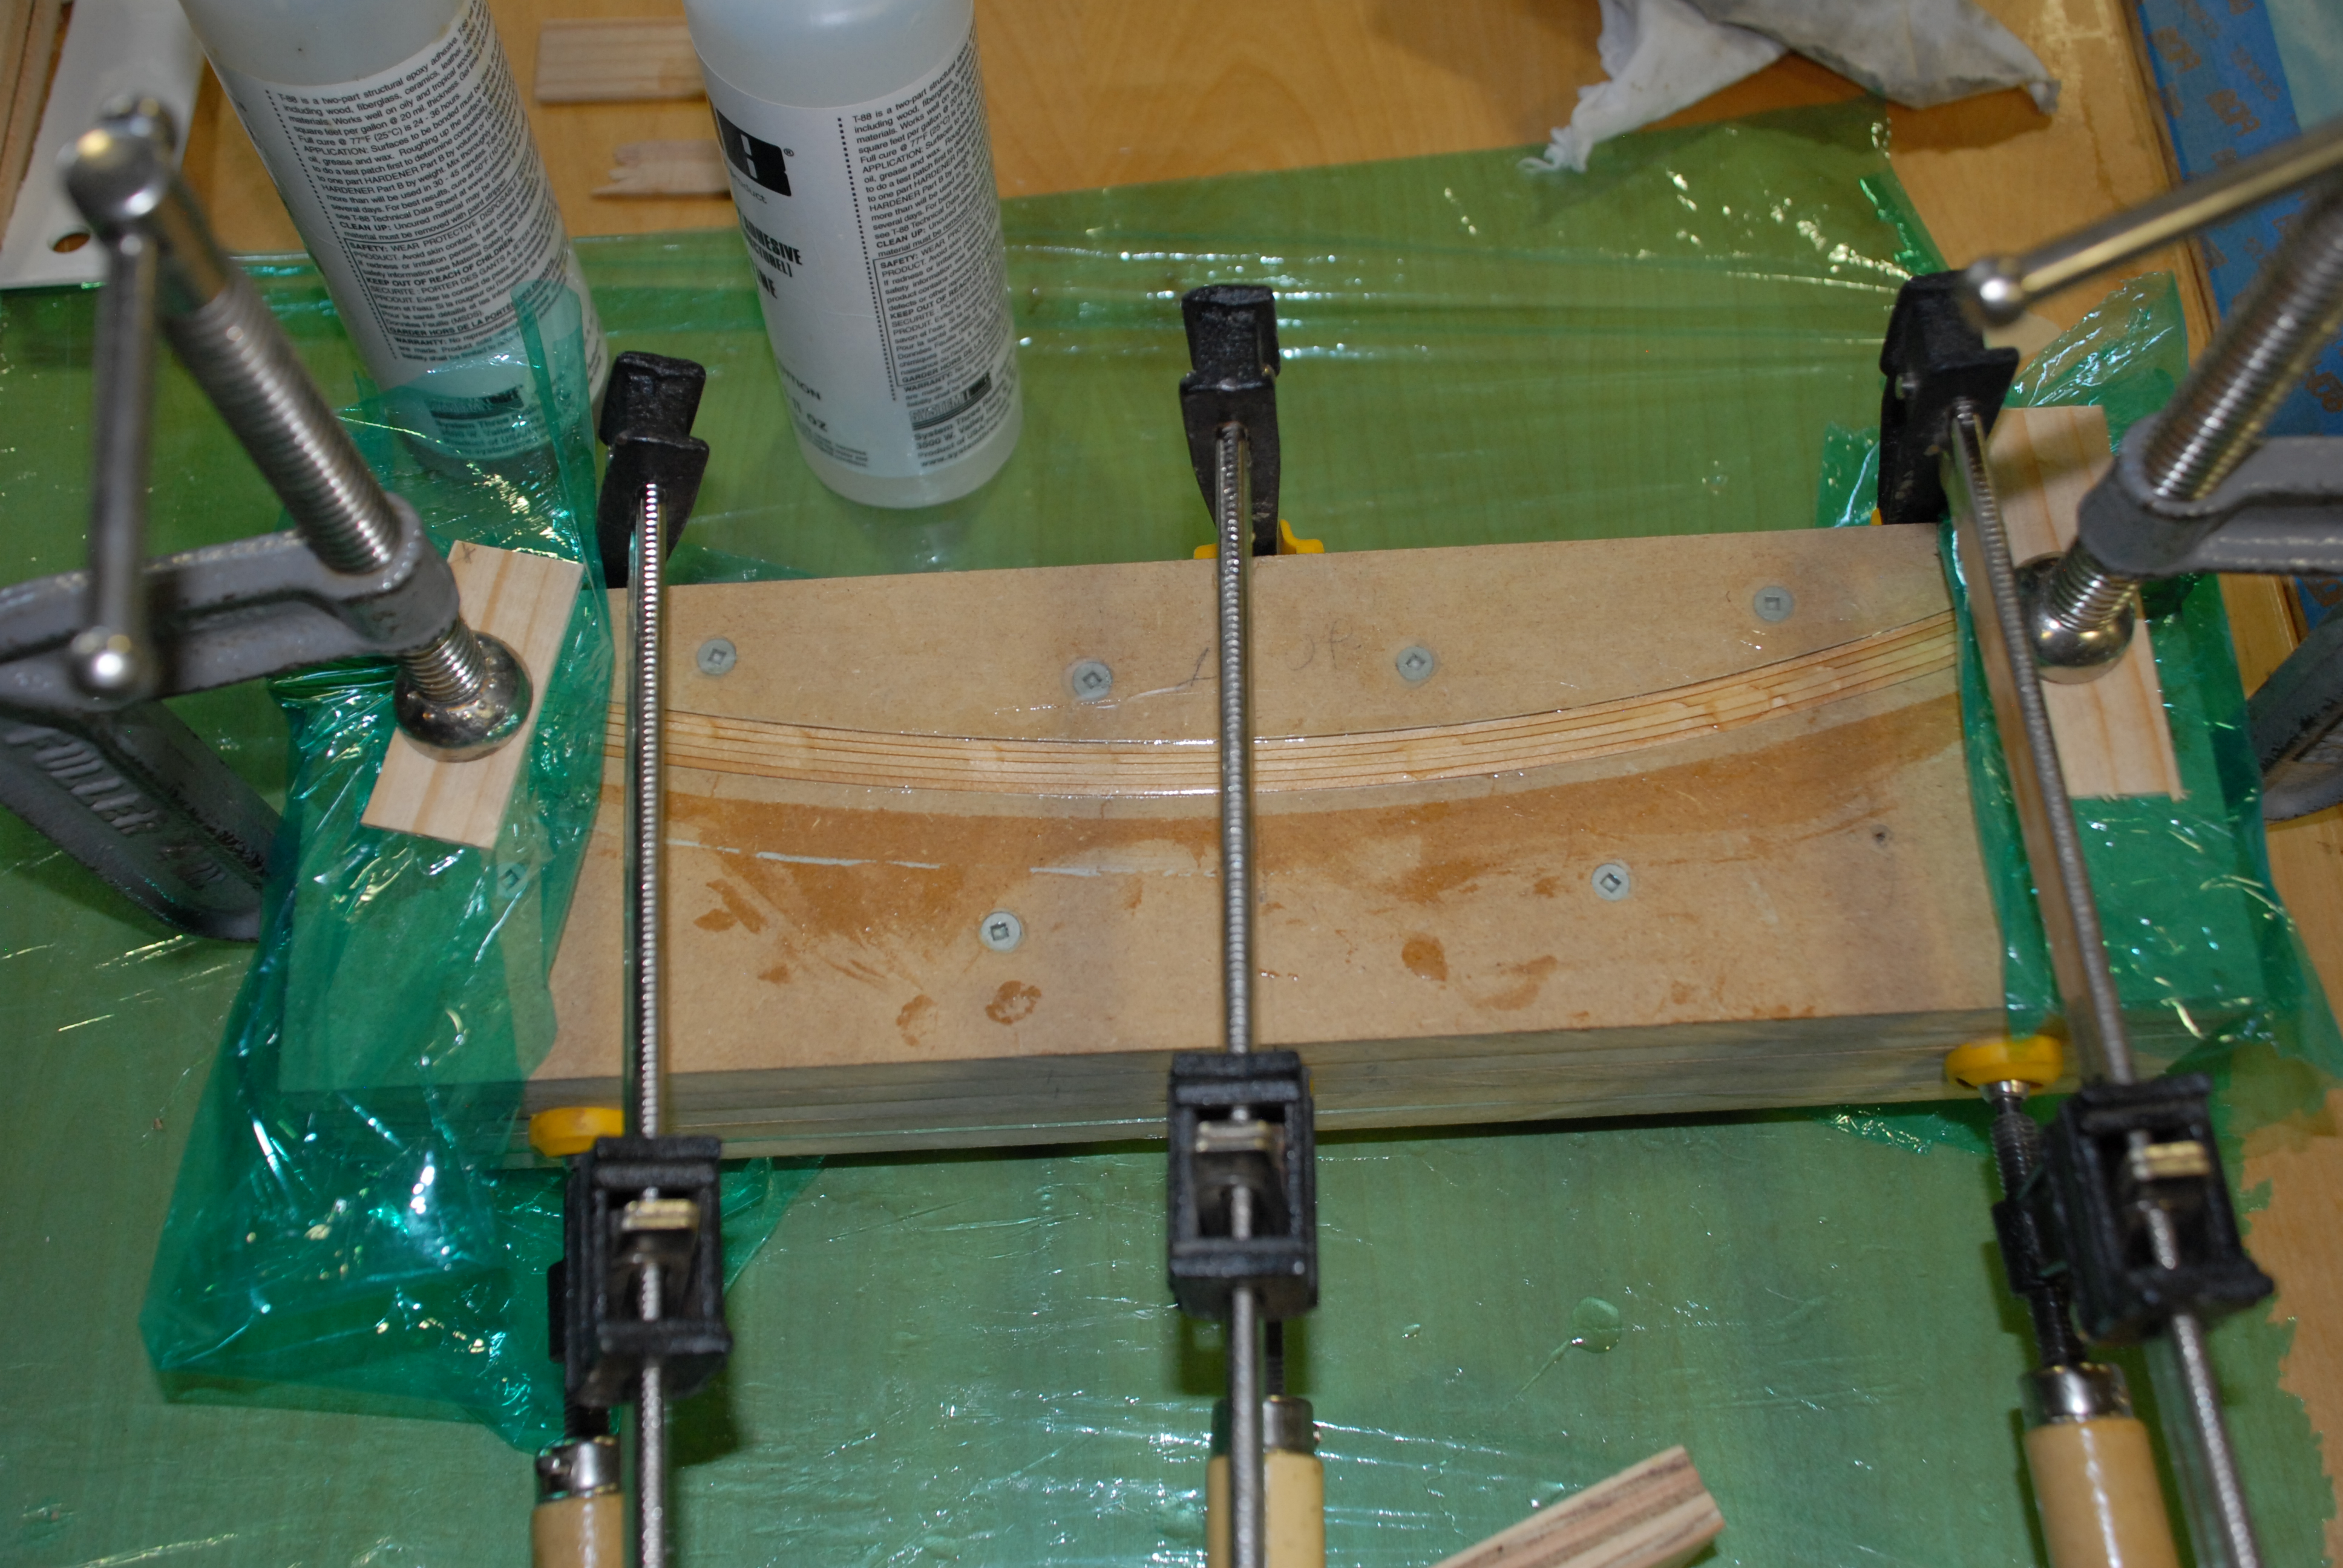
New and old ribs side by side. How to make a new rib: Plane ten strips. Create a mould in which to glue and shape them. Clamp. Wait to dry. Remove and trim. Repeat for every new rib required.
It would be easier to build a new rib than repair the old but this is not our intent, so skins on one side have been removed to repair the internal material. This exposed us to an interesting discovery: Some parts are a perfect mirror image of their opposites down to every screw hole. One template works by simply flipping the part over to make another part.
The large area of work at this point is the skin repair to the upper fuselage. The aircraft had so much damage to the upper area it was difficult to determine where to stop. We had started on the right side forward of bulkhead three, then discovered that the blueprints and the aircraft structure before us didn't match. The left side skin patch was removed only to find it didn't match the right side, or the blueprints.
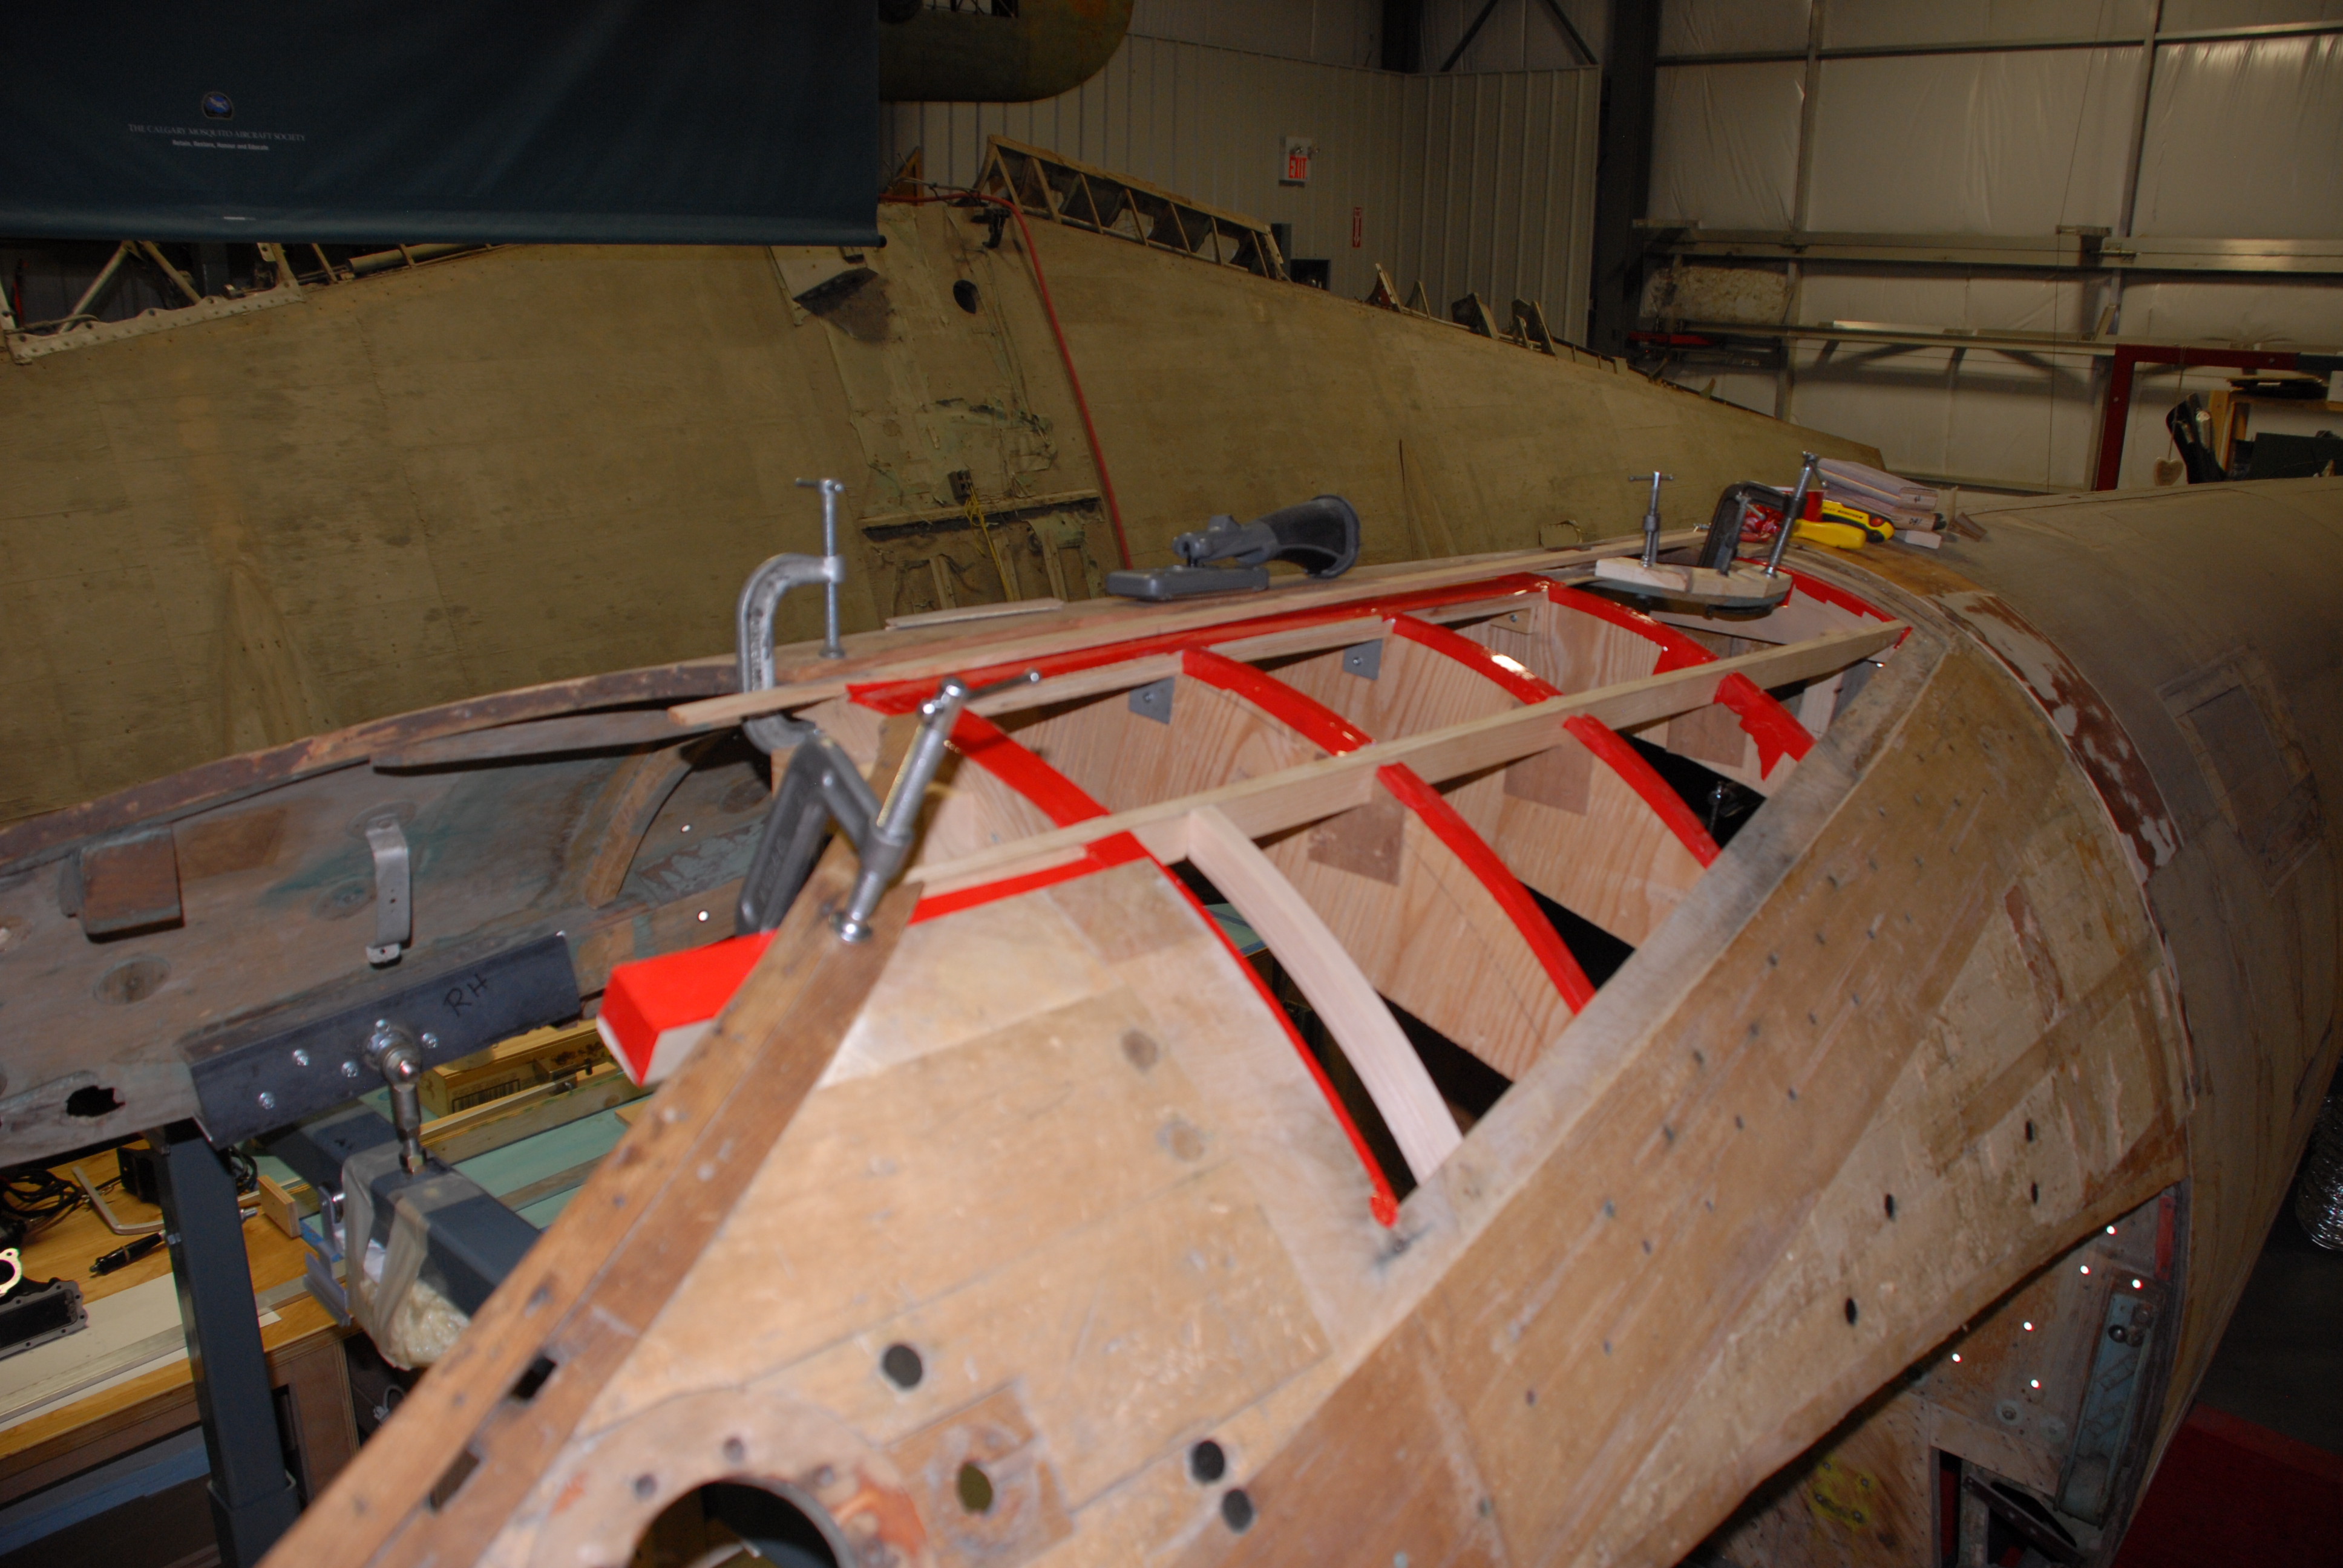
Upper fuselage, just aft of the canopy. All of the red taped structure is temporary and was needed so that the new inner skin can take its proper shape. Once the skin is installed and dry, all red taped parts will be removed. Note new rib, sans red tape, in the foreground and the new stringer it is attached to.
The foam blocks are currently removed so we can get at the entire structure right down to the internal stringers. The stringers had a number of holes, along with the stresses applied over her life have deformed the stringer leaving only the ends intact.
Part by part we have working inward from the left side to replace the inner damaged skins and stringers using plywood forms to mould them into position. An area around the primary structure was removed with all efforts made to not touch the main bulkhead and wing attach points. It would have been better to replace the entire skin but this might have opened other issues. A 20 to 1 lap joint was used to install the new skin rather than a scarf joint so we could get tighter to the structure, saving more original material.
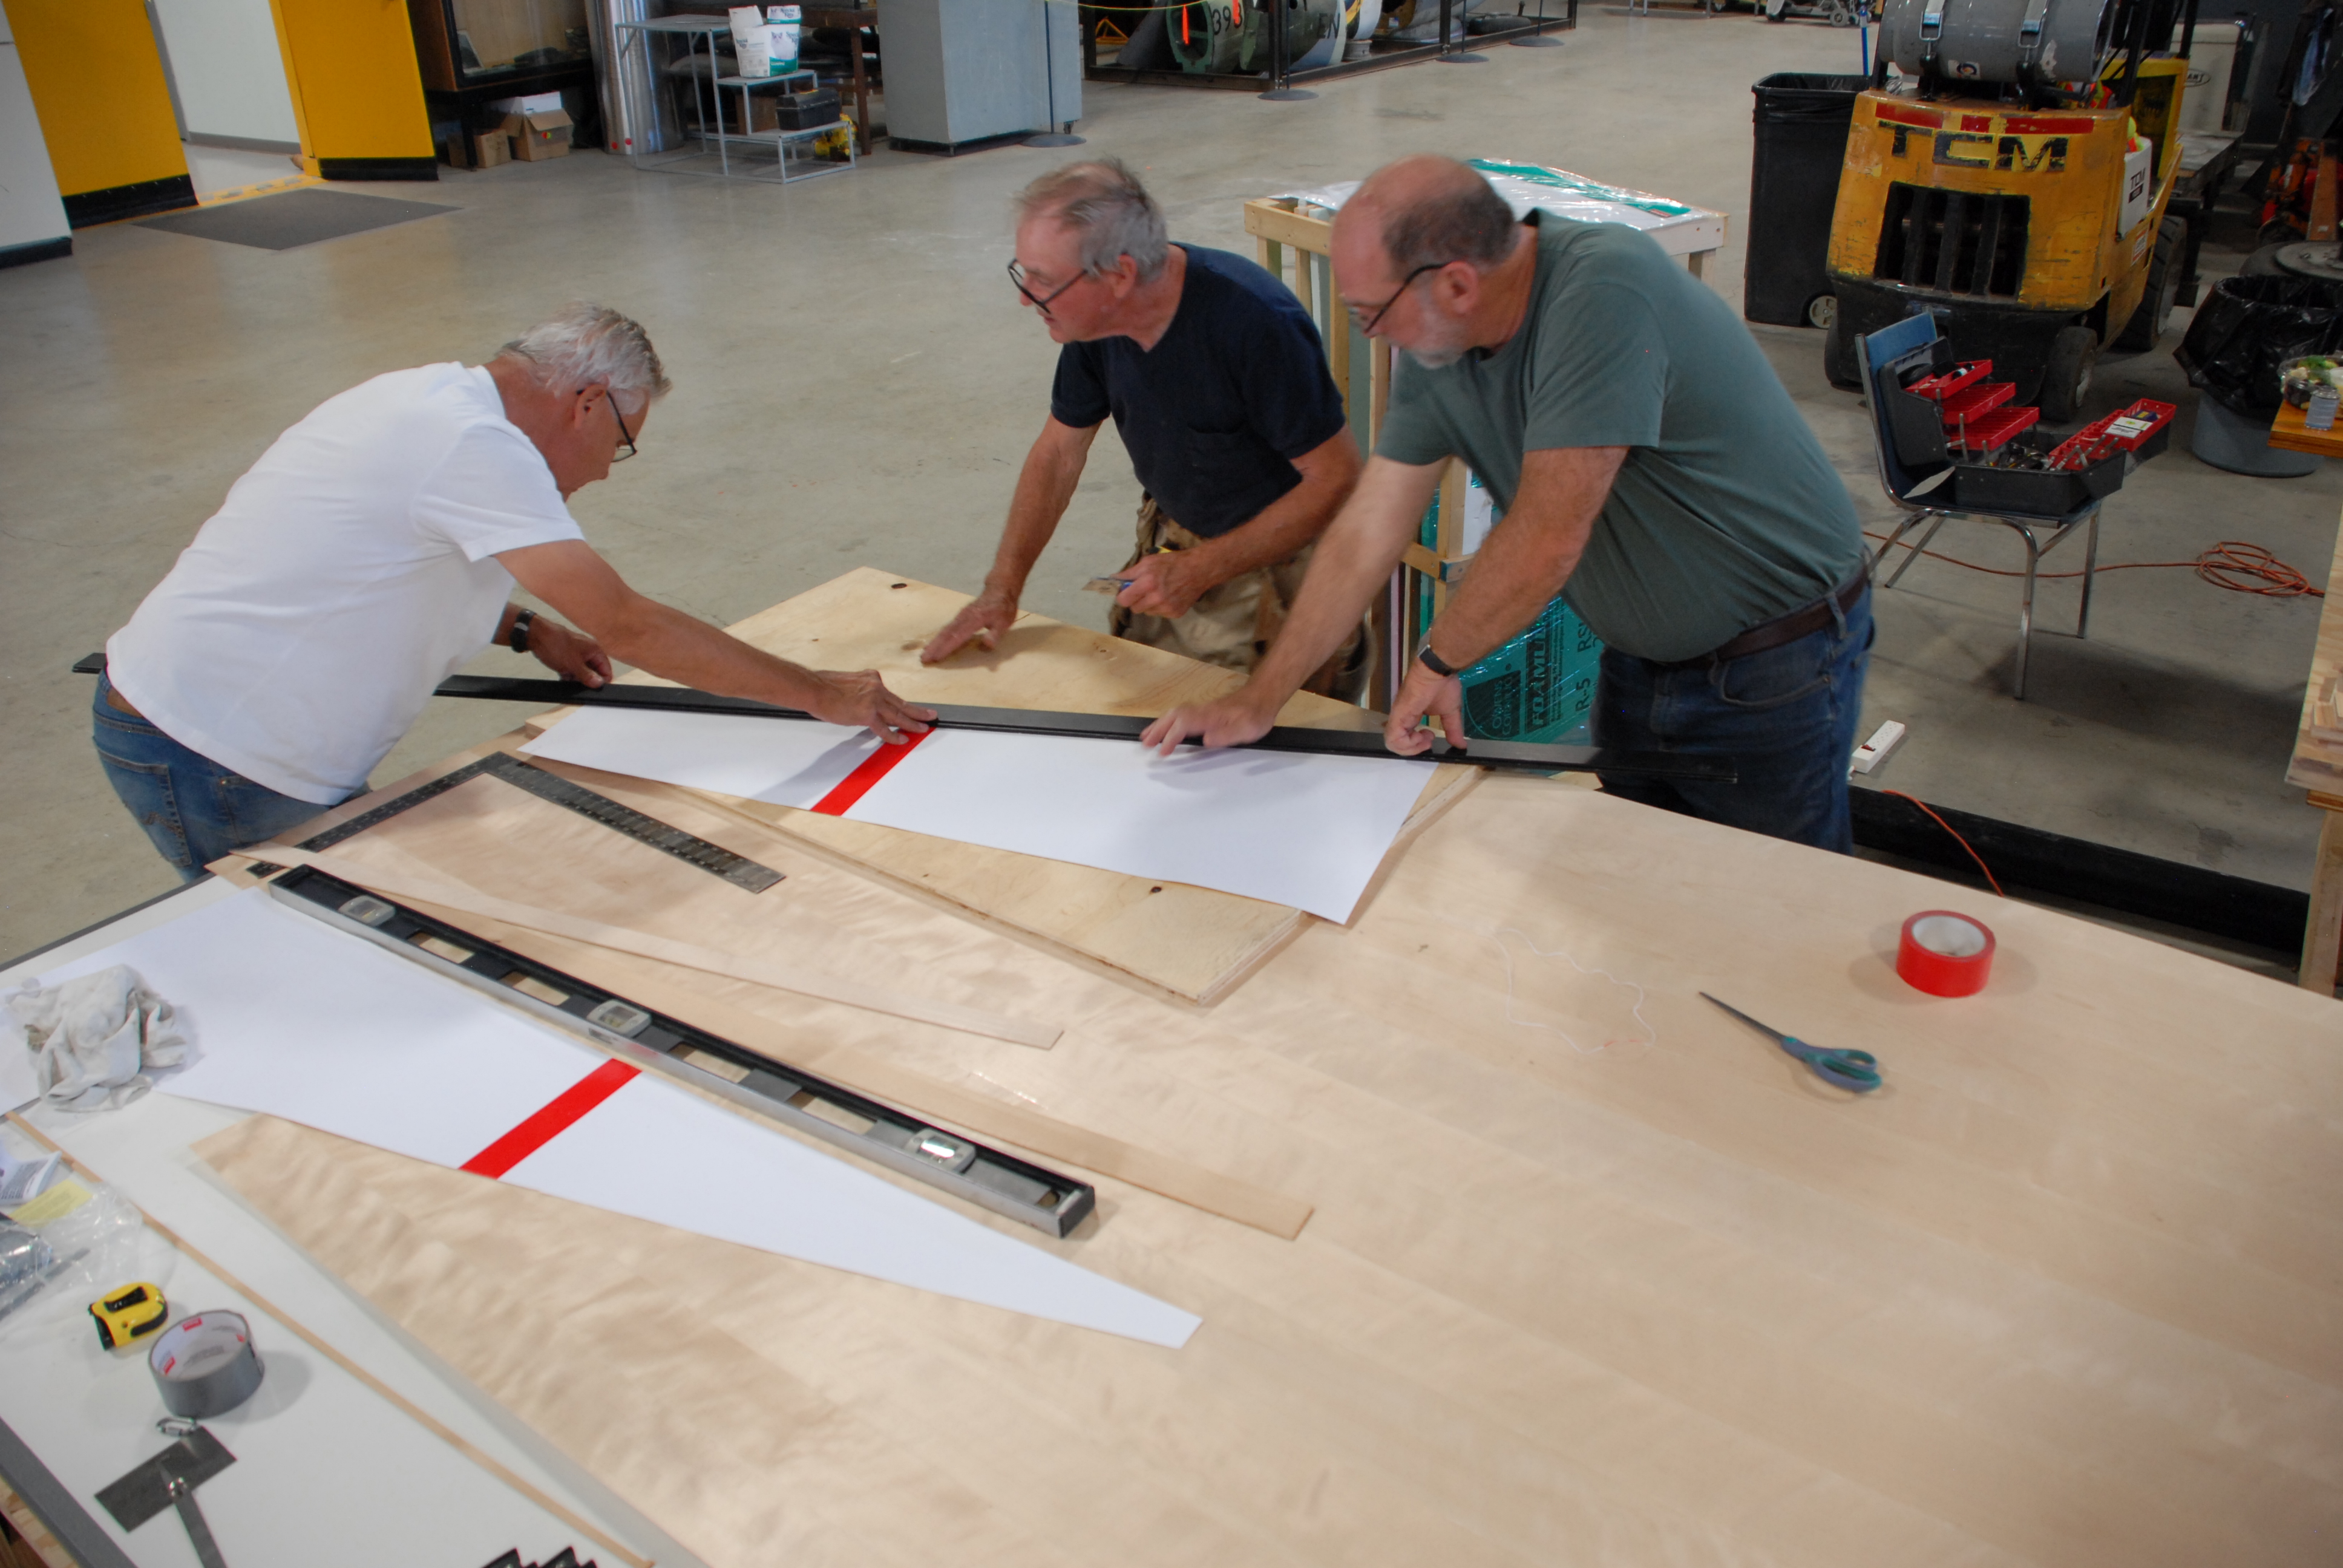
A big day for us: Dick, Roger and Jack cutting the first new skin for the Mosquito fuselage. At $650 a sheet for the plywood, it's measure 11 times, cut once.
The skin was installed over a new stringer and overlapping stringers are now going into position. The ribs that had been made from laminating strips of spruce are now being fitted. Along with original pieces being re-glued, the area should be completed shortly allowing us to repeat the process on the right side. Outside of the internal skin, two parts have already been made for the opposite side, so this should happen at a quicker pace.
We are also starting to develop ideas on how to deal with the fuselage forward of the wing attach point, where the radiator butted the fuselage, on the starboard side. This
area has been cracked open in the past from a heavy impact just above the armour plating. The skin will be opened up from the outside once the upper skins are in place to determine the level of internal damage.
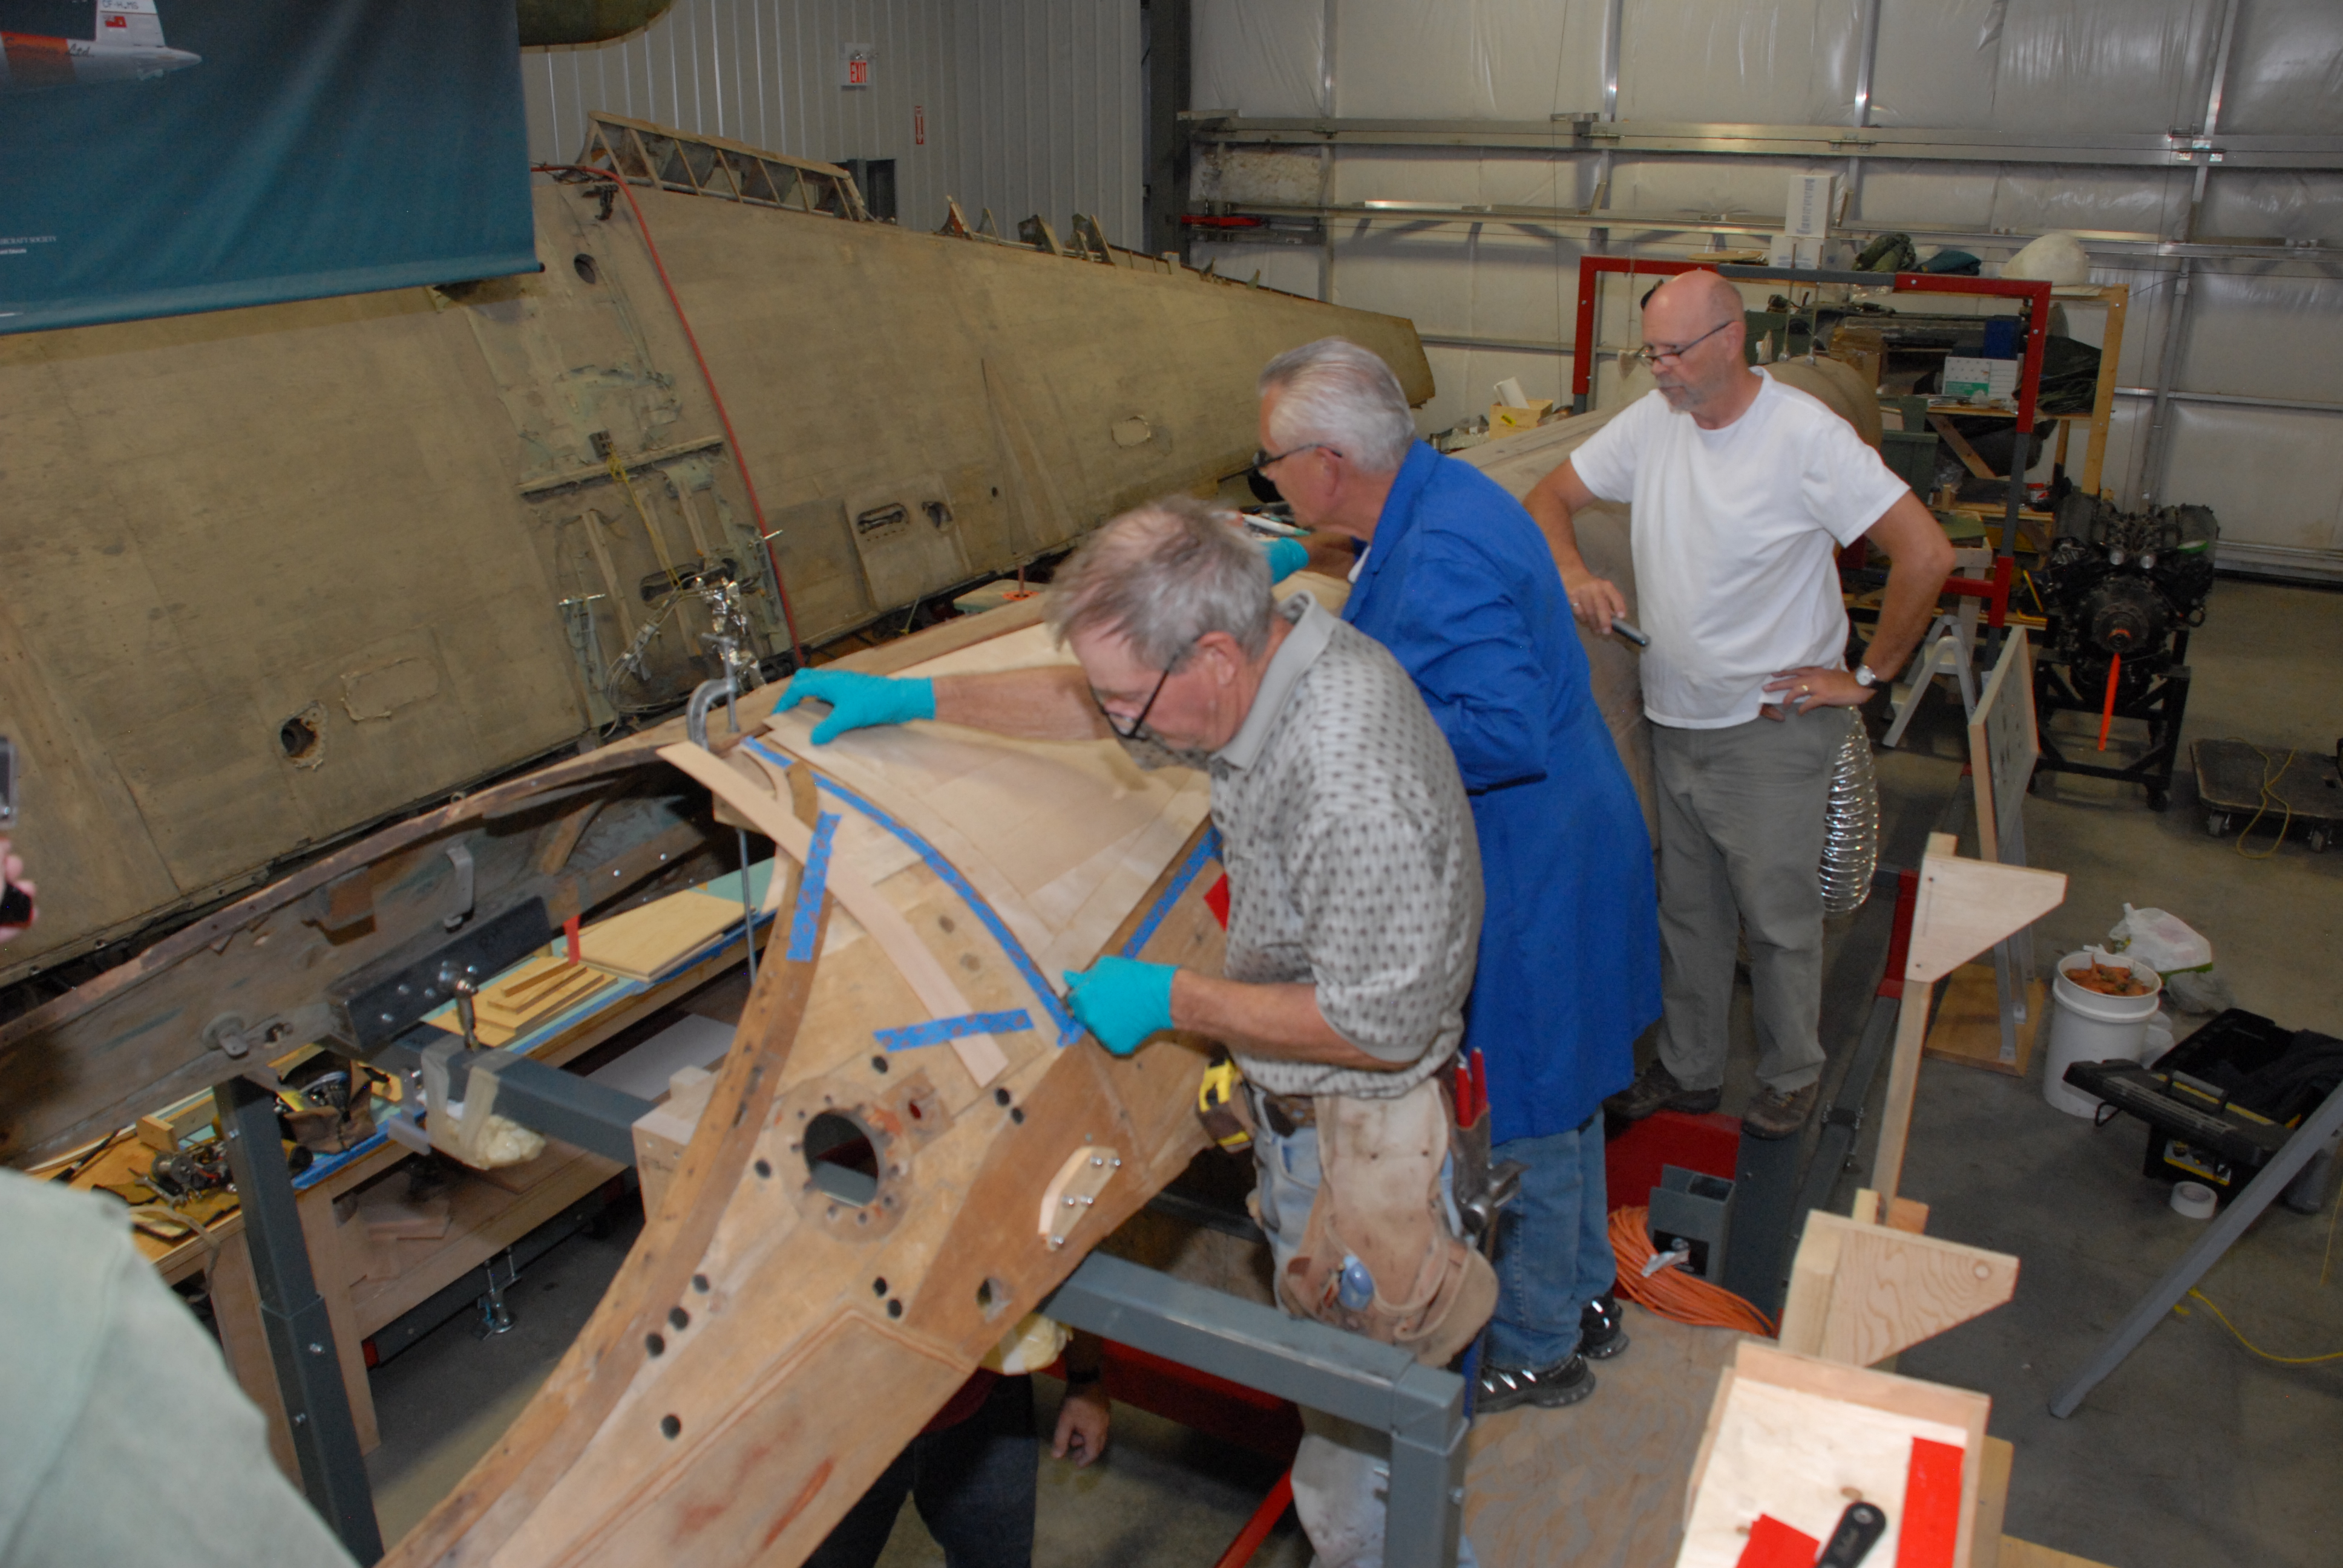
Roger and Dick (with Andy 'supervising') install the first new skin on the upper fuselage, just aft of the cockpit.
Displays and Presentations
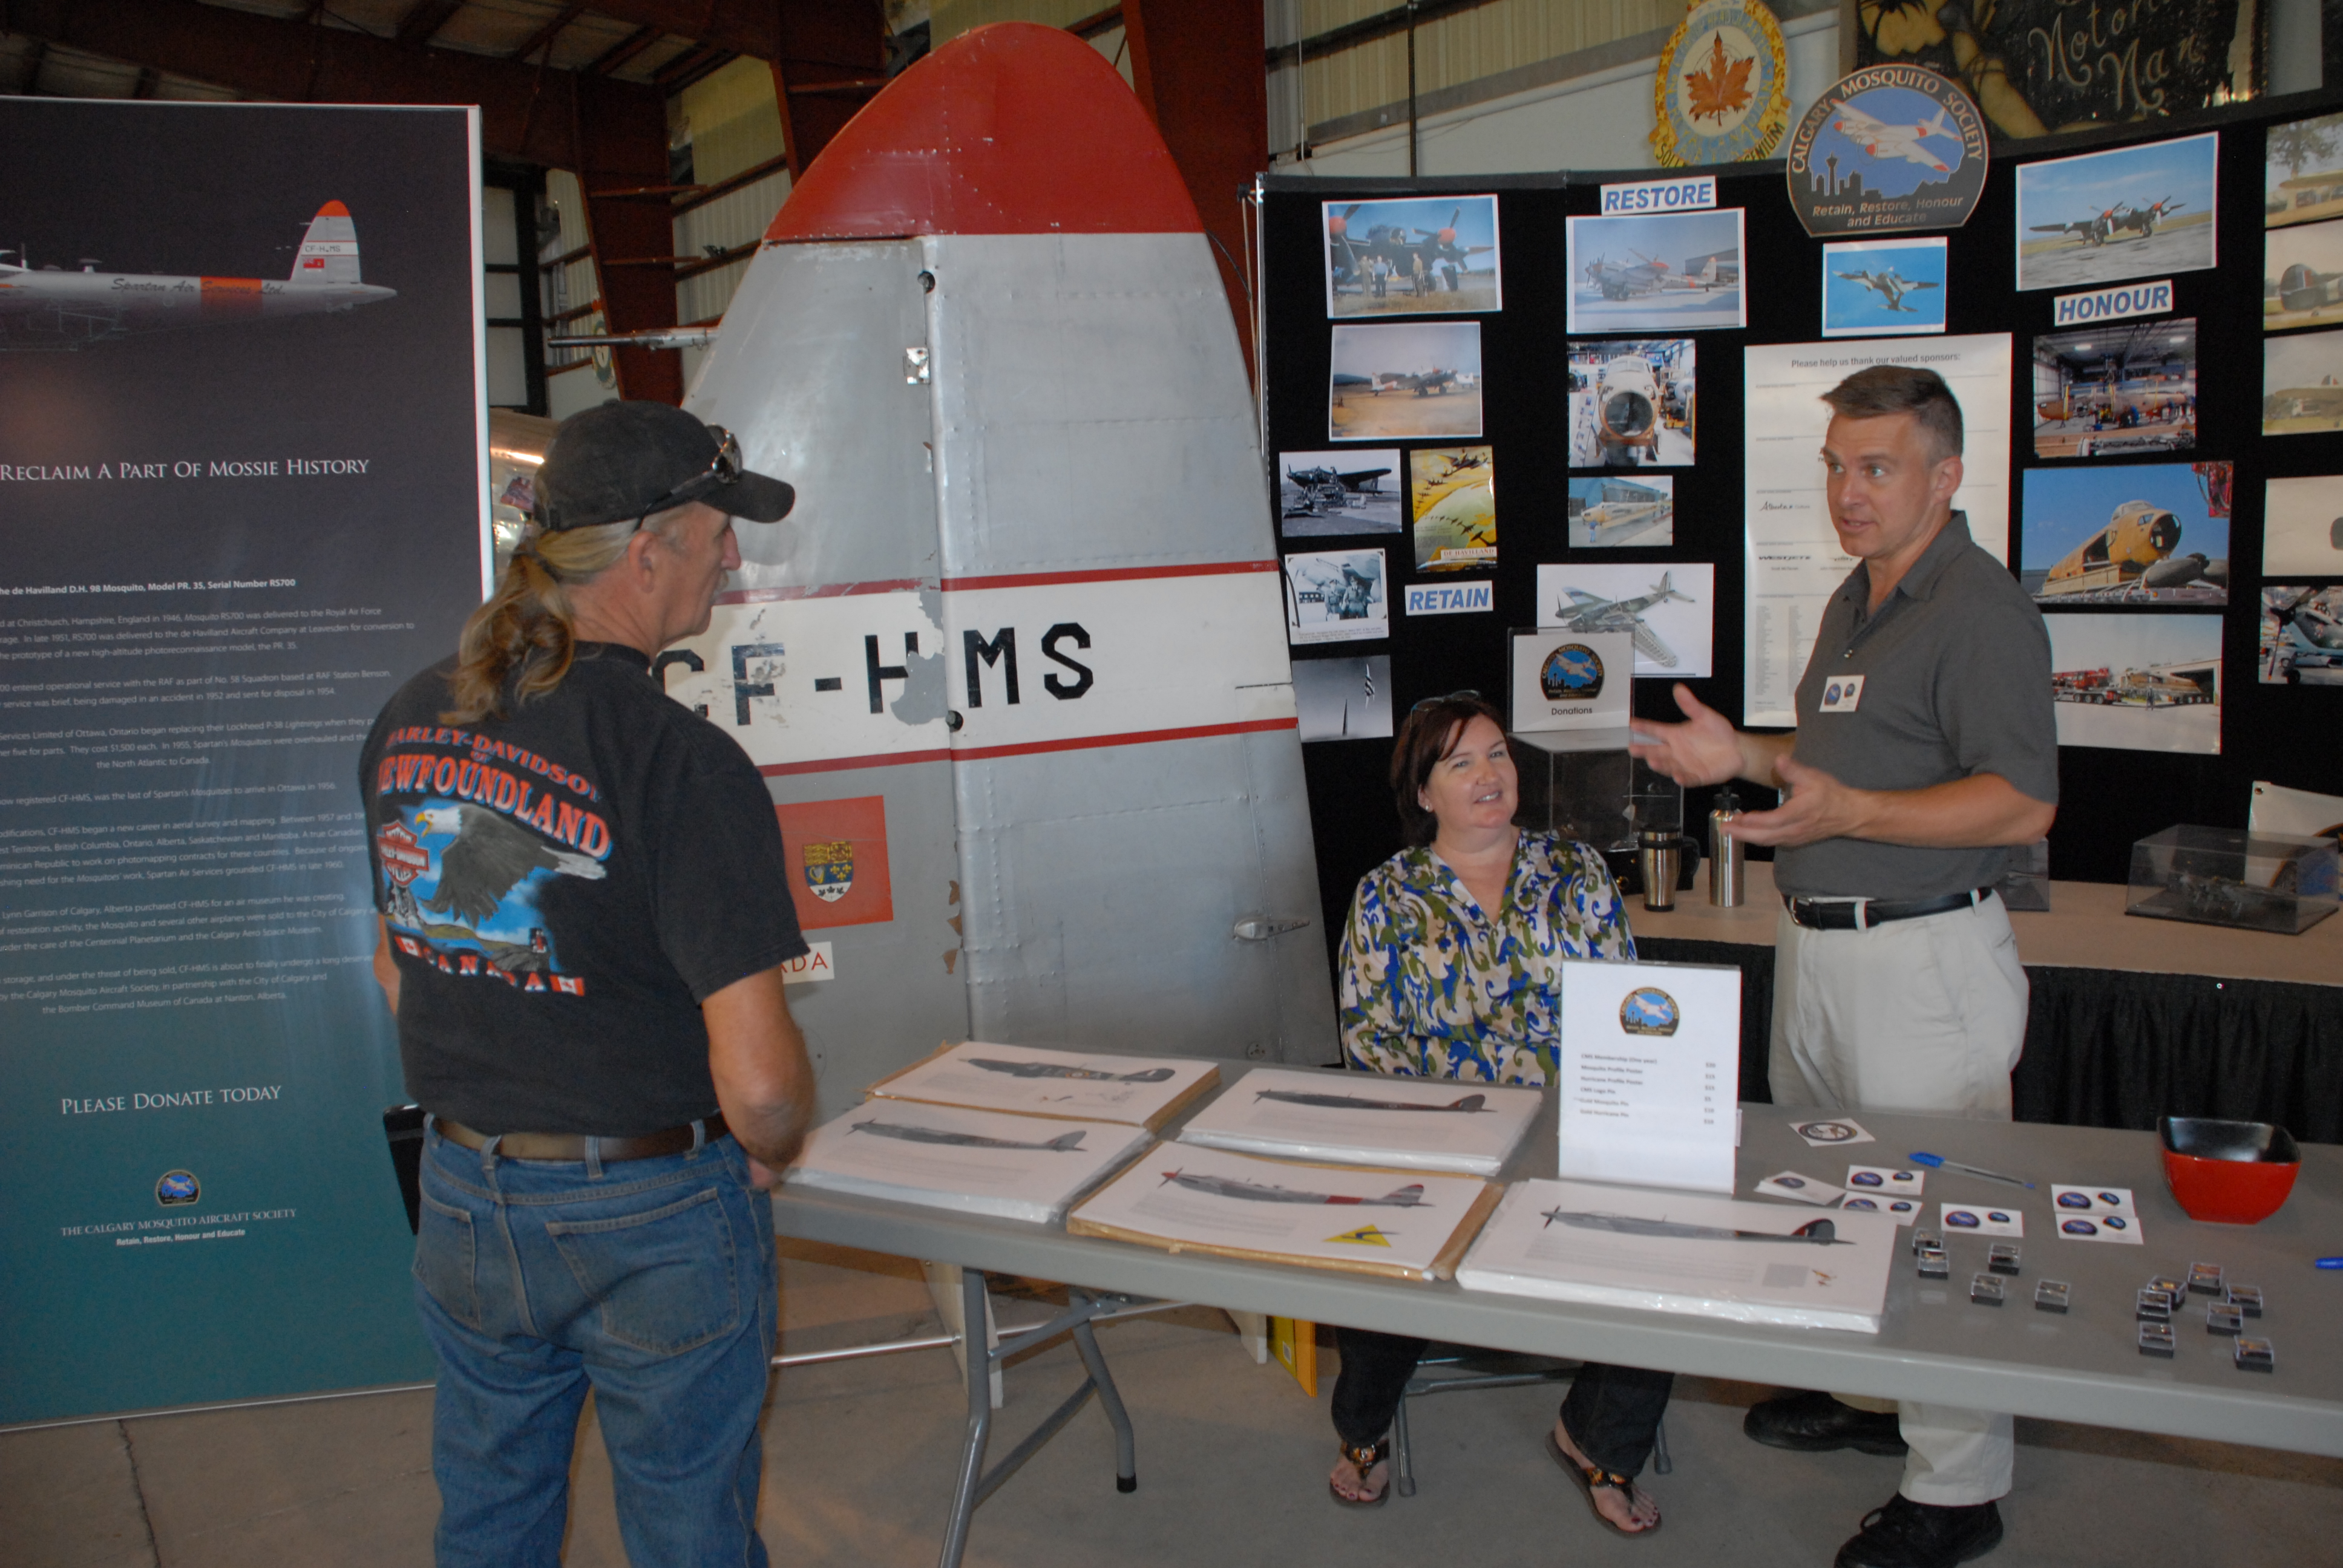
The third quarter marks the busiest of the year for displays and presentations. This year it began with the annual Bikes and Bombers event on July 4th, at the Bomber Command Museum. For all of the special event days, we staff our permanent display in the hangar talking to visitors about our project and selling souvenir merchandise. On these days, the crew working on the Mosquito and Hurricane engine tend to spend most of their day talking to people about our work. A full list of event days at the museum can be found at: www.bombercommandmuseum.ca/eventschedule.html
July 18th saw the first 'Field of Dreams' car show event adjacent to the museum. As expected, car and bike people are easily engaged in discussions about vintage aircraft.
Board members Colette and Stéphane talk to a visitor during the July 4, Bikes and Bombers event at the Bomber Command Museum.
At the end of the July we again participated in the annual Historic Calgary Week, organized by the Chinook Country Historical Society with a repeat performance of the story of Calgary's World War II Hurricane ace, William McKnight: www.chinookcountry.org/HCW2015/0-Week%20At%20A%20Glance.pdf The event was attended by 105 people at the Central United Church on July 30.
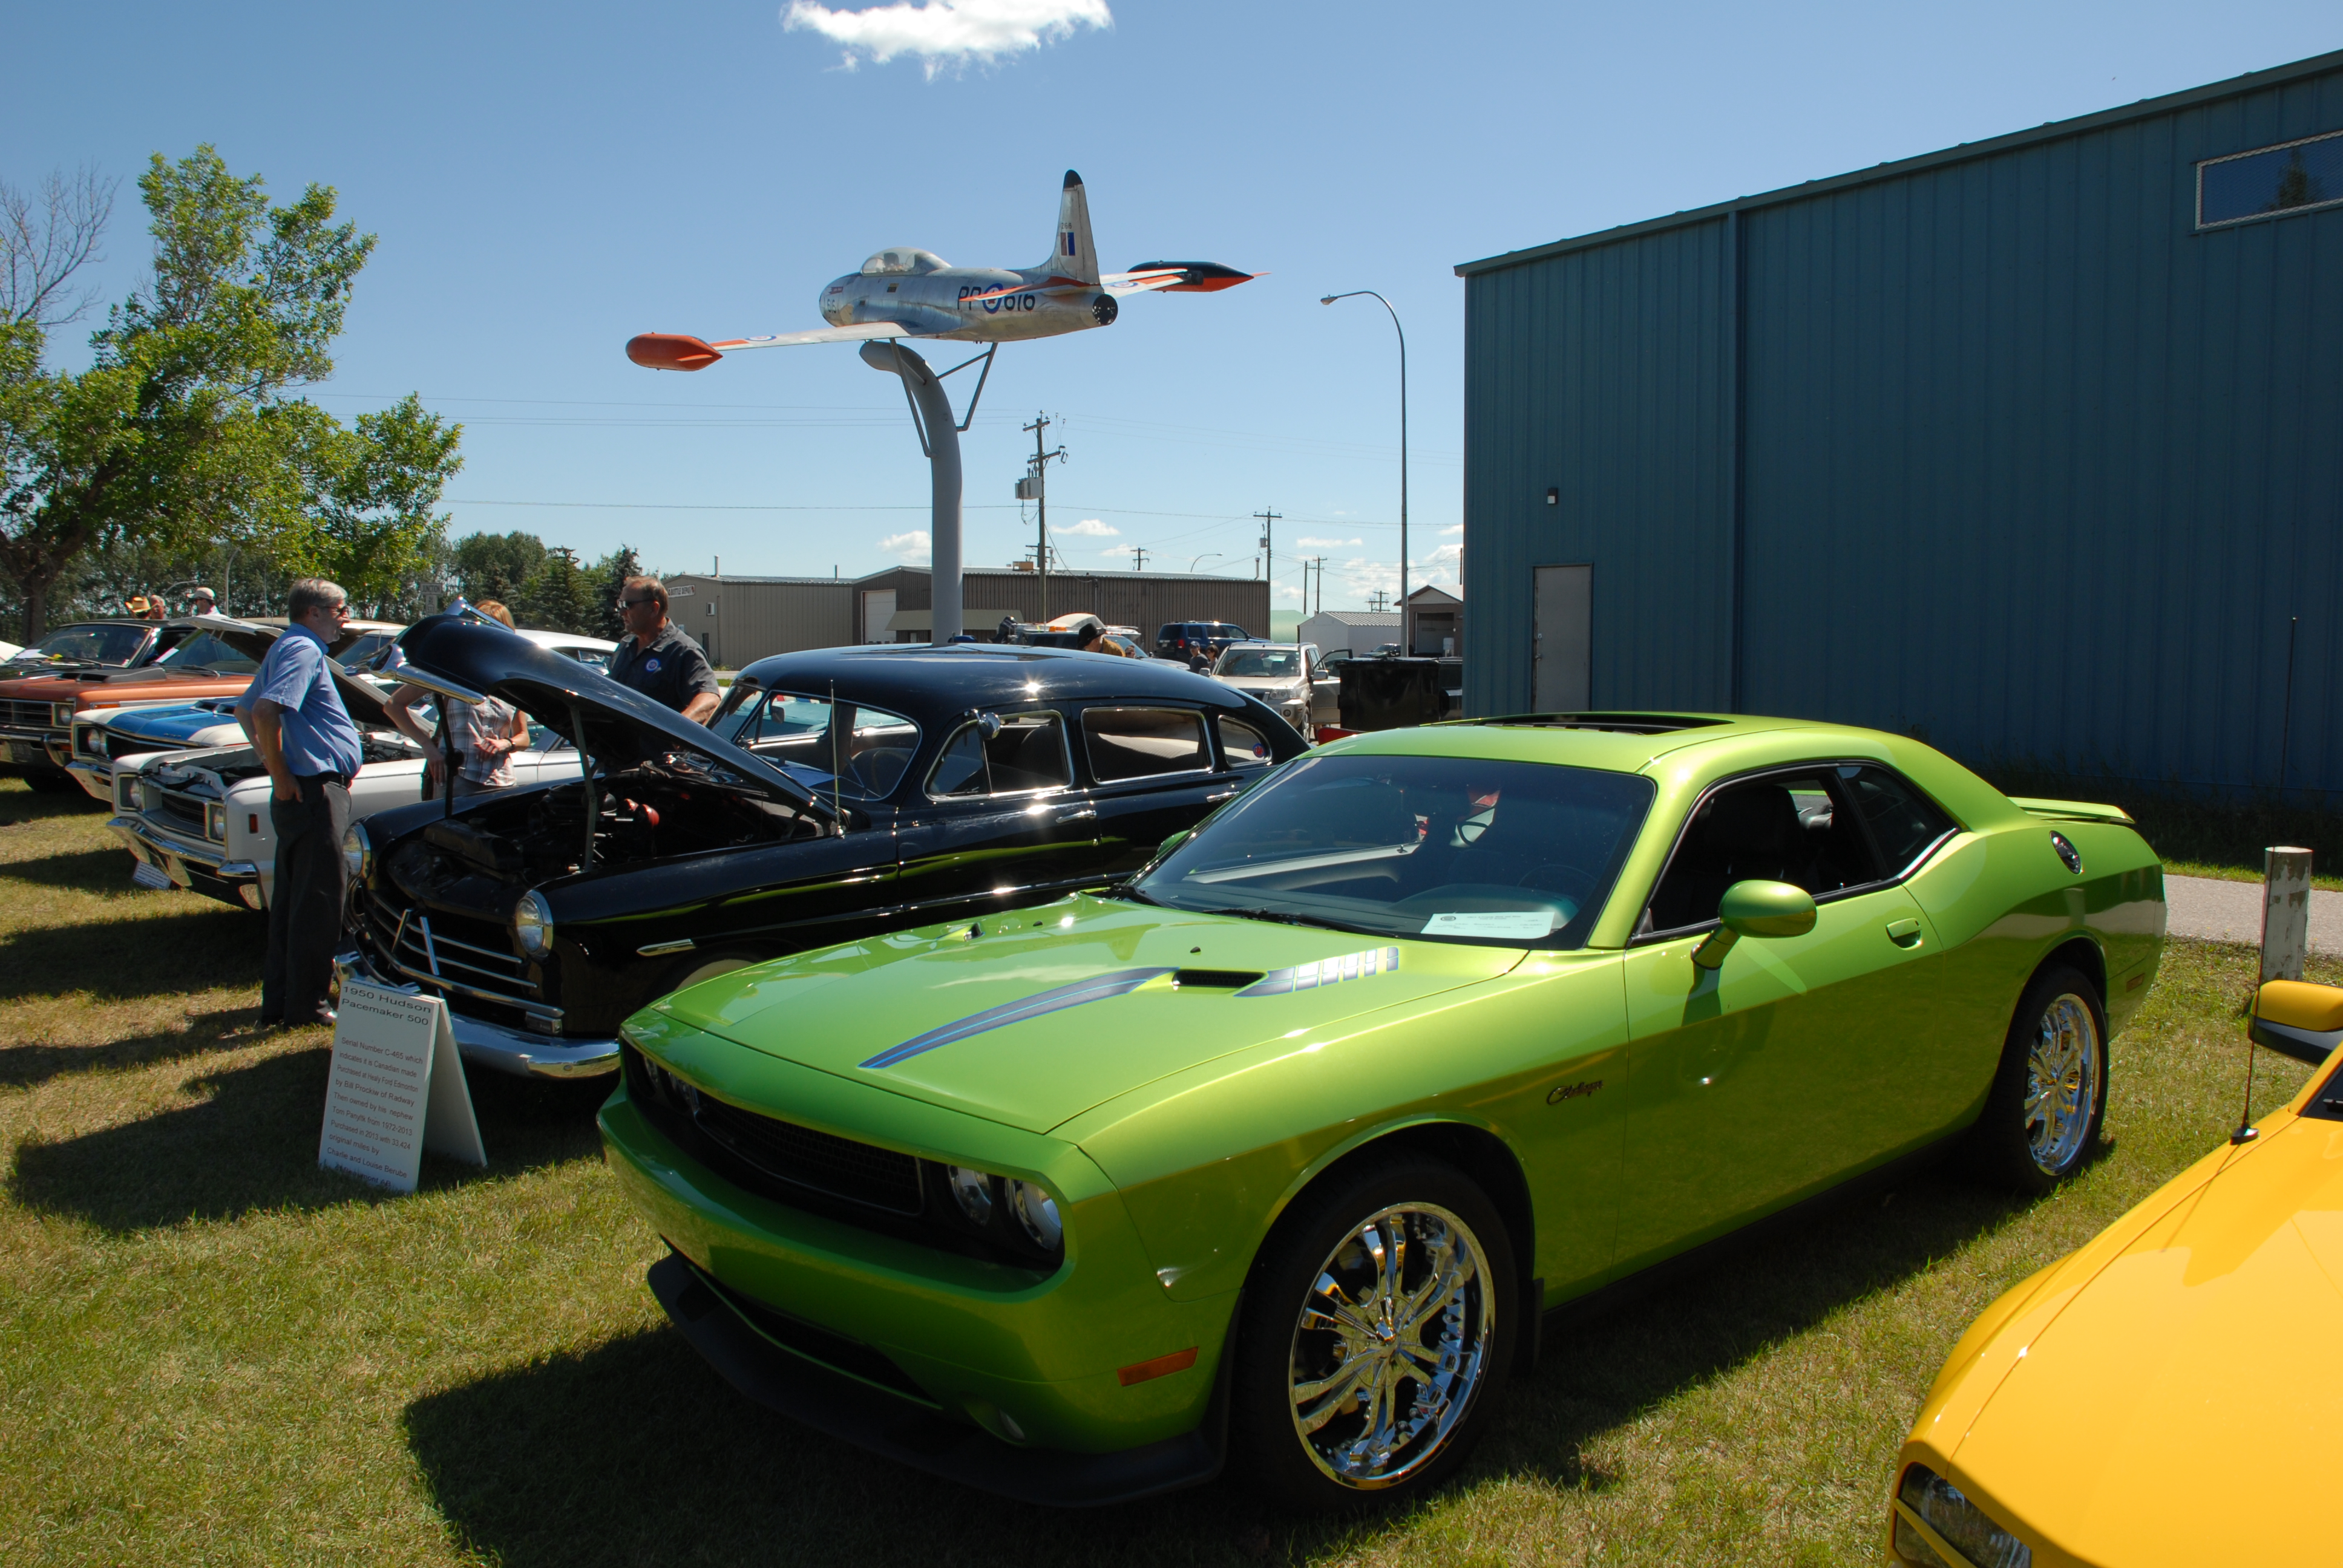
The July 18 ‘Field of Dreams’ event drew visitors and cars of all ages.
We were again hosting hundreds of visitors on August 3 for Nanton Parade Day. August 22nd marked the biggest event day of the year at the Bomber Command Museum which this year celebrated the 70th anniversary of their star attraction, Lancaster FM159. September 19 marked the rededication of the Bomber Command Memorial Wall, an event which featured CMS board member,
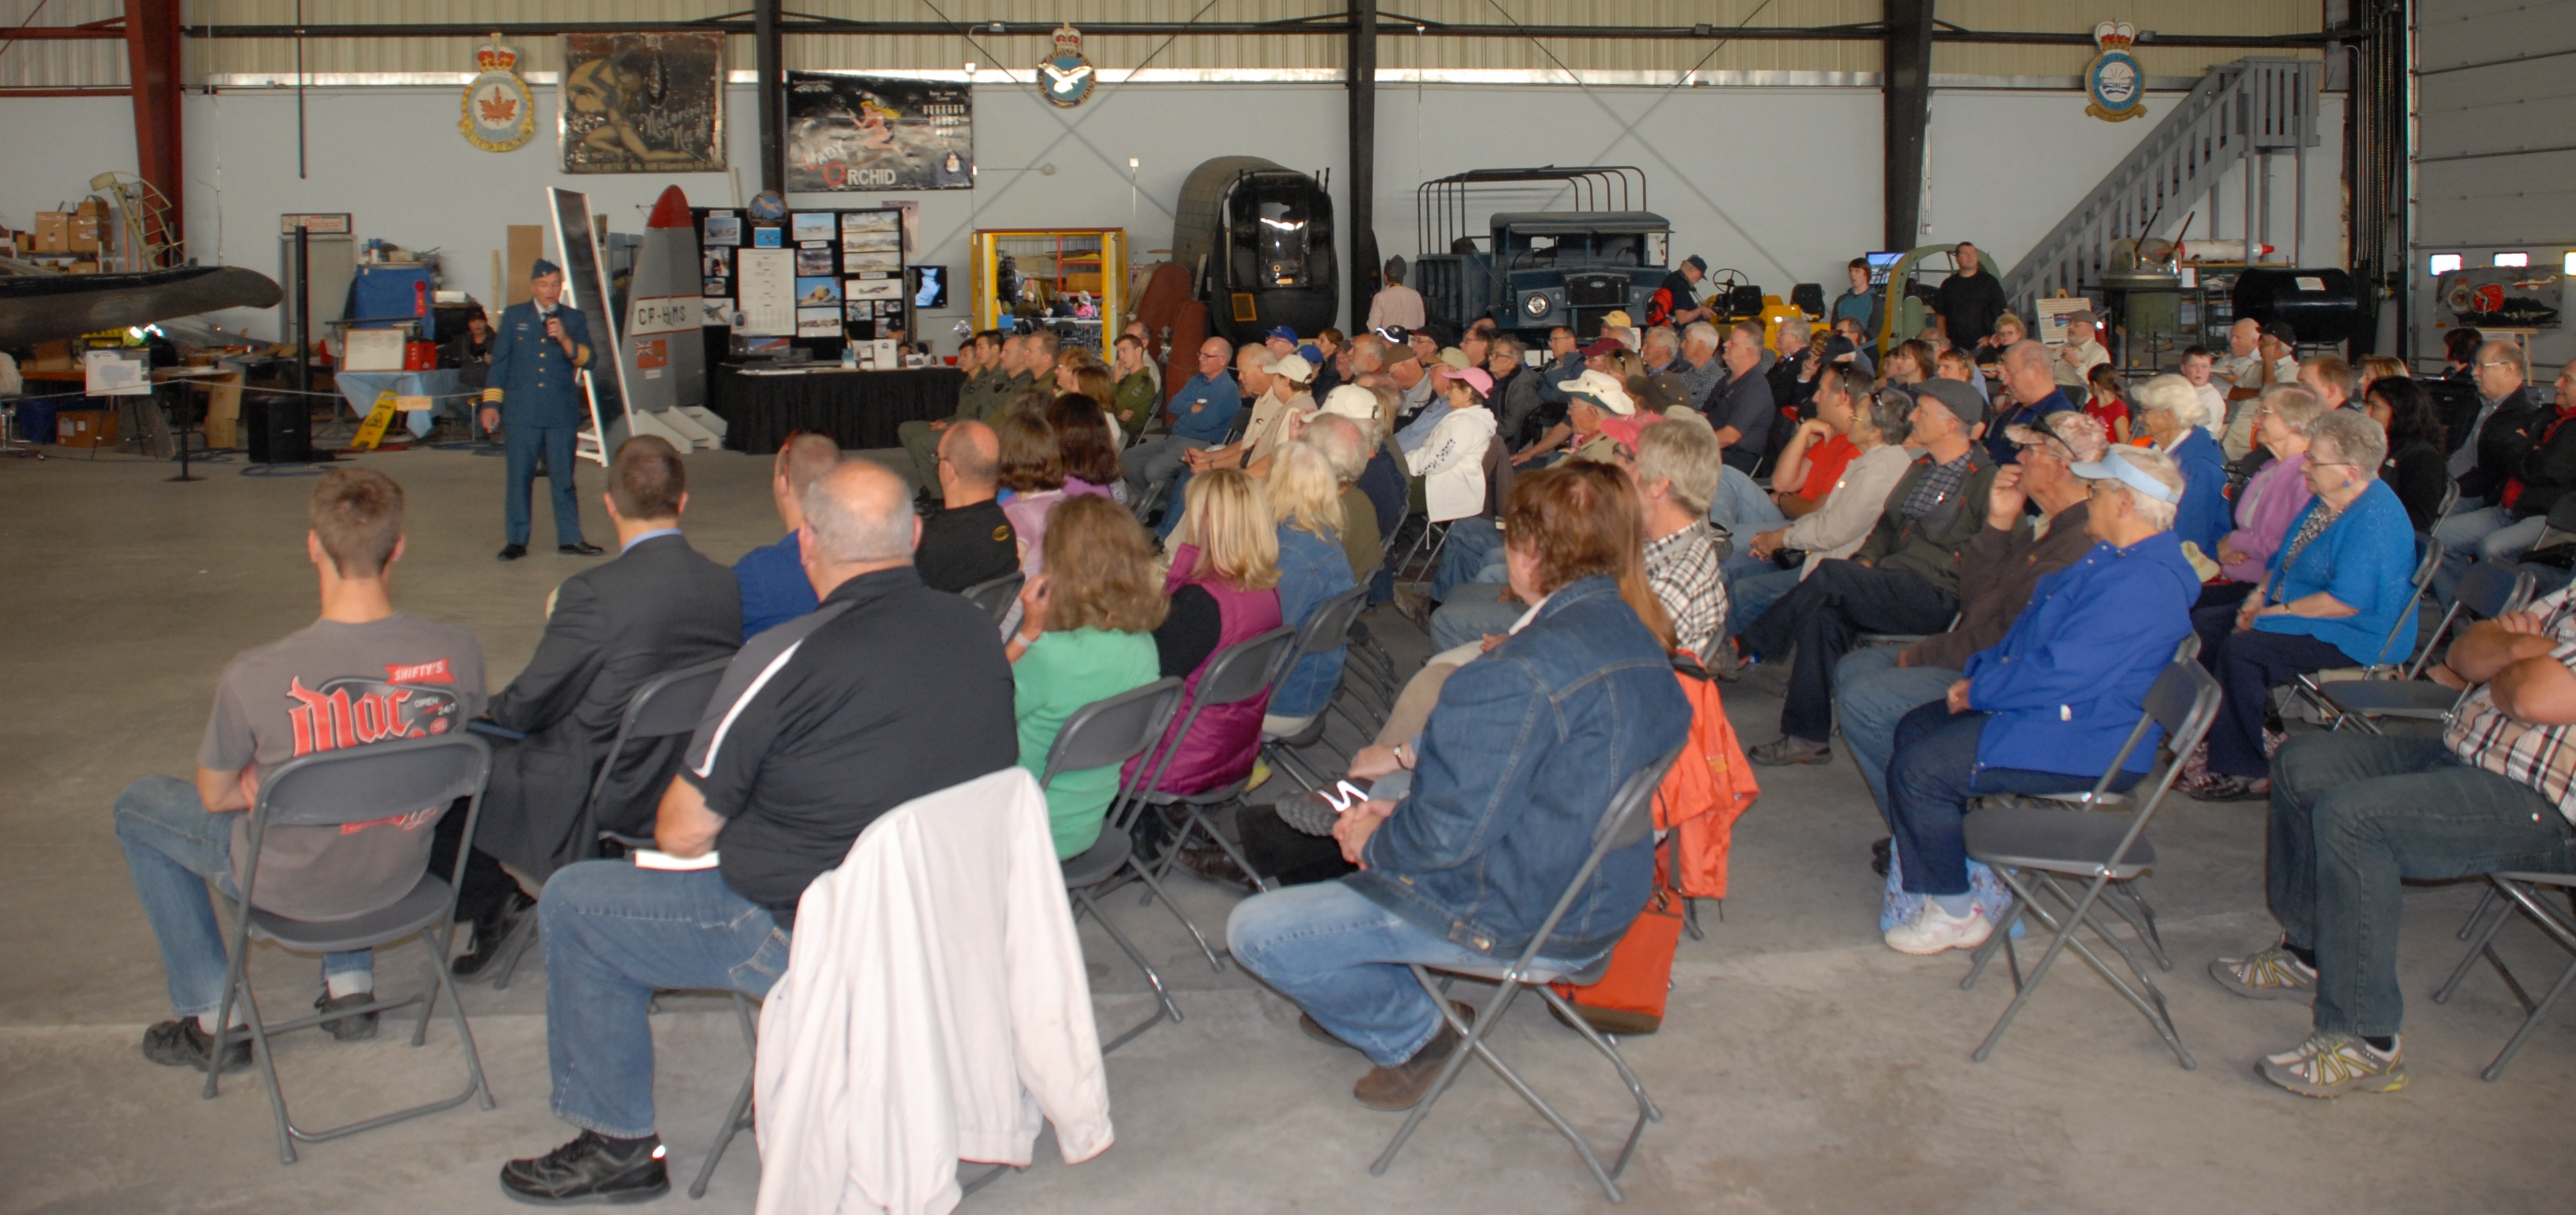
Working to fulfill our mandate to "Honour and Educate", CMS board member Dr. Stéphane Guevremont delivers his presentation on a day in the life of Bomber Command at the museum in Nanton on September 19th.
Dr., and now Honorary Colonel of RCAF 419 Squadron, Stéphane Guevermont, with his presentation A Thousand Shall Fall.

Richard de Boer, President
October 13, 2015