Click on any image for a slideshow!

Mosquito and Hurricane Work for the Summer Quarter of 2018
If you've been reading our quarterly updates, you may have noticed that we always start with the number of volunteer hours invested. Why? Because this report is not just for public consumption, but is also part of our contractual obligation to the City of Calgary. We get credit for the number of volunteer hours that we work, so we have to report on them. For public consumption we do take out some boring bits and the financial reports.
So for this quarter it's 187 hours of admin work, 17.5 on the Hurricane and 1338.25 on the Mosquito for a total of 1542.75 hours. Now you know, and now you know why.
Hurricane
We start this report by again thanking our friend from Hamilton, Brian Davis who has been working with Historic Aviation Services to fill in some of the blank spots in our aircraft systems.
This time it is for the fuel system junction branch and filter, mounted to the port side of the center section wing spar.
We have been trying to fill this hole for several years and were at the point of considering going with a 'John Deere' solution until Brian saved the day by supplying the much sought after parts.
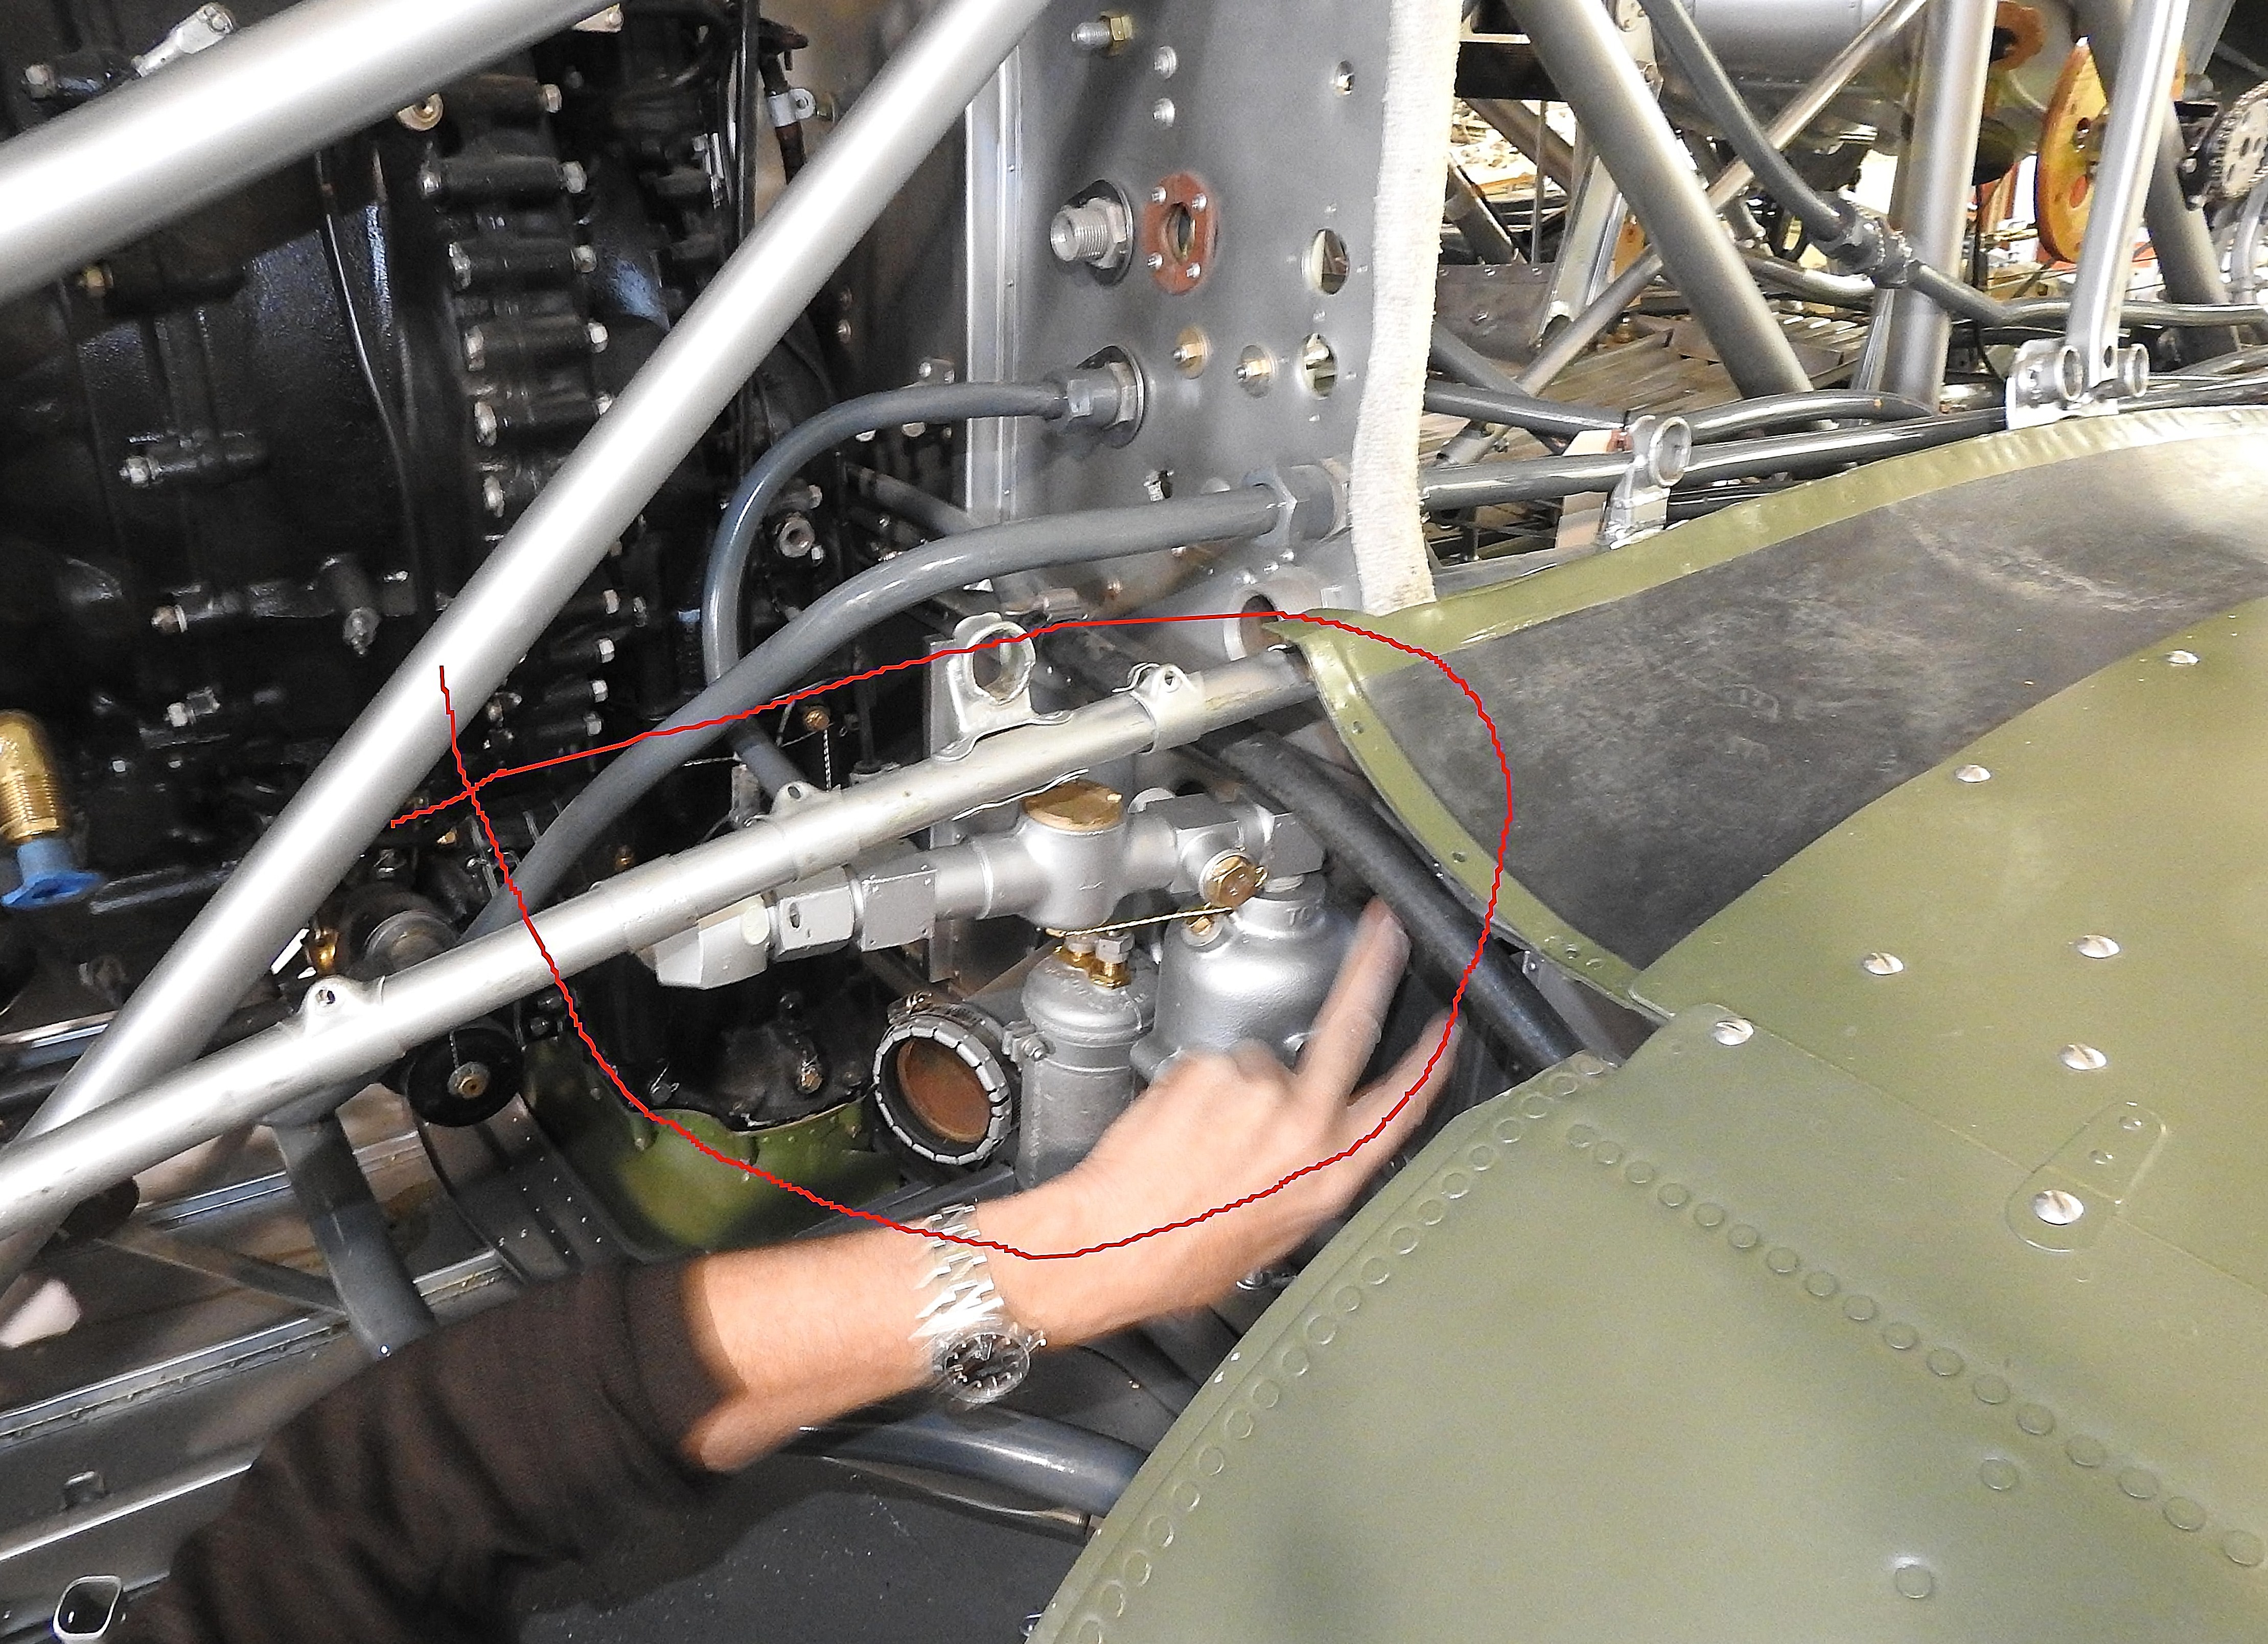
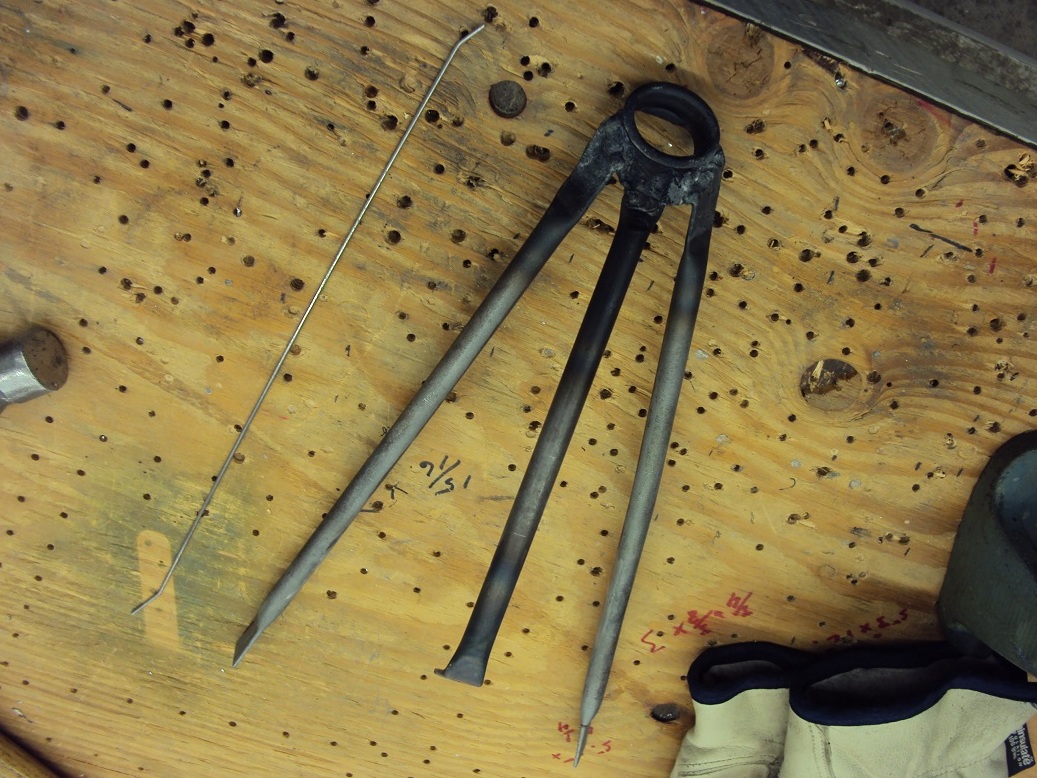
Fuel system junction branch and filter.
In this quarter we did two more presentations to organizations that were interested to learn about the history of the Hurricane, its relevance to Calgary and the state of the restoration. On August 2, we spoke to approximately 80 members of the Calgary Probus Club and on September 6 we were at the Fountains of Mission Retirement Residence.
We conducted our quarterly inspection of the Hurricane in Wetaskiwin on September 28. Given some of the challenges in completing the various aircraft systems to bring it to run and taxi status, it has been decided to push the completion date out to the spring of 2019.
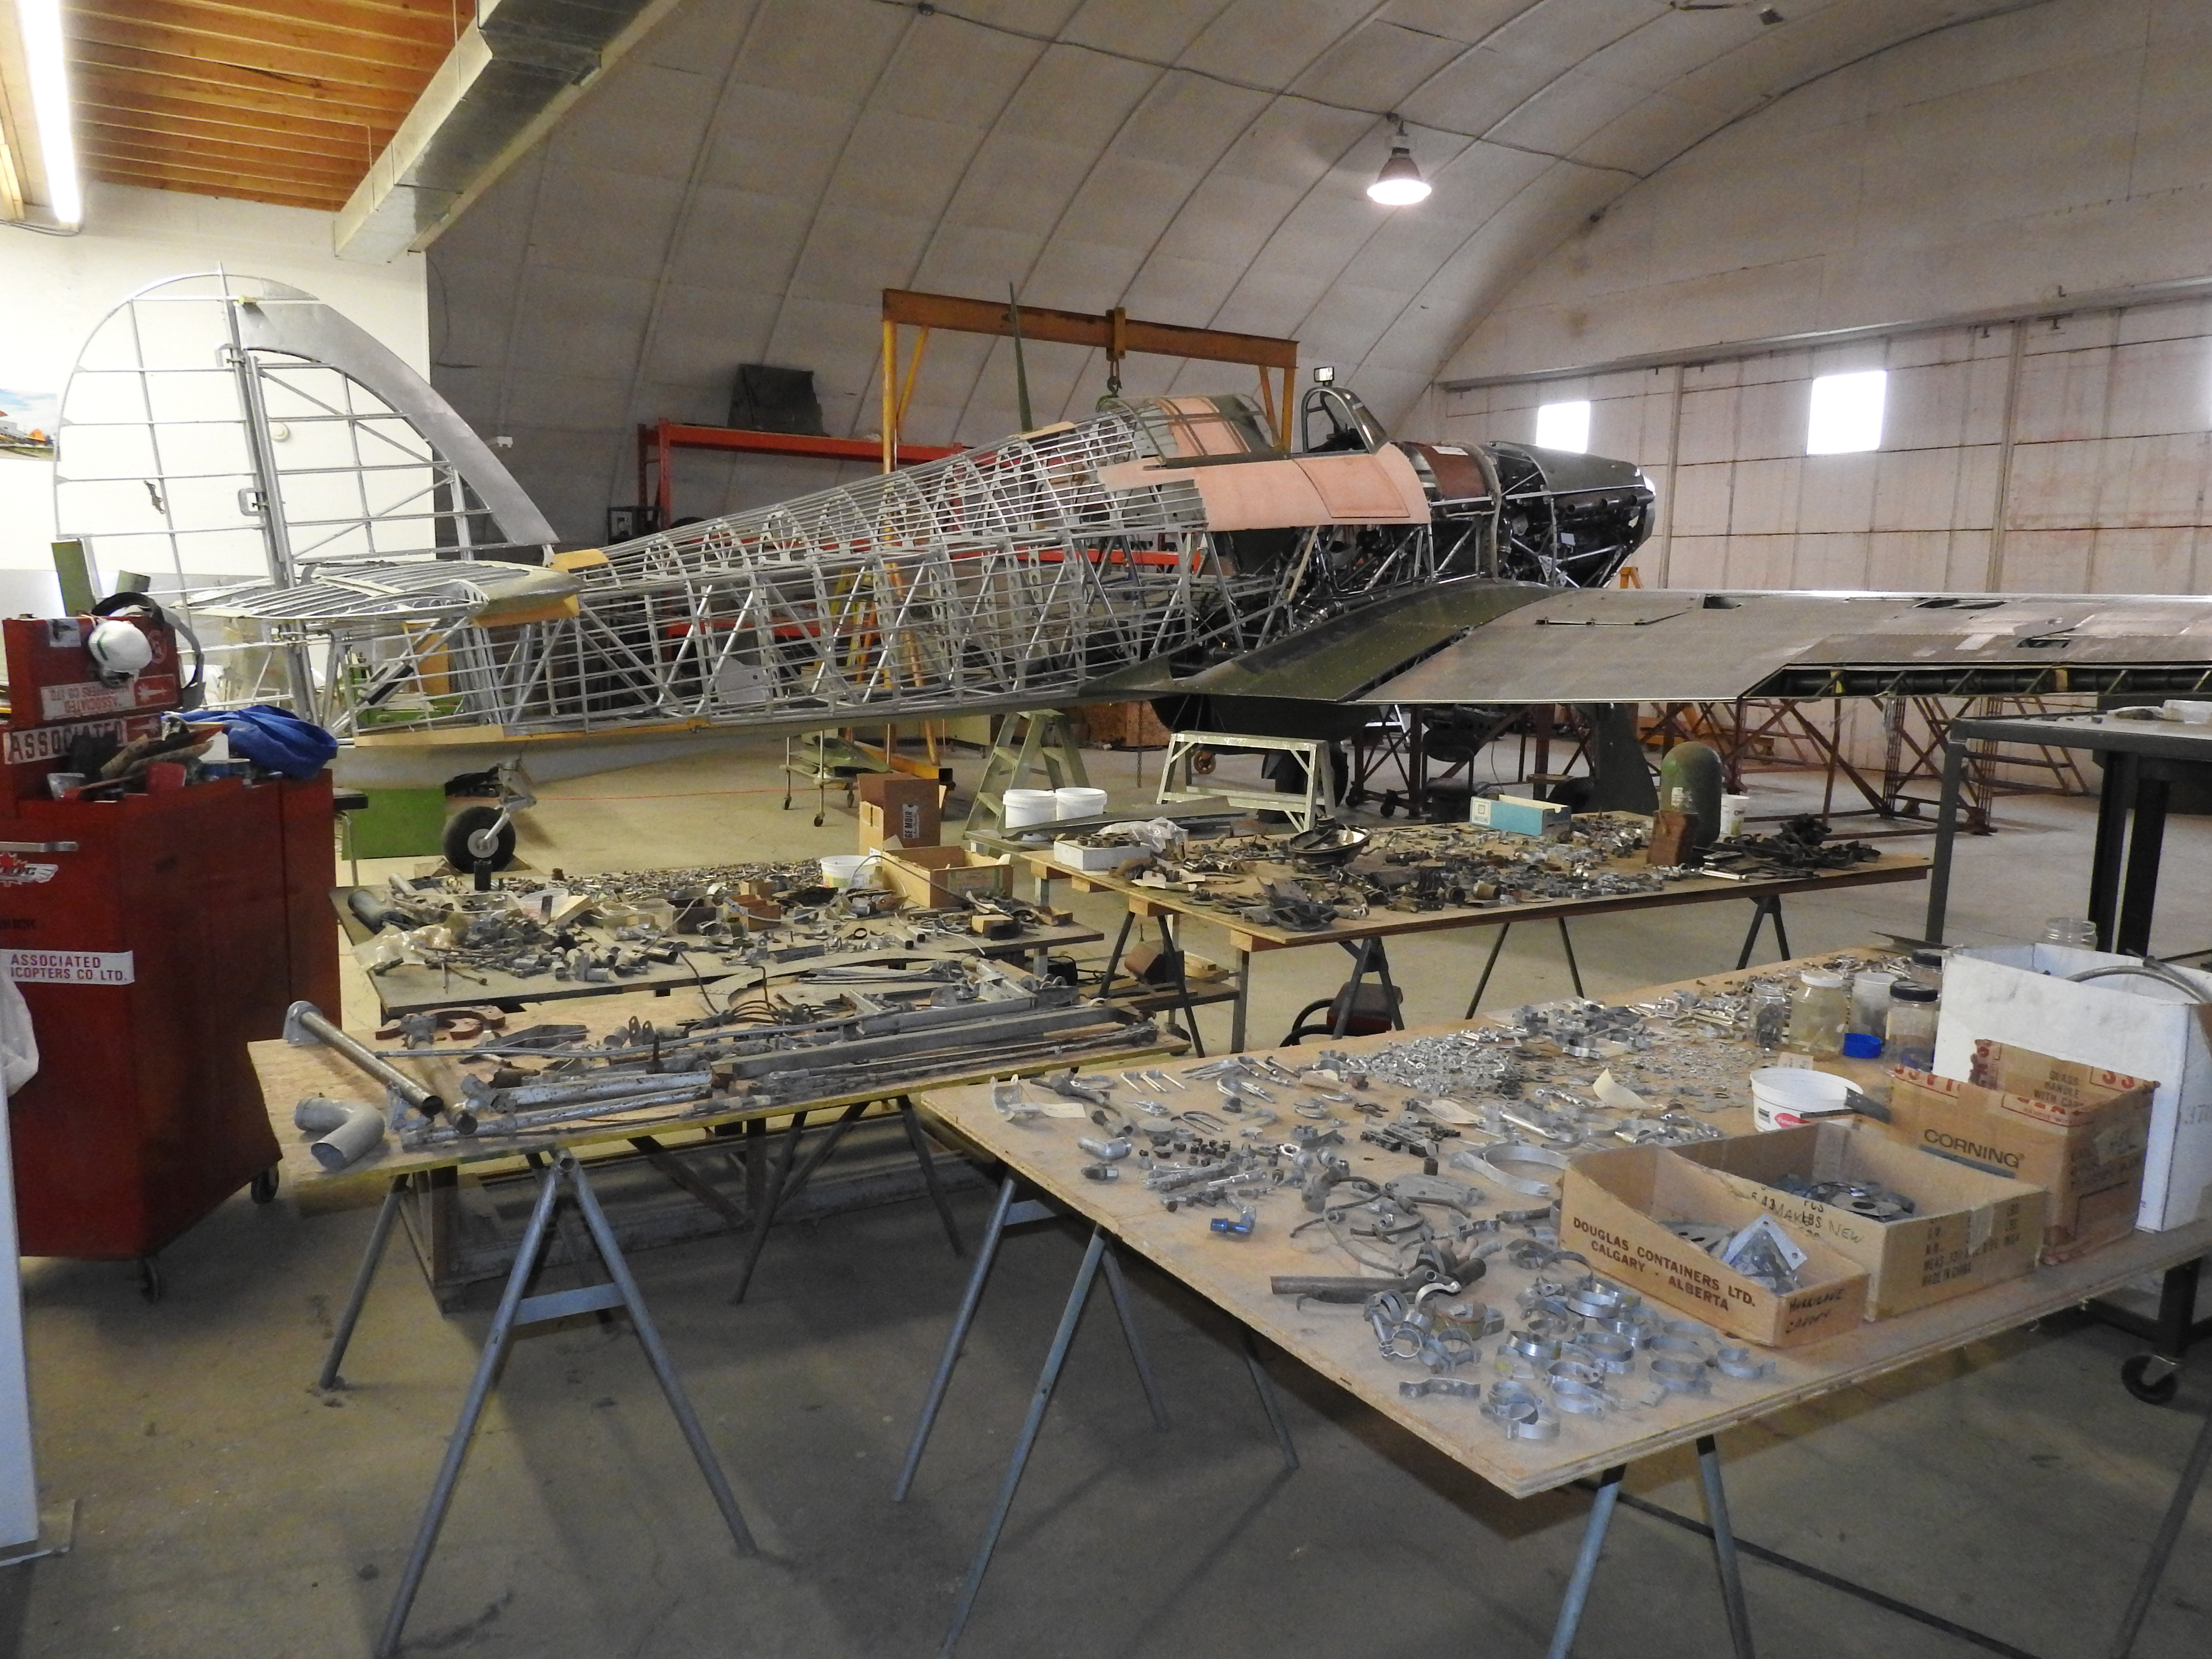
How many parts does it take to make a Hurricane? (One Hurricane owner said 23,000).
All we got was the box top art, not the instructions.
Airframe: Historic Aviation Services
Fuselage and Center Section
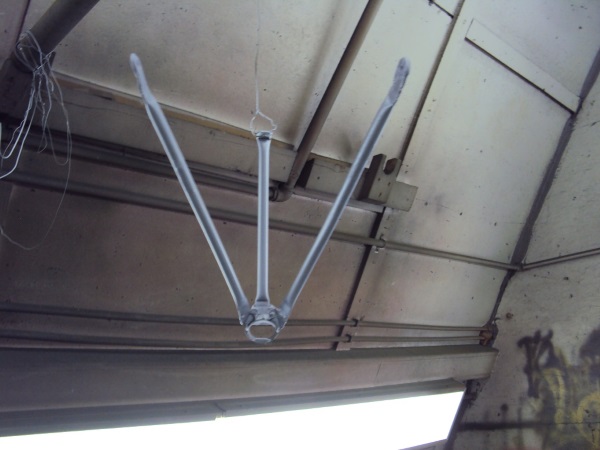
- Fabricated new port side, cockpit access step assembly (original missing) including box frame, base, spring loaded door and all mounting brackets as per Hurricane 5418 and installed completed unit in position in fuselage.
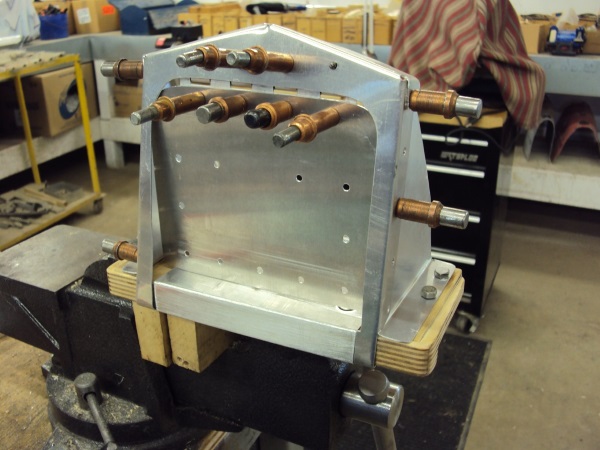
The port side kick step in process (above) and installed. (below)
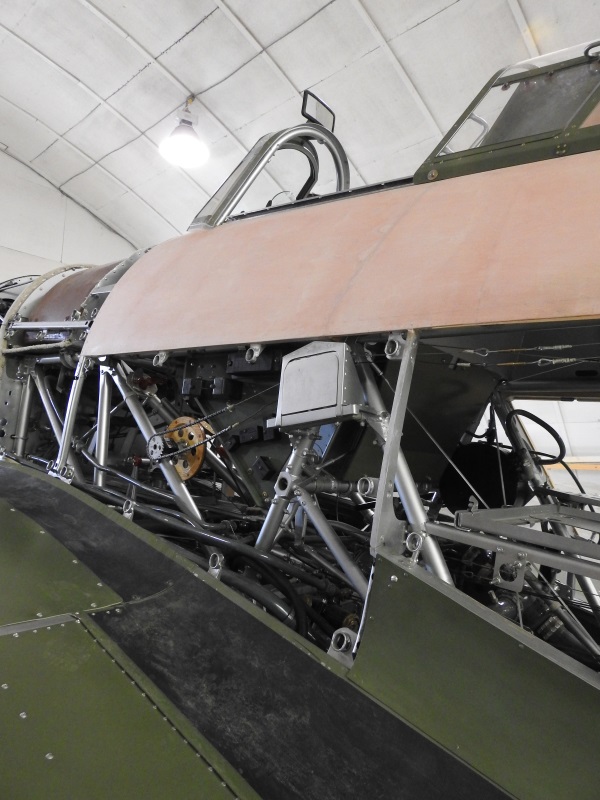
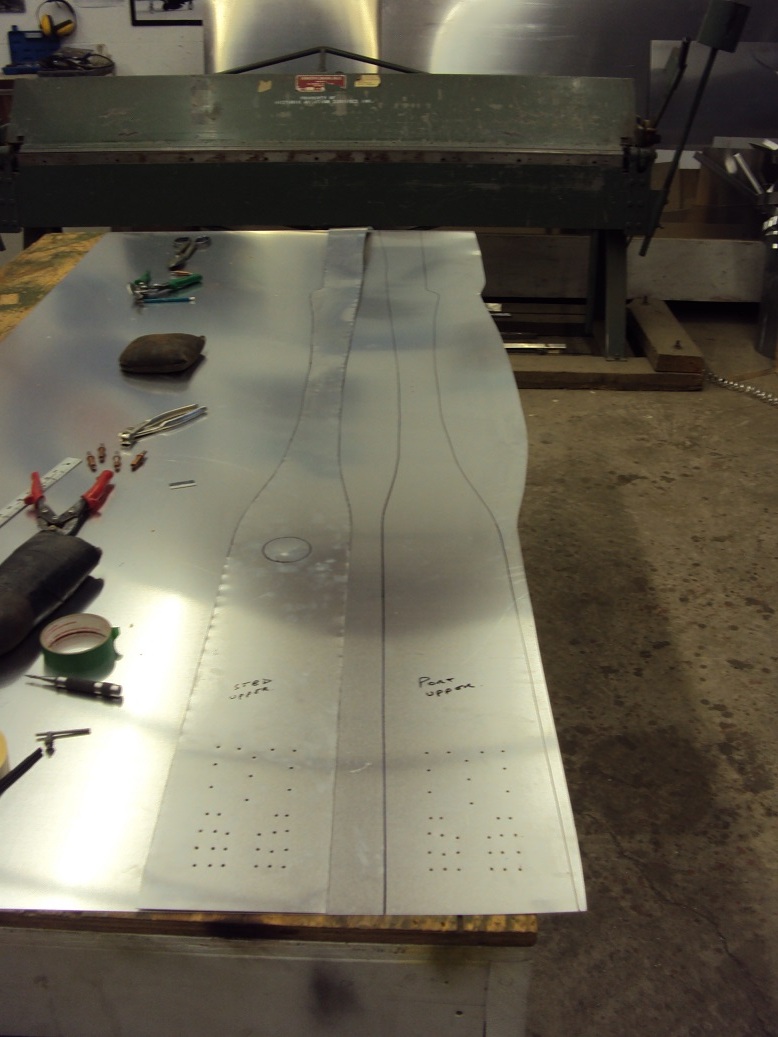
- Fabricated port and starboard wing to centre section closure panels (originals missing) as per Hurricane 5418 (2 top and 2 bottom panels per wing) including all mounting flanges, tensioner brackets and hardware.

The wing closure panels being fitted. They start out being cut from sheet aluminum, which seems simple enough...
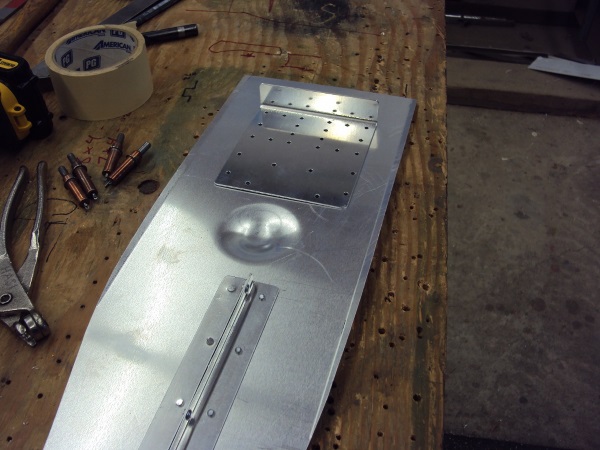
But a look at the underside reveals a centerline reinforcing strip, end plates, a dimple and rolled edges; days of work to build what at first glance seems a simple strip of metal.
- Manufactured special rolling tool to form wing to centre section closure panel edges to their proper profile.
- Test fit new closure panels in position and adjusted as necessary.
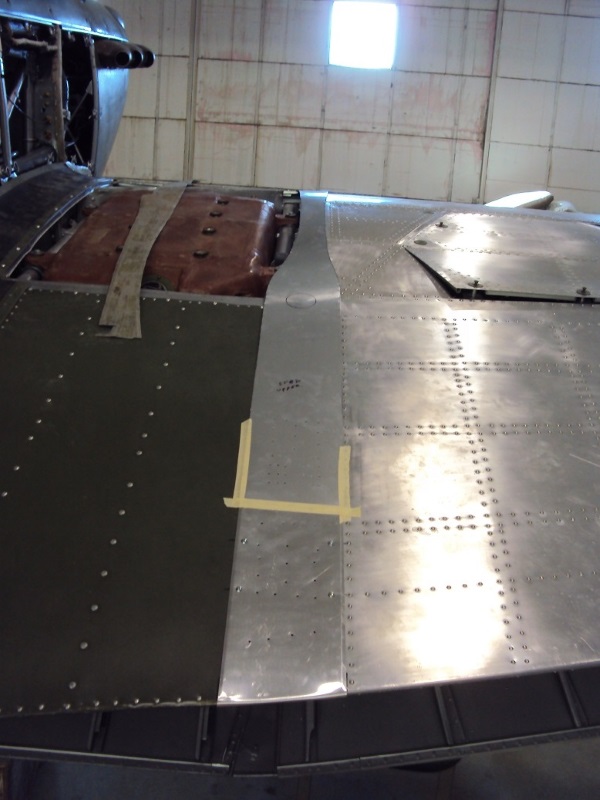
- Final install of port and starboard, top and bottom, centre section fuel tank covers.
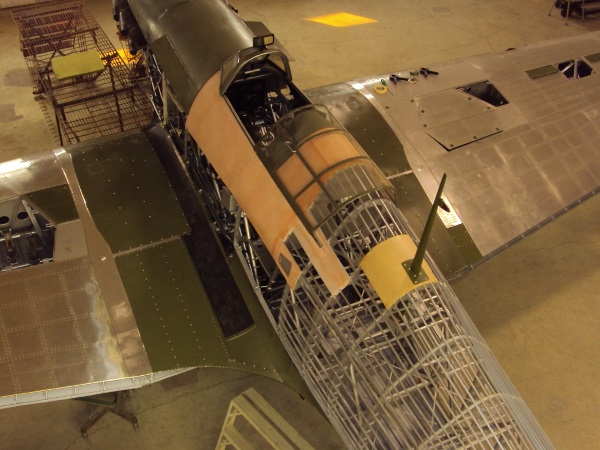
Fuel tank covers; the green panels on the front of the center section. A full set of upper and lower panels now complete and installed.
- Installed hydraulic undercarriage/flap selector valve in position in fuselage.
- Began fabrication of missing hydraulic system pressure and return lines, ferrules and fittings as required.
- Fabricated lower aft oil tank to centre section closing panel (original missing) as per Hurricane 5418.
- Primed and painted inner surface with silver butyrate dope and installed in position.
- Fabricated port and starboard undercarriage drag-strut closure doors (originals missing) as per Hurricane 5418.
- Manufactured special wing attach pin relief tool and added blisters to newly built port and starboard wing to centre section closure panels and drag-strut closure doors for proper clearance. Test fit then primed and painted inner surfaces with silver butyrate dope.
- Installed drag-strut closure doors in position on undercarriage legs.
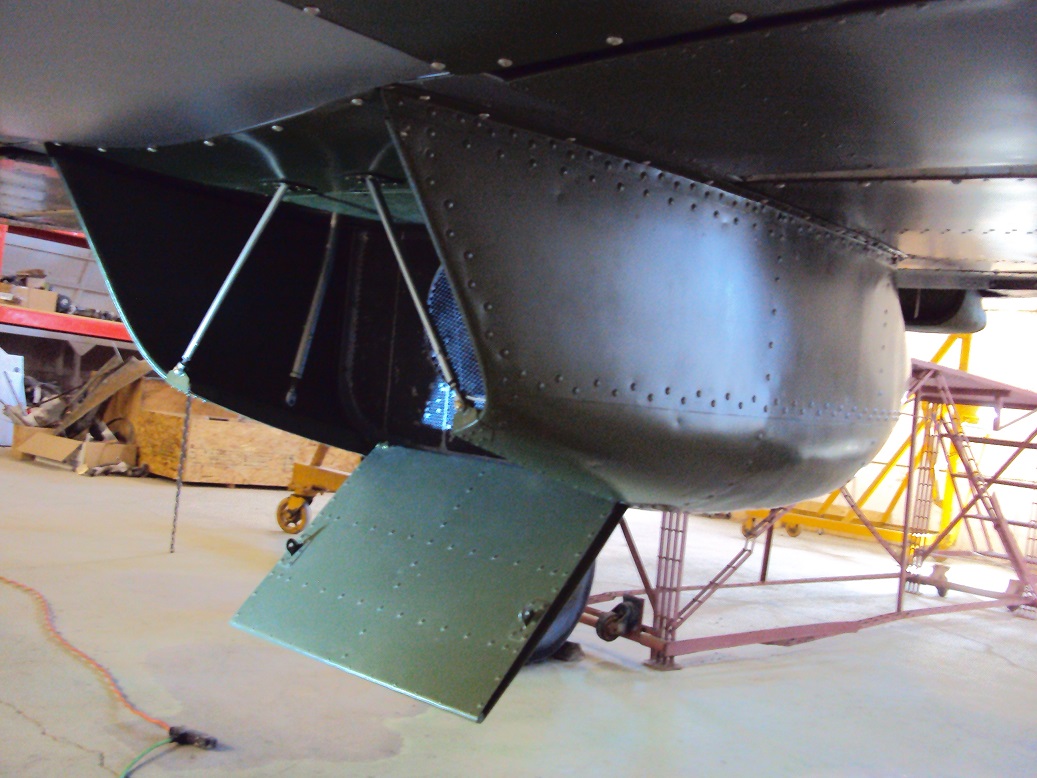
- Finish installation and rig of radiator scoop adjustable air flow door.

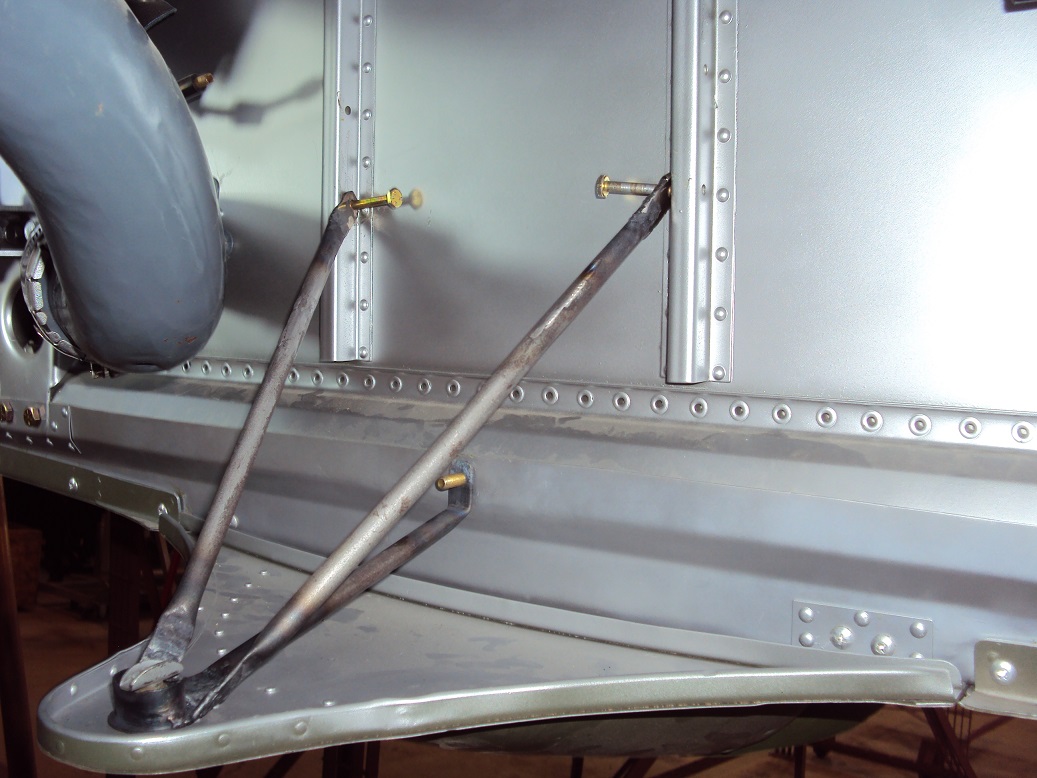
The radiator and oil cooler scoop door being fitted and rigged. The door was needed to regulate the amount of air flowing over the rad: open on the ground, closed in the air.
- Fabricated and installed missing lower coolant system over flow drain lines.
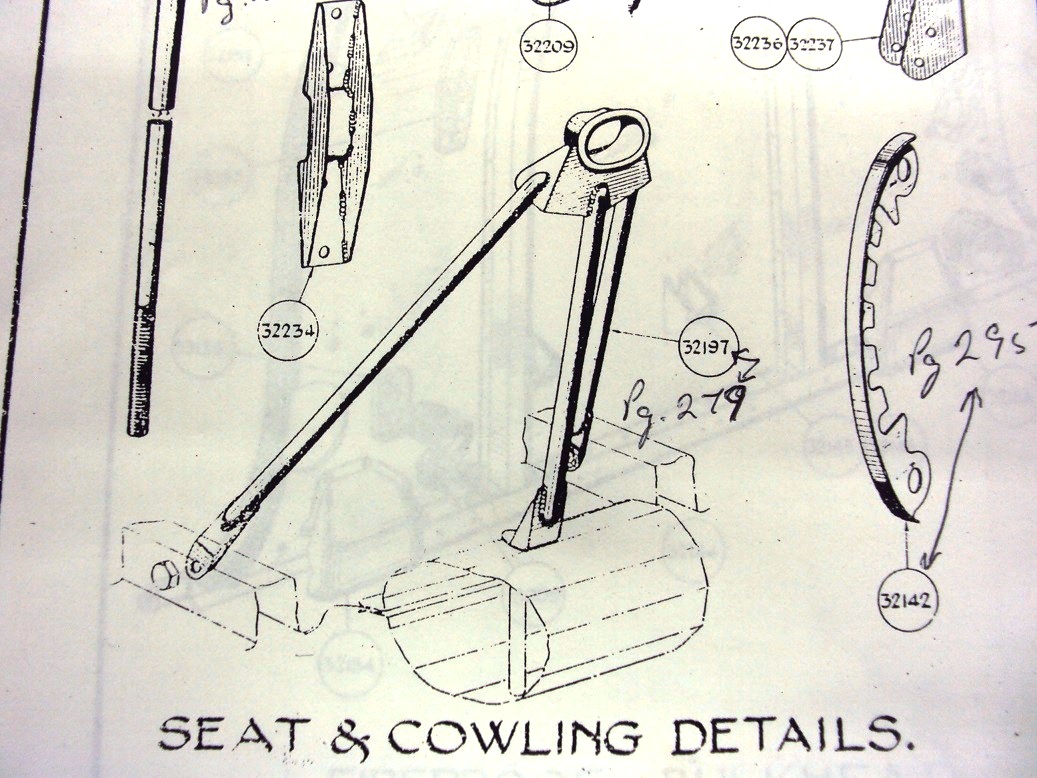
- Fabricated rear carb scoop to forward, centre undercarriage panel support bracket (original missing) as per Hawker drawing # 32197. Installed in position.
- Fabricated missing brake air bottle mounting bracket and stainless steel strap assembly (2 required) using existing example as a pattern. Primed and painted with silver butyrate dope and installed both units in position.
- Manufactured missing hydraulic oil reservoir filler plug.
- Began overhaul of fuel system junction branch -acquired from Brian Davis.


The above described panel support bracket from drawing to manufacture, to prime and paint, to installation.
Wings
- Manufactured port and starboard wing to centre section flap panel, universal joint cross pins, and grease fittings (originals missing), as per Hurricane 5418. Test for fit and function.
Empennage
- Continued rib repairs to port and starboard elevators, rudder, horizontal and vertical stabilizers.
- Continued leading edge repairs to all above as required.
- Continued trailing edge repairs to all above as required.


Mosquito
This quarter got off to a rousing start with hundreds of visitors attending Mosquito Celebration Day on July 7 at the Bomber Command Museum. For this event we held a silent auction, created new artifact displays, set up merchandise and book sales tables, gave tours of the restoration progress and gave an illustrated presentation on the "13 1/2 Amazing Things About the Mosquito". The museum contributed to the festivities with two engine run events by the Lancaster bomber and by the Bristol Hercules engine.
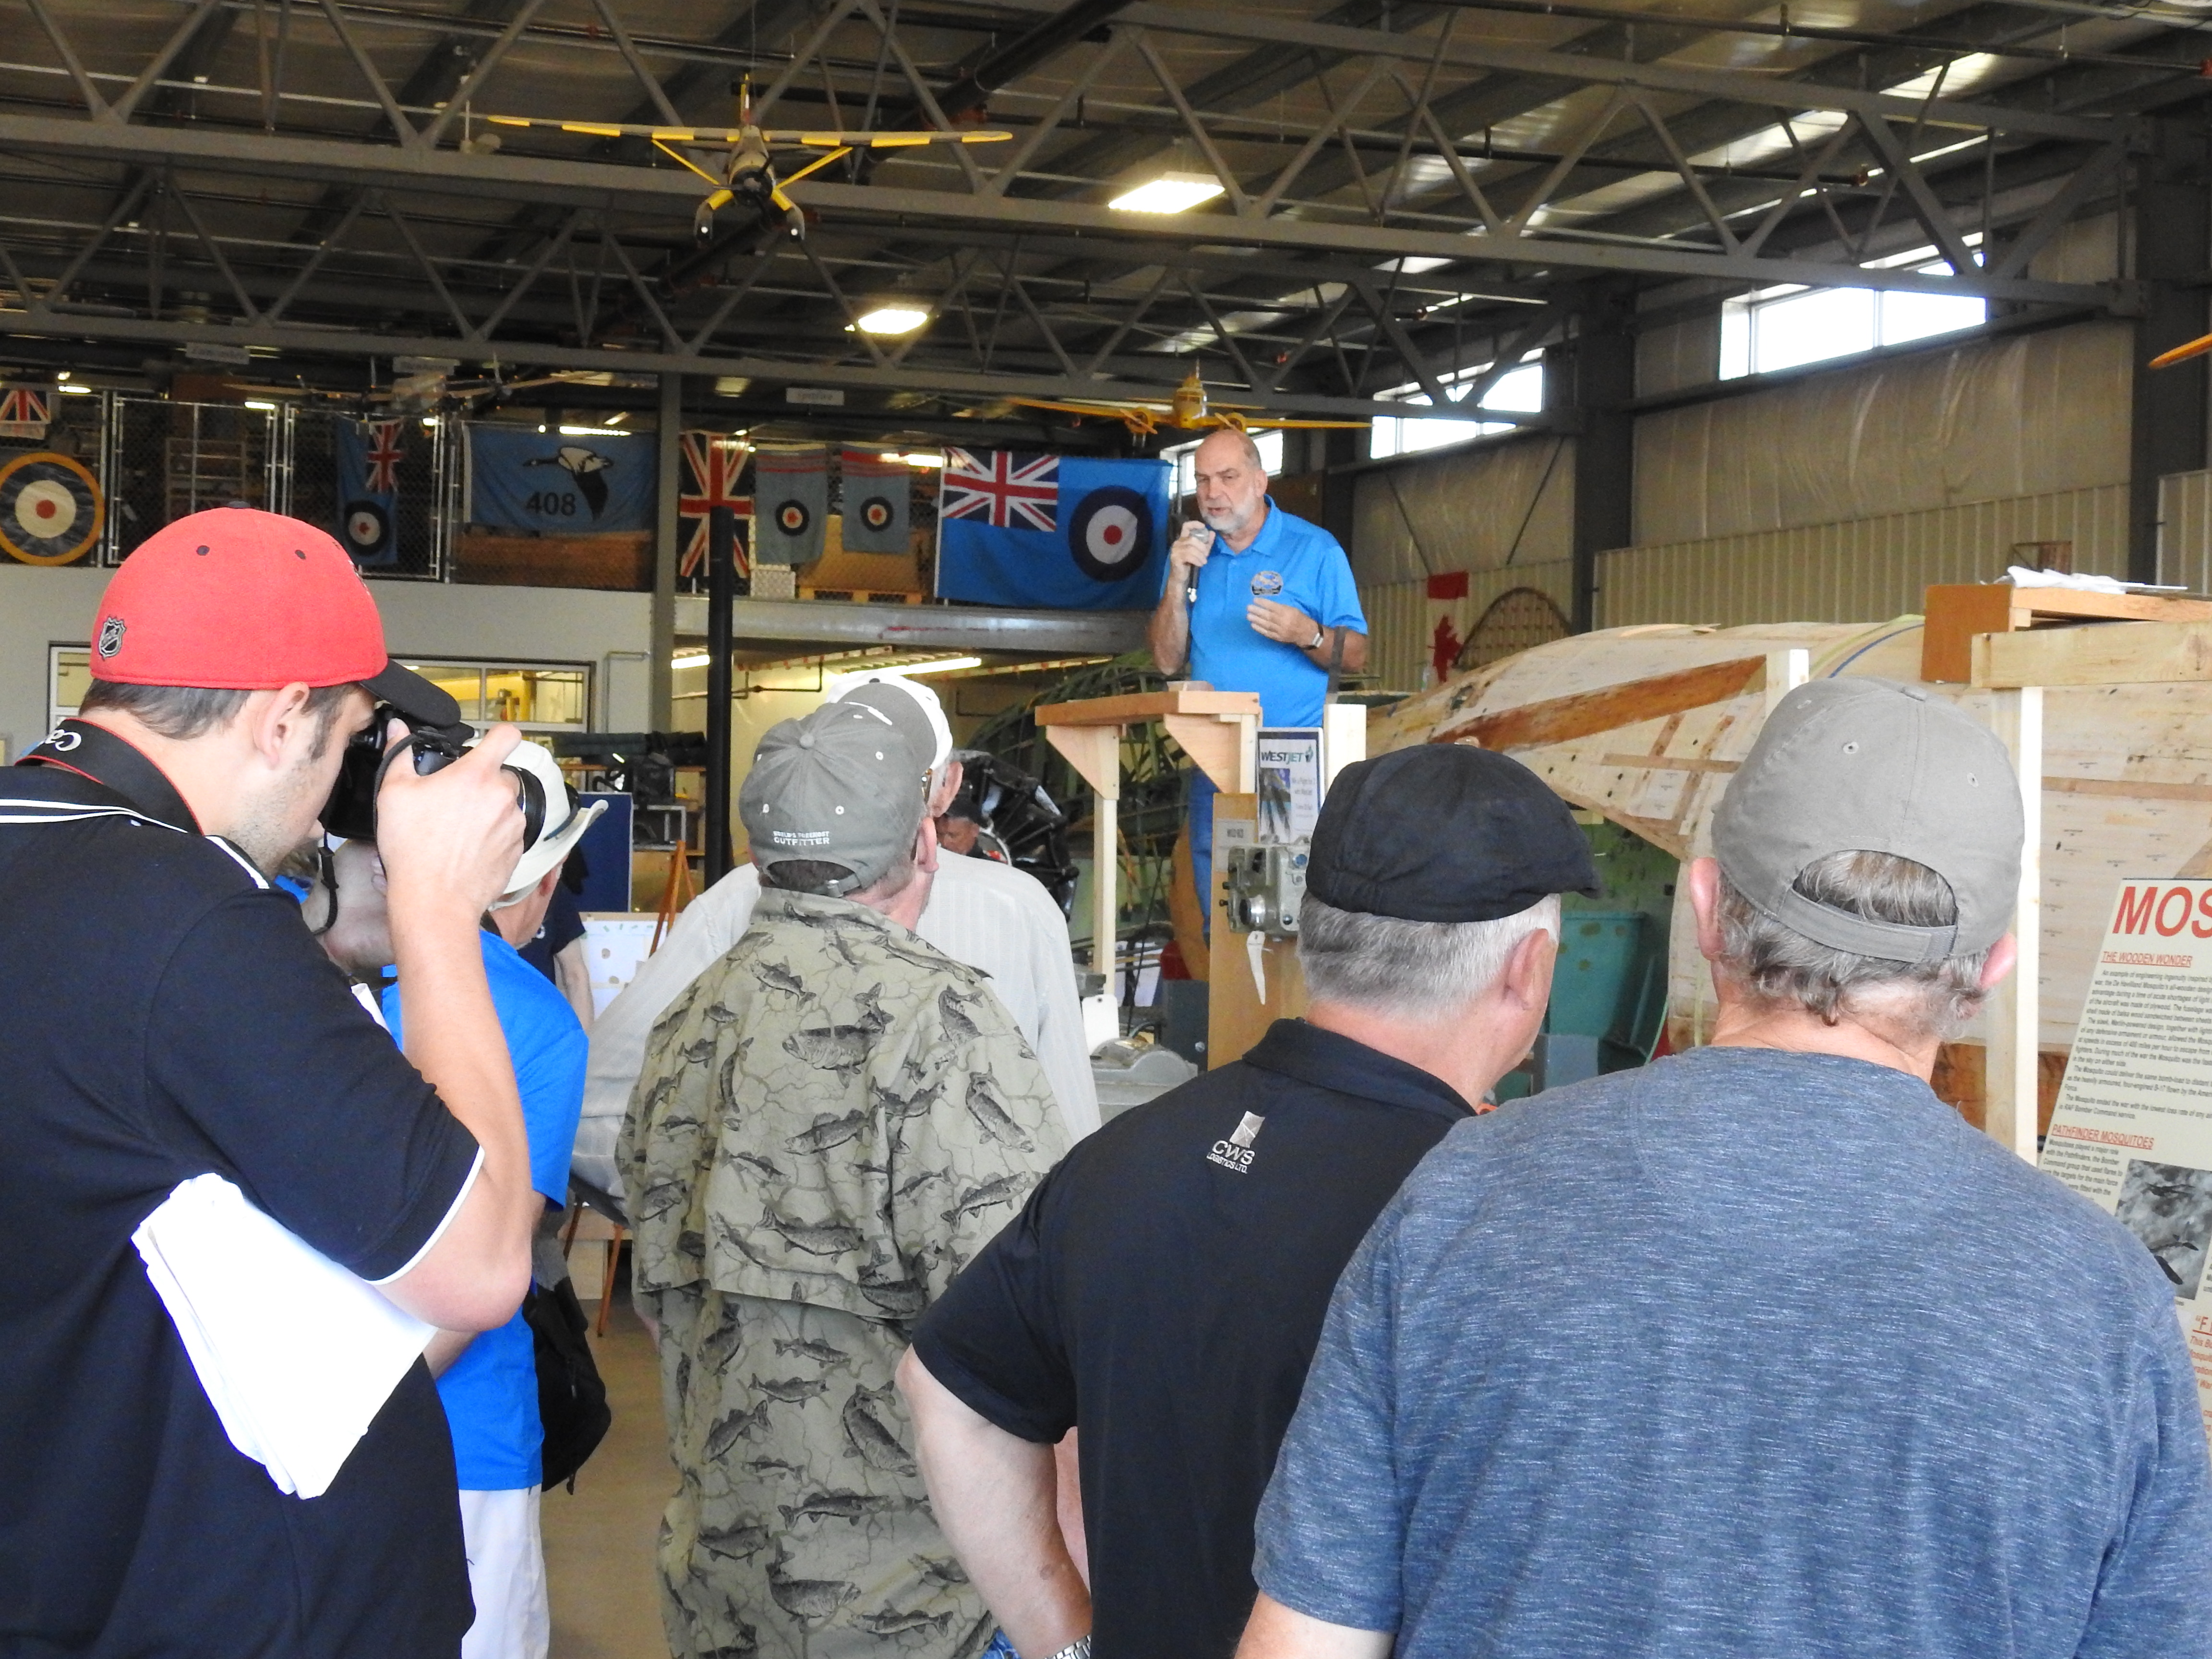
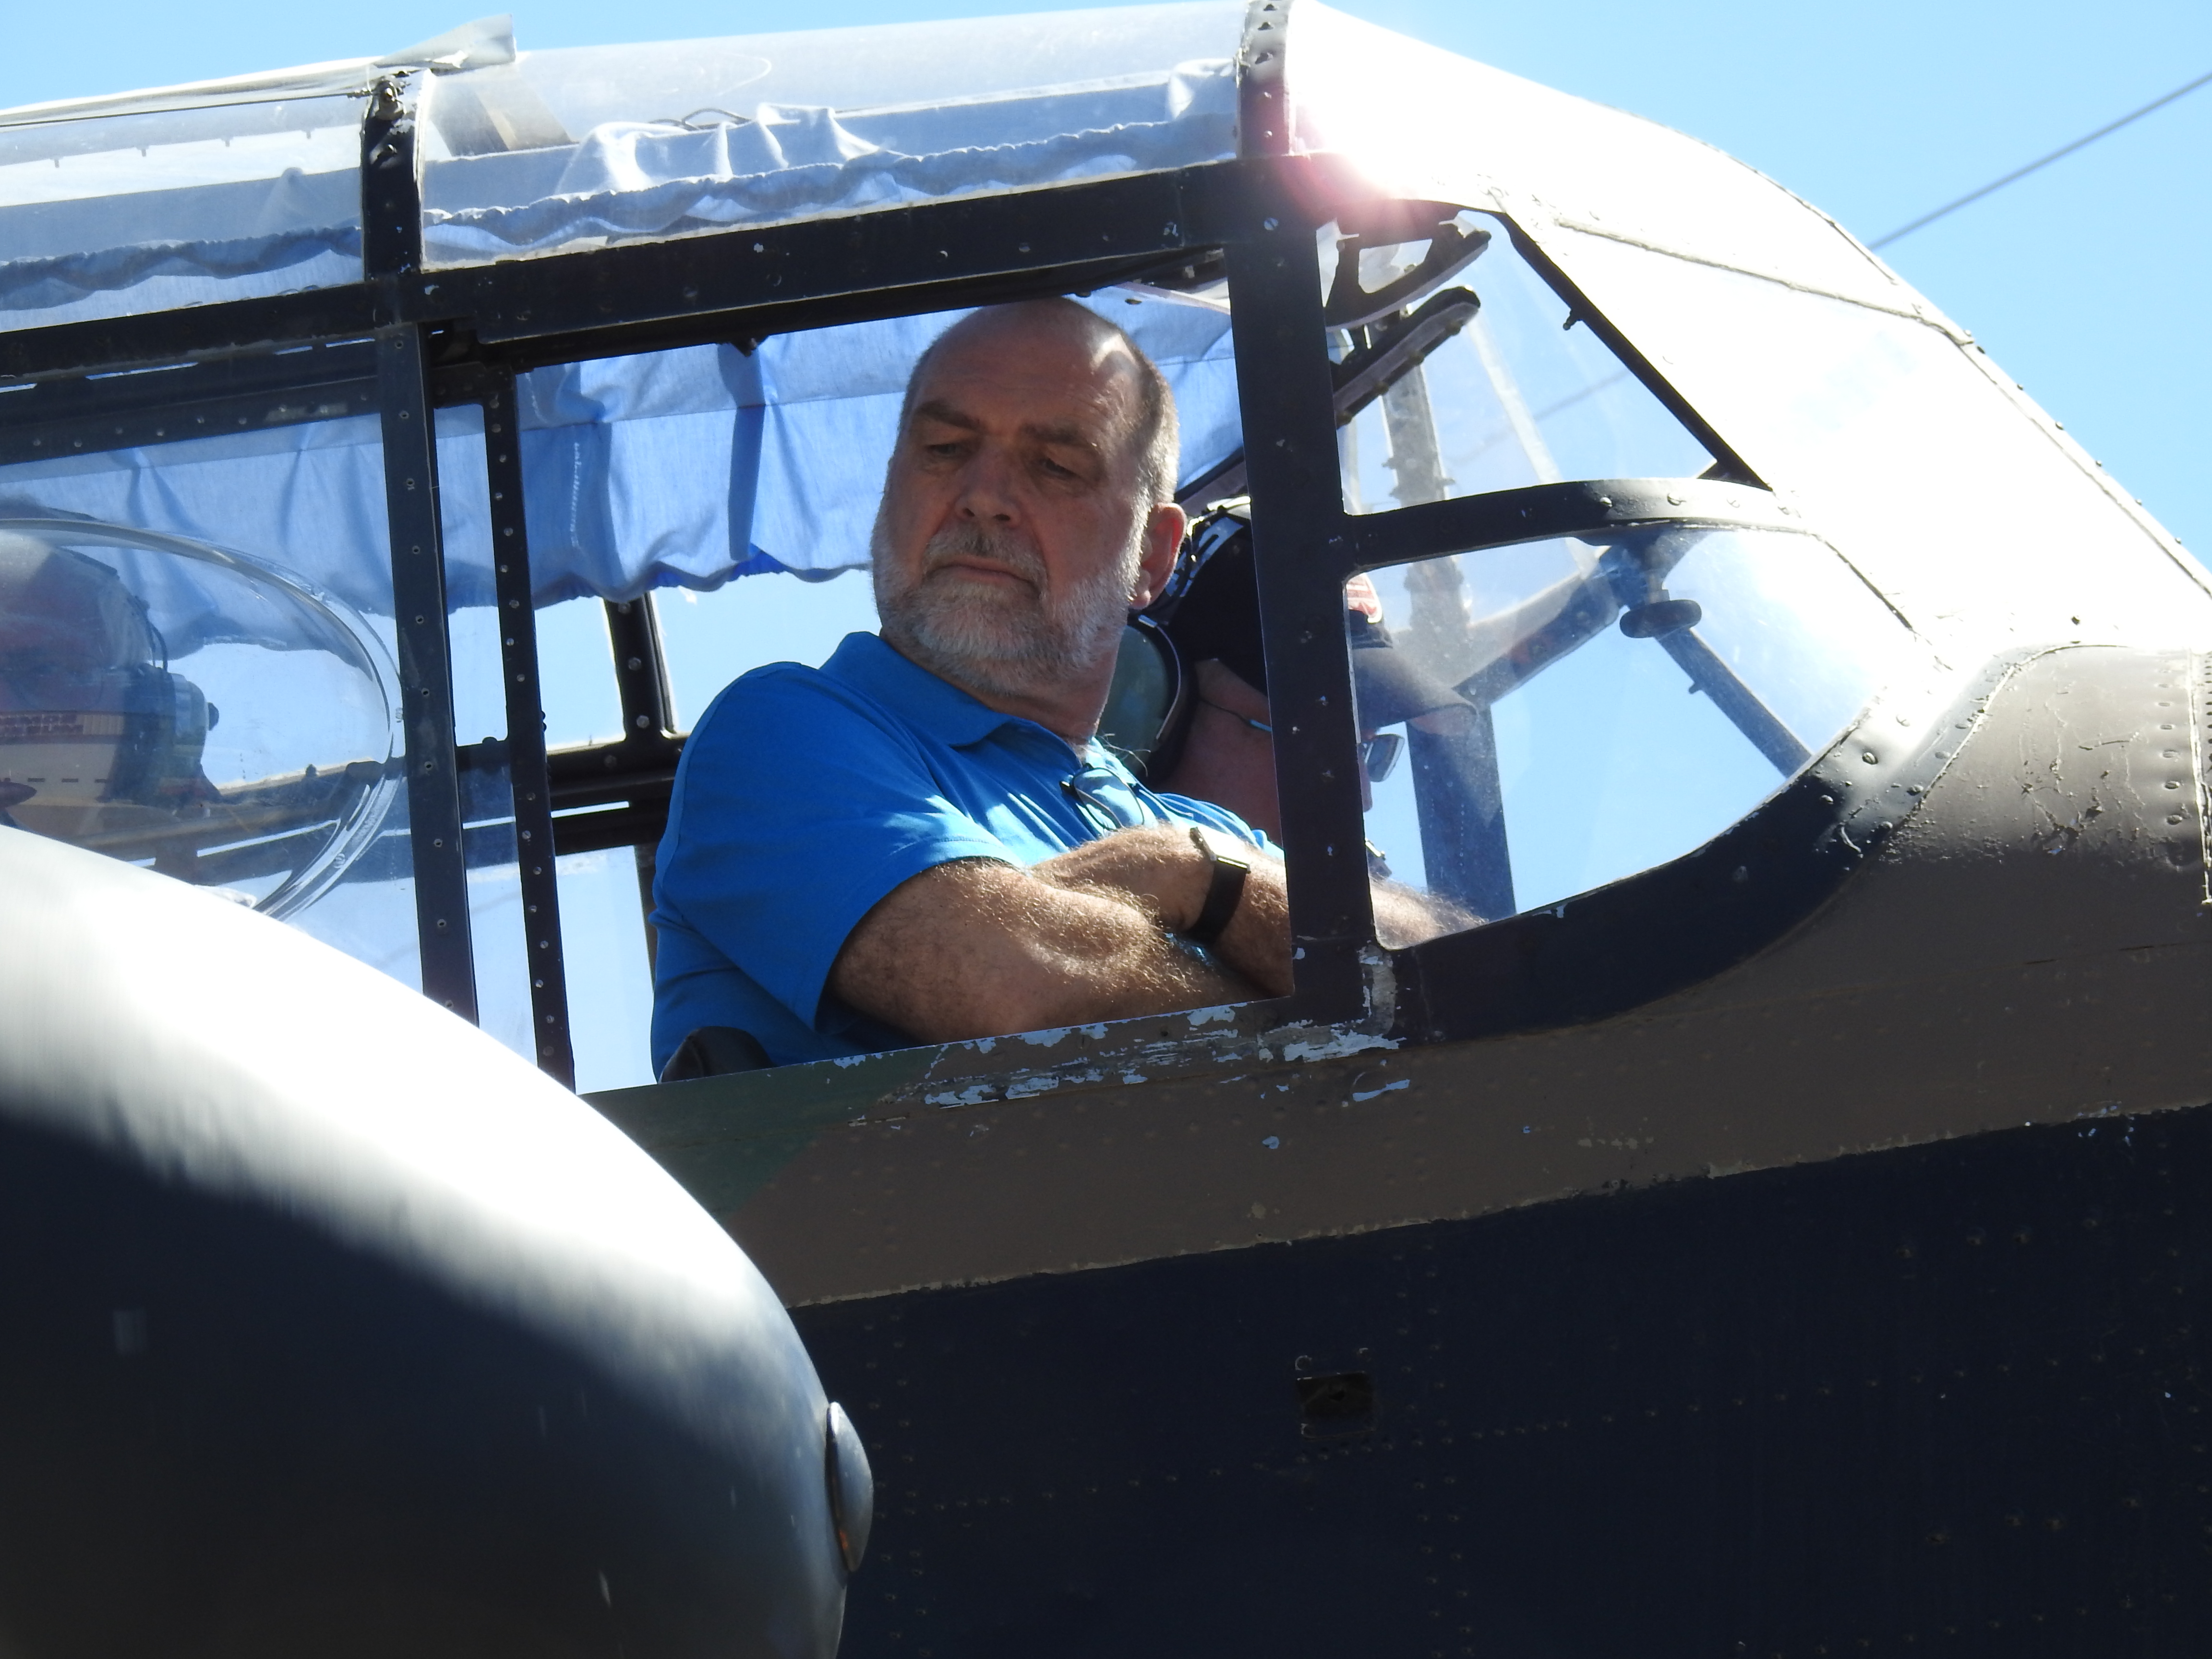
For Mosquito Celebration Day, Jack holds court, updating visitors on the Mosquito restoration progress and then enjoys a well deserved front seat in the Lancaster for the morning run.
Also in this quarter we were very pleased to acquire a crew access ladder for the Mosquito from our friends at the Windsor Mosquito Group of Canadian Historical Aircraft Association. Even before we started the restoration in 2012, we were told by the Mosquito restoration crew at the de Havilland Aircraft Museum north of London, that the crew access ladder was an extremely rare item. Several years ago we negotiated with a restoration shop owner in the UK who offered one to us for £1000. After we agreed to the price, the seller changed his mind, so we continued our search. Our efforts were rewarded after we loaned our friends in Windsor some parts for duplication and were generously gifted a 'rare as hens teeth' crew ladder in return. Thank you Windsor!
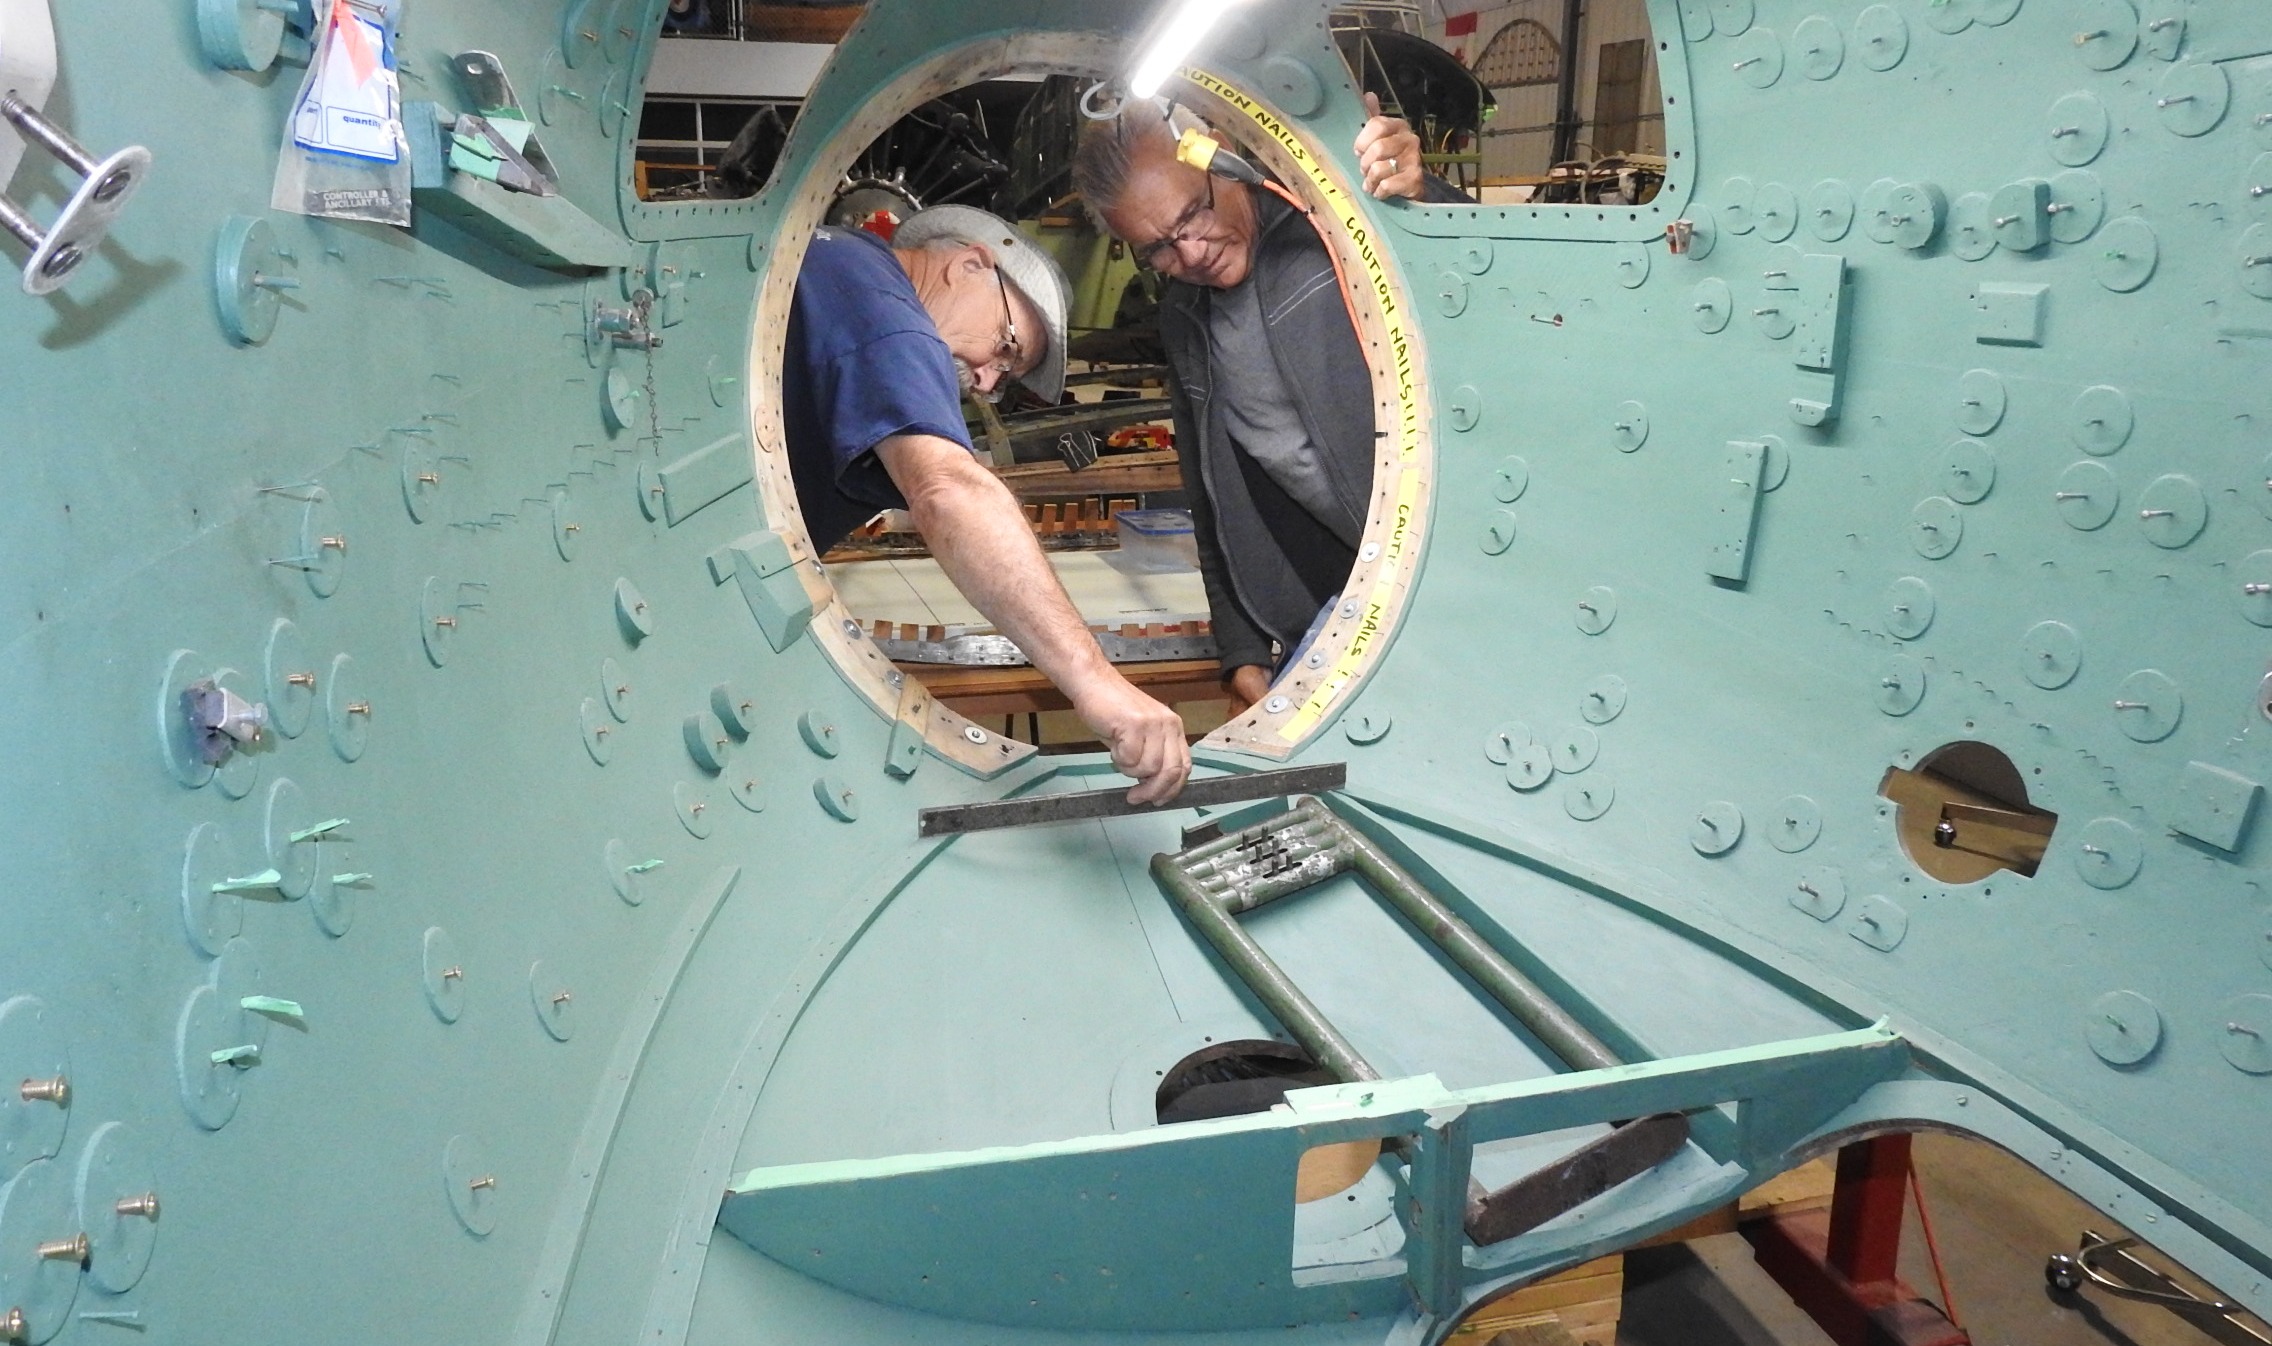
Gary and Dick check the telescoping crew access ladder for clearance in its storage compartment under the cockpit floor. It is such a tight space that it fits only one way. Our thanks to the Windsor Mosquito Group of CH2A for fulfilling this item on our wish list.
And on the subject of generous friends, our thanks to David Coeshall for sending us an original 1943 maintenance manual for a Canadian built FB.26 Mosquito. We were able to copy it and add it to our growing library of technical references. Thanks also to Ward Skinner of Halifax, NS for the two copies of the de Havilland Canada factory newsletter from April and May 1954. A nod also to Don Farrell of Calgary, who donated five wartime scrapbooks compiled by his mother during the war. Filled with newspaper clippings, they focus on the Calgary and area boys who joined up, many of whom never made it home. Of particular interest to us are the original newspaper clippings of the arrival in Calgary and the untimely demise of Mosquito F for Freddie, the day after VE Day.

A new manual to add to our collection courtesy of David Coeshall of Devon, UK and two DH Canada wartime newsletters from Ward Skinner of Halifax, NS.
Jack McWilliam
Rather than start off at one end of the aircraft and work to the other, I will bounce around to different subjects relating to our work on the fuselage.
So let us start with the most important; the bonding of new external skins utilizing a hard learned vacuum bagging technique. I am happy to report that after some months, the team has solved all of the issues allowing us to move forward on the right side of the aircraft. We have been working on the right side of the fuselage as that requires the least amount of work thereby developing better techniques as we move from small to ever larger patches.
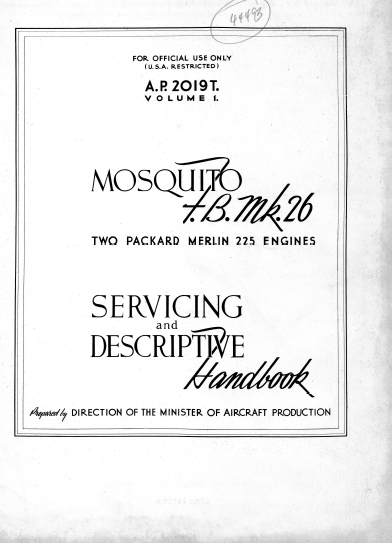
Gary and Dick have worked to solve various scarfing problems both on the aircraft and on the new skins to be installed. Because the fuselage is both round and tapered, the contours change so one size does not fit all. We have been using a router with a special shoe to cut the scarfs on the new skin patches. The scarf is then completed by hand with a chisel and sandpaper. The scarf on the new skin patches is completed by first stapling the plywood flat to a jig, using a guide for a plane.
The scarf ratio is 12 to 1 on skins that are just 2 mm thick. A completed scarf is so thin that we are down to just fibers at the thin edge. One stroke too many means having to start all over again.
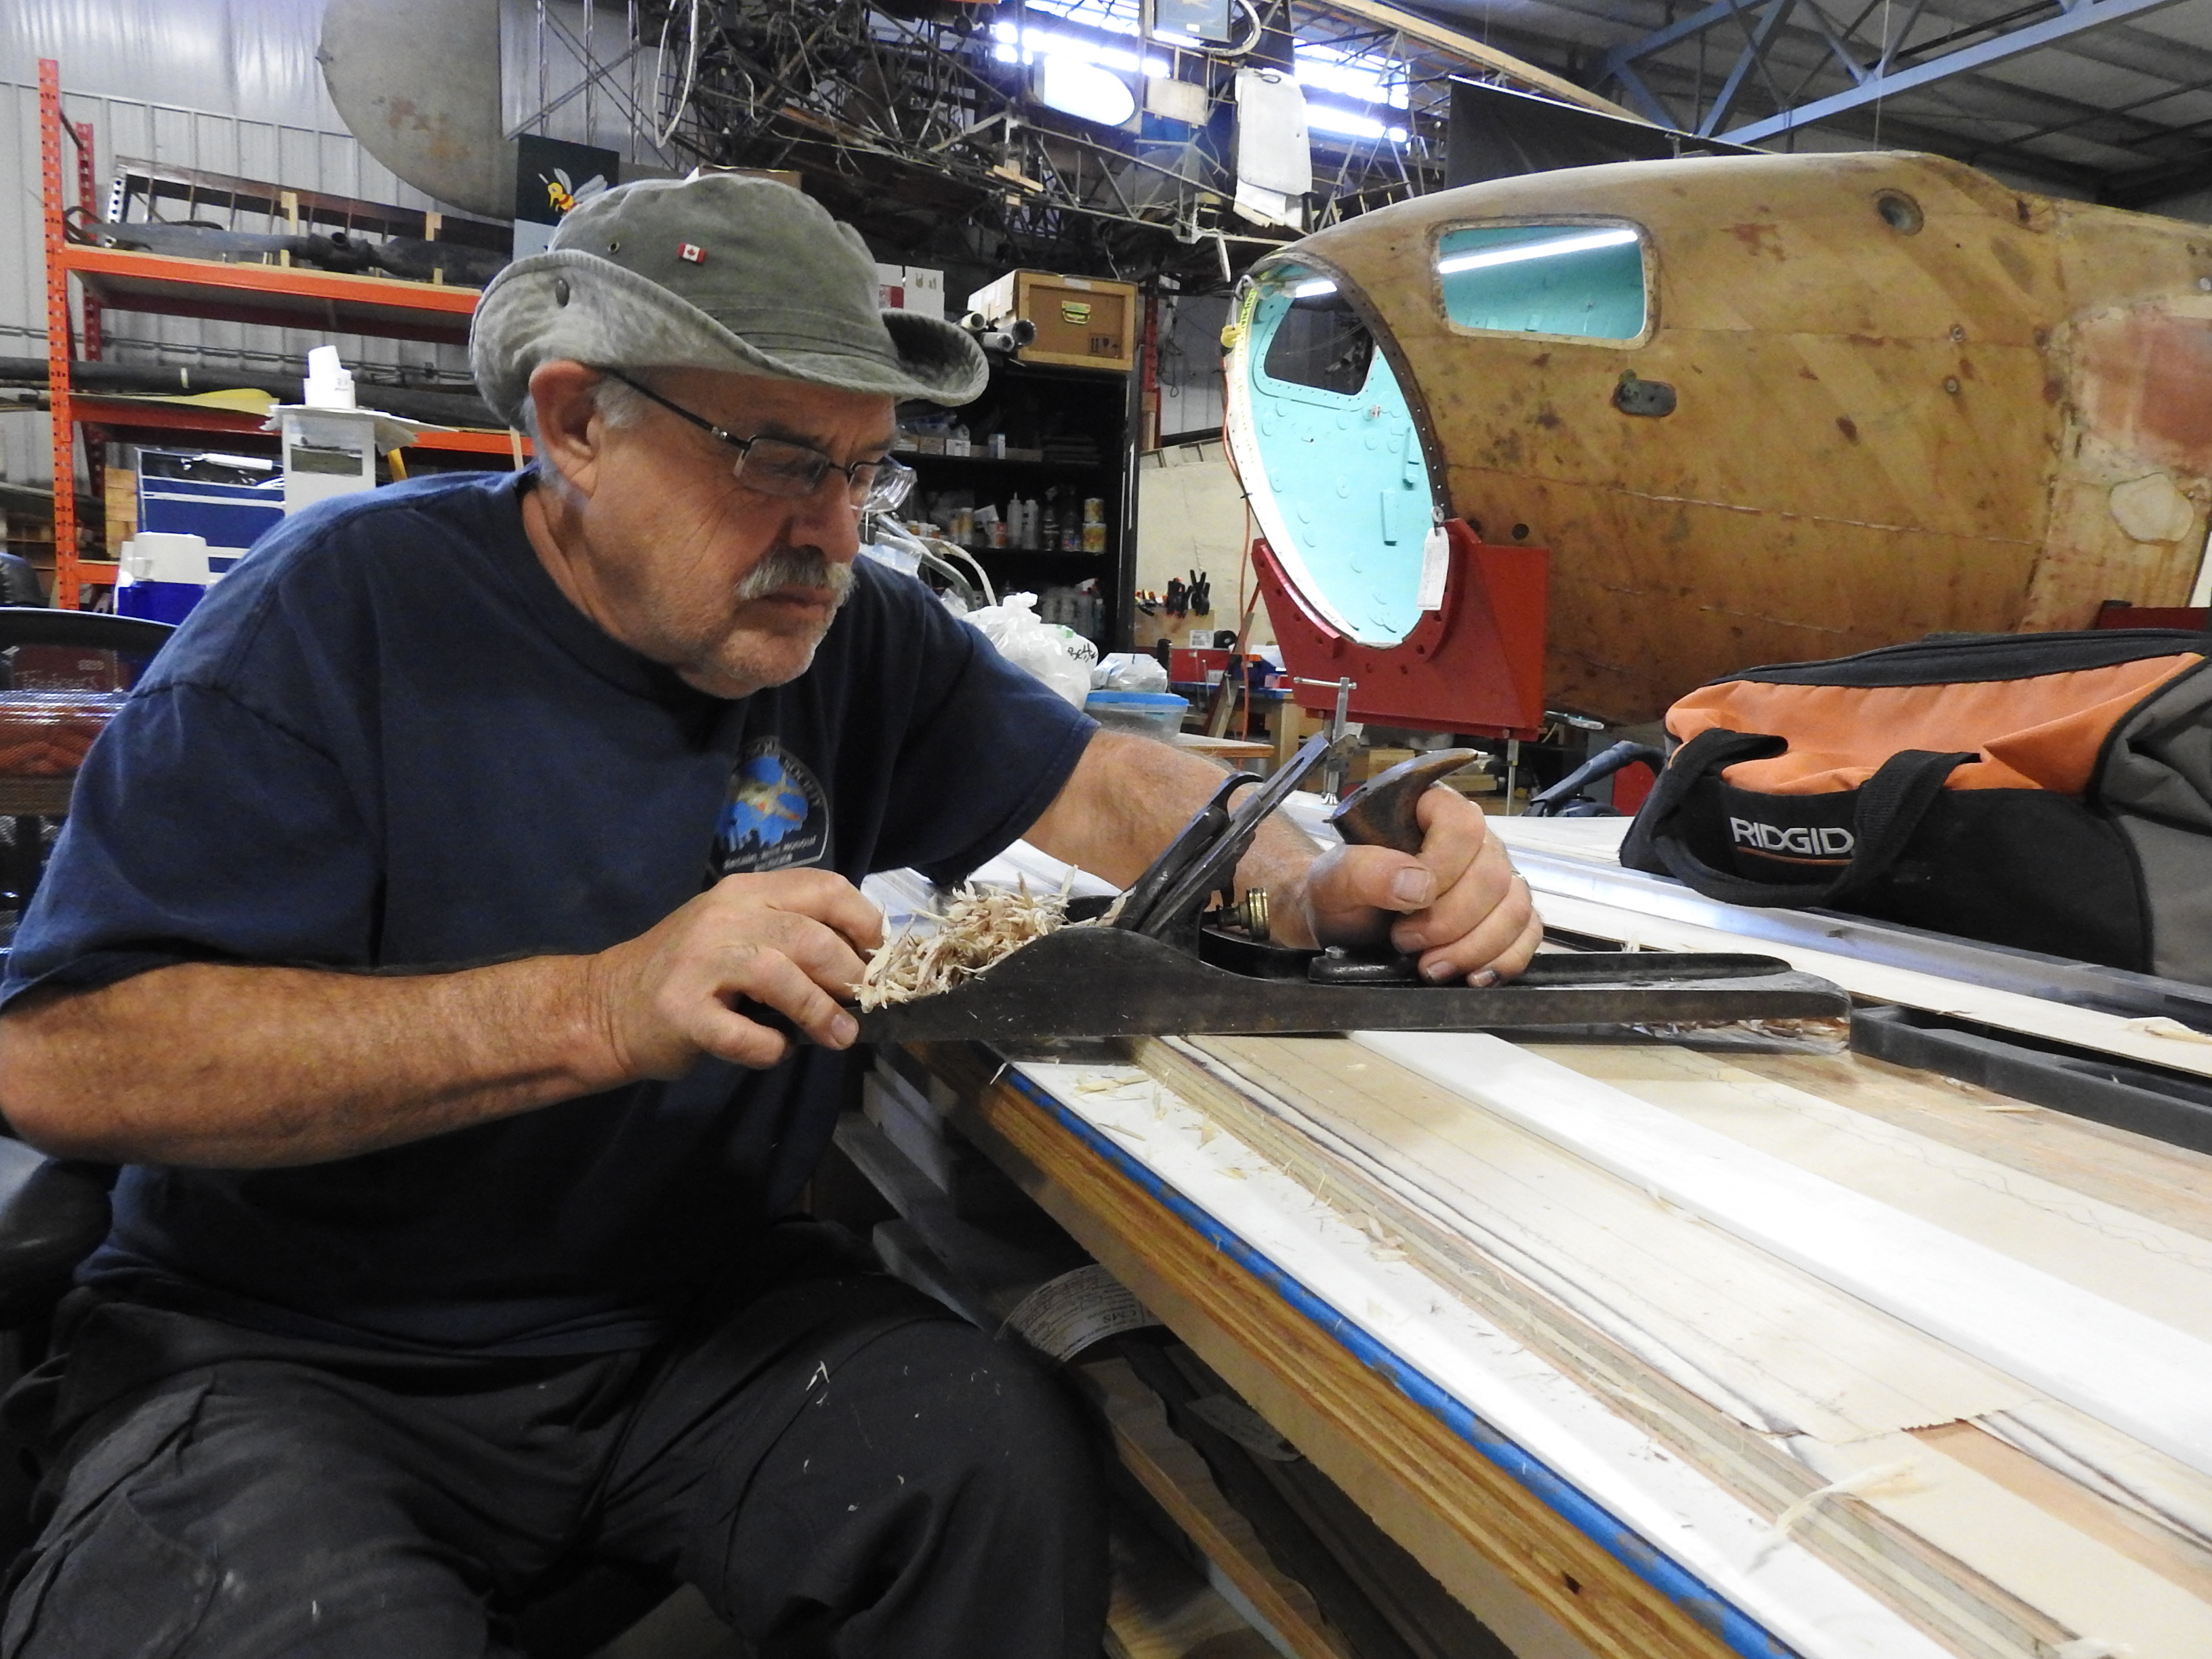
Masters of the Plane: Gary and Dick taking a 2 mm thick skin patch and bringing all four edges down to a 12 to 1 scarf. One cut too many and its 'start again time'.
The first patches were small, so once techniques were mastered, it was simple to scarf four sides for the patch to fit in. But since we are putting the aircraft back to as close to original as possible other patches required far more work. The original skins have visible seams where they are joined. When we patch over these areas, we are reproducing the original seam lines. It is a detail that will likely never be seen once the fuselage is covered in fabric and dope, but it matters to us; thus one patch is actually made of six pieces in order to reproduce the original seams. This takes weeks of prep work to finish the patches before they can be installed on the fuselage. We have left test pieces around for individuals to touch as the actual patches become too delicate and valuable given the time invested in each piece.
Once the patches are complete, location holes are made in the fuselage with small wooden dowels installed to hold the parts in the exact position for both fitting and gluing. During the fitting the two mating surfaces are finely tuned with chisels and sandpaper to ensure they lay flat once glued. The slightest angle difference causes the edges to stick up or the patch to sit low when in position.
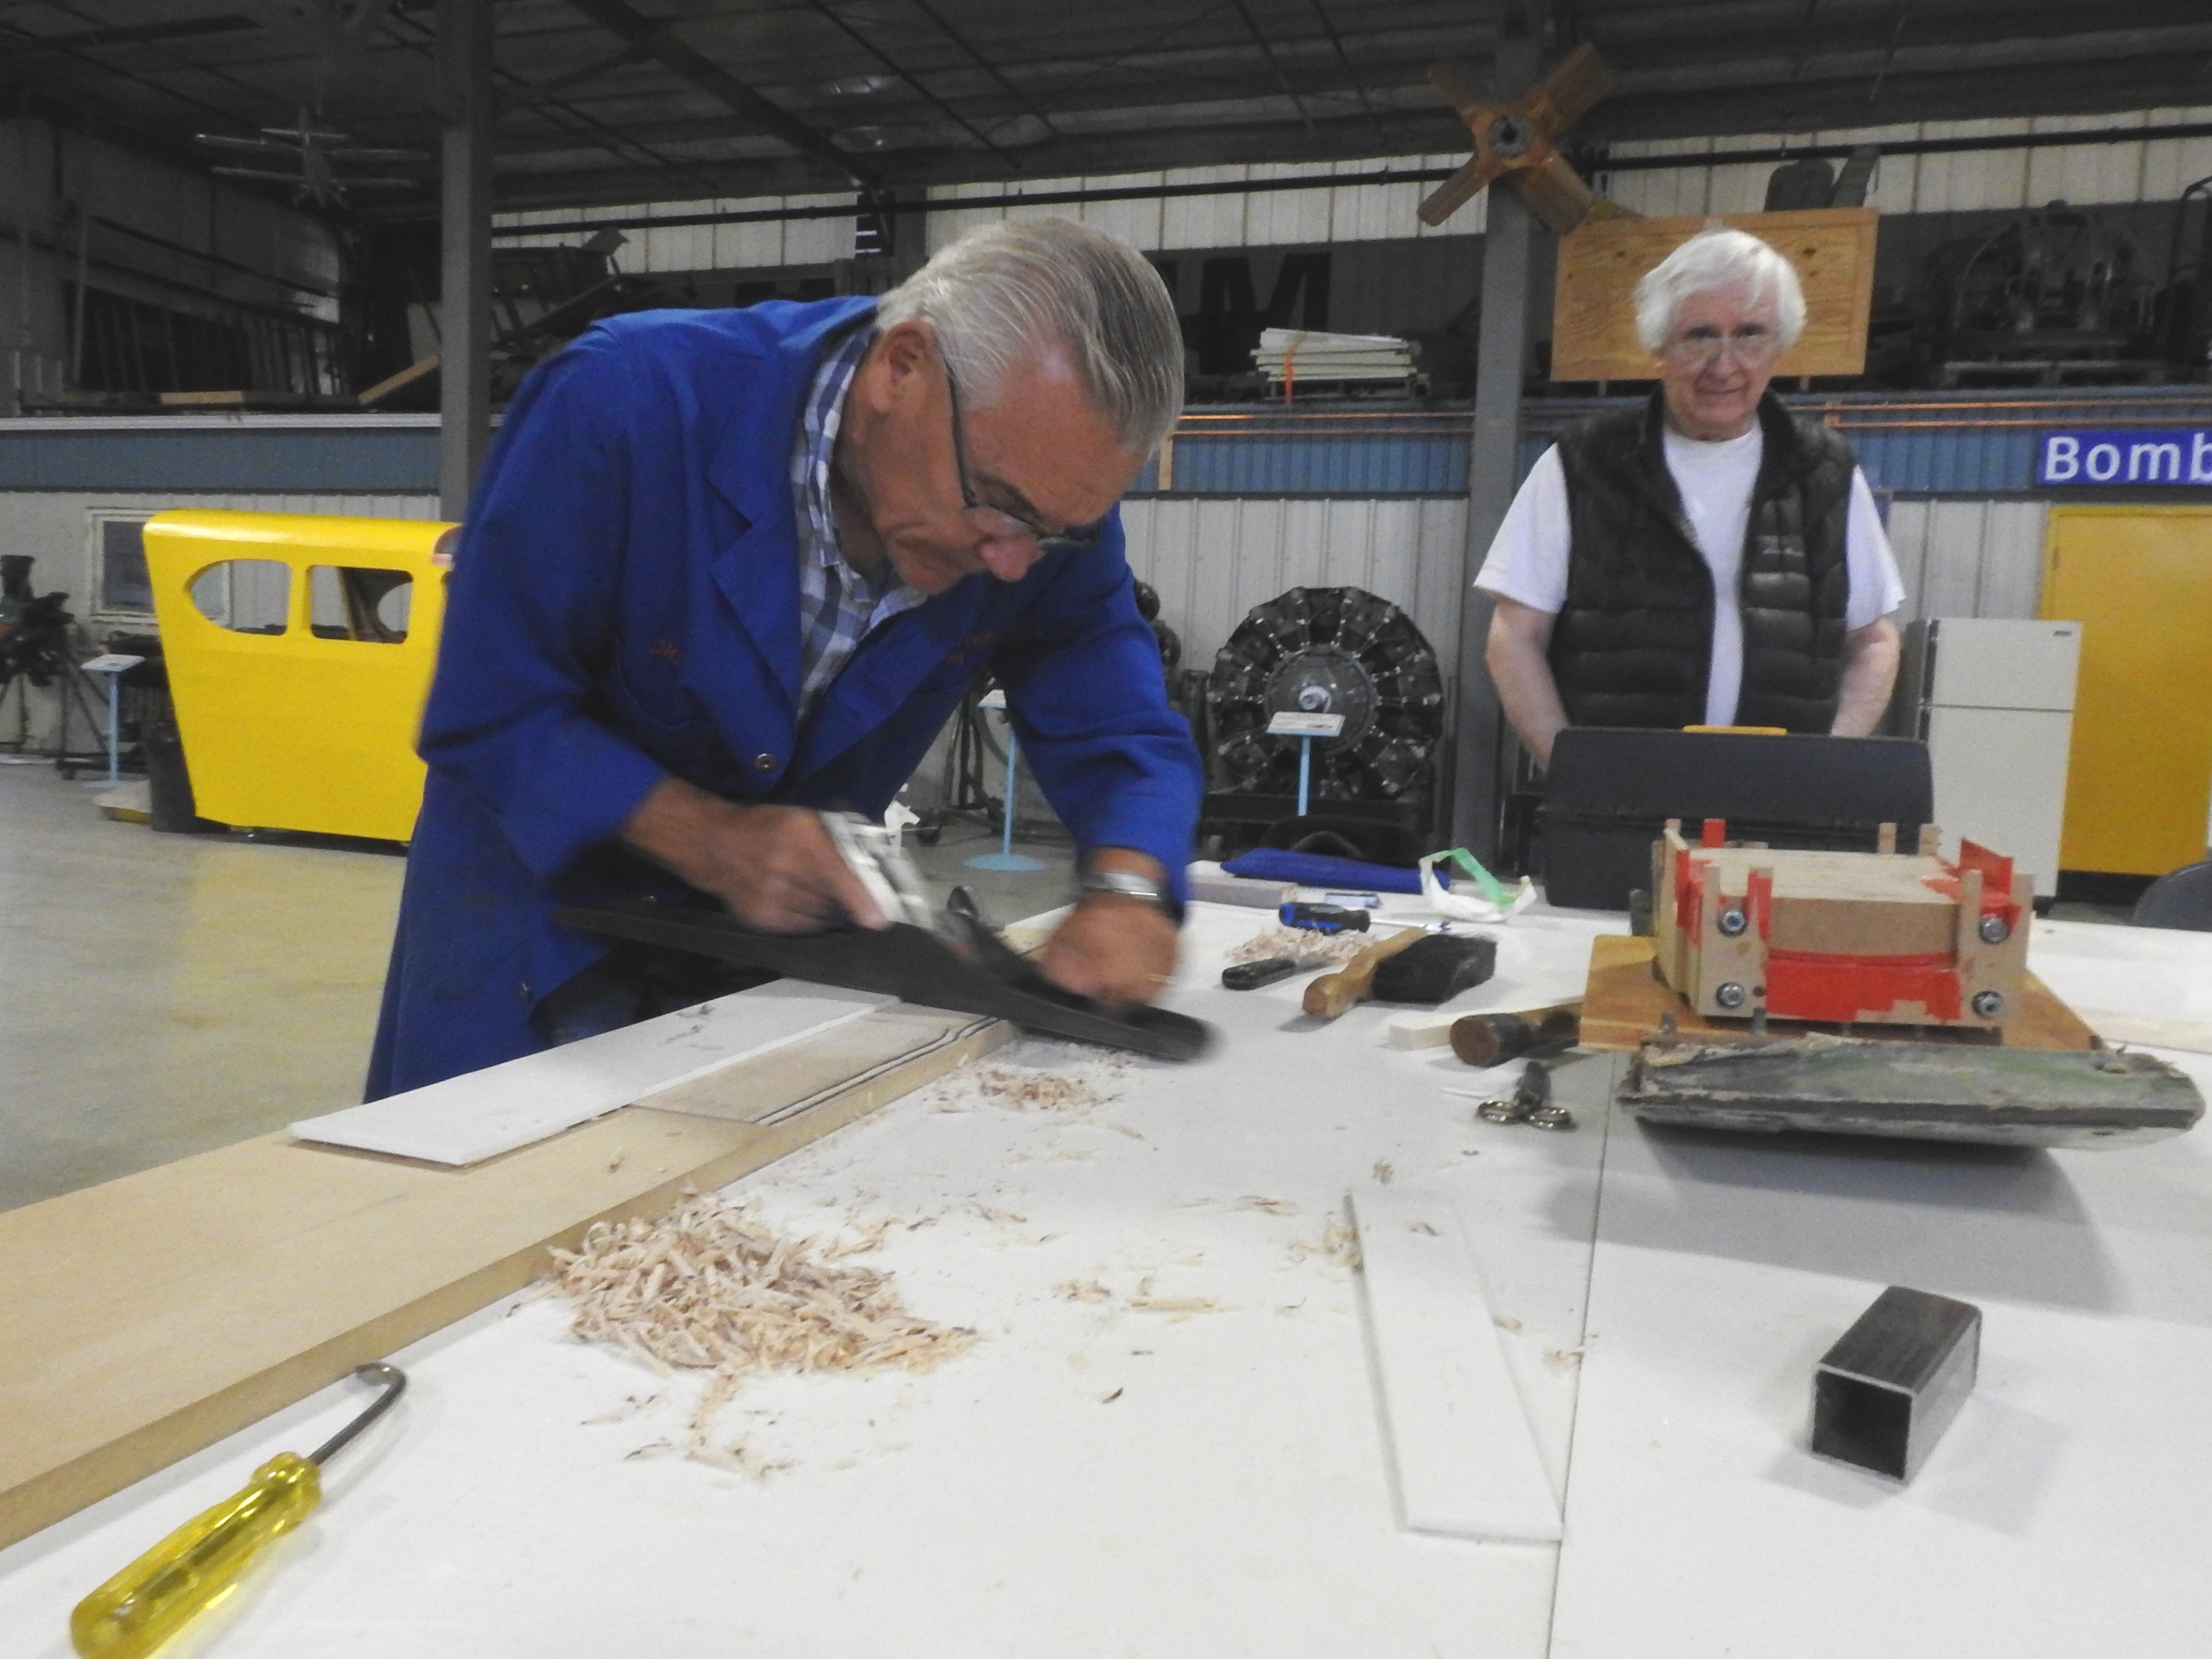
Three vacuum pumps pulling 23” are used to attach the new skin patches. Along with the pumps are a splitter, reinforced tubing and (learned the hard way) an exhaust line for the pumps that gets vented outside the hangar.
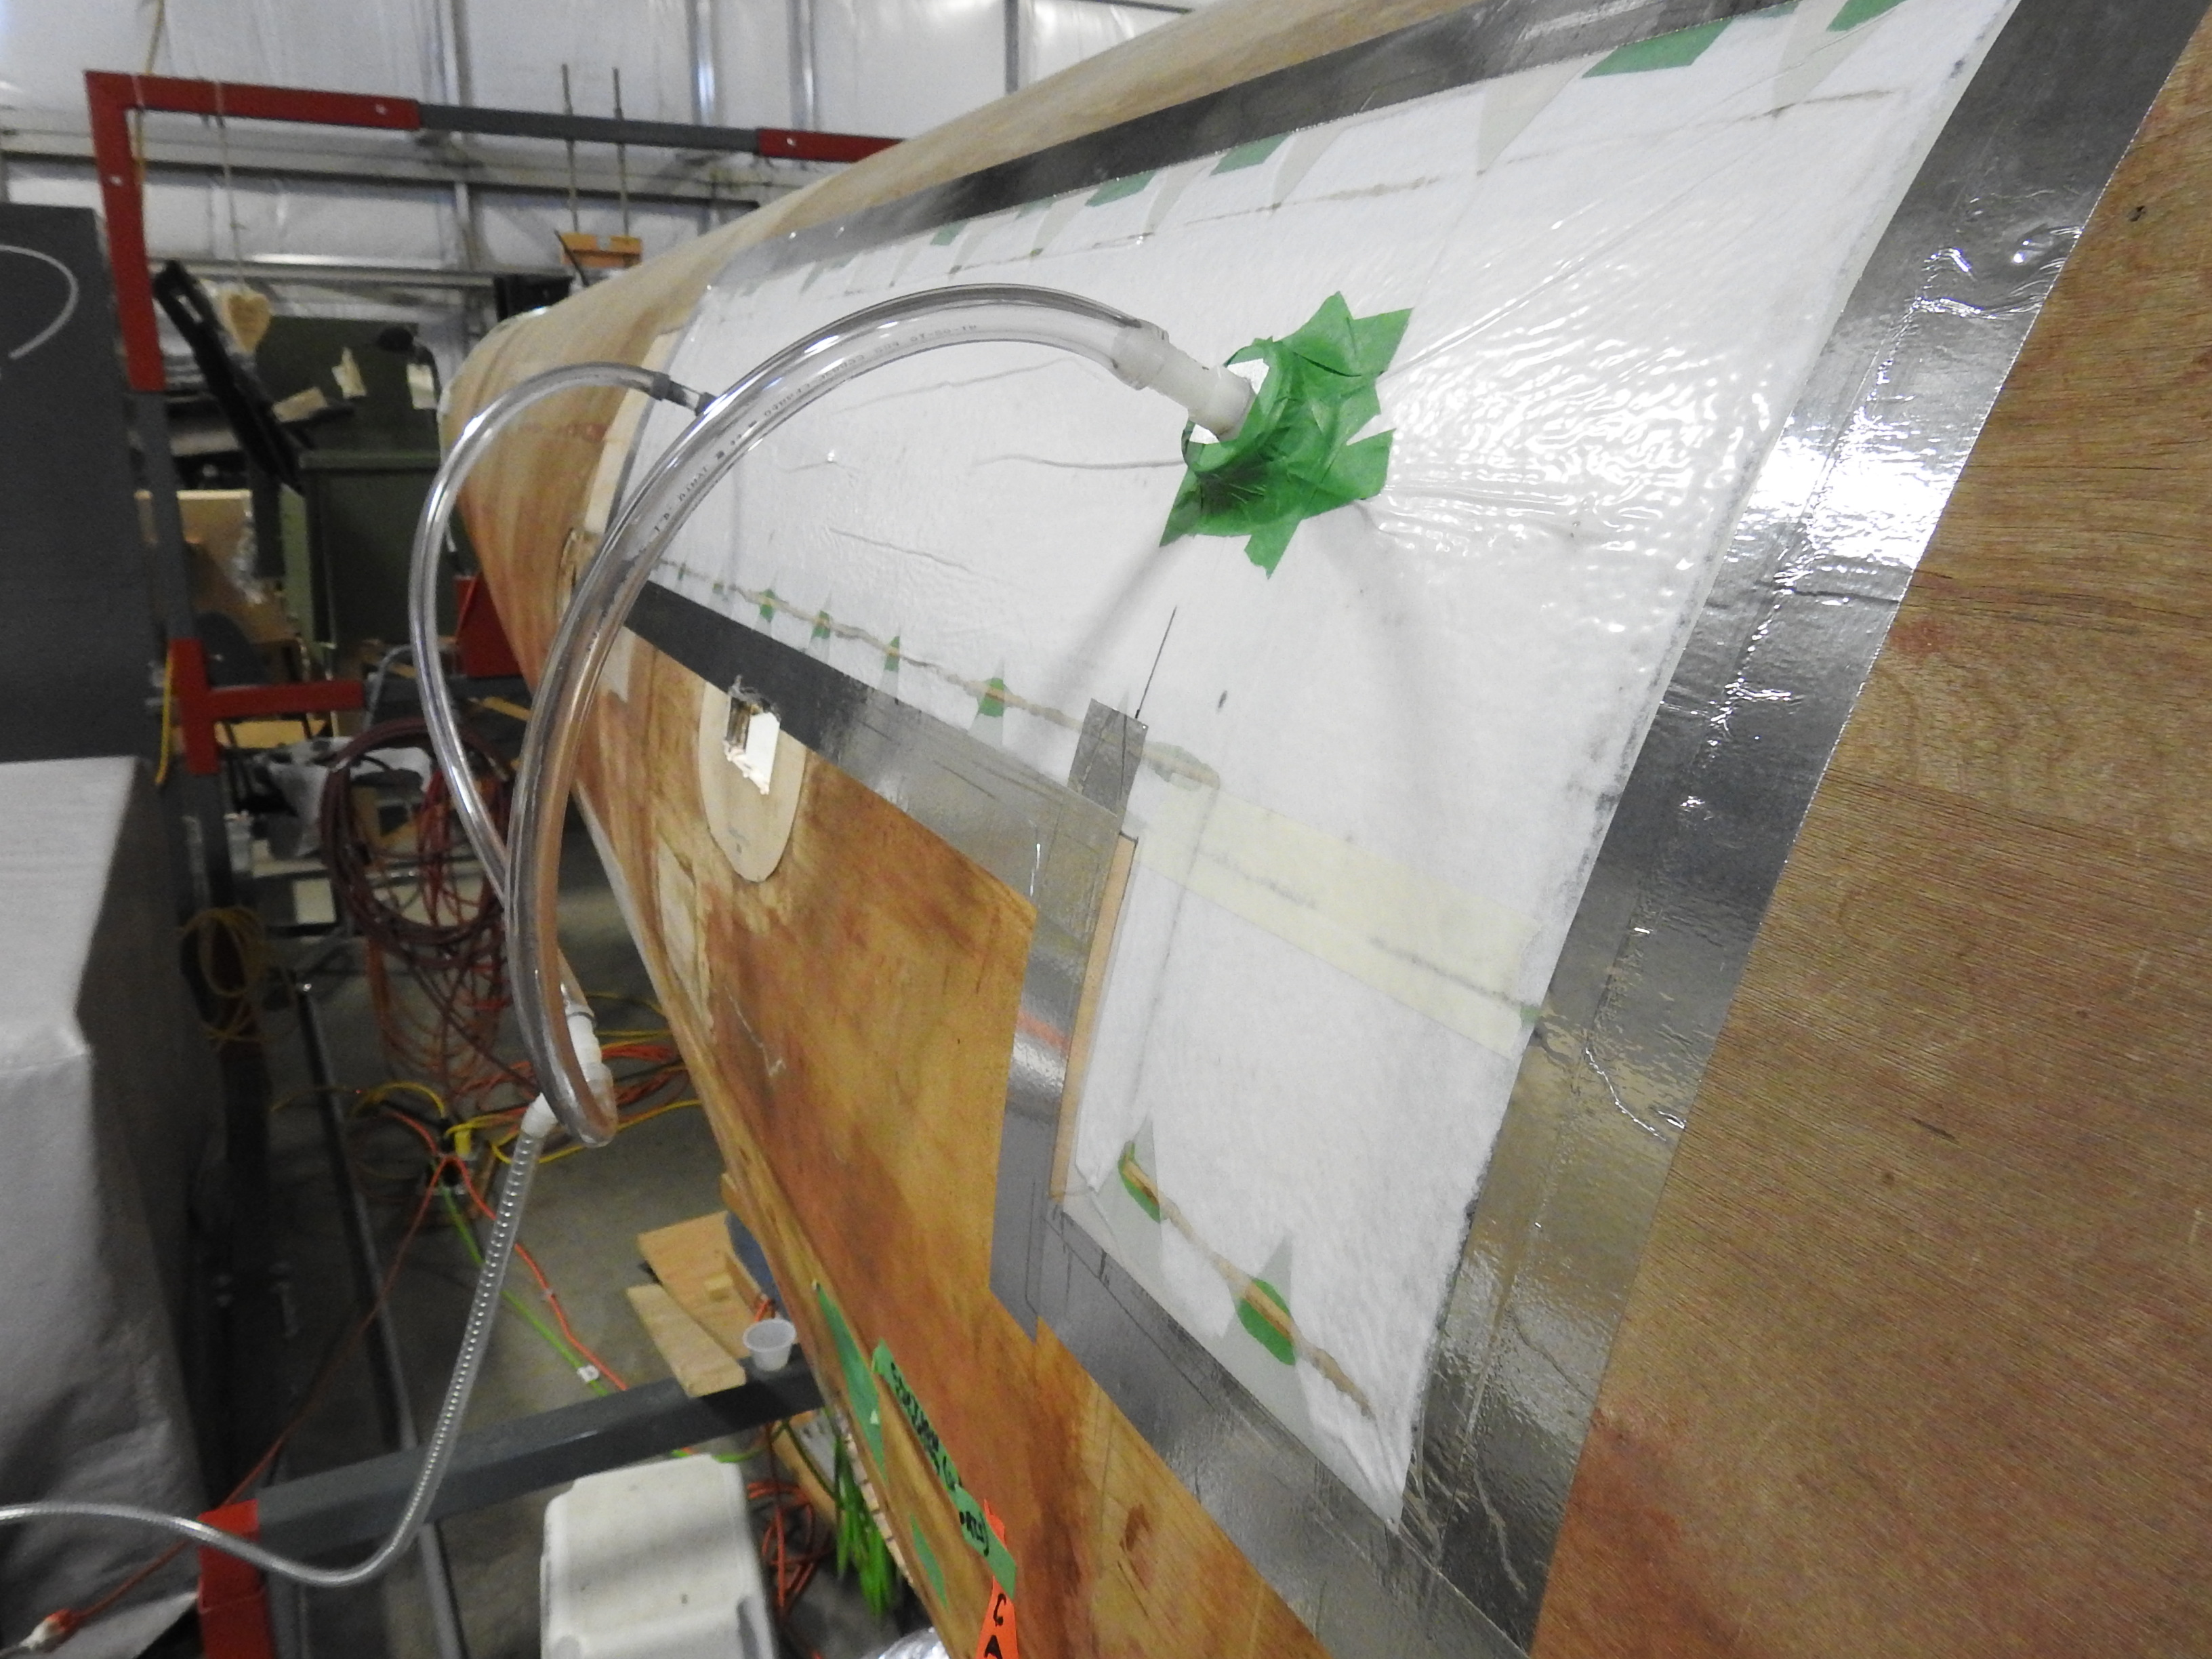
And all of those vacuum pumps and lines feed up to the largest patch installed to date. Lots and lots of lessons to get us to this point. It takes about 8 hours for the epoxy on a patch to set. Soon we will move over to the other side of the fuselage for the really big patches.
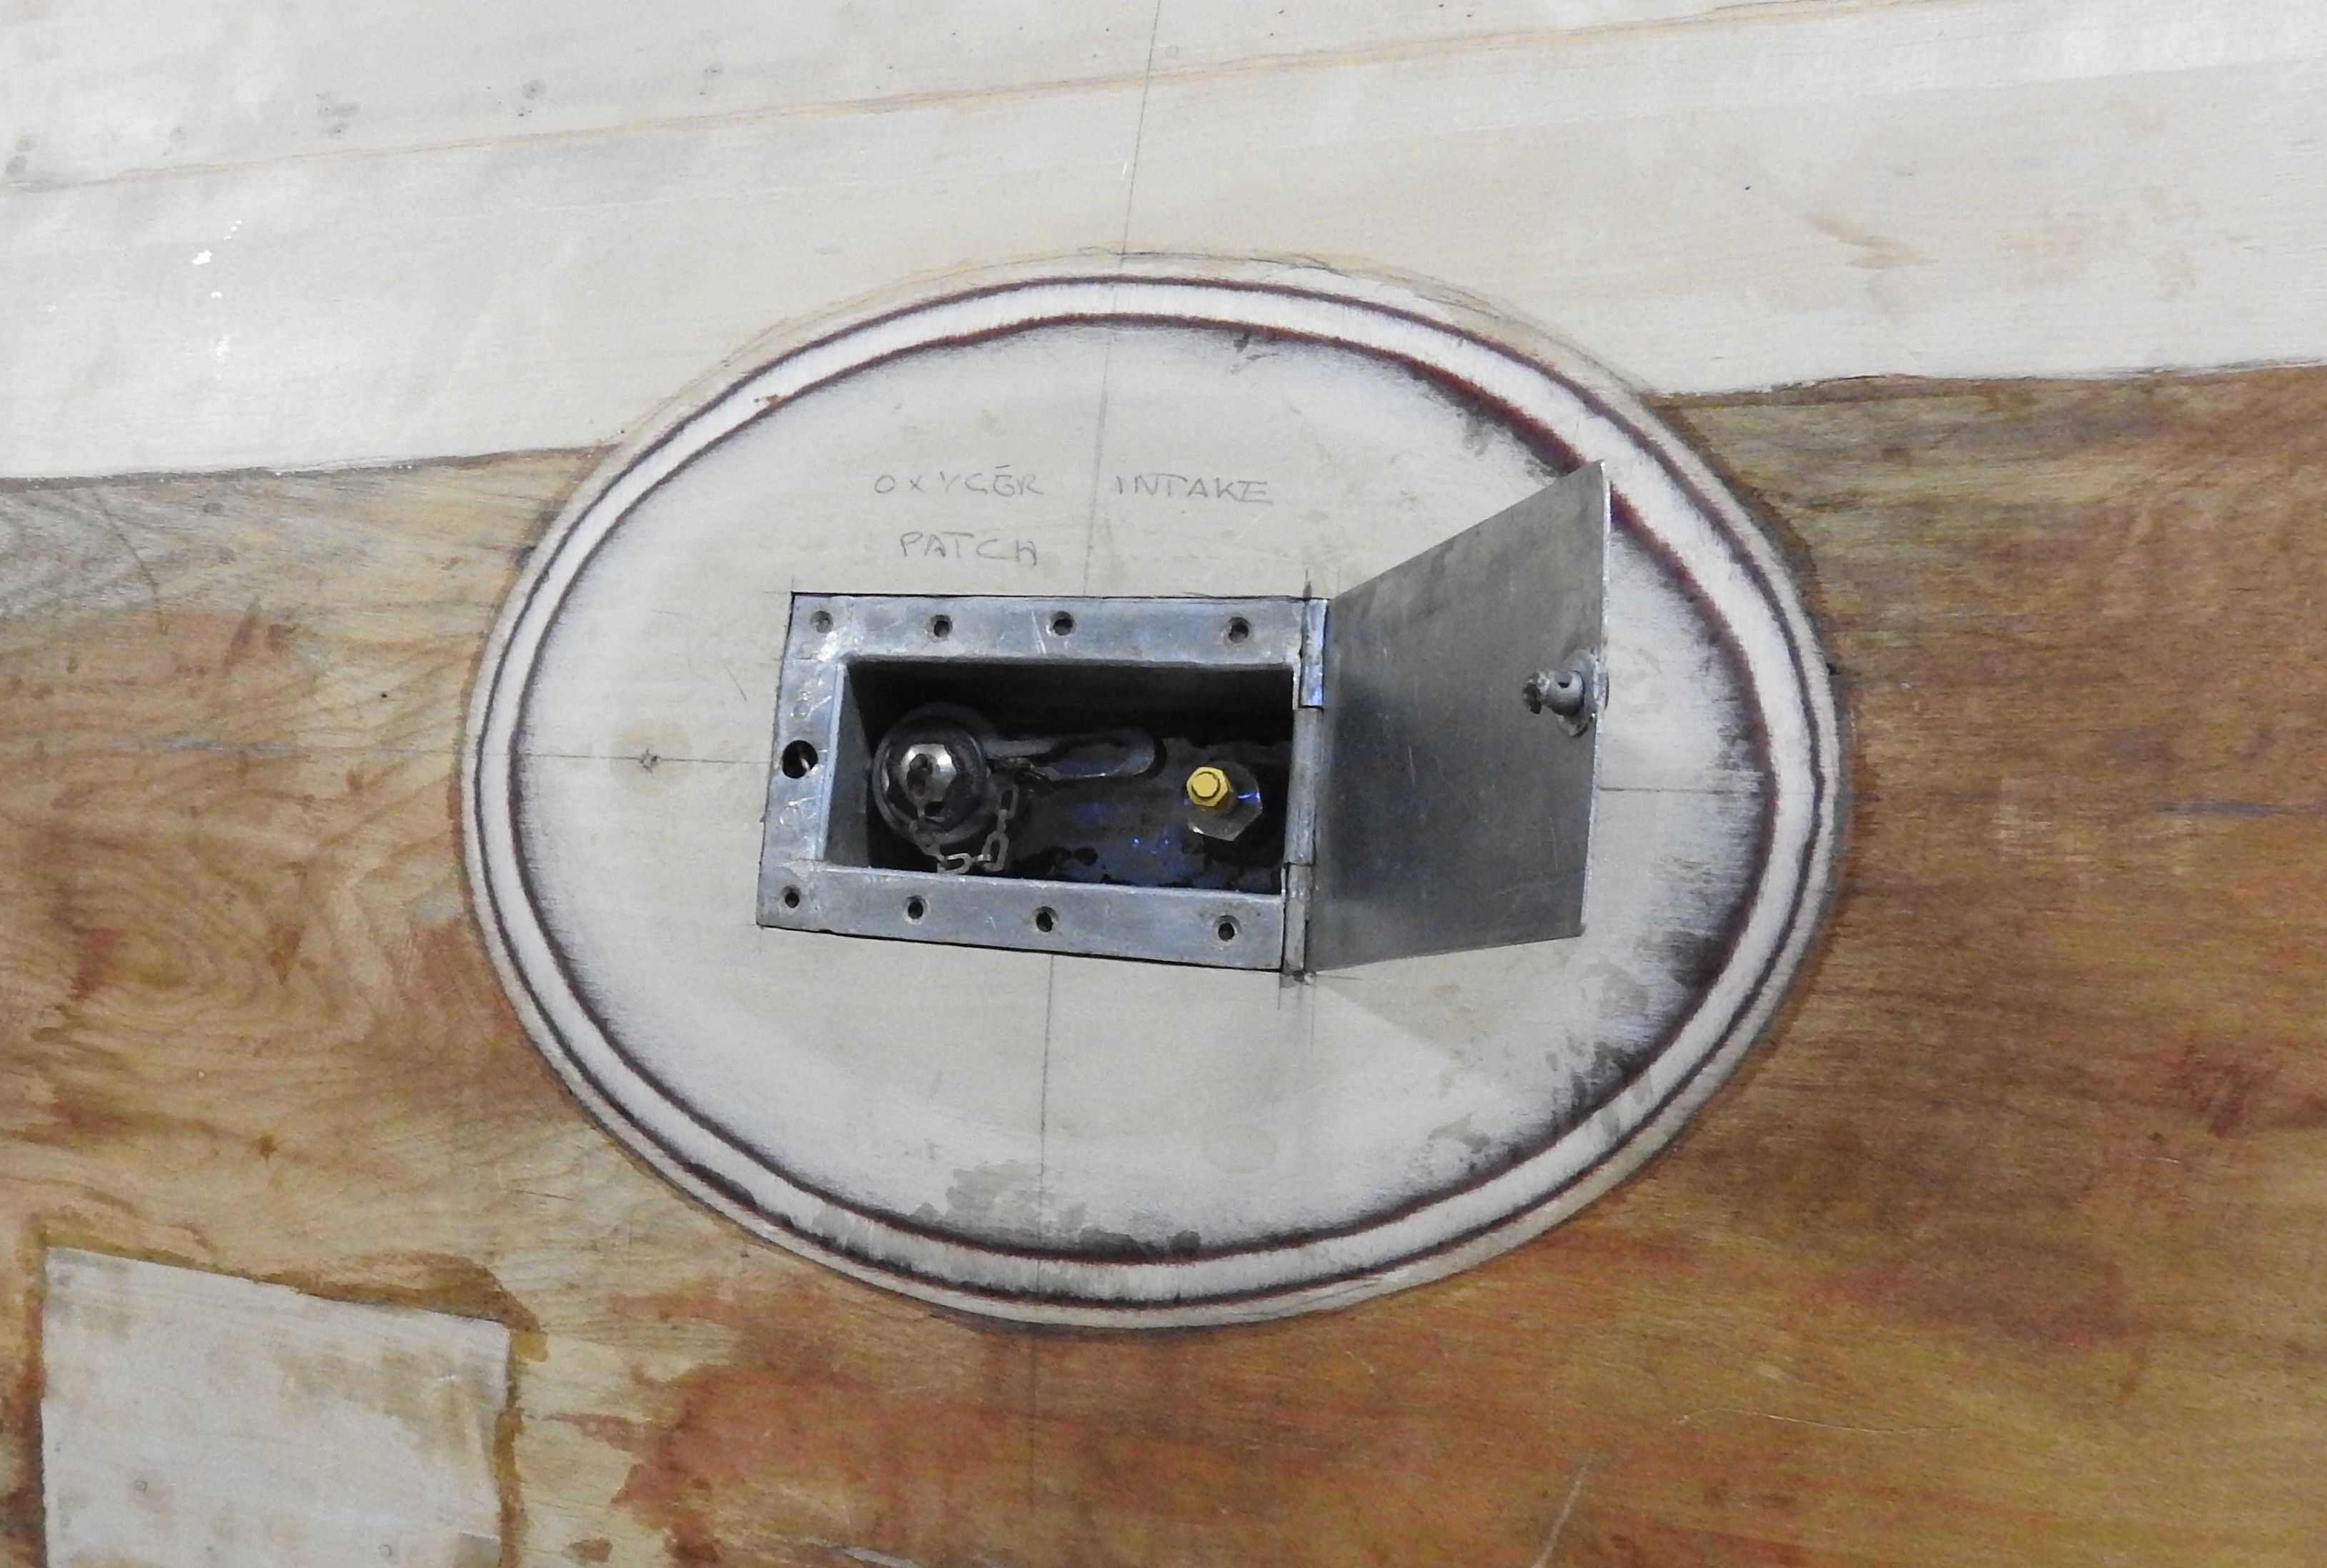
As we have moved forward along the fuselage we have also been able to install a doubler for the external oxygen fill fitting (a Spartan modification). Though the fitting is rather crude, the patch itself is very much a work of art. The fibers start to blend into the aircraft giving us a finish and fit that is so tight that we really don't want to cover it with fabric.
Having solved numerous problems we can now pull about 23" of vacuum suction when installing the patches. Each patched position presents us with its own little problems. With the learning curve now flattening out, the issues are now easier to recognize and to solve.
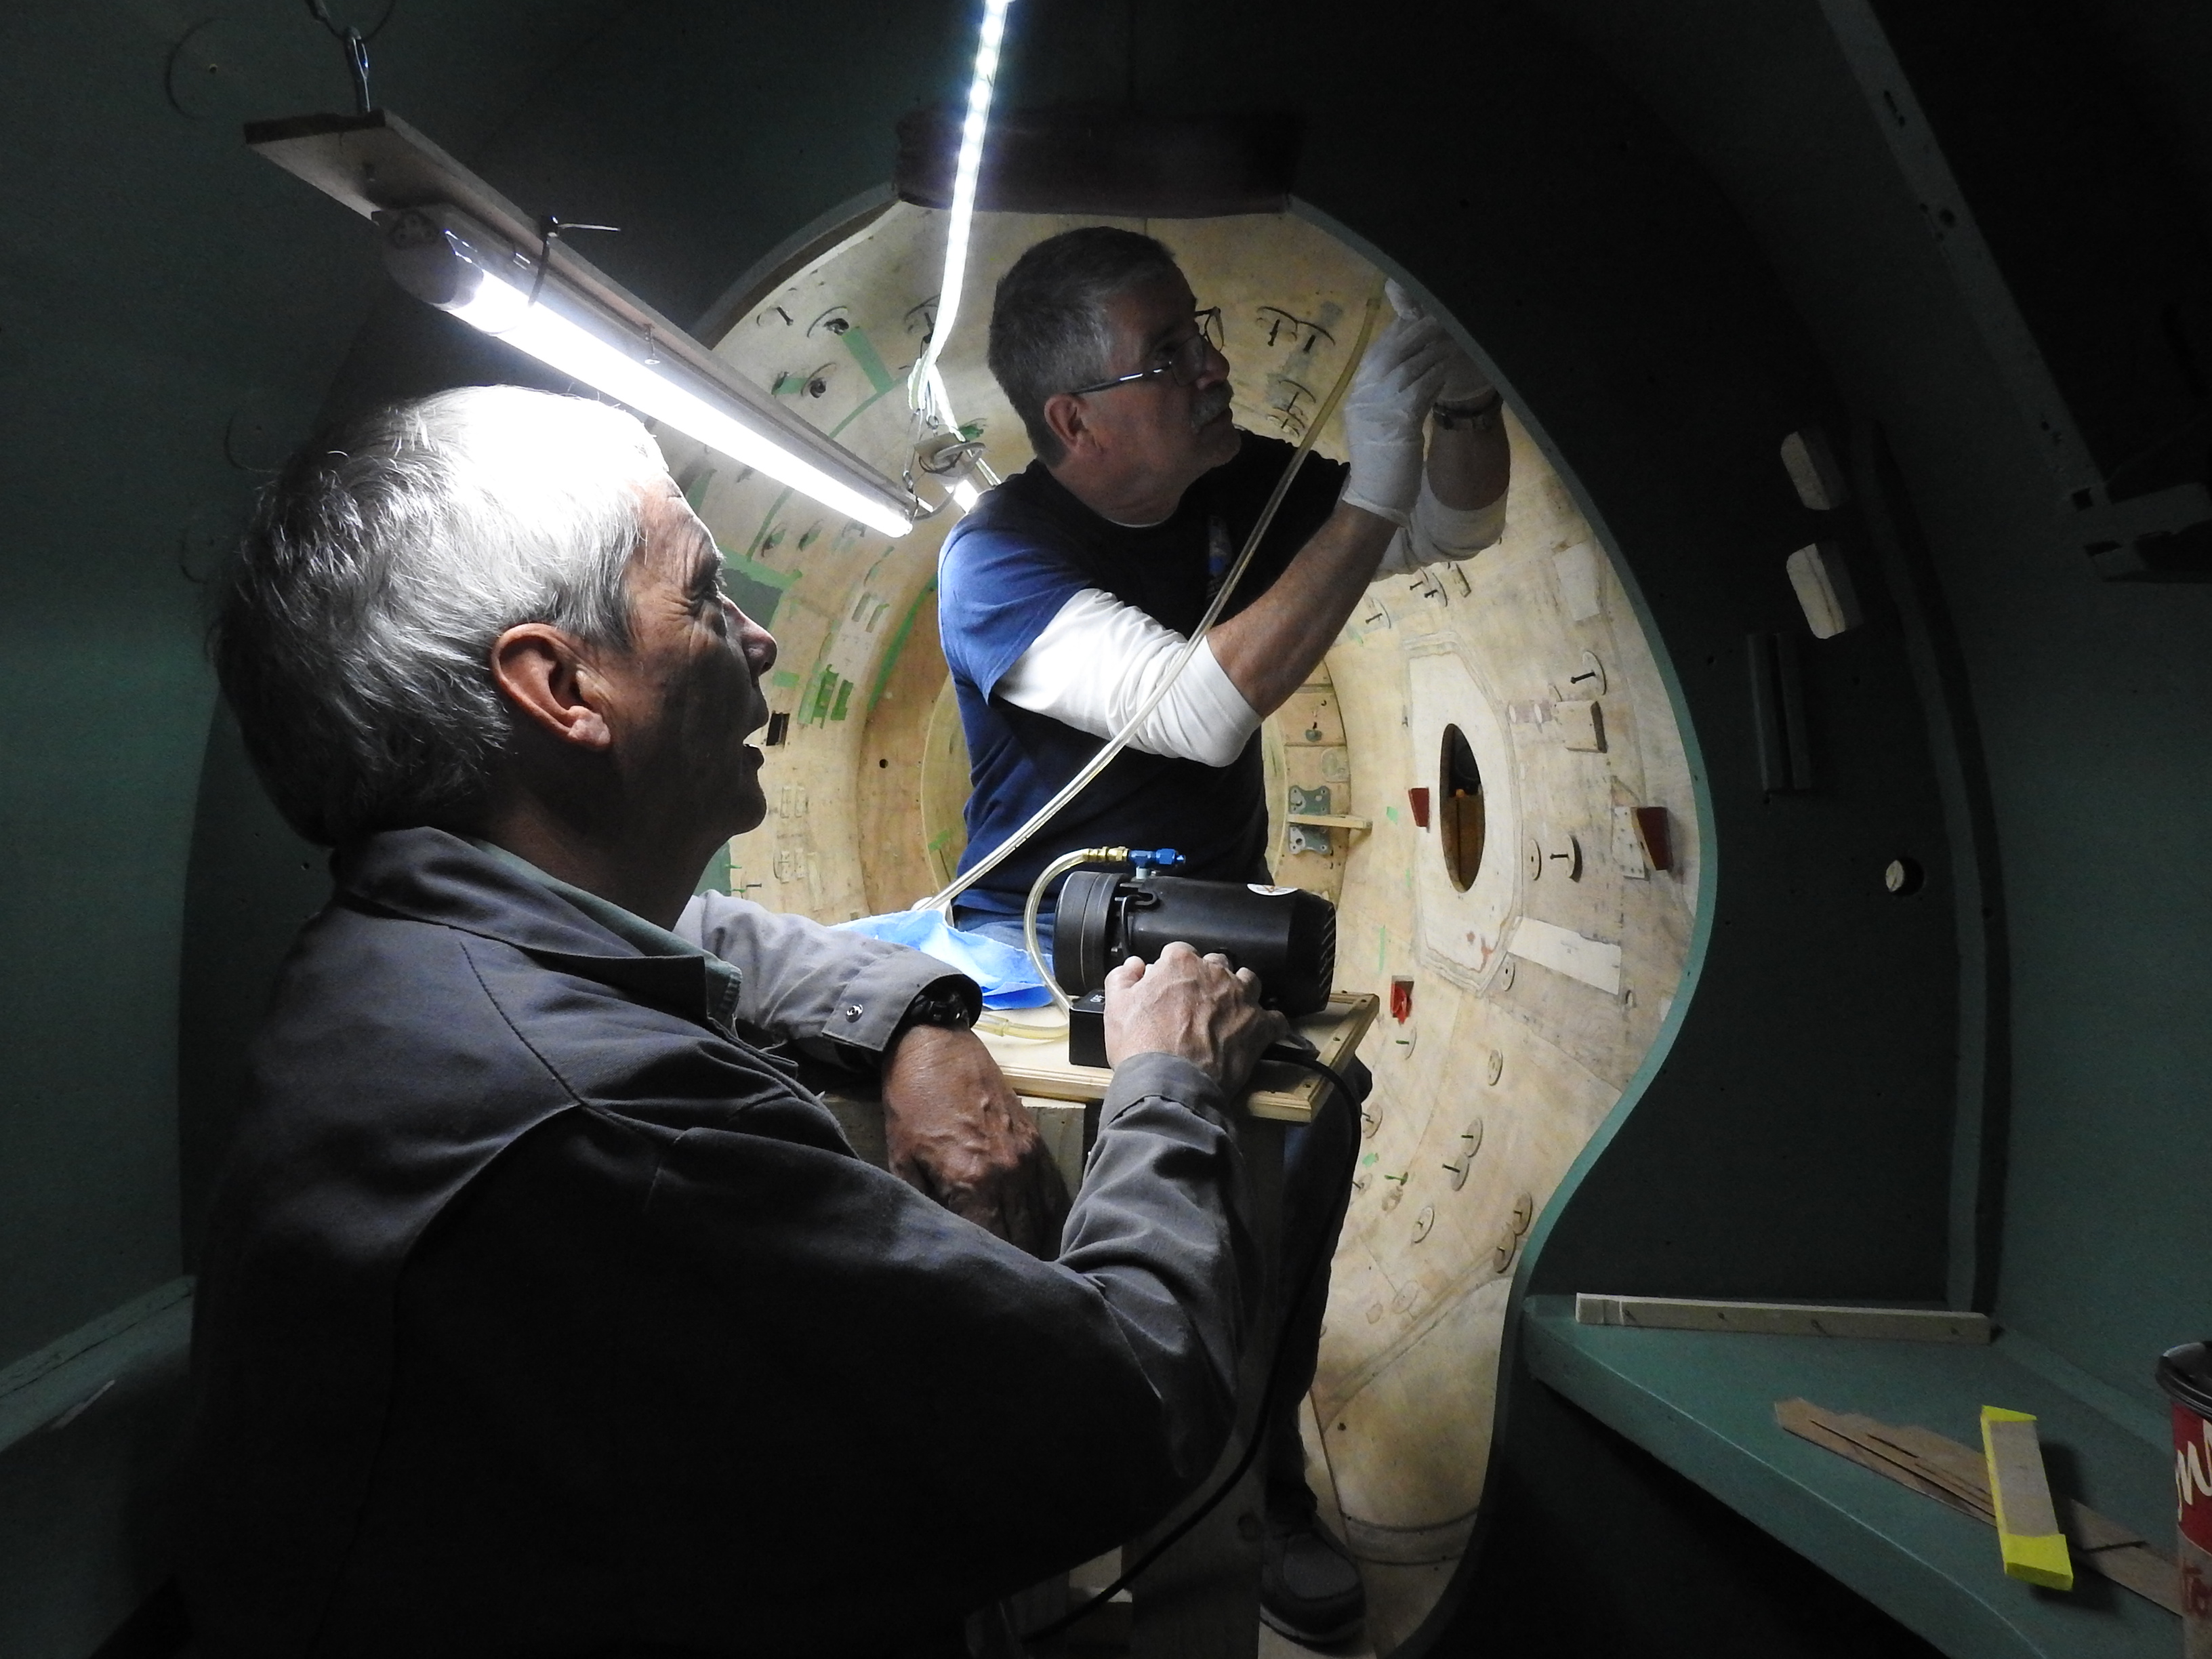
With the skin patches now coming along, we are also starting to tackle the top fuselage center line joint. The health of this joint is key to the structural well being of the fuselage. The centerline joint is where the two halves join through the use of 'V' grooves that are then covered by doublers, both internally and externally. The internal doubler is in good shape, but much of the external is in pieces or is missing. Andy and Michael are working to re-bond the 'V' groove by drilling small holes down to the midpoint. They then attach a vacuum pump over one hole and inject a low viscosity epoxy into the adjacent hole with the intent of sucking the epoxy into the joint. The epoxy then fills the voids, especially where the outer strips are missing.

With a syringe full of epoxy and a vacuum pump to work it into the spaces, Michael and Andy strengthen the center line joint on the upper fuselage. Once this is complete, a new doubler strip is added on top of the joint.
Roger and Peter are working to remove the top layer of veneer so we may install a new piece, giving us a clear and level surface on which to attach the external doubler. This is a time consuming task as there are a large number of small brass nails embedded in the material. Because of the nails, a router can't be used to remove the material.
As we have learned the hard way, the vacuum bagging process requires us to seal the balsa wood prior to fitting the new skin patches. For that we use thin clear coat epoxy. The left side of the rear fuselage has large areas to cover and the balsa requires at least three coats in order to seal adequately. For two reasons we have now covered the left side with the first coat, one to start the process of patching and the other because individuals look at the fuselage in disbelief that its real balsa. They tend to test it with their fingernails.
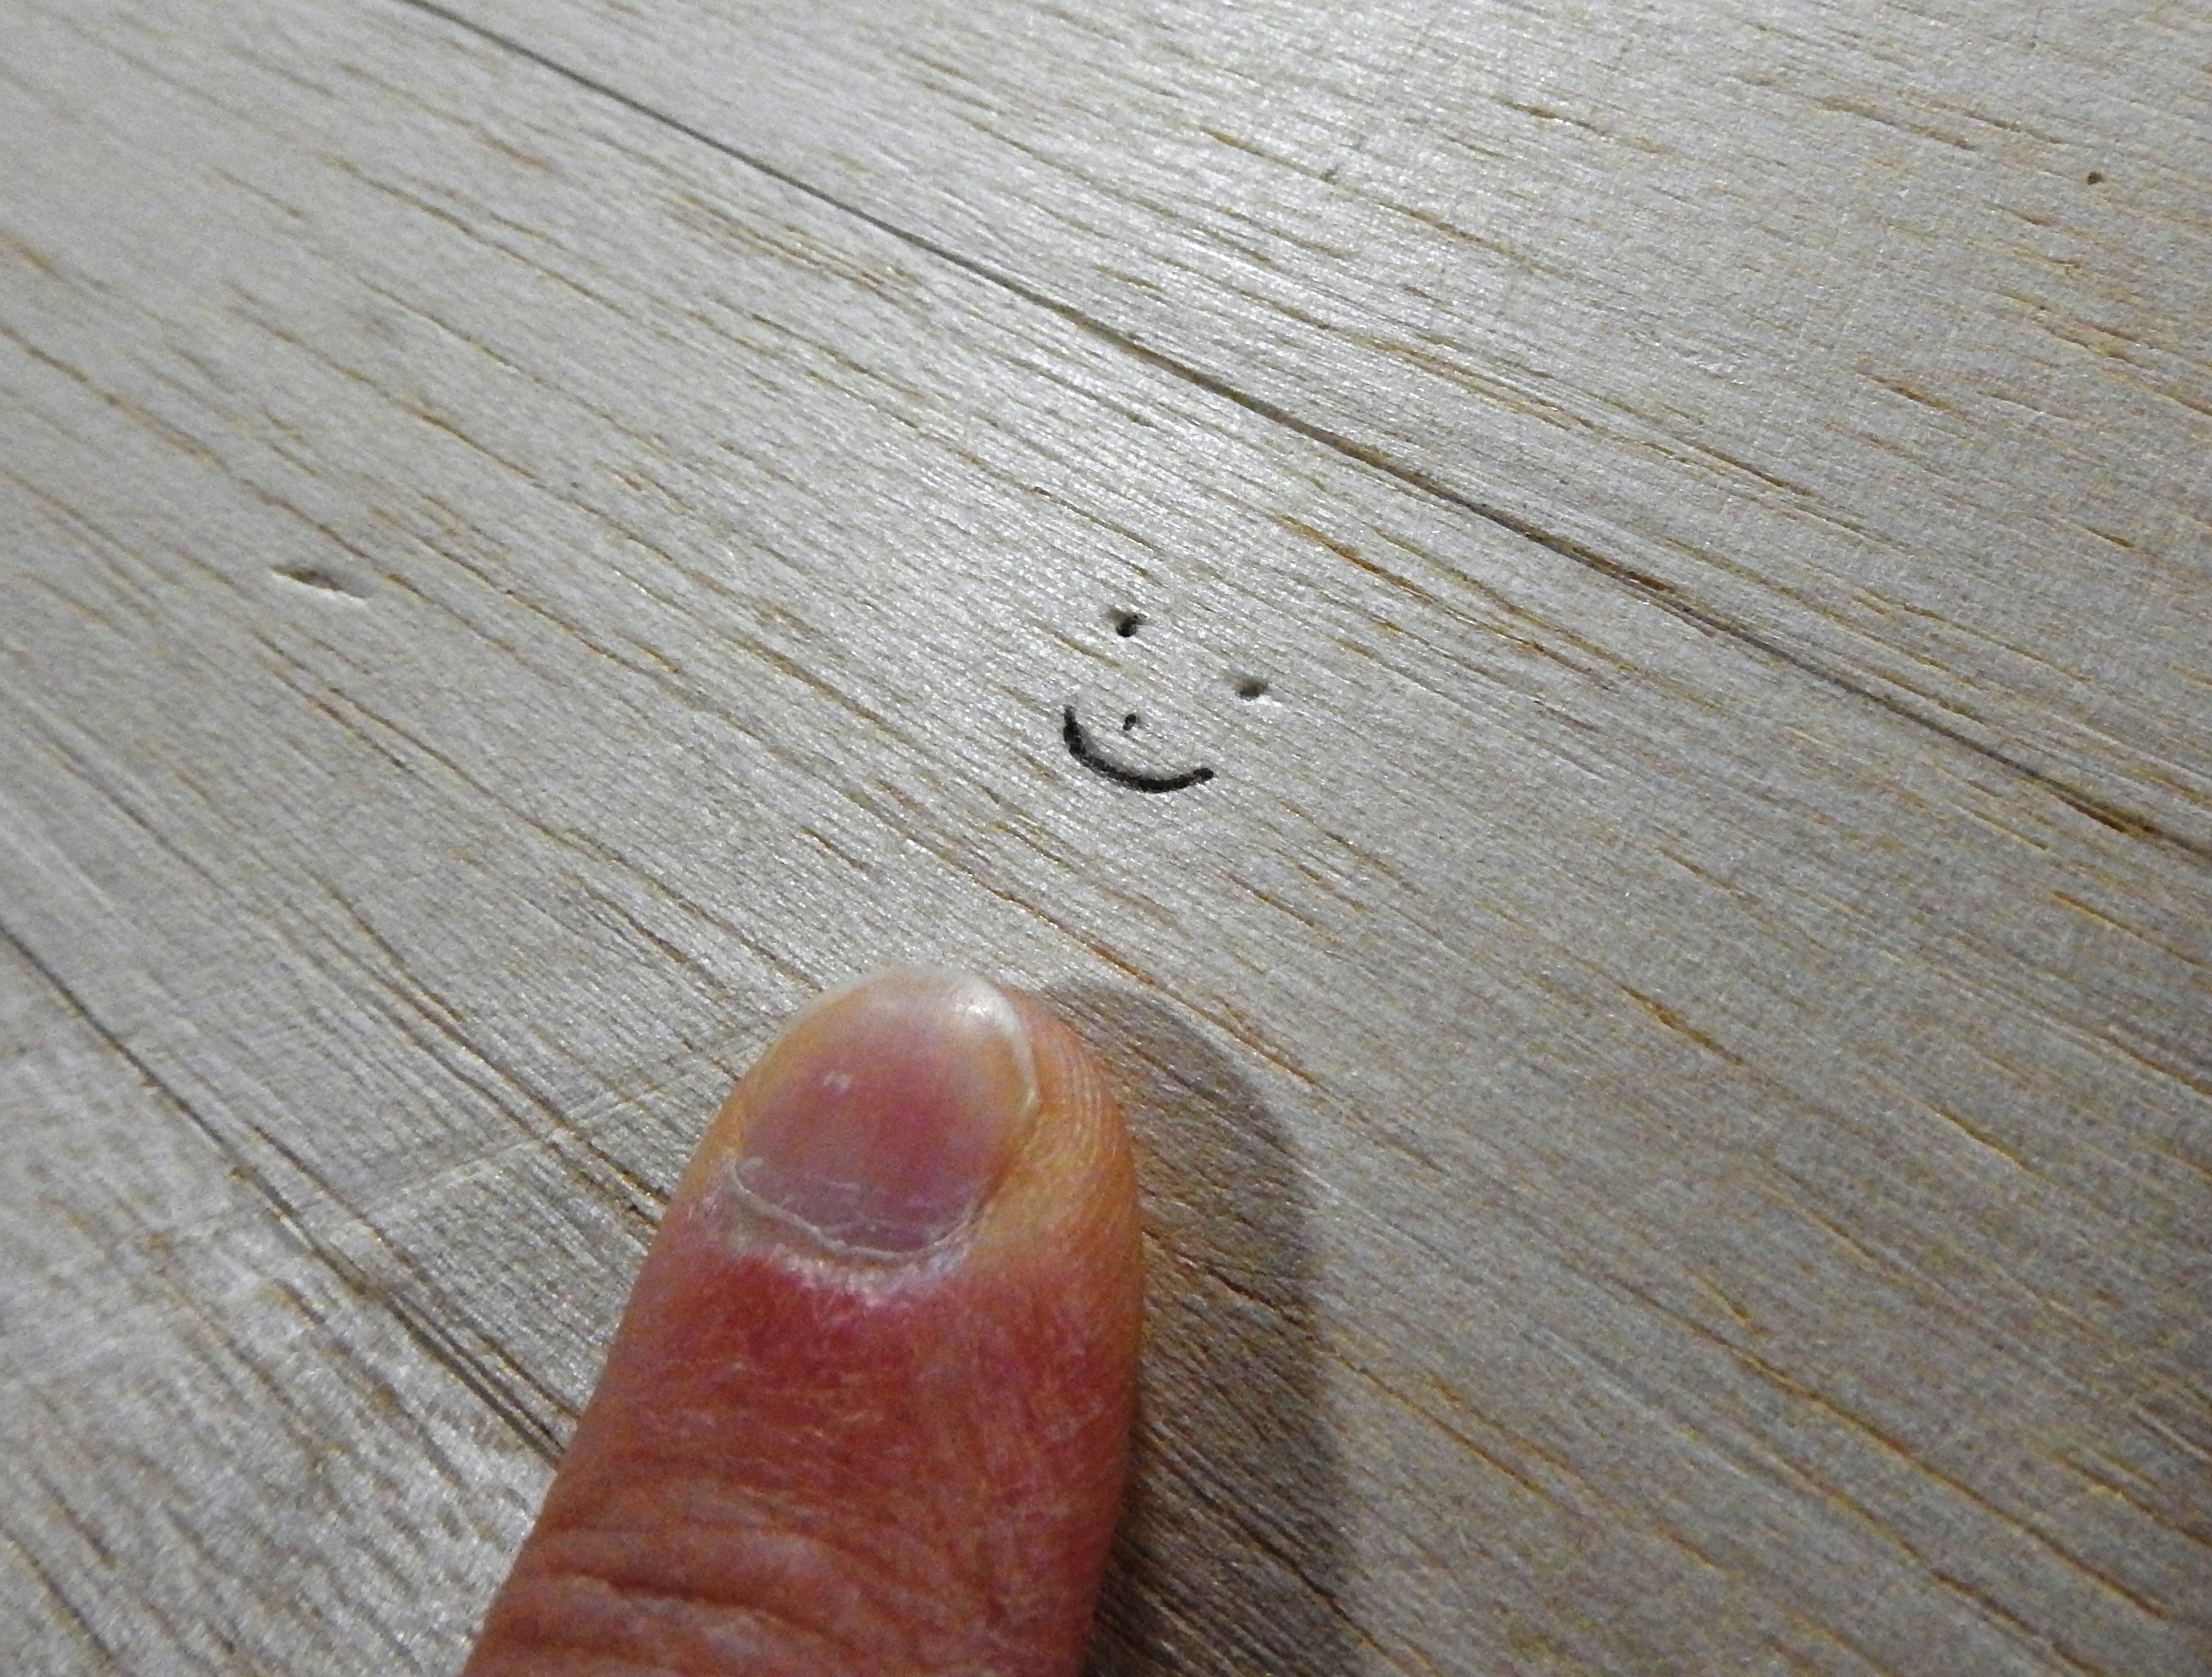
Fingernails and happy faces. Some young visitors decided to see how soft balsa really was and left us this little souvenir of their visit.
We have started painting the interior of the rear fuselage as all structural repairs have been completed. The lower areas of the rear fuselage are also covered with epoxy to protect the wood. At this point we haven't decided how much to cover with epoxy as the aft area is apt to collect fluid, dirt, moisture etc.
As well, Mike and Don have been pulling epoxy through the grounding strap nail holes to bond more of the internal skins.

A lot of square centimeters on the port side of the fuselage waiting for new skins. All of the lessons learned on the smaller patches for the starboard side will soon be applied here, starting with three thin coats of clear epoxy to seal all the balsa and stringers so that the new skins can get sucked down for effective adhesion.
Throughout the interior Don, Jeff, Andy and Dave have been patching small areas with epoxy. Dave has been tap testing for bonding between layers to ensure that we have as good a bond as possible, shy of pulling areas apart. Mike and Don follow along applying the first coats of green paint to protect the wood from contamination. Again this is a bit of a bittersweet activity as the years of cleaning, patching and repairing now get painted over.
Don and Michael using the syringe and vacuum line technique to inject epoxy into the inner skins of the fuselage just aft of the camera bay.
We have a couple of attach brackets in the camera bay area that were not removable so these have been stripped and painted in place. As more parts are being painted we are also experimenting to get the proper sheen on the newly painted metal parts prior to installing them.
With the copper grounding straps now cleaned and repaired we are starting to reinstall them throughout the fuselage interior. These iconic copper straps are needed in wooden airplanes to ground the electric systems and to help discharge static build up in the airframe.
I would just like to finish off this report with a comment from my perspective. A long time ago I looked at an area on the right side of the fuselage that had been cut open after it had been struck with something heavy, actually deforming the area by at least a 1/4 inch, and breaking the stringer. I can now say the damage is fully repaired and the skin is back in place. This was a critical structural repair that presented us with a large number of significant challenges, all of which have now been resolved.

Before: Right rear fuselage area with impact damage and a cracked stringer, delaminating skins, water stains and dry rot.
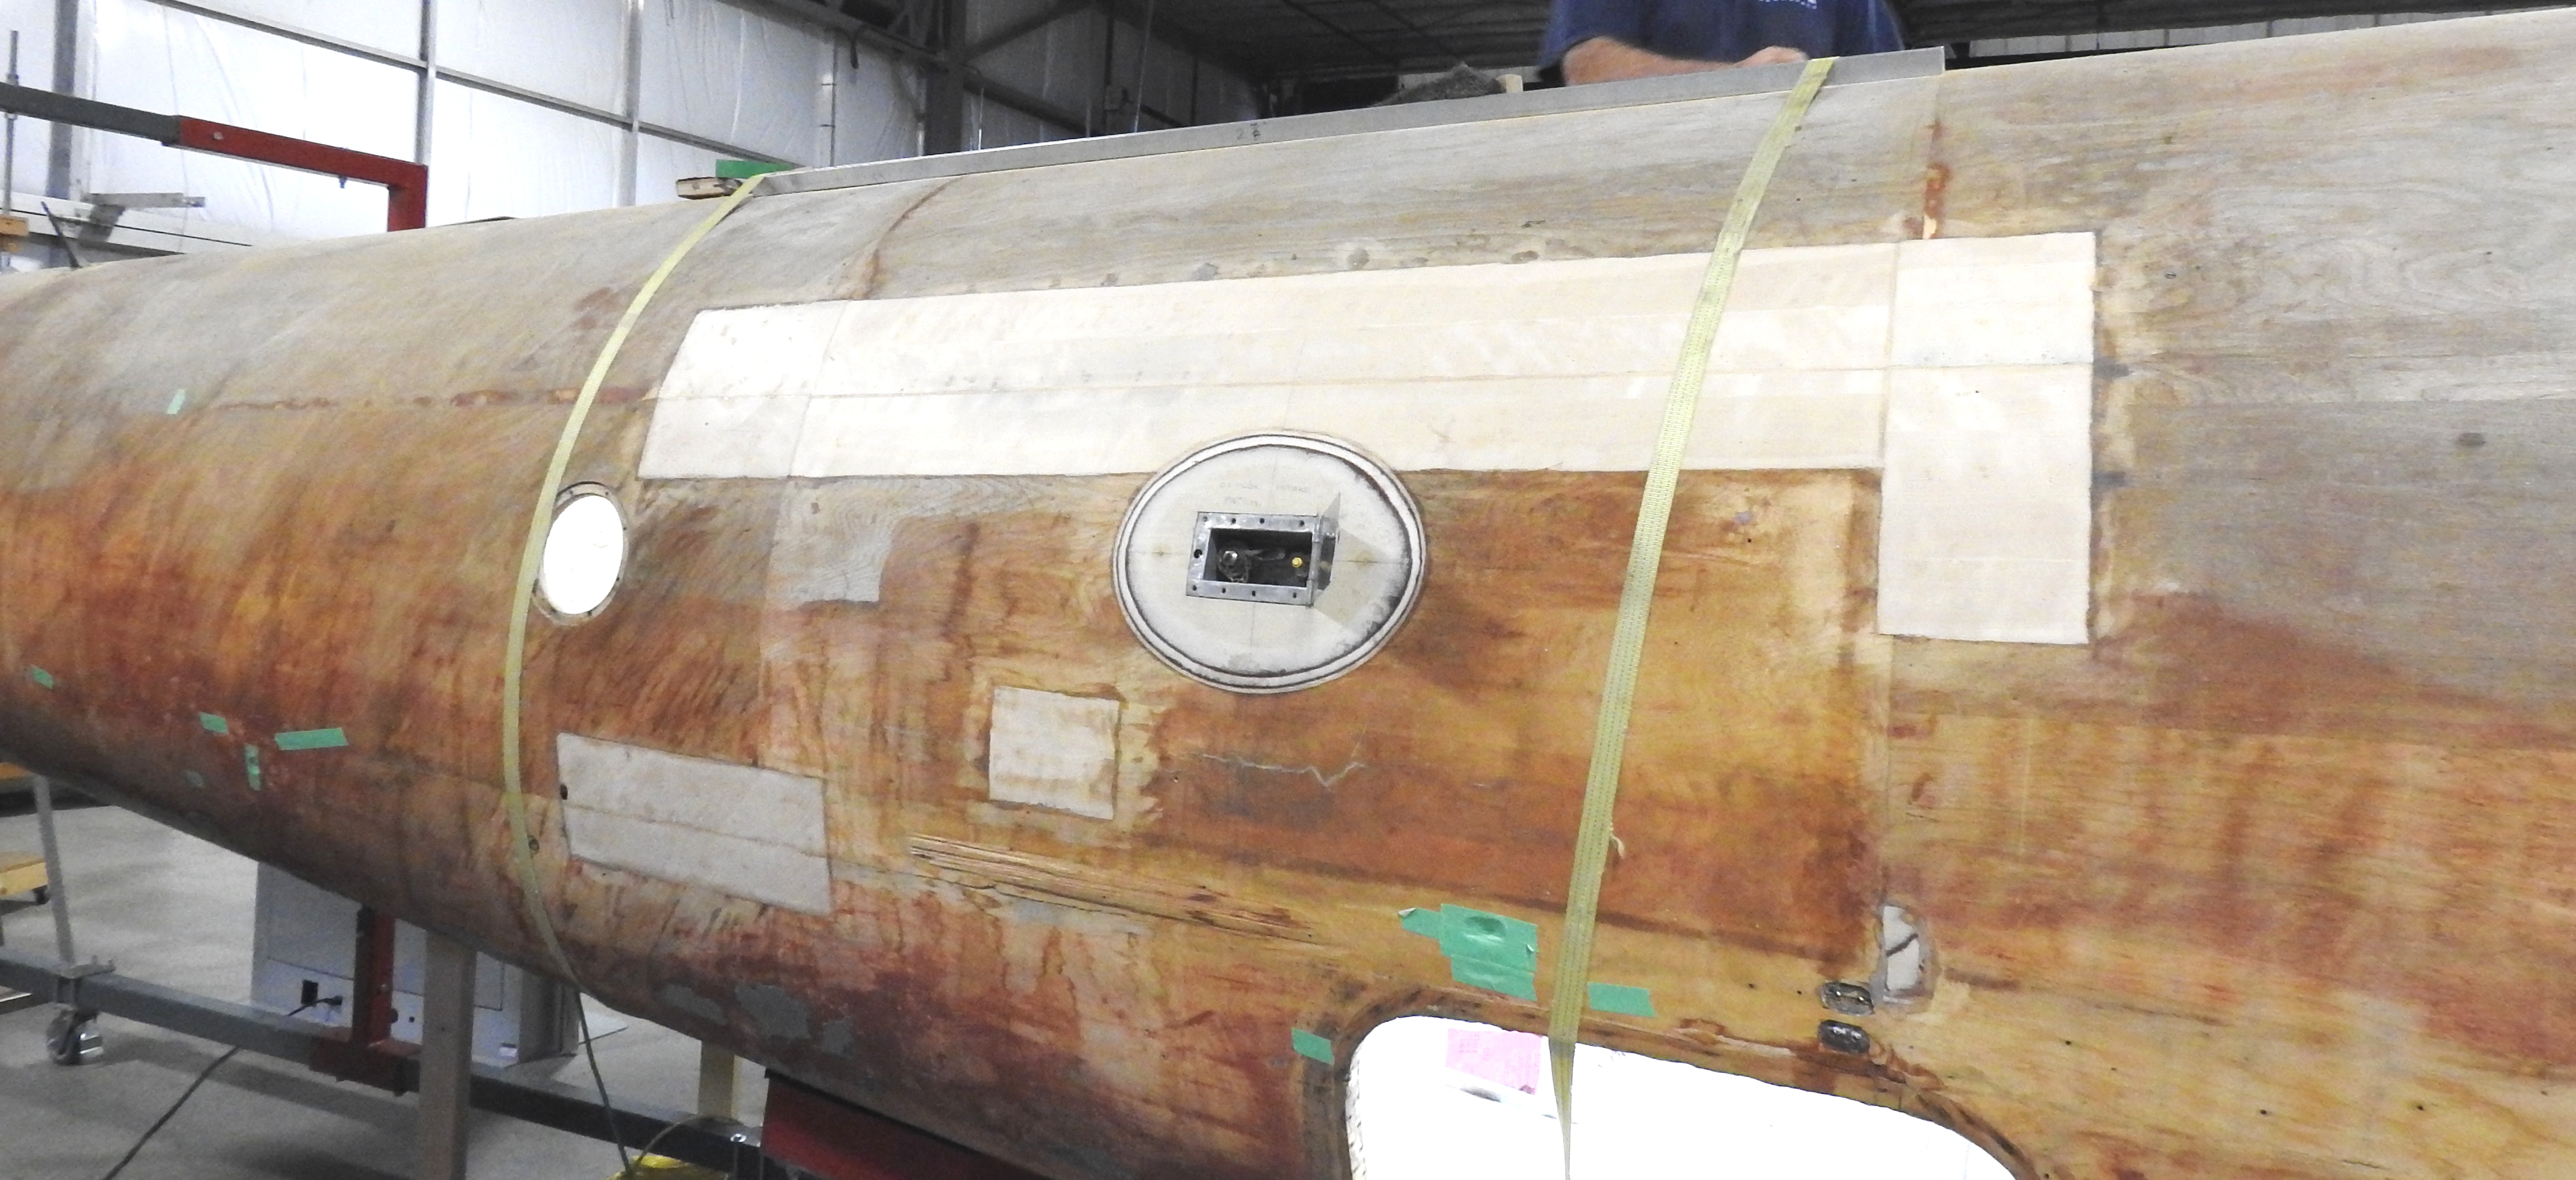
After: Stringer repaired. Balsa replaced. Oxygen fill port area repaired. Ten new skin patches installed. Note that the large patch is comprised of six separate pieces in order to match the original seam lines in the external skins.
Events and Miscellaneous
Beyond the Mosquito Celebration Day in early July, the third quarter of the year is always busy with themed special event days at the Bomber Command Museum. As usual we are kept busy giving tours, updating visitors on our restoration progress, selling branded merchandise and used books and staffing new artifact displays, all in aid of fulfilling our 'Honour and Educate' mandate.
July 28 was the annual Bikes and Bombers event which was again blessed with perfect motorcycling weather and hundreds of visiting bikers. The fields north of the museum are hosting more and more collector cars on this event day as it continues to grow in popularity.
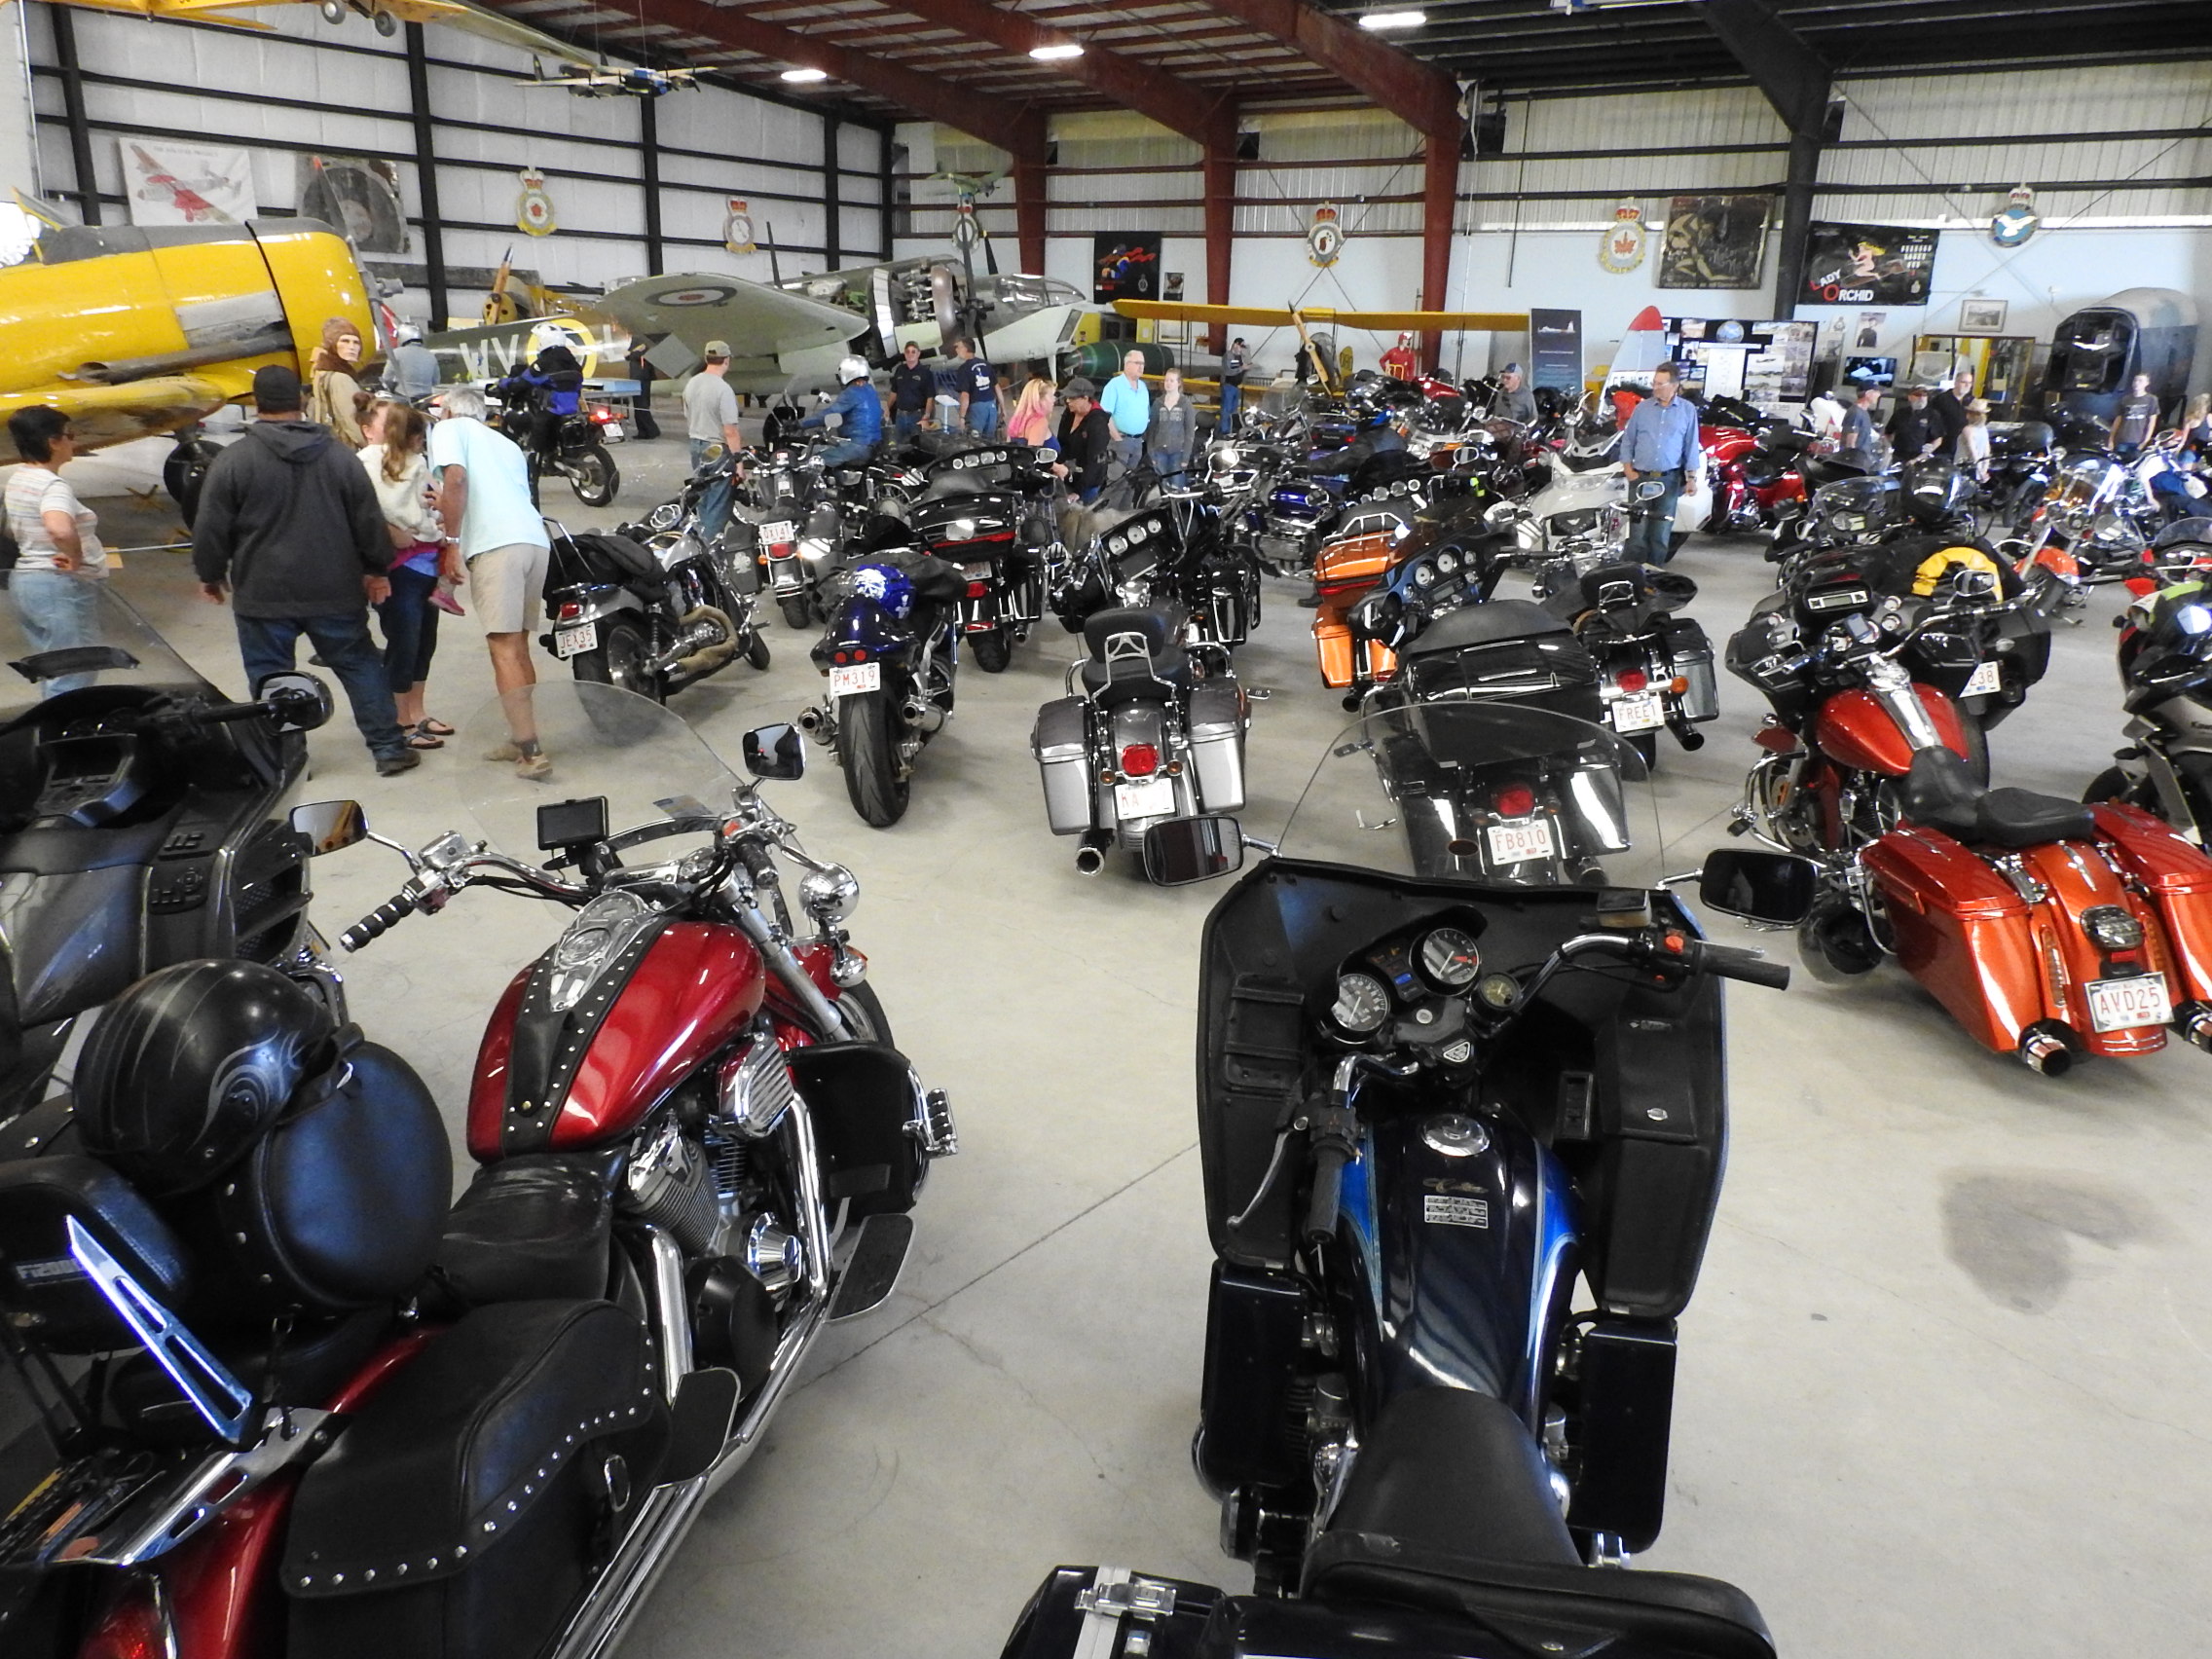
More motorcycles than you can fit into the hangar. Hundreds now attend this very popular event which also features a 'show and shine' car club event as well. Keeps us busy giving tours and selling merchandise.
The weekend of August 24/25 was likely the best attended event day ever held at the Bomber Command Museum. This year it was themed to celebrate the 75th Anniversary of the famous Dam Busters raid. The event featured historian and author Ted Barris' book launch, family members of Dam Buster crew who came from all across Canada and the USA to attend, the sale of replica bomb sights, 4 Wing RCAF band and much more. The event gained national and international media attention and it all kicked off with a Friday night social with the Mosquito as backdrop to the whole event.
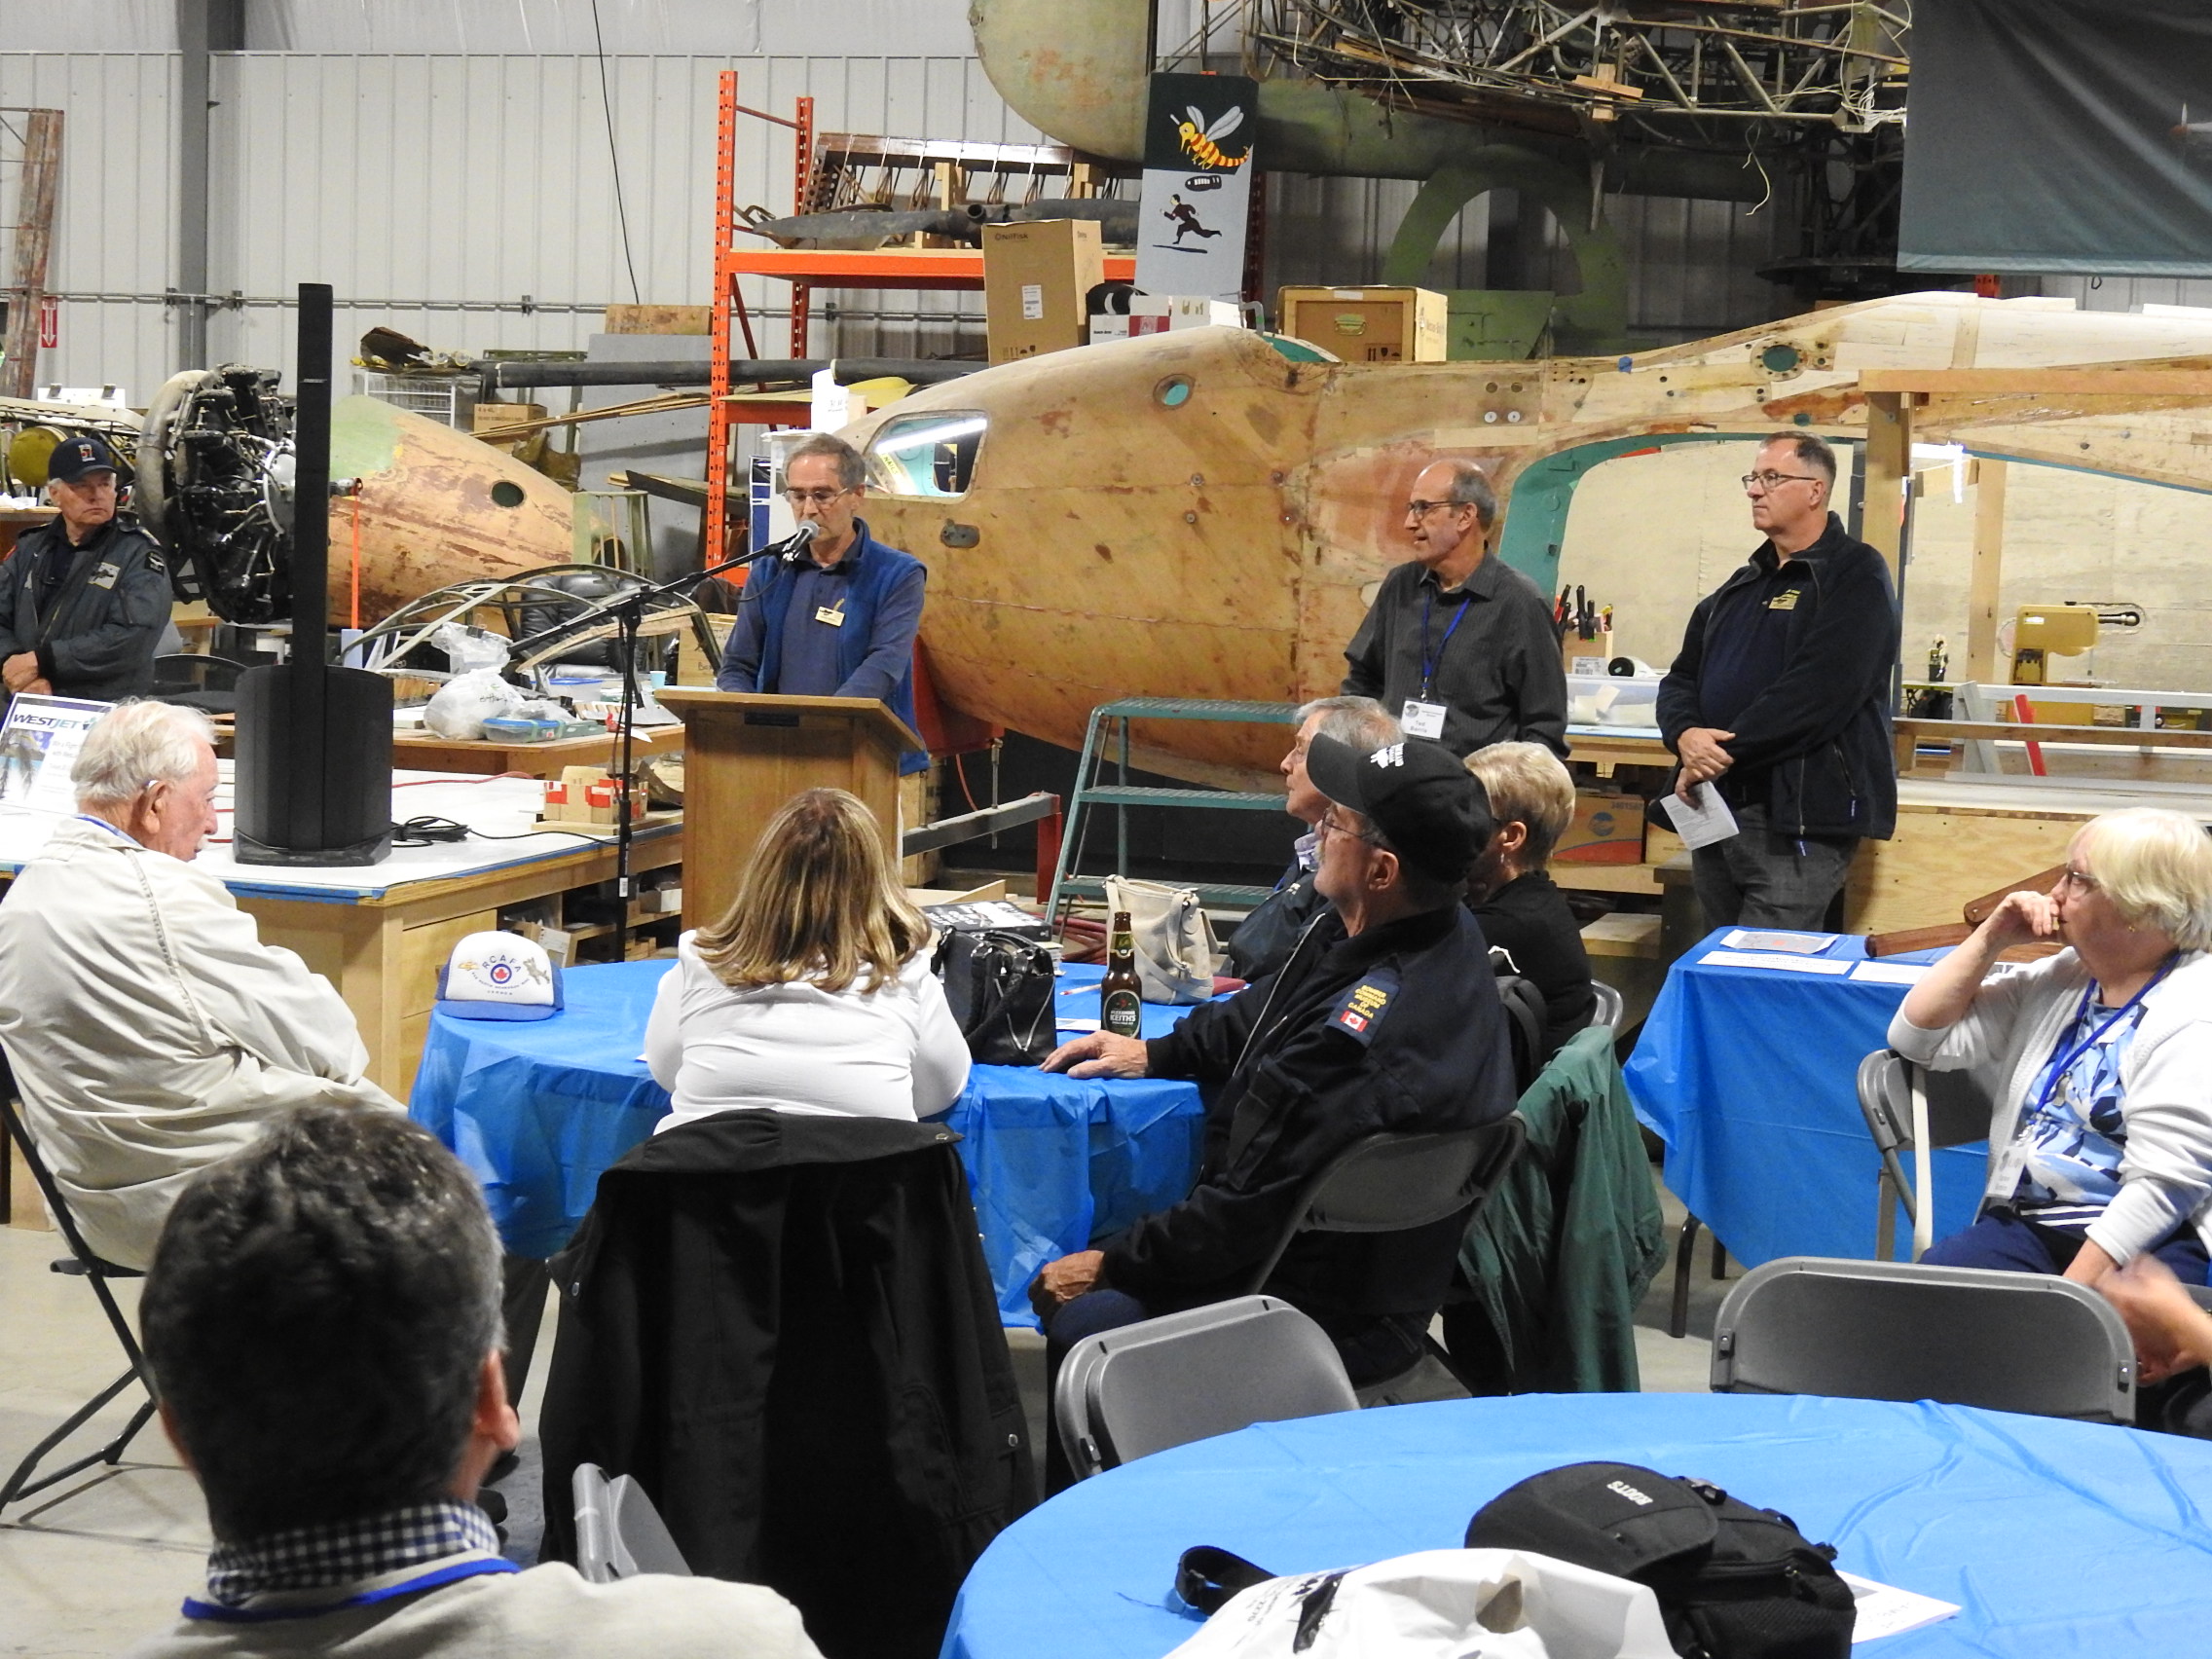
With the Mosquito as backdrop, the biggest event of the season kicks off with a 'Meet and Greet' at the Bomber Command Museum to celebrate the 75th anniversary of the famous Dam Buster raid by 617 Squadron of the RAF.

With a replica of the famous 'Upkeep' bouncing bomb strapped in and ready to spin, the Lanc crew readies for a night run. Some of the largest crowds ever attended the Saturday events.

The weekend also featured a visit from the City of Calgary's Civic Partner Consultant Kevin Forster and Vern Rehbein who came down for their annual inspection and received a full restoration update from Jack M.
We wrapped up museum event days for this quarter celebrating the museum's efforts to acquire and restore that other WWII four engined bomber operated by the RCAF, the Handley Page Halifax.

The mighty Bristol Hercules engine, as used on the Halifax bomber, gets off to an oily start and wraps up the special event days at the Museum.
Beyond museum event days, we also participated in the annual Historic Calgary Week event with a presentation at Central United Church on August 2 on the Power of Partnerships, highlighting our relationships with the City of Calgary, the Bomber Command Museum and Historic Aviation Services in preserving and restoring the Hurricane and Mosquito.
We would also like to acknowledge our ongoing partnership with Westjet who, at the request of CMS member Trevor McTavish, again provided us with two 'Fly Anywhere' tickets. As before, we sold raffle tickets for $5 throughout the year, drawing the winning ticket on August 24.
Jack McWilliam sold the winning ticket to Anne Campbell of Vancouver. Thank you again Westjet!
Still on the theme of money, and to close out this report, we had word from the AGLC that our next casino dates are on January 19 and 20, 2019.
Richard de Boer, President
October 9, 2018