Click on any image for a slideshow!

Mosquito and Hurricane Progress for the Spring Quarter of 2018
Volunteer Hours
In the second quarter of 2018, board members of the Mosquito Society worked a total of 114 hours in the second quarter of 2018 on all duties required to run the organization.
Additionally, members of the society worked 1149.75 hours on the Mosquito on 24 separate dates in Calgary and in Nanton. We also worked 20.5 hours on the Hurricane over the same period. Total volunteer hours for this quarter are 1284.25.
Hurricane
We continue to work closely with Historic Aviation Services in sourcing parts and dealing with vendors who are working on components of the aircraft. At present, Aero Propeller is close to completing the Hamilton Standard three blade unit for our airplane. Aerocorp Avionics is working on several instruments including the RPM indicator, Fuel Indicator and fuel tank selector switch.
Thanks again to Brian Davis for the airspeed indicator, RPM indicator and fuel selector gauges as well as two newly manufactured armour plate sections which we exchanged for a windscreen frame and structure.
On April 13 we were pleased to host the very first visit to Historic Aviation Services in Wetaskiwin, AB of several board and staff members of Calgary's Hangar Flight Museum.
When complete, the Hurricane will be displayed at the museum which holds the balance of the City of Calgary owned aircraft collection.
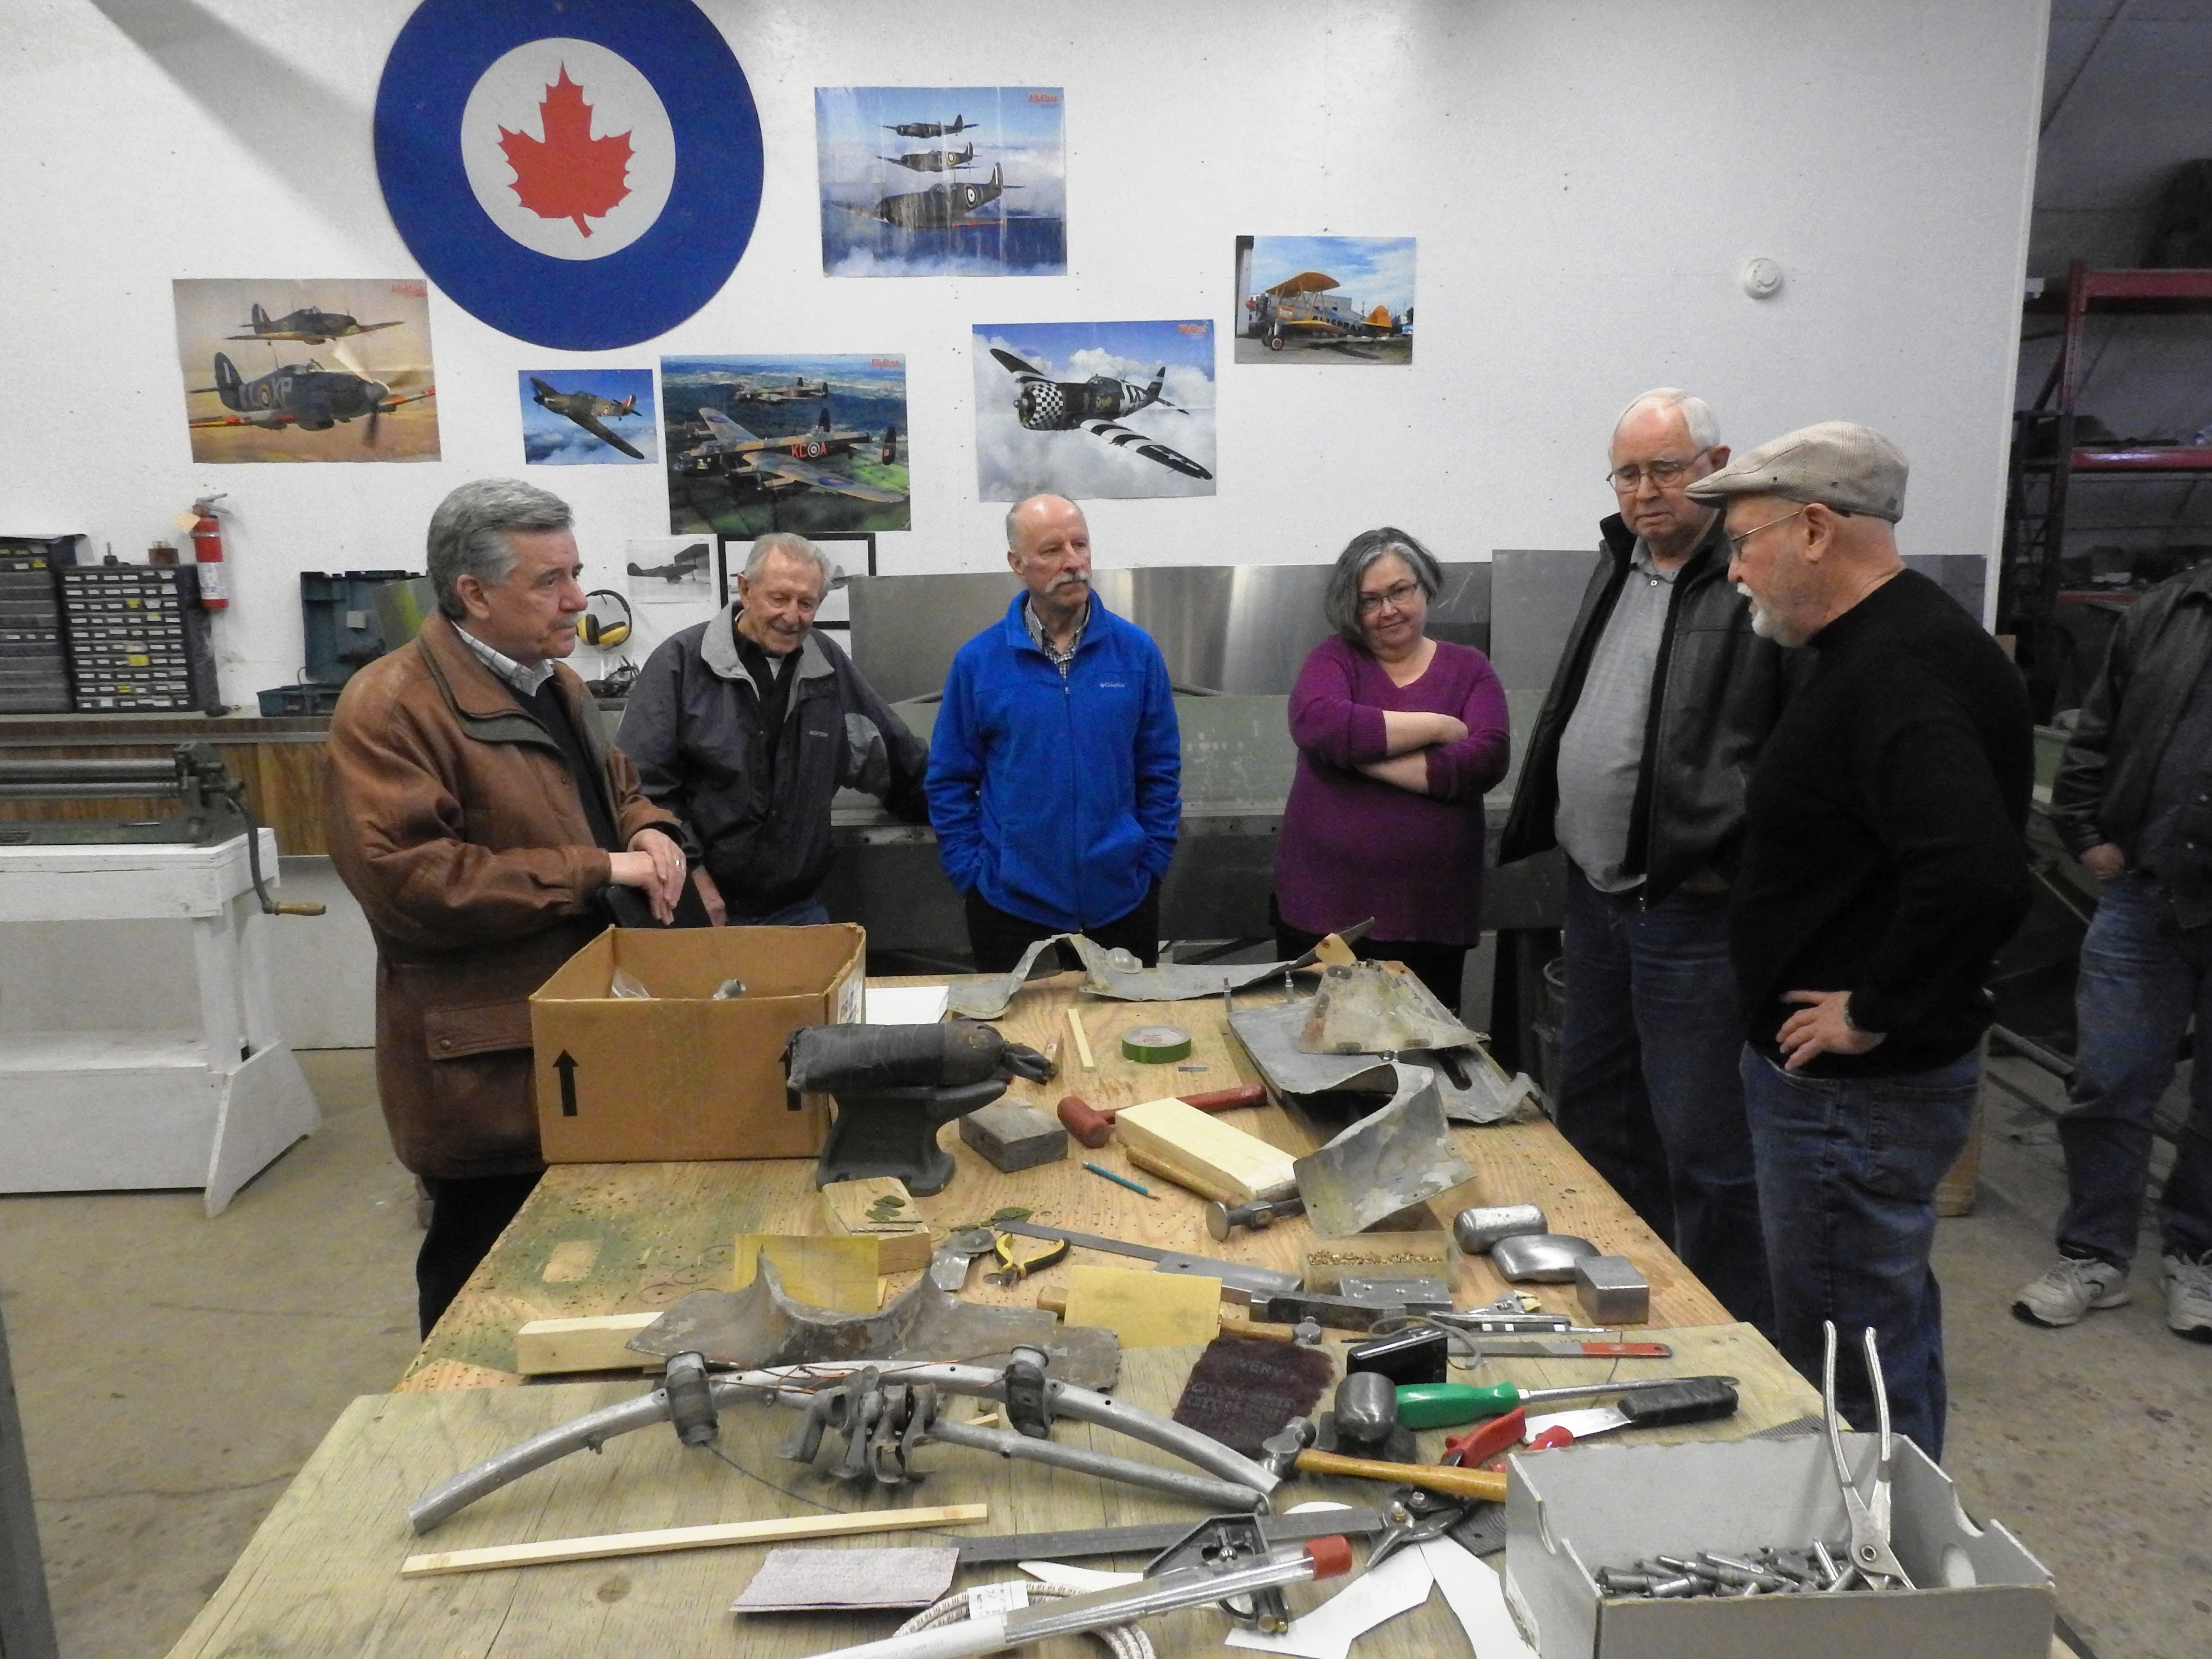
Byron Reynolds, at far right, discusses the Hurricane restoration with Hangar Flight Museum board chairman Jim W. (left), Vern R., Civic Partner Consultant Kevin F., former Executive Director Anne L. and board member Don R.
With the completion and return to Calgary of the Hurricane within sight, interest in the type and the history of this example is starting to build. On April 18 we were invited by the Military Museums of Calgary to delivery our presentation on the history of Hurricane 5389. Attendance exceeded what their theater could accommodate, so the open floor space in the Naval Wing of the Museum was used. Despite the larger venue, we were told that they ran out of chairs.

Visitors begin to gather at the Military Museums for the April 18 presentation on the History of Hurricane 5389. It proved to be a popular topic with the museum moving us from their theater to the larger open space and then running out of chairs.
We were then invited to attend the board meeting of the Hangar Flight Museum on June 27th to deliver the same presentation to their board and to key staff members.
We conducted our quarterly inspection of the Hurricane on July 6. We were very pleased to see that for the first time since 1946, 5389 is once again sporting a pair of wings. Although visually this is the most significant sign of progress, 99% of the work conducted is to manufacture the 1% of missing items that prevent any of the aircraft systems from functioning. This includes cables, fittings and trim components, connectors, inspection panels, fasteners, lines, tubes and the moulds on which to shape sheet and tube metal. This is time consuming detail work beyond the comprehension of those not familiar with the process of restoration.
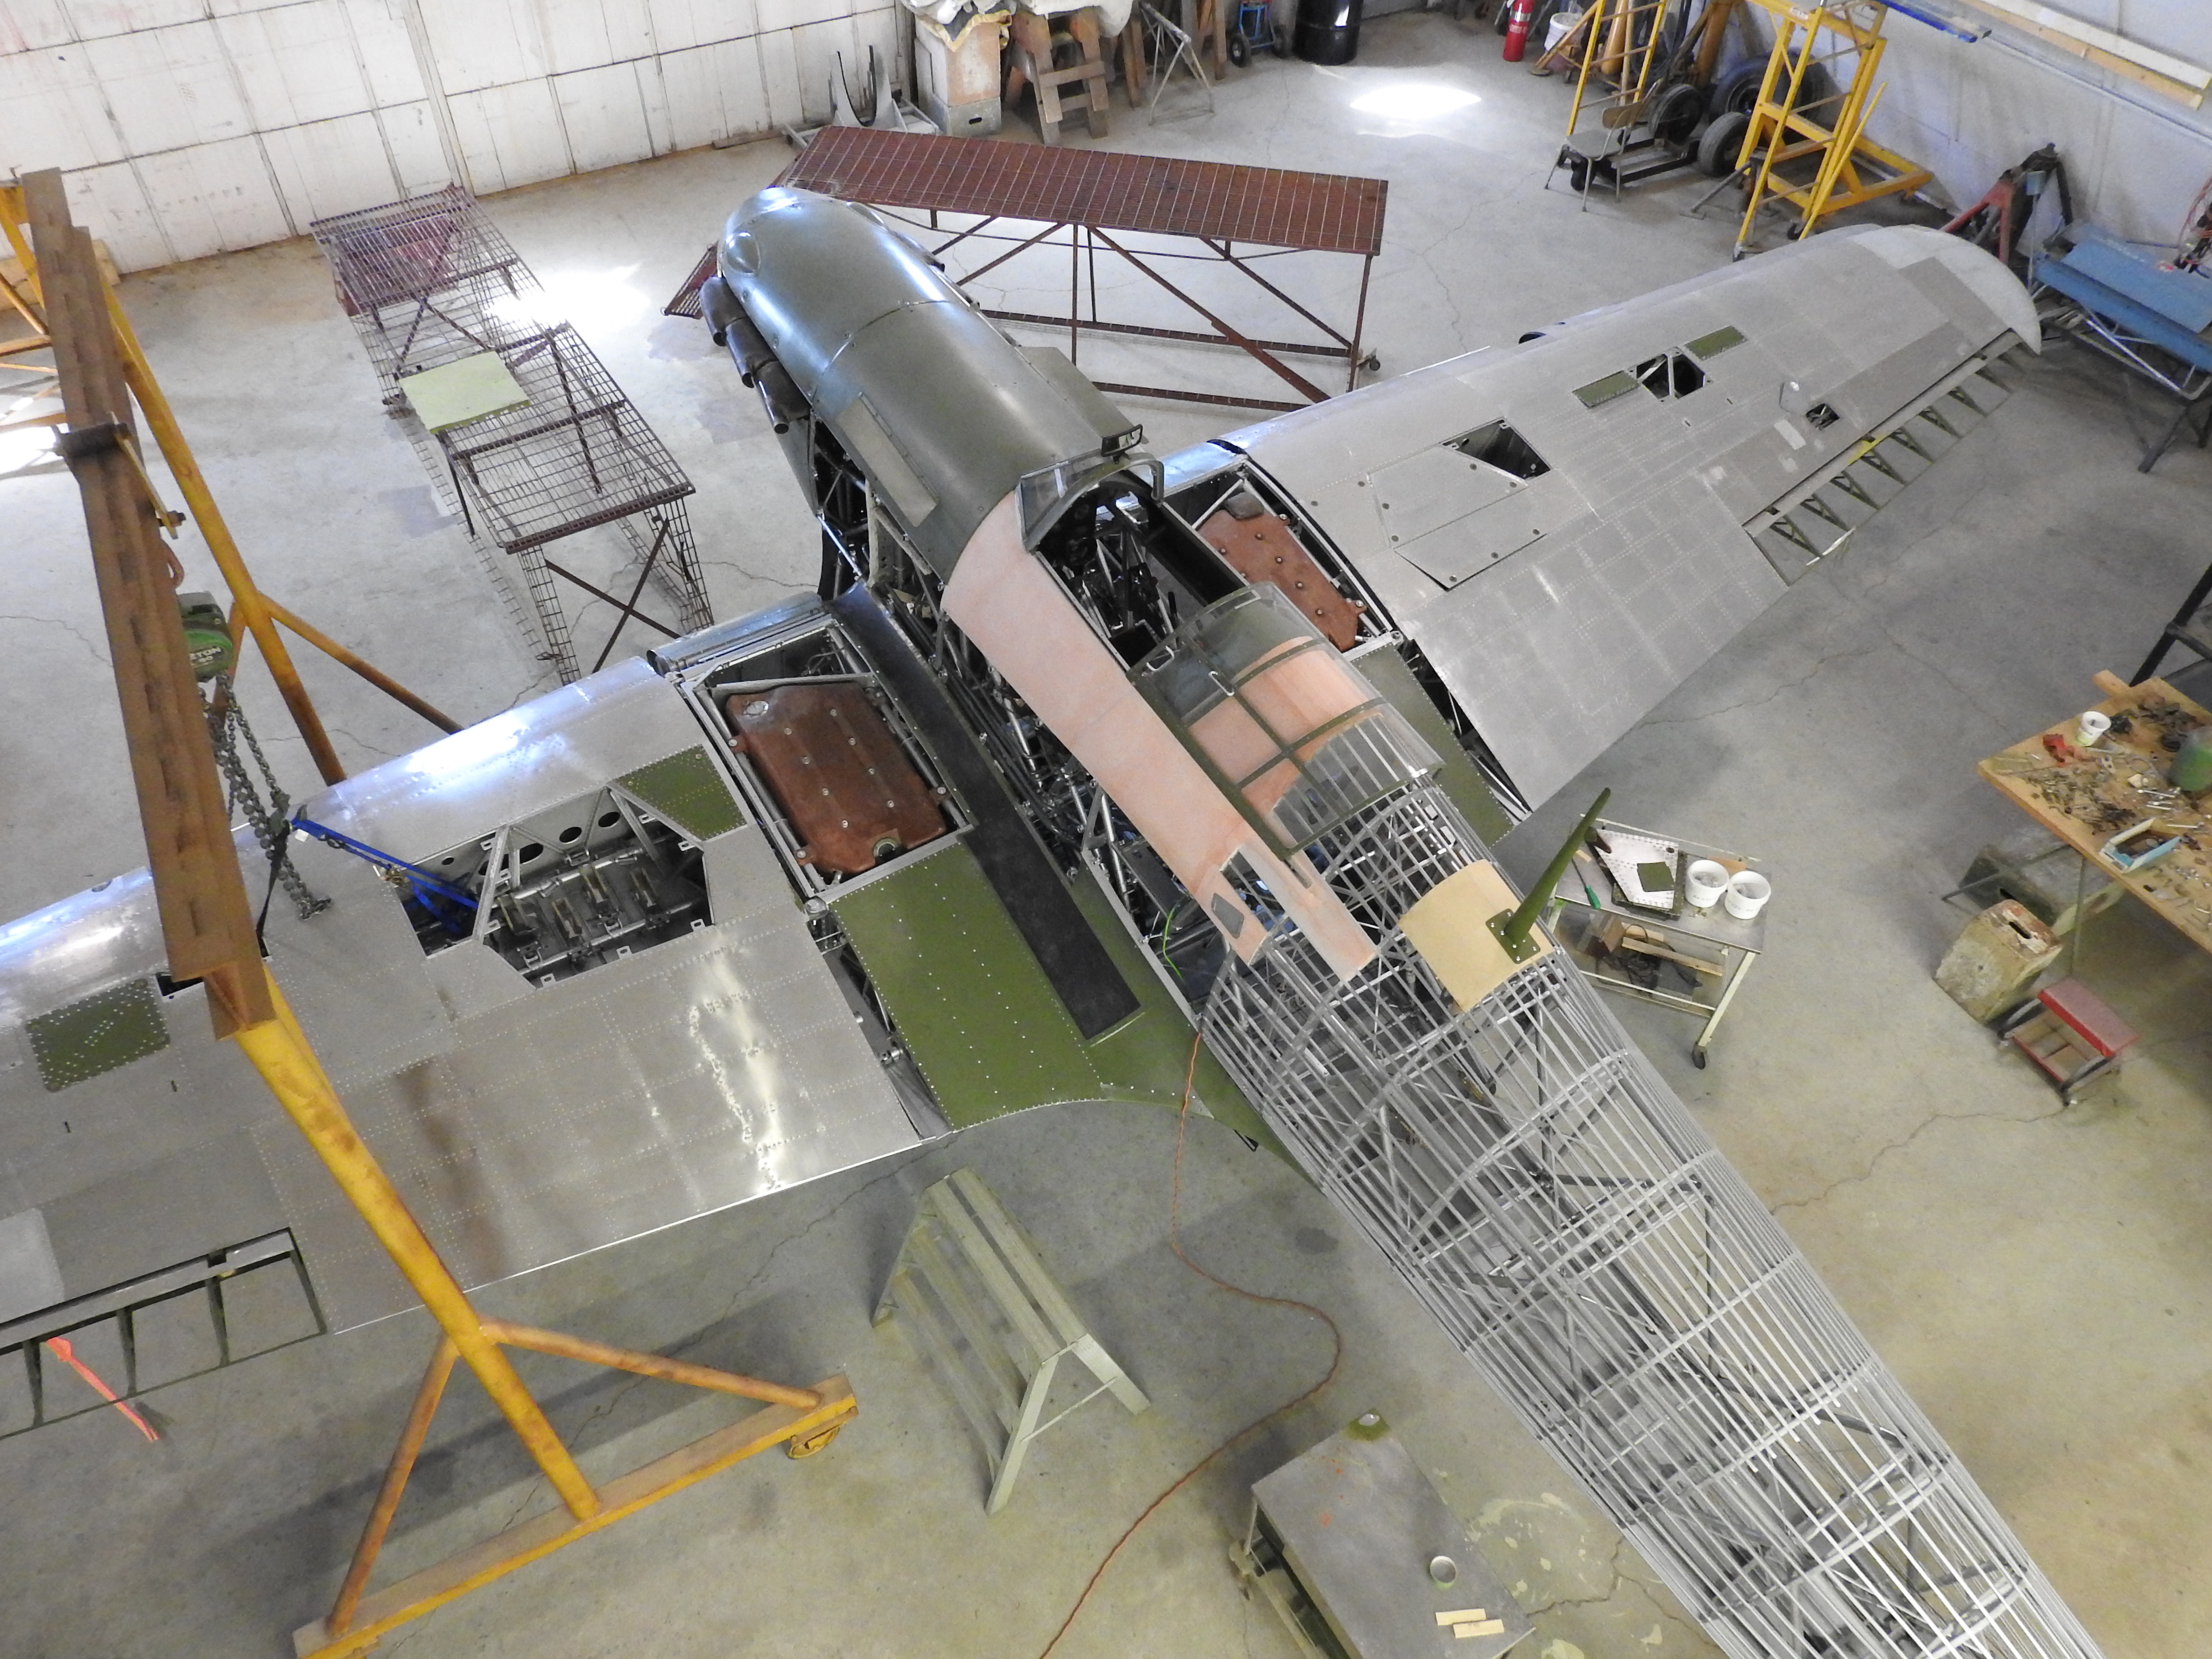
Not only is she sporting her wings for the first time in 72 years, but the center section fuel tanks are installed, the antenna mast is secured and the cowlings are now properly fitted.
Note that the following detailed work report provided by Historic Aviation Services is longer than normal as we received a report at the beginning and at the end of this quarter.
Airframe: Historic Aviation Services
Fuselage and Center Section
- Design, build and laminate woodwork backing for vertical and horizontal stabilizers to fuselage fairings, using remnants of original as sample. Install same and finish varnish on upper, rear fuselage.

New wood for the upper rear fuselage where it mates to the horizontal and vertical stabilizers.
Starting to fit the fairings; all of which require extensive English Wheel and beanbag and hammer work.
- Completed fabrication of upper and lower cockpit armour plate sections (originals missing). Primed and painted both "cockpit green" and installed same in position behind pilot's seat.
- Finished installation of canopy lock assembly actuating cable through rear seat armour plate.
- Fabricated and installed rear view combat mirror mounting bracket above front windscreen and fixed mirror assembly in place.
- Repaired broken gun sight mount as required and mounted to front sunscreen bracket.
- Repaired cockpit compass mount and bracket as required and installed in position below instrument panel.
- Installed pilot's P-11 compass and corrector assembly in position in cockpit.
- Fabricated new radio antenna mast (original missing) as per Hurricane 5418.
- Built new radio antenna mast wood inner mount and fitted to new mast; fabricated radio antenna mast mounting brackets and installed in position.
- Design, build and laminate woodwork backing for radio antenna mast (original missing) and installed same in upper fuselage behind cockpit.
- Installed new mast assembly in position behind cockpit.


Upper fuselage, just aft of the cockpit: Wood and sheet metal panel for the radio antenna mast. Lower: the radio antenna copied from Hurricane 5418 in the Reynolds-Alberta Museum. Every piece of the antenna mast had to be manufactured as no original pieces were present.
- Conducted inventory of all aircraft rudder, elevator and aileron control circuit components.
- Clean, inspected and refurbished original front four elevator cables as required. Made up four rear elevator cables as required (originals missing).
- Ship set of elevator control cables installed in fuselage using new turnbuckles, pulleys, fairleads and associated hardware as required. Elevator control circuit rigged as per Hurricane II manual.
- Made up set of four rudder control cables as required (original missing).
- Ship set of rudder control cables installed in fuselage using new turnbuckles, pulleys, fairleads and associated hardware as required; rudder control circuit rigged as per Hurricane II manual.
- Conducted inventory of all aircraft rudder and elevator trim circuit components.
- Disassembled, cleaned, inspected, repaired, re-assembled and installed port and starboard elevator trim tab gearboxes.
- Made up all elevator trim cables (originals missing or unusable) as required.
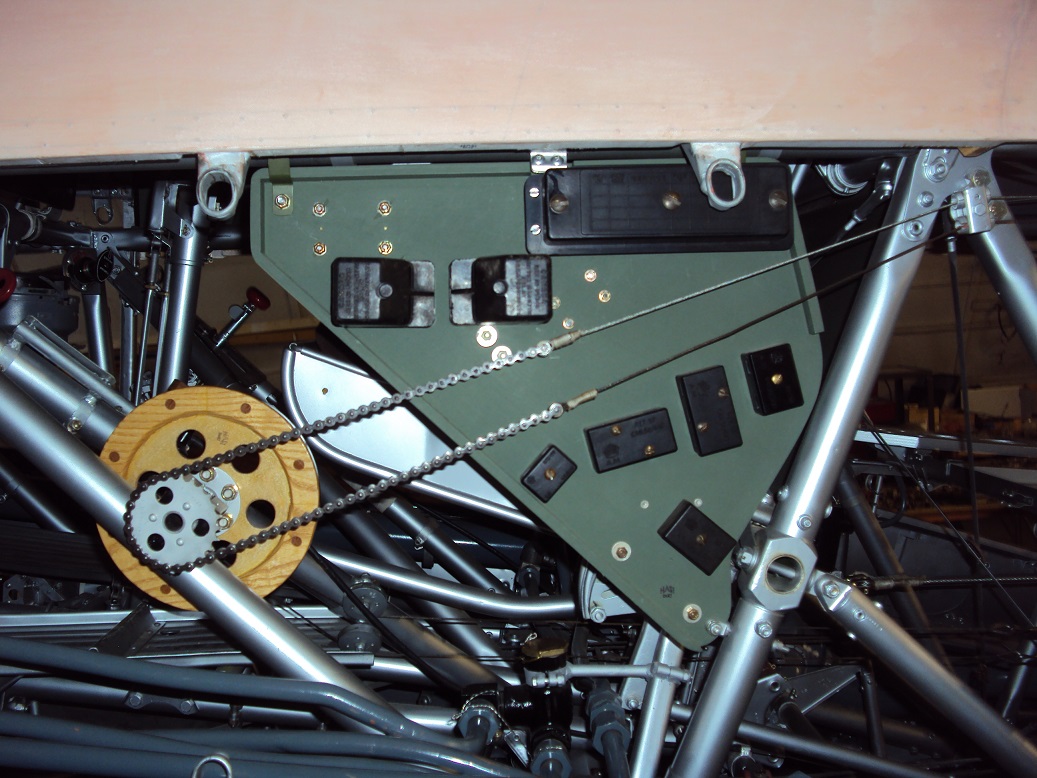
- Serviced elevator trim control chains as required.
- Refurbished elevator trim control circuit installed in fuselage using new turnbuckles, pulleys, fairleads and associated hardware as required. Elevator trim system rigged as per Hurricane II manual.
- Port and starboard elevator trim tabs repaired as required and test fit to gearboxes.
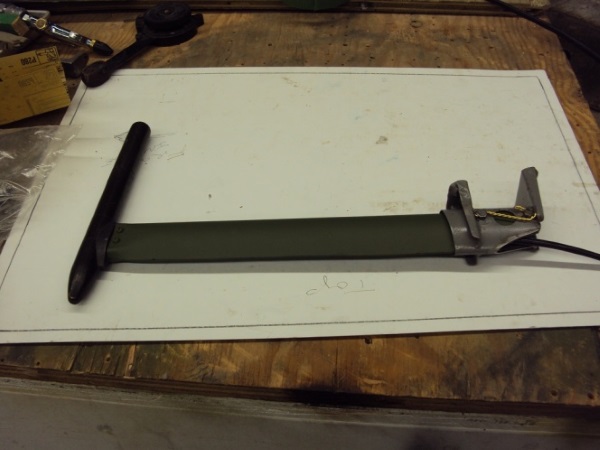
- Fabricated rudder trim tab counter balance assembly as required (original missing) using the original from Hurricane 5418 as a pattern.
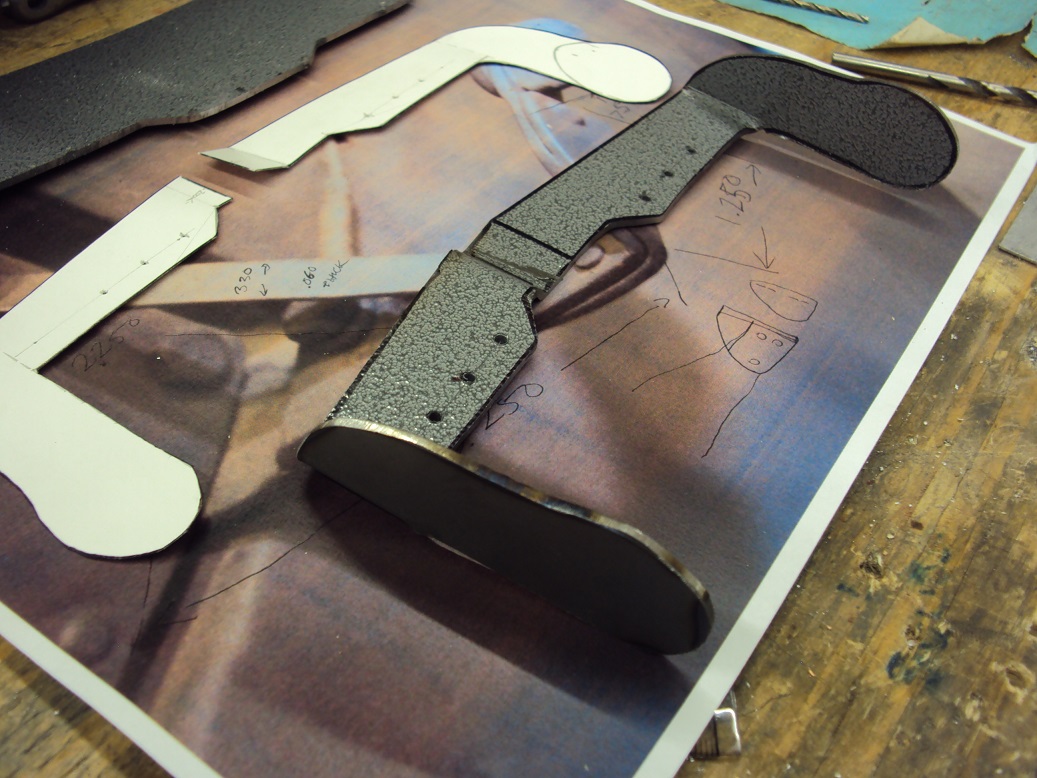
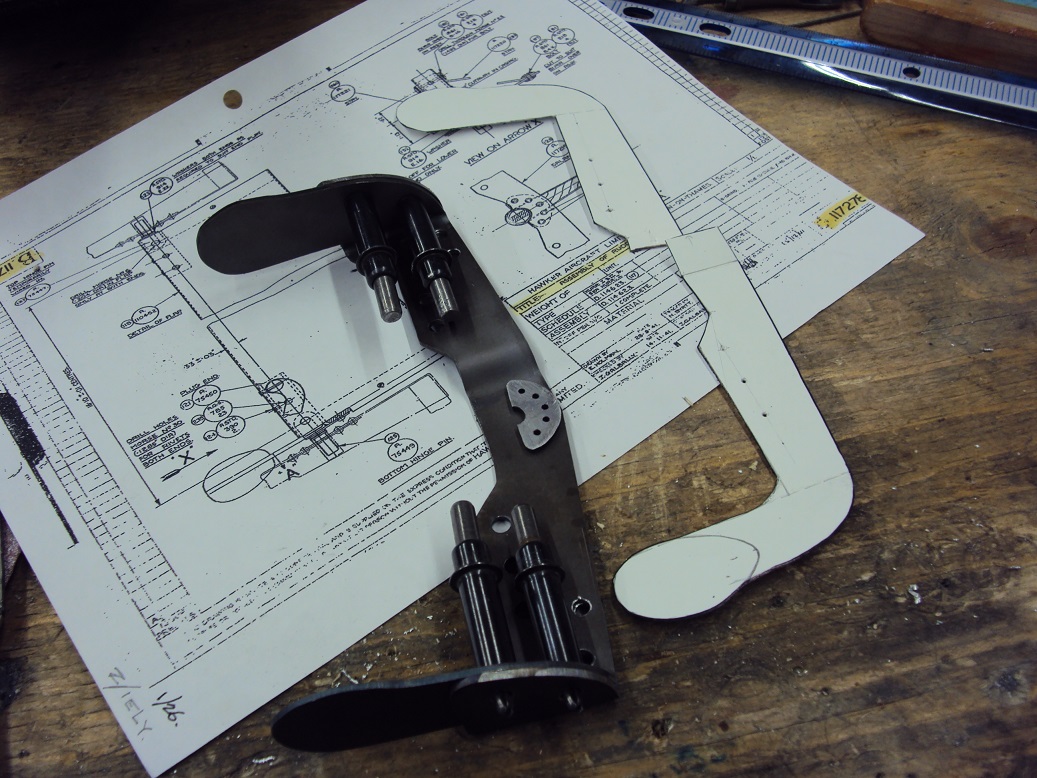
Read the line above the photos again. Try to imagine the number of hours and the skill set required to accomplish that. Here are just a few photos of the process. Upper: Starting with a paper pattern, and then cutting the actual piece from sheet steel. Lower: Painted and adding the forward facing arms which hold the weights. Note the 'step' in the horizontal arm.
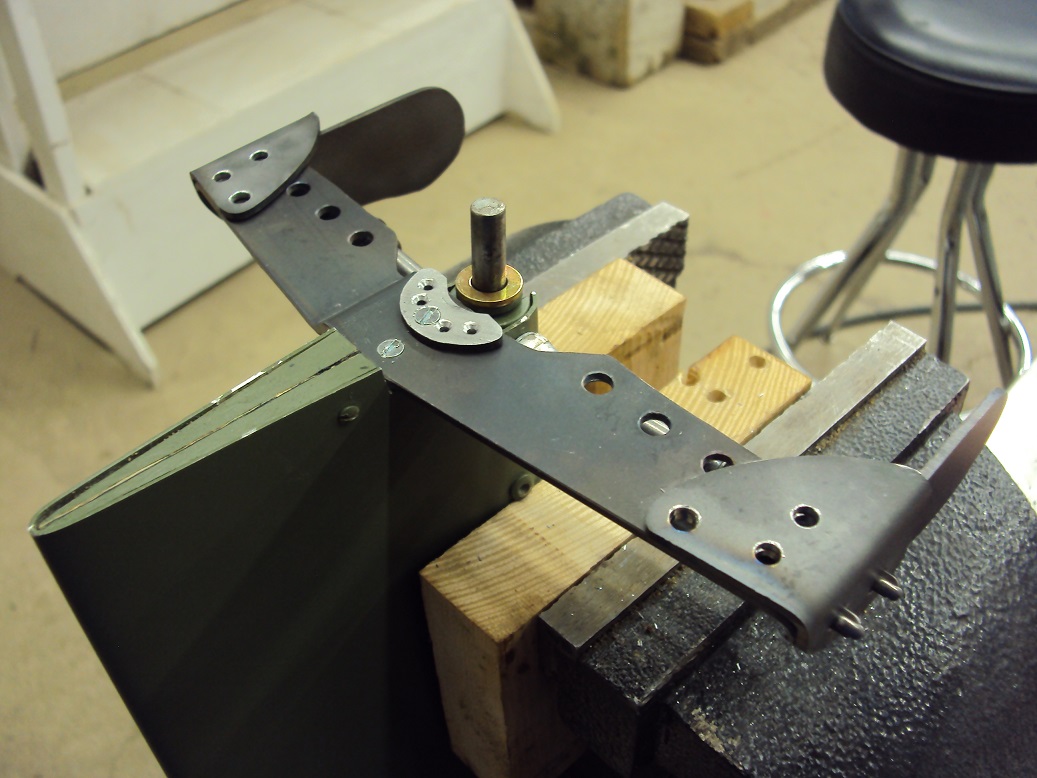
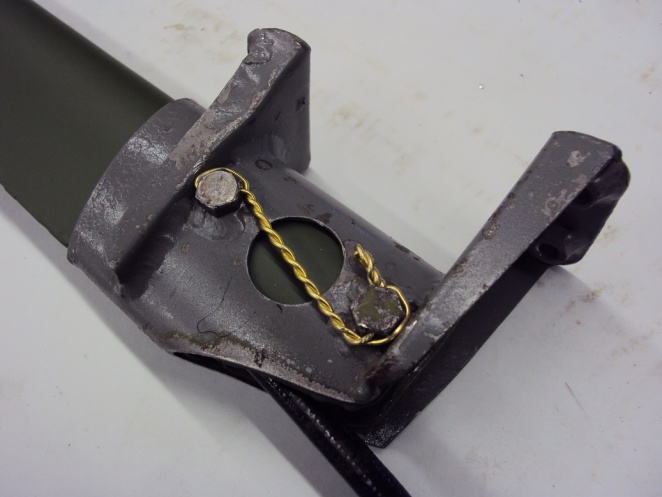
Mounting the unit on the rudder trim tab. Now drilled, reinforced, with a pivot point.
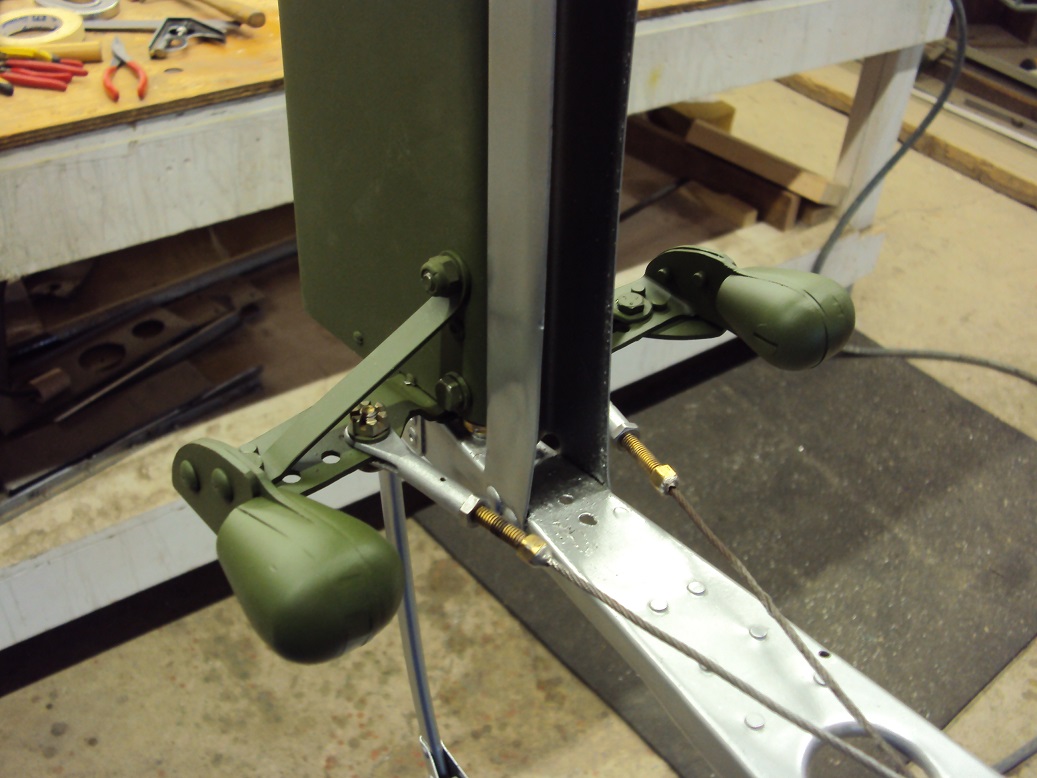
Installed on the rudder with angled reinforcing strips and counterbalance weights. Note that the horizontal plate has a 'step' in it to allow the trim cables to cross without rubbing, as seen in the lower right of the photo.
- Repaired rudder trim tab as required.
- Attached new rudder trim tab counter balance assembly to trim tab and test fit unit to rudder.
- Made up all new rudder trim cables as required (originals missing or unusable).
- Serviced rudder trim control chains as required.
- Serviced rudder trim conduits and direction spindles as required.
- Refurbished rudder trim control circuit installed in fuselage using new turnbuckles, pulleys, fairleads and associated hardware as required.
- Repaired top, forward engine cowl rear support former as required; made up mounting lugs and fastener sockets (originals missing) and installed complete assembly in position.
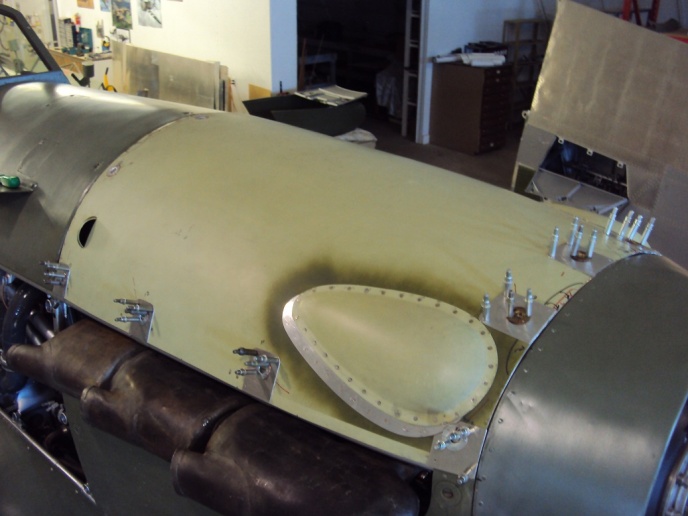
- Test fit newly manufactured top, forward engine cowl that came with aircraft and found it completely unusable. Re-manufactured same as required including relocation of engine cam cover blisters, 80% of all fastener locations and trimming of excess side and front material.
- Re-fit refurbished top, forward engine cowl; prime and paint inner surface with silver butyrate dope and reinstall fasteners.
- Repair front and rear, port side wing walk panels as required; prime and paint inner surfaces with butyrate dope and install in position.


Well it almost fits... The top cowling was not original to the airplane, but was manufactured at some time as part of an earlier 'restoration' effort. It did not fit. Lower: Moving all of the fasteners and the cowl 'bumps' as well as shortening the front of the cowling panel.
- Fabricated starboard side front and rear wing walk panels and mounting brackets (originals missing) as per Hurricane 5418. Prime and paint inner surfaces with silver butyrate dope and install in position.
- Make up missing cooling system access panel and fit to starboard wing walk to fuselage fairing.
- Coat port and starboard, front and rear wing walk panels with non - slip traction compound.
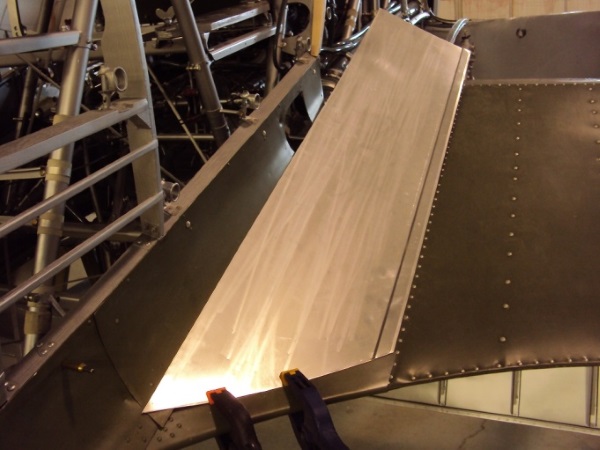
Newly manufactured wing walk panels. Inner surface coated with silver butyrate dope as per original.

Outer surface finished with non-slip traction compound.
- Installed port and starboard centre section fuel tanks and connected fuel and vent lines as required.
- Installed new build belly panel aft of radiator and fabricated filler panel to join up with intermediate panel to rear.
- Made up port and starboard centre section aileron control cables (originals missing) and fit same to pulley cluster of lower control column pedestal.


Wings
- Fabricated port and starboard lower aileron bell-crank actuator cover panels (originals missing). Note: Port side cover also allows access to pitot tube. Primed and painted same with silver butyrate as required.
- Repair as required port and starboard aileron bus cable guard assemblies. Installed same in position on aileron bell-crank assemblies.
- Fabricated pitot tube mounting bracket (original missing) as per Hurricane 5418 and installed in position inside port wing adjacent to aileron bell crank assembly.
- Fabricated pitot tube mast (original missing) and mounted to pitot head.

Pitot tube mounting bracket built from scratch as was the full pitot tube at lower. Ready for installation.
- Installed pitot tube assembly in position in port wing; connected pressure and static lines to pitot tube assembly and installed pitot heat wiring to first junction box.
- Sorted wing attach hardware. Found all bushings present and a quantity of four pins and nuts missing.
- Cleaned and inspected wing attach bushings and fitted same to wing panels and centre section attach points as required.
- Test fit outer wing panels to aircraft and attached starboard outer wing panel with existing original pins and port side with shop bullets.
- Began manufacture of quantity four wing attach pins and nuts to replace missing originals.
- Connected centre section aileron control cables to aileron actuating rods in port and starboard outer wing panels and checked for proper function.

Empennage
- Continued rib repairs to port and starboard elevators, rudder, horizontal and vertical stabilizers.
- Continued leading edge repairs to all above as required.
- Continued trailing edge repairs to all above as required.
- Completed fabrication of port side tail wheel, lower rudder hinge, horizontal stabilizer mounting, service/inspection panel (original missing) as per Hurricane 5418. Trial fit in place.
- Completed manufacture of lower, rear fuselage to rudder streamlined fairing (original missing). Covered same with Poly Fibre fabric using Stits process through to silver.
- Build up fuselage to rudder streamlined fairing mounting brackets as required and secured in place on lower, rear fuselage and rear face of lower vertical stabilizer spar. Installed fairing in position on lower rear fuselage for test fit.
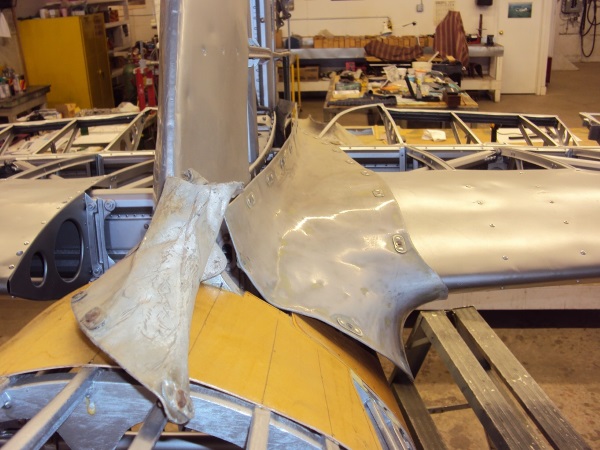
- Repaired all vertical and horizontal stabilizer to fuselage fairings as required. Note: These fairings, although all present, were extensively damaged (as if trampled by a herd of cattle) and required considerable man hour investment, but at the end of this process, all these original components will be refitted to the aircraft.

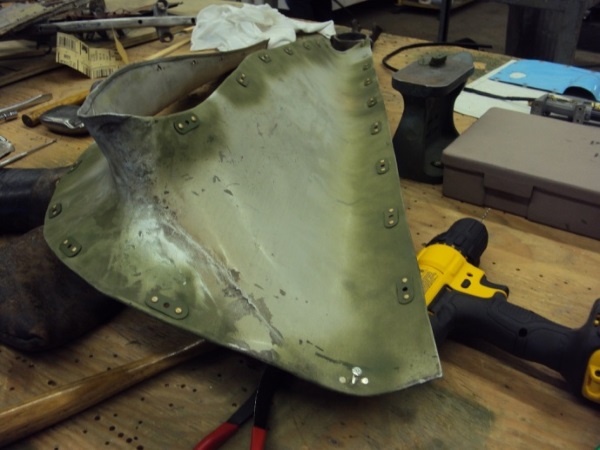
'Cattle trampled' fairings for the vertical and horizontal stabilizers. For the sake of originality, these were repaired and reinstalled.
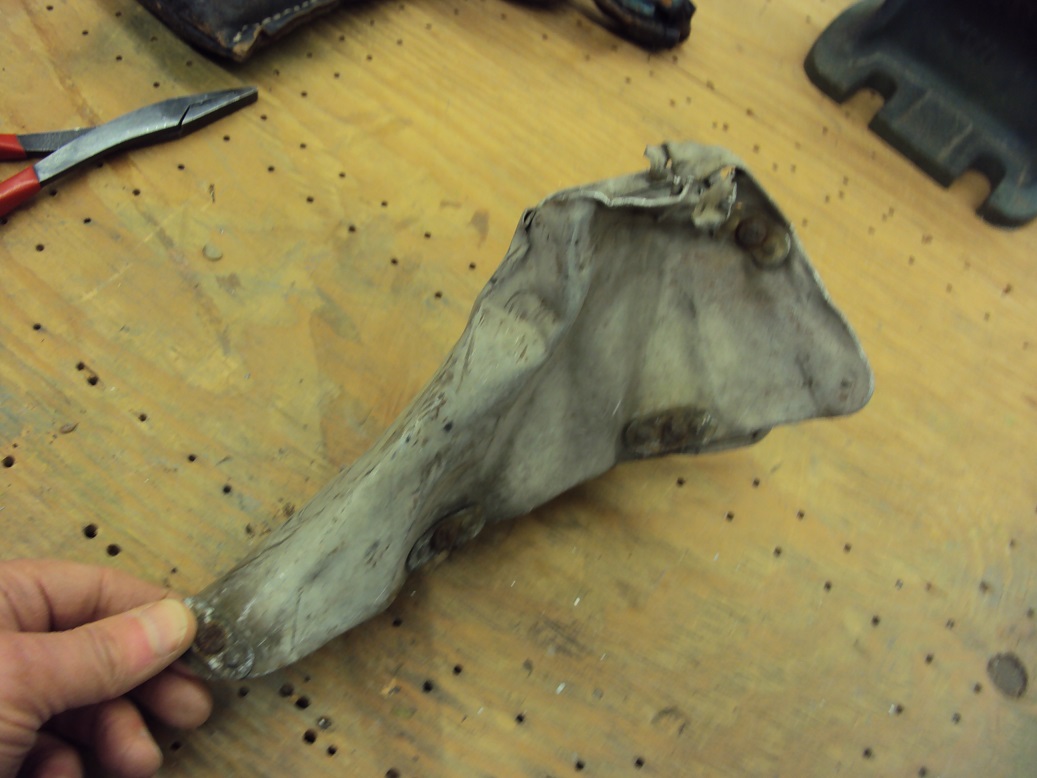
- Fabricate new leather rudder cable anti chafing guides and install in position in horizontal stabilizer fairings.
- Continued rib repairs to port and starboard elevators, rudder, horizontal and vertical stabilizers.
- Continued leading and trailing edge repairs to all above as required.
- Prime and paint inner surfaces of all vertical and horizontal stabilizer to fuselage fairings with silver butyrate dope as required.
- Test rig elevator, rudder and trim control cables to surfaces - check for proper function.

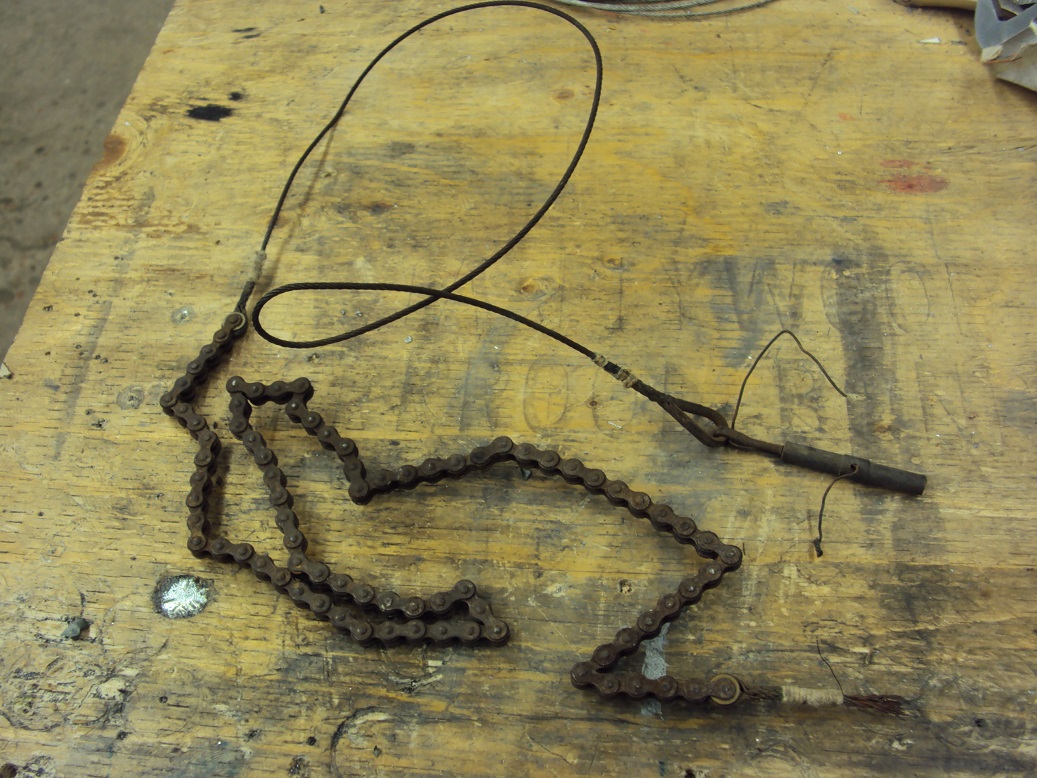
Trim cable before and after restoration: From rusted and cut to serviceable and installed.
Mosquito
Jack McWilliam
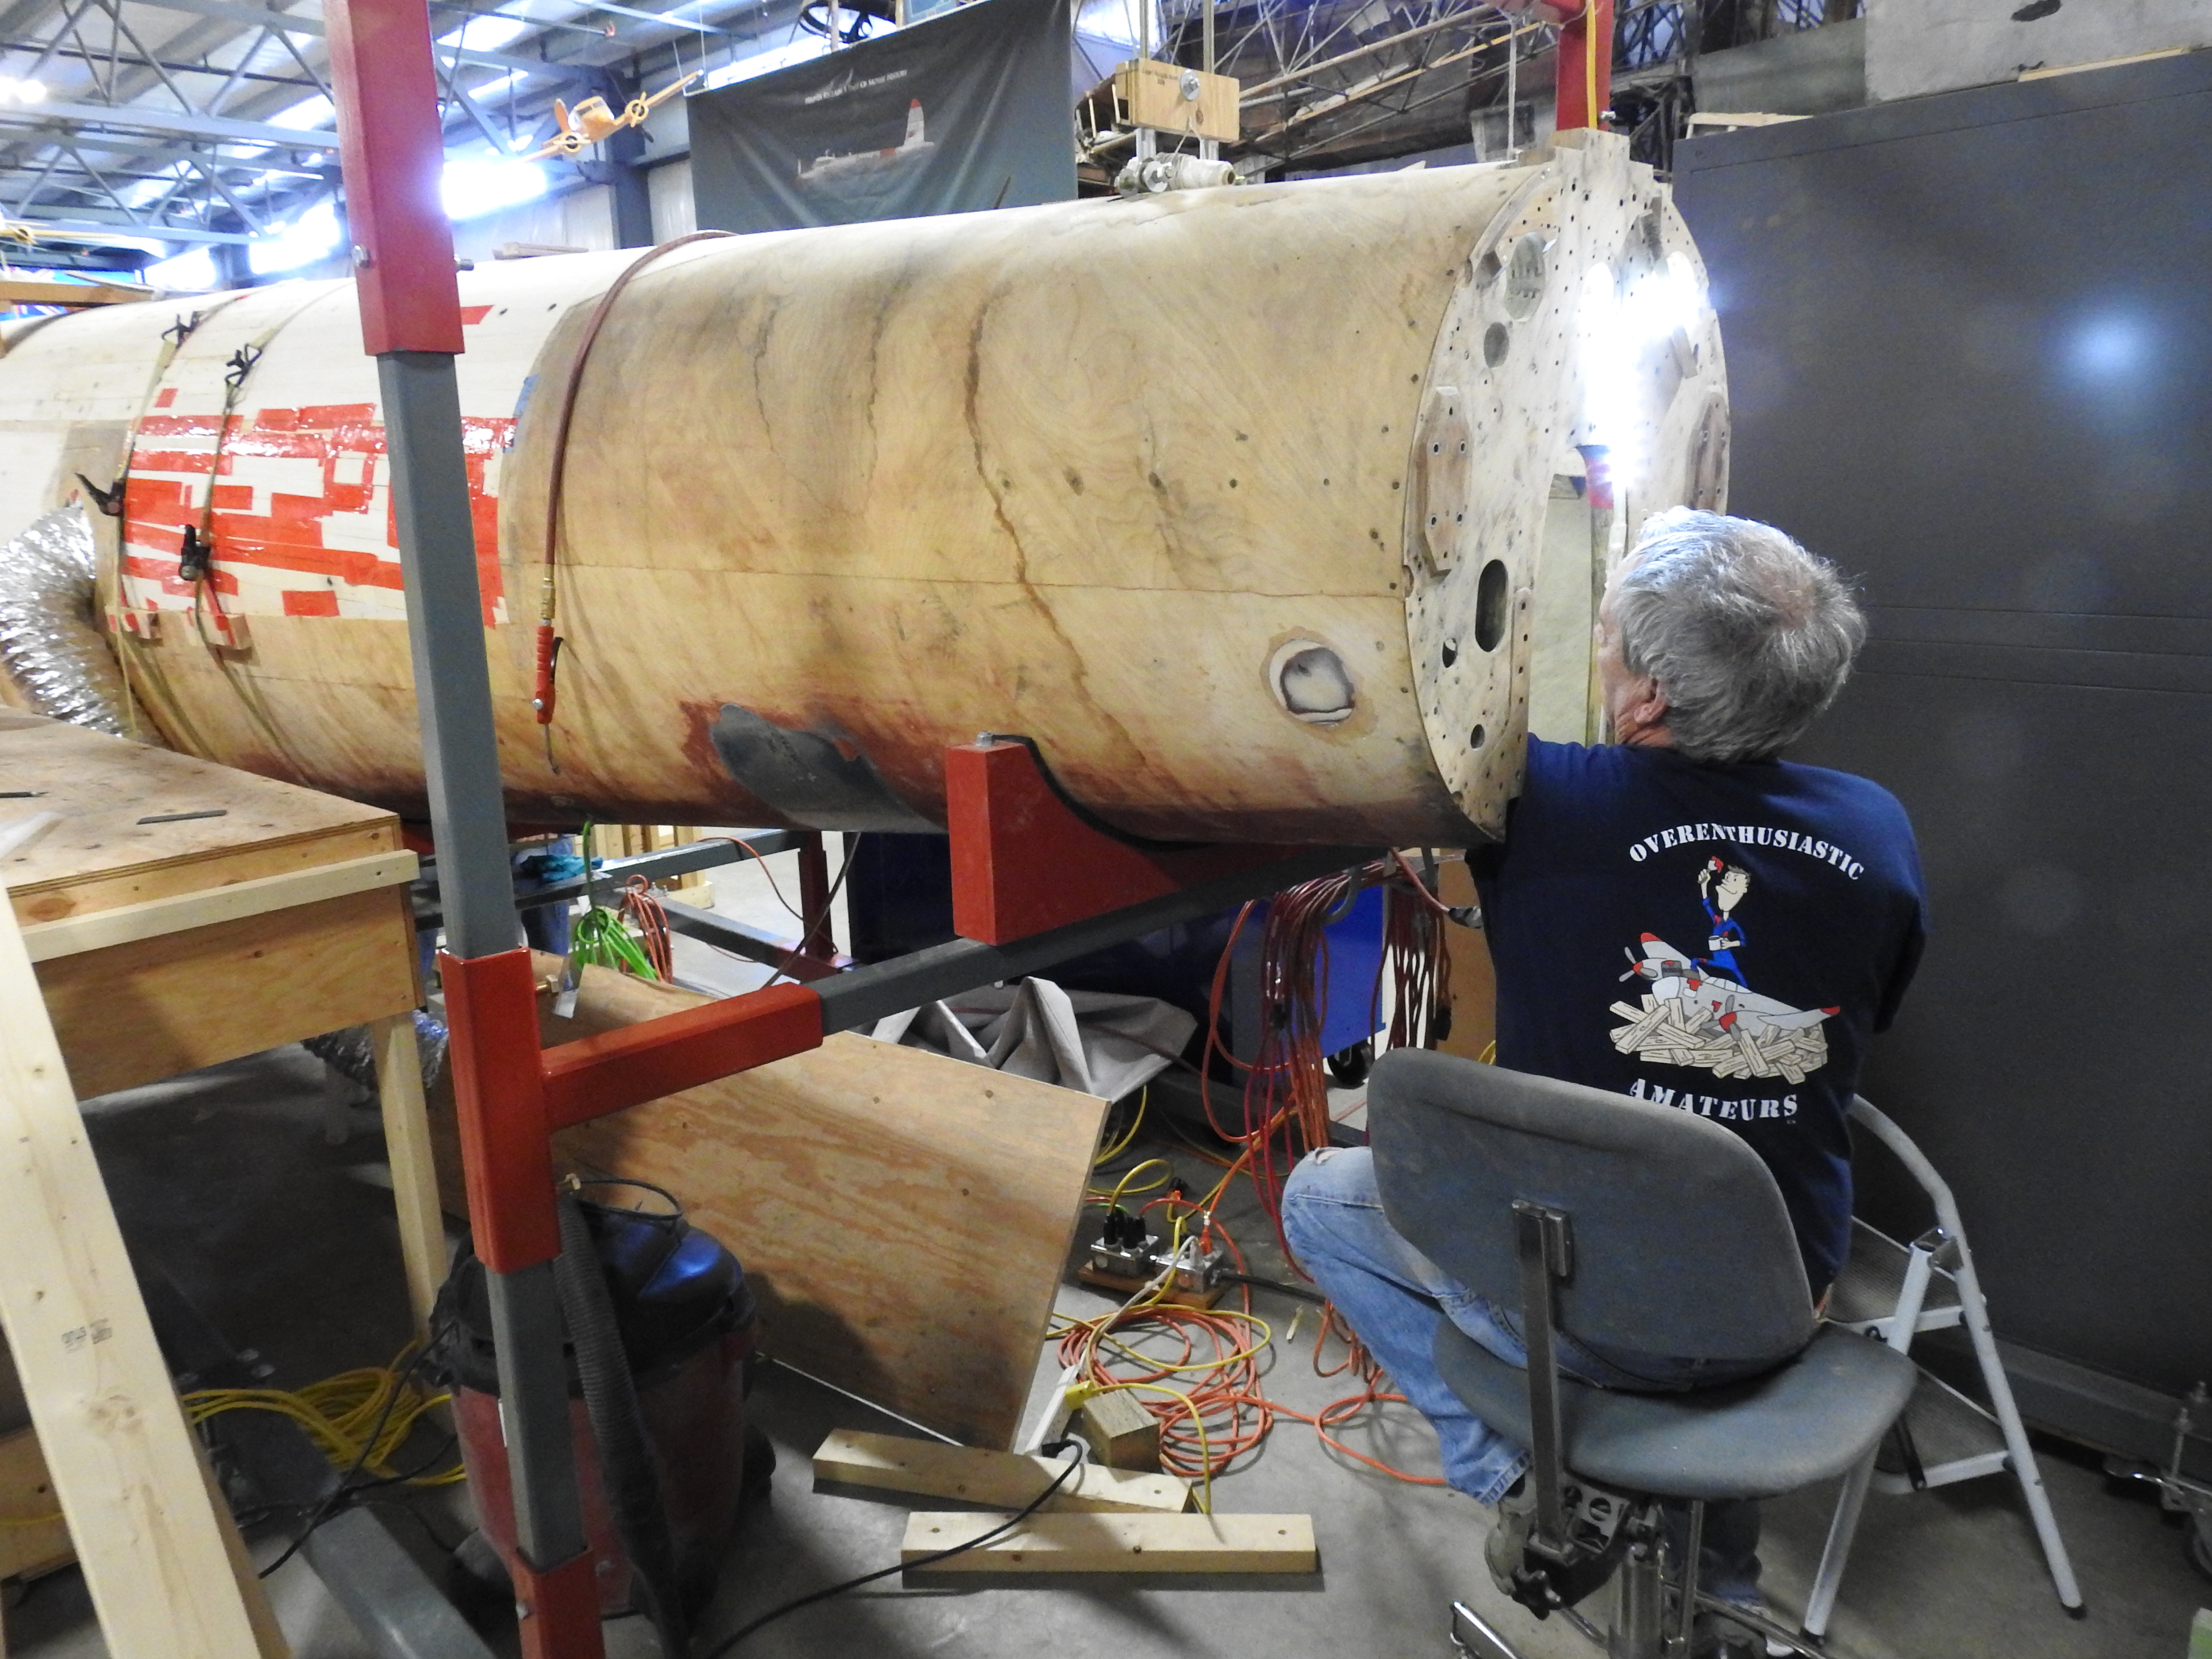
Starting from the front of the aircraft, it is strange to report nothing is going on structurally forward of bulkhead three as it is now complete. With the painting of the forward inner fuselage complete, we are now working on the copper grounding straps to clean them of all paint and corrosion; a task that Don Y. has been at for some time. Once clean, we will work on gently rolling the copper flat with a jewellery roller.
One of the things that has worked well is that we have gone to a very thin epoxy that can be sucked into the wood using a vacuum pump. This also helped to fill the nail holes needed to reattach the copper strips. At times it has worked so well that we find epoxy entering the hose to the pump. Picking up on an existing nail hole with a suction cup to apply the vacuum, a syringe is used to inject the thin epoxy an inch or so away. We have also used the syringe to inject epoxy in areas where the pump is not appropriate. As stated before, we know there are issues with bonding between the balsa and skins both inner and outer.
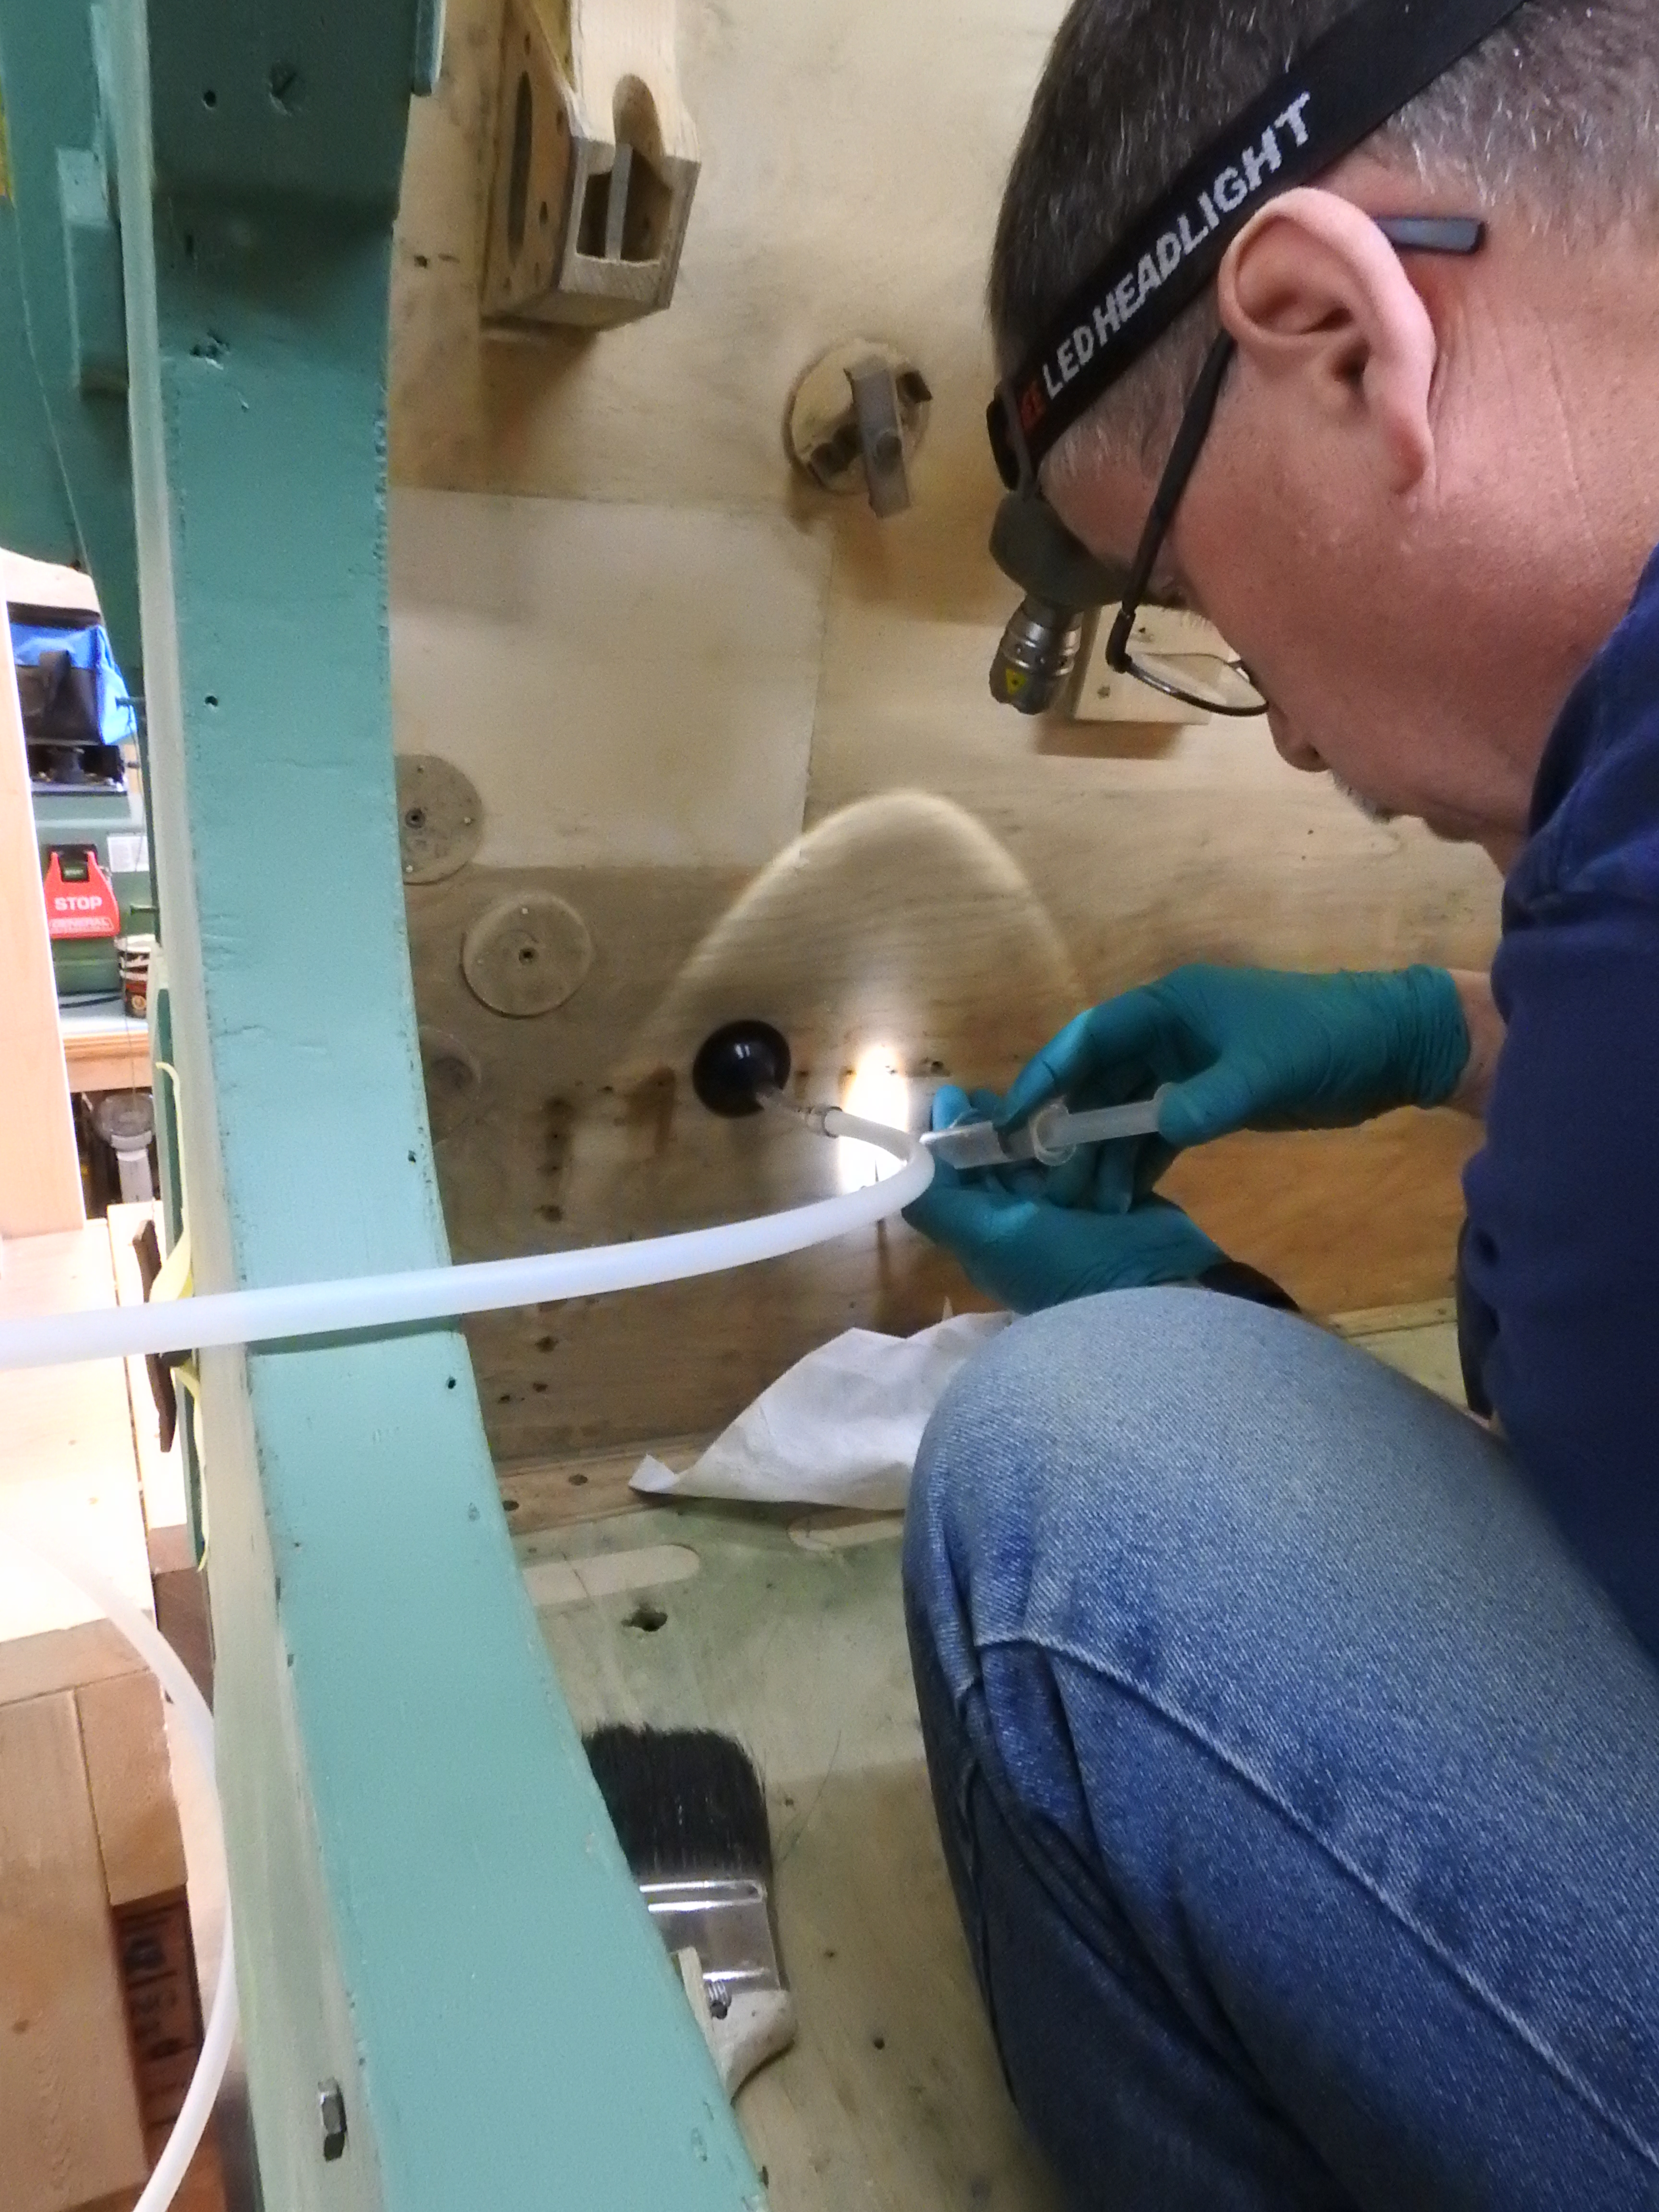
Using a vacuum line to a small hole on the inner skin, Michael H. uses a hypodermic to inject a thin epoxy in areas of the fuselage where we suspect that the original adhesives are no longer holding. This method allows us to strengthen the monocoque structure without having to open up the inner or outer skins; a process which can be very labour intensive with a high degree of risk to the original structure.
I would like to acknowledge Davey D. who has been relentless at cleaning the interior of the aircraft.
The detailed work completed is exceptional; exposing damaged areas, markings hidden for decades and making it easier to repair while giving us a uniform surface for painting.
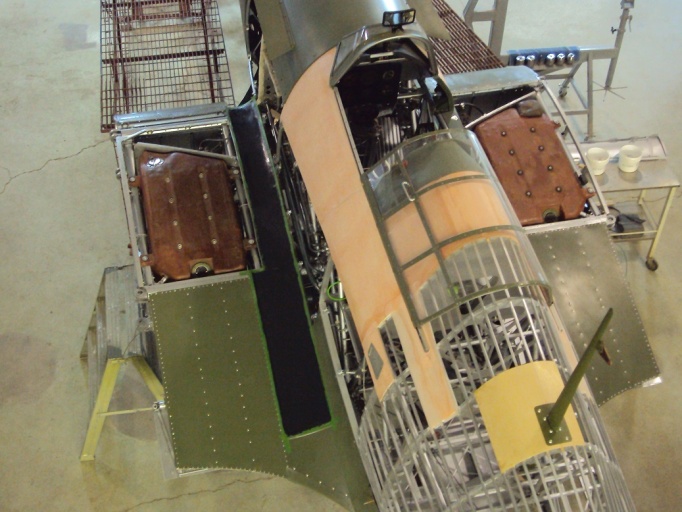
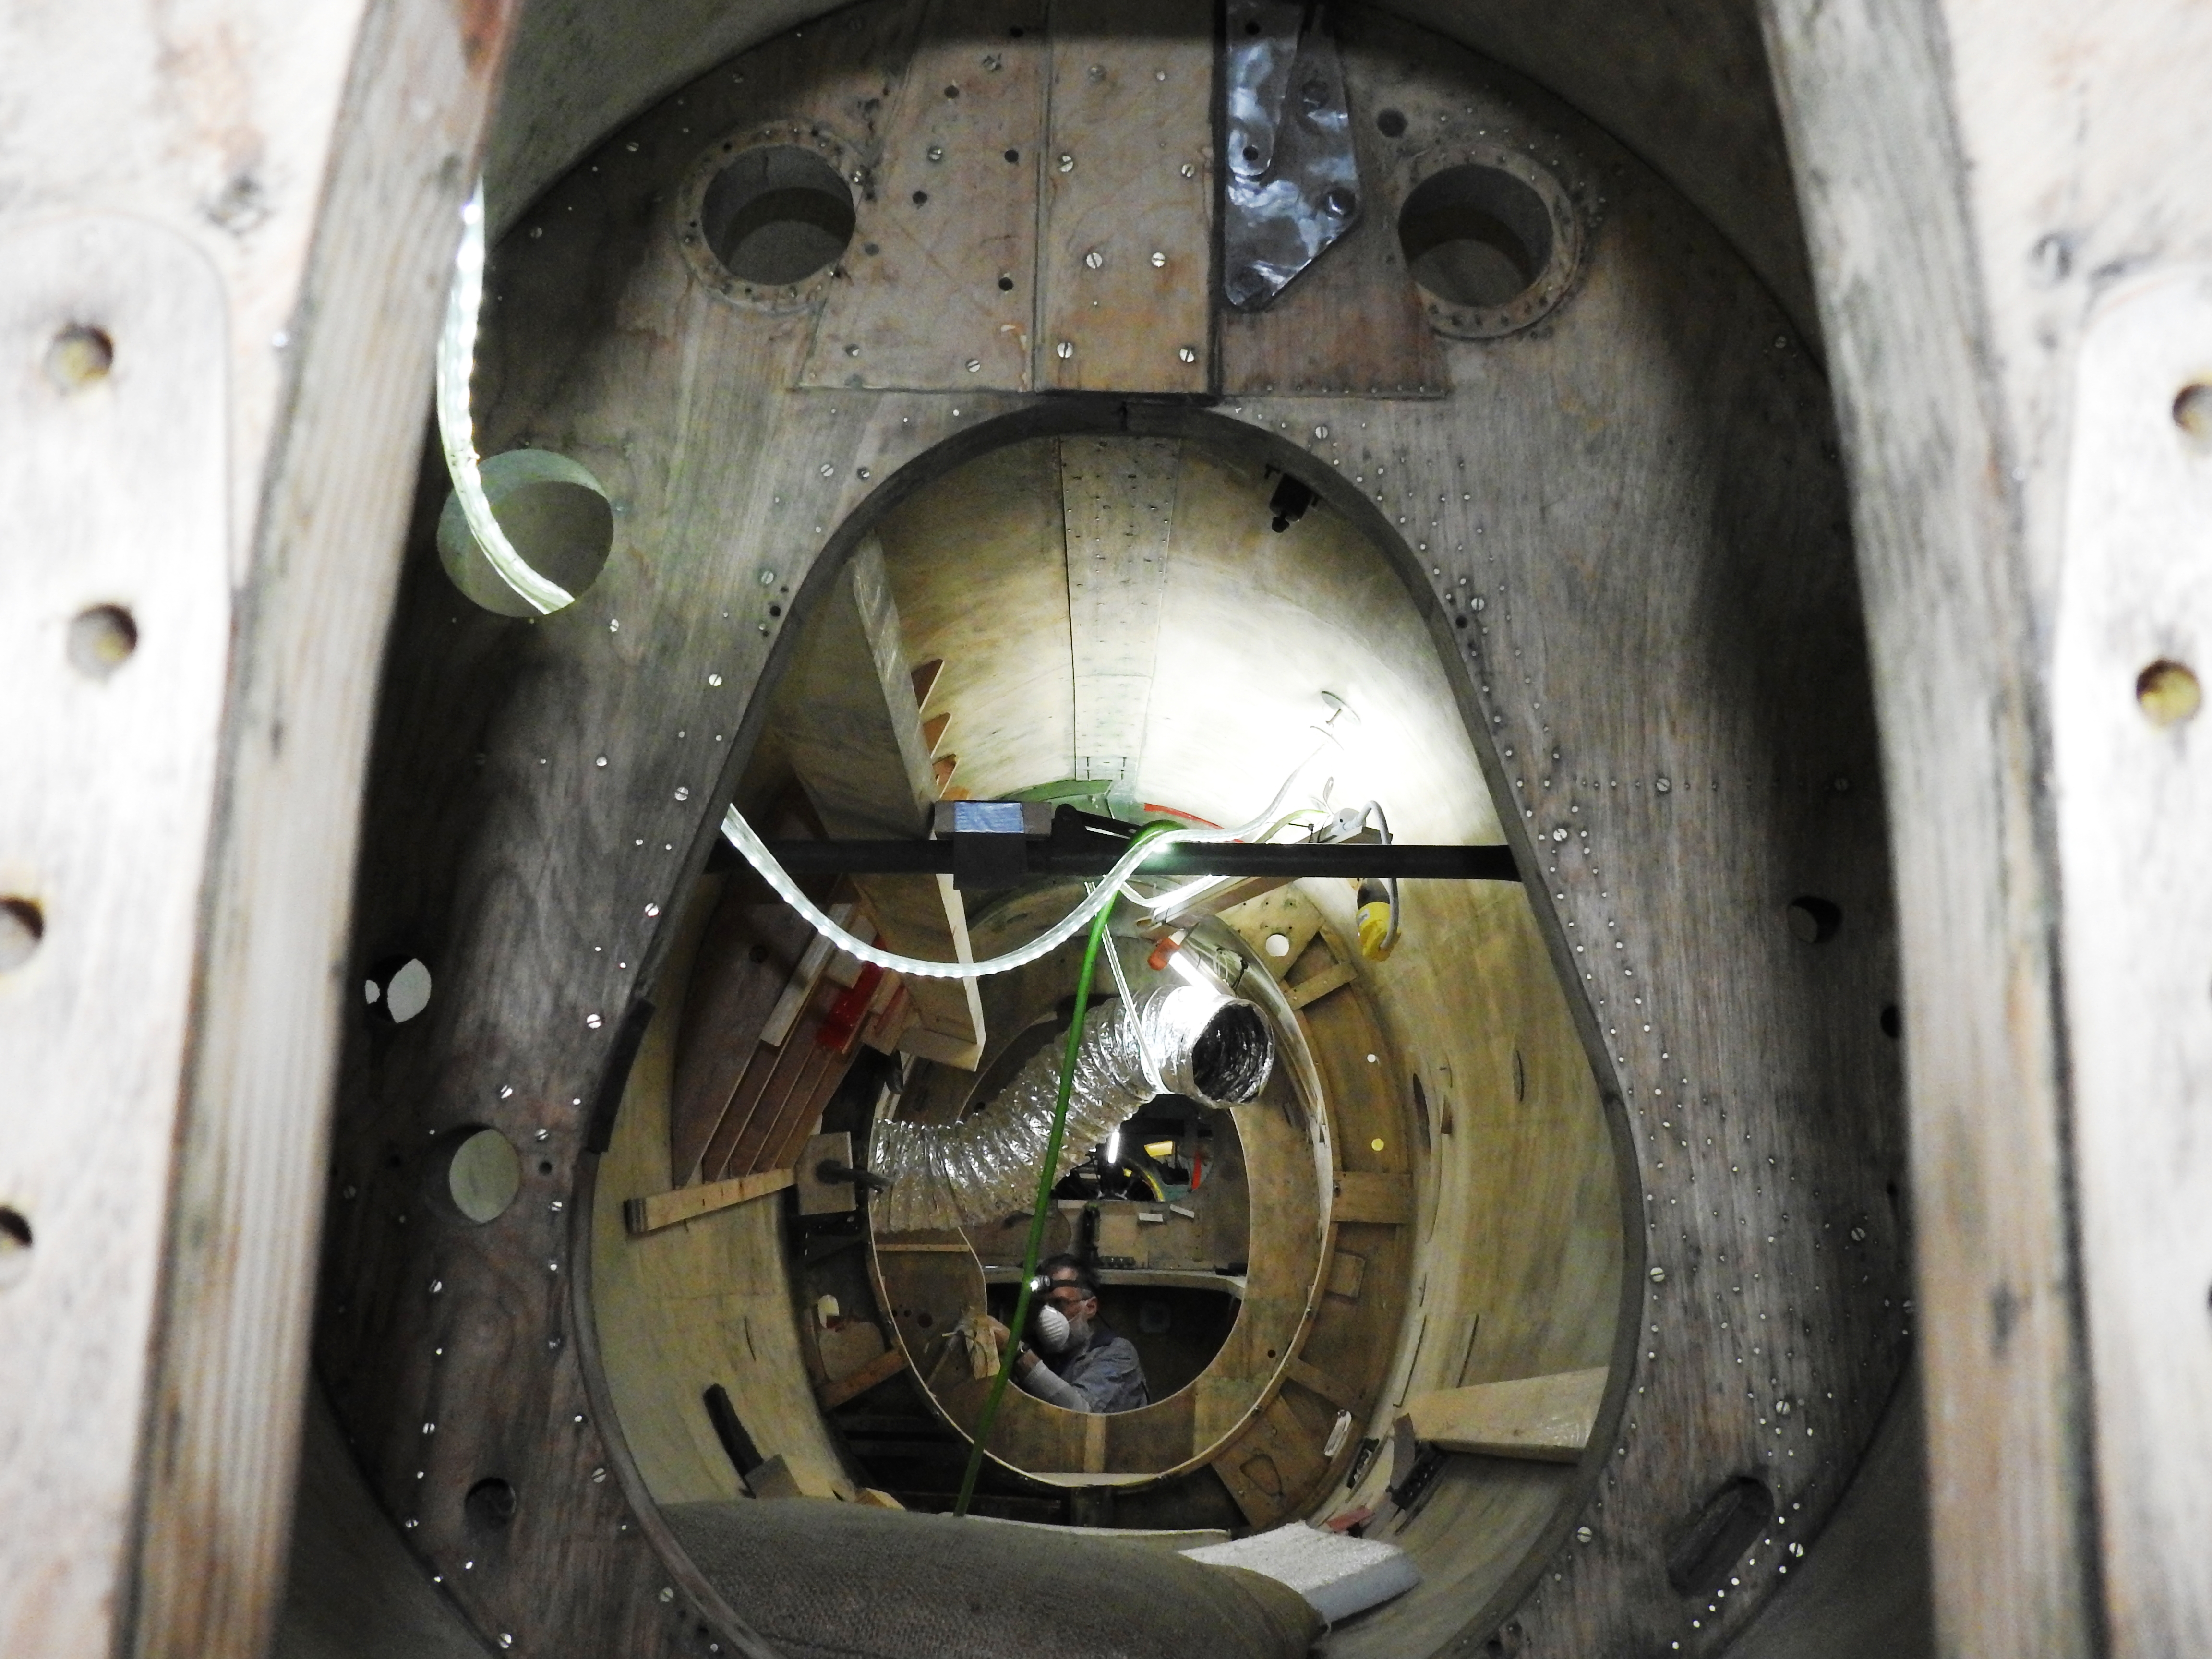
We are now working aft of the camera bay in the equipment bay, or for those in aviation, 'The Hellhole'. This area has been ninety per cent cleaned and repairs are about sixty percent complete. Others have now started working on components that will be readied for reinstallation. Work becomes more challenging as we move aft because the fuselage tapers to a smaller and smaller diameter.
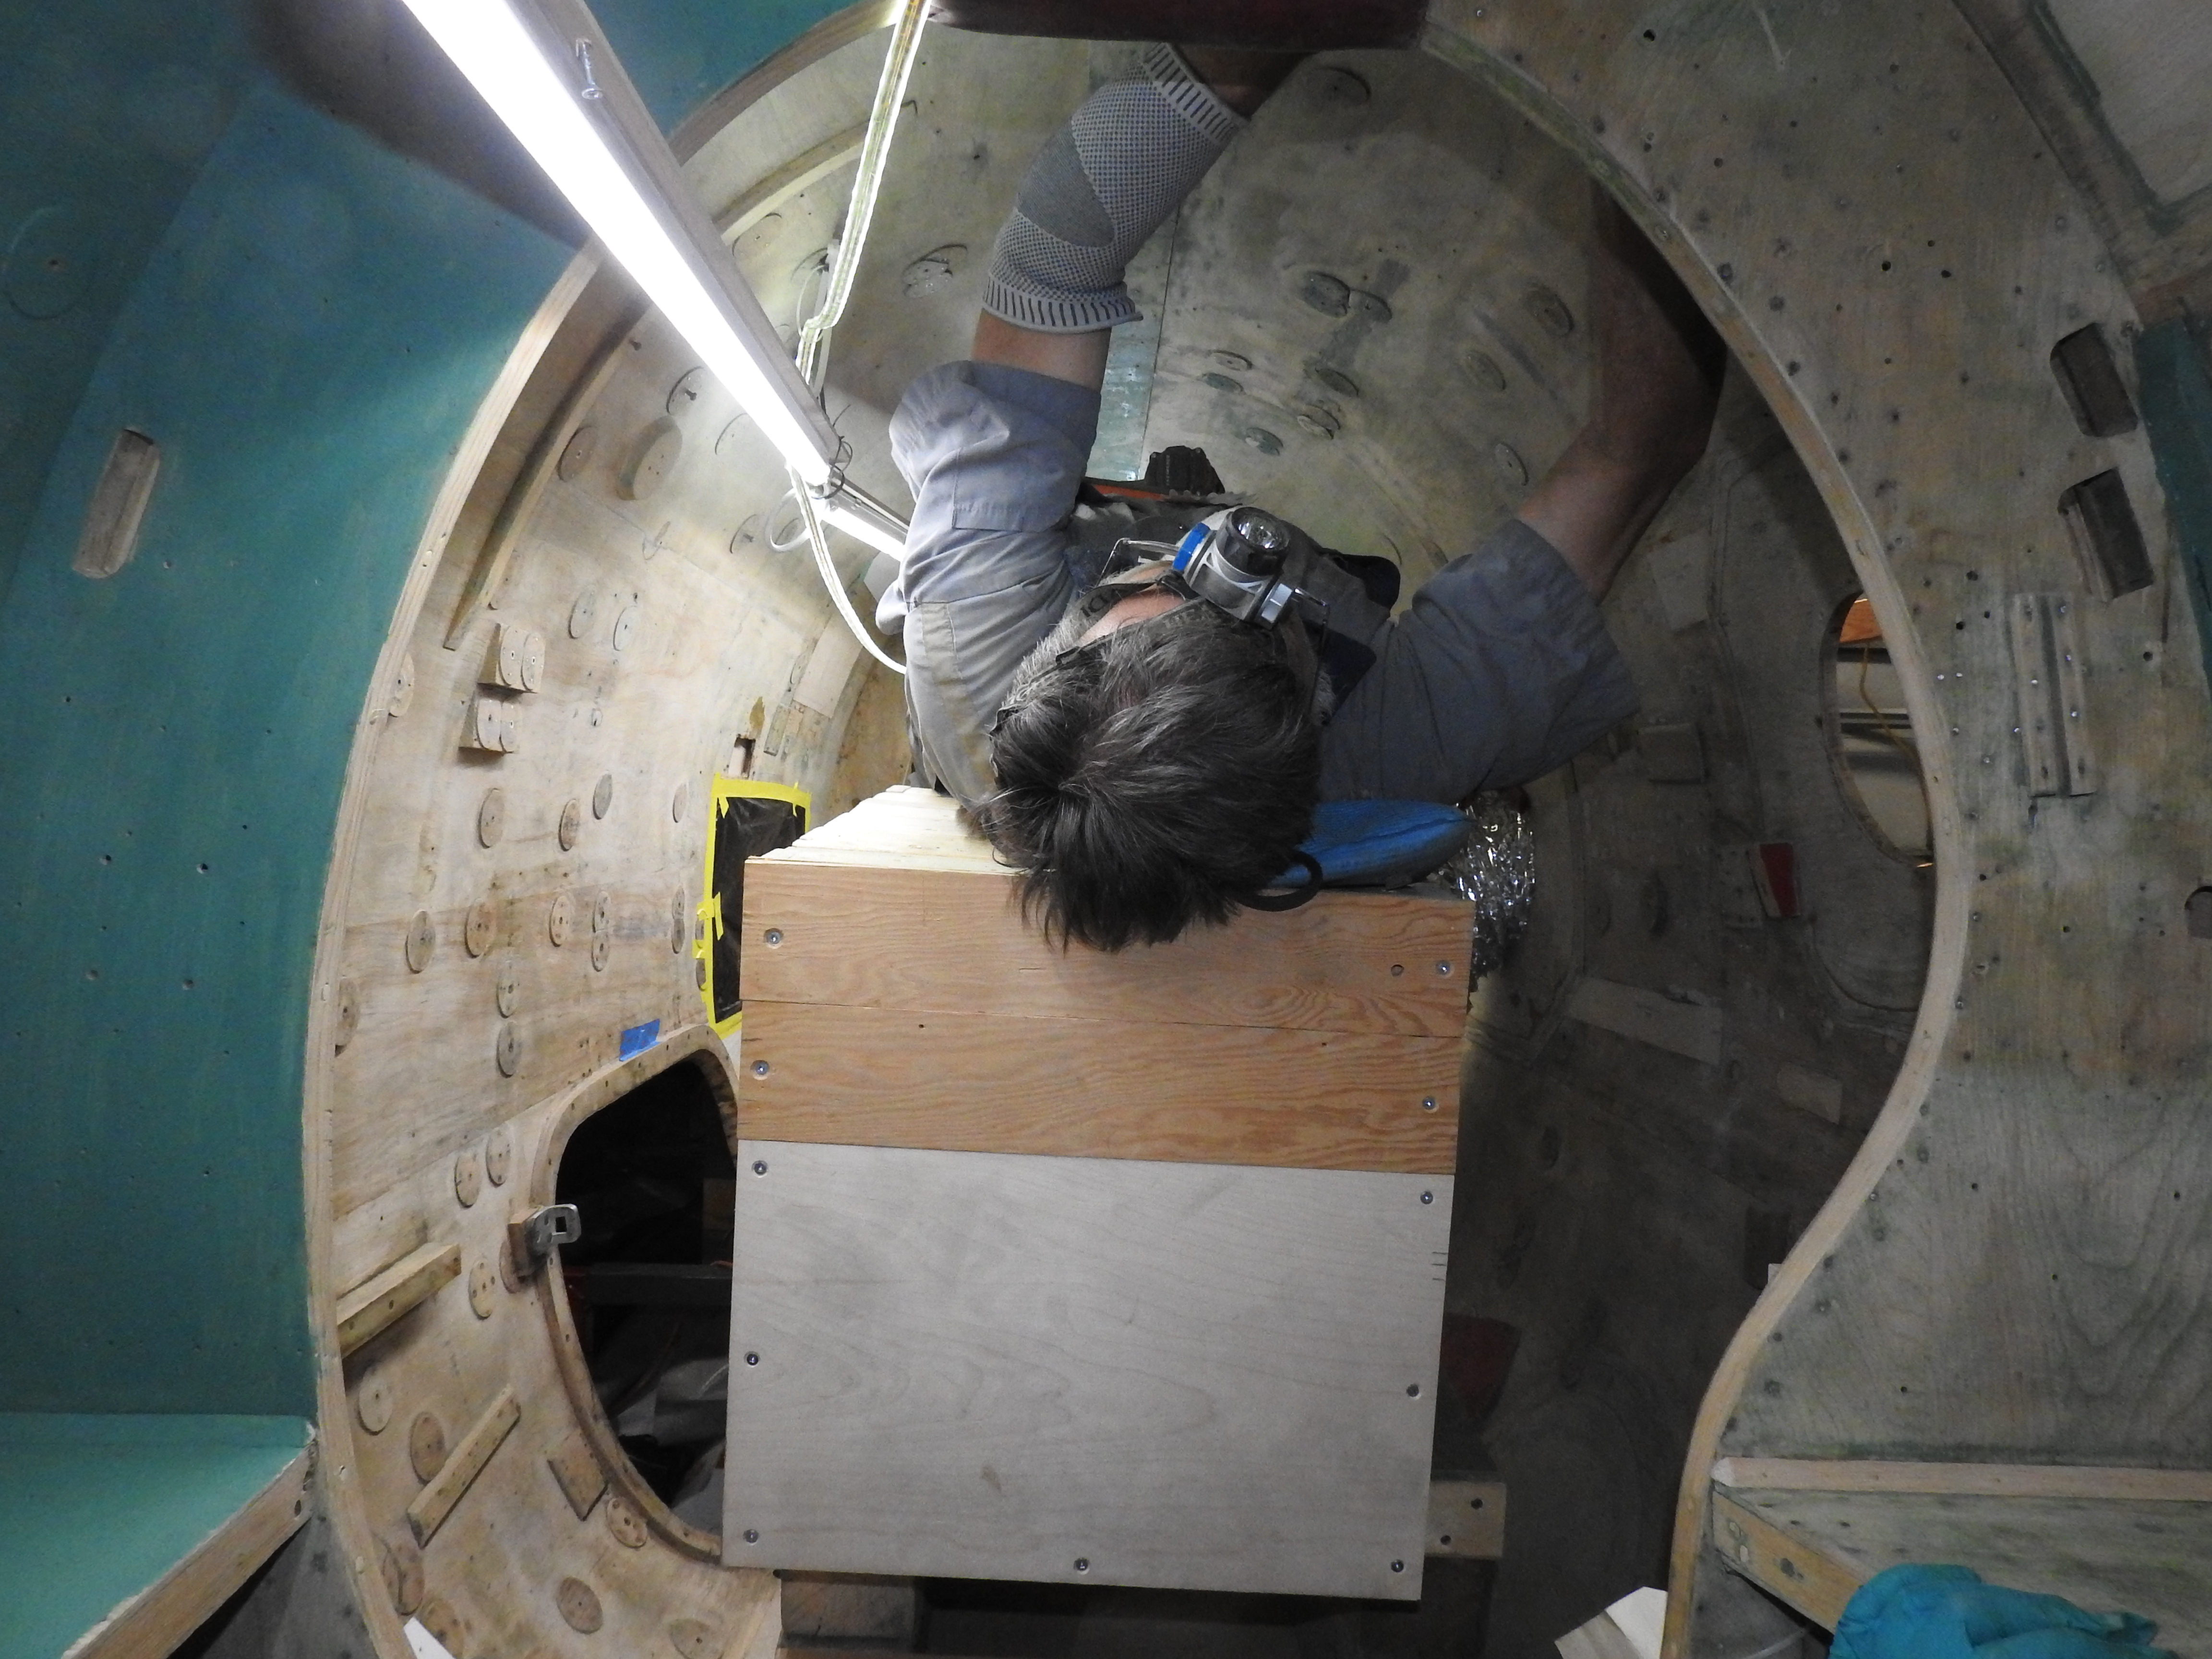

It ain't the ceiling of the Sistine Chapel, but... Davey D. uses a purpose built work platform to scrape and remove layers of old paint and grime from inside the fuselage. After an afternoon spent chipping and grinding old green primer, Davey suggested that he looked like Shrek.
Don Y., Cam B. and Michael H. have been taking shifts working from the tail inward, finally clearing and removing the old varnish, oil and dirt. This area provides just enough room for one arm, or your head if you turn it just right.
Don H. works in one of the awkward spots to clean and remove paint and +70 years of grunge from the inside, rear fuselage structure. Room for only one arm at a time.
Something that has been exposed in the aft tail area is the difference in construction between the two fuselage halves. The left side has been assembled with wood screws while the right side is assembled with a large number of nails.
Bulkhead 6, at the rear of the fuselage. The port side was constructed with a reasonable number of brass screws. The starboard side is riddled with dozens and dozens of brass nails, highlighting the fact that the whole fuselage was made in halves and by different people who did not adhere to similar standards or construction techniques.
We have elected to highlight this area by not covering it with paint, but coating it with the thin transparent epoxy. From a preservation perspective it is important to show some of the things we have discovered rather than cover them back up. It is also a testament to the care and skill the team is showing to expose these areas without doing any damage. I think one company that is happy with our work is the makers of Advil as this is a difficult spot to access and work in, even for a twenty year old.
I think we can say the interior will be cleaned completely by late third quarter, to early fourth with more painting to follow soon thereafter.
The exterior has presented the biggest challenge this quarter, as we continue to struggle on a couple of fronts; one the scarf joints on the new skins and the other, bonding the exterior skins. Gary T., Andy W. and Dick S. have focused on experimenting with various vacuum pump methods combined with strapping the full circumference of the fuselage. While some efforts look promising, nothing has yet emerged as a perfect solution.
The team has worked on the scarf joint issue with some areas being completed but at a slow pace. We see an end in sight with the biggest problem coming from scarfing the 45 degree grained plywood with a 12:1 scarf on material which is just 1.5 mm thick. One wrong stroke, or one too many, means scrapping the piece and starting over.
The vacuum bagging is our hope for installation of the outer skins that gives us the most control with the best consistent finish, but we struggle with the high leak rate on the bagging. We have also learned that bagging the inside of the fuselage as well as the new outside skin at the same time will give us some added vacuum pressure. We were able to get to 22 in. Hg on a small area patch, but the question becomes how difficult is it to scale up from what we have done. Bear in mind we are pulling a vacuum on balsa, old dry wood, and loose glue joints with the inner skins riddled with nail holes.
Gary T. shows off some very tricky work in the way of a new exterior skin patch that has been scarfed on three edges of one surface and on one edge of the opposite surface. Gary applied his considerable skills to create a 12:1 scarf on 1.5 mm, three ply birch. (The birch runs ~$800/sheet).
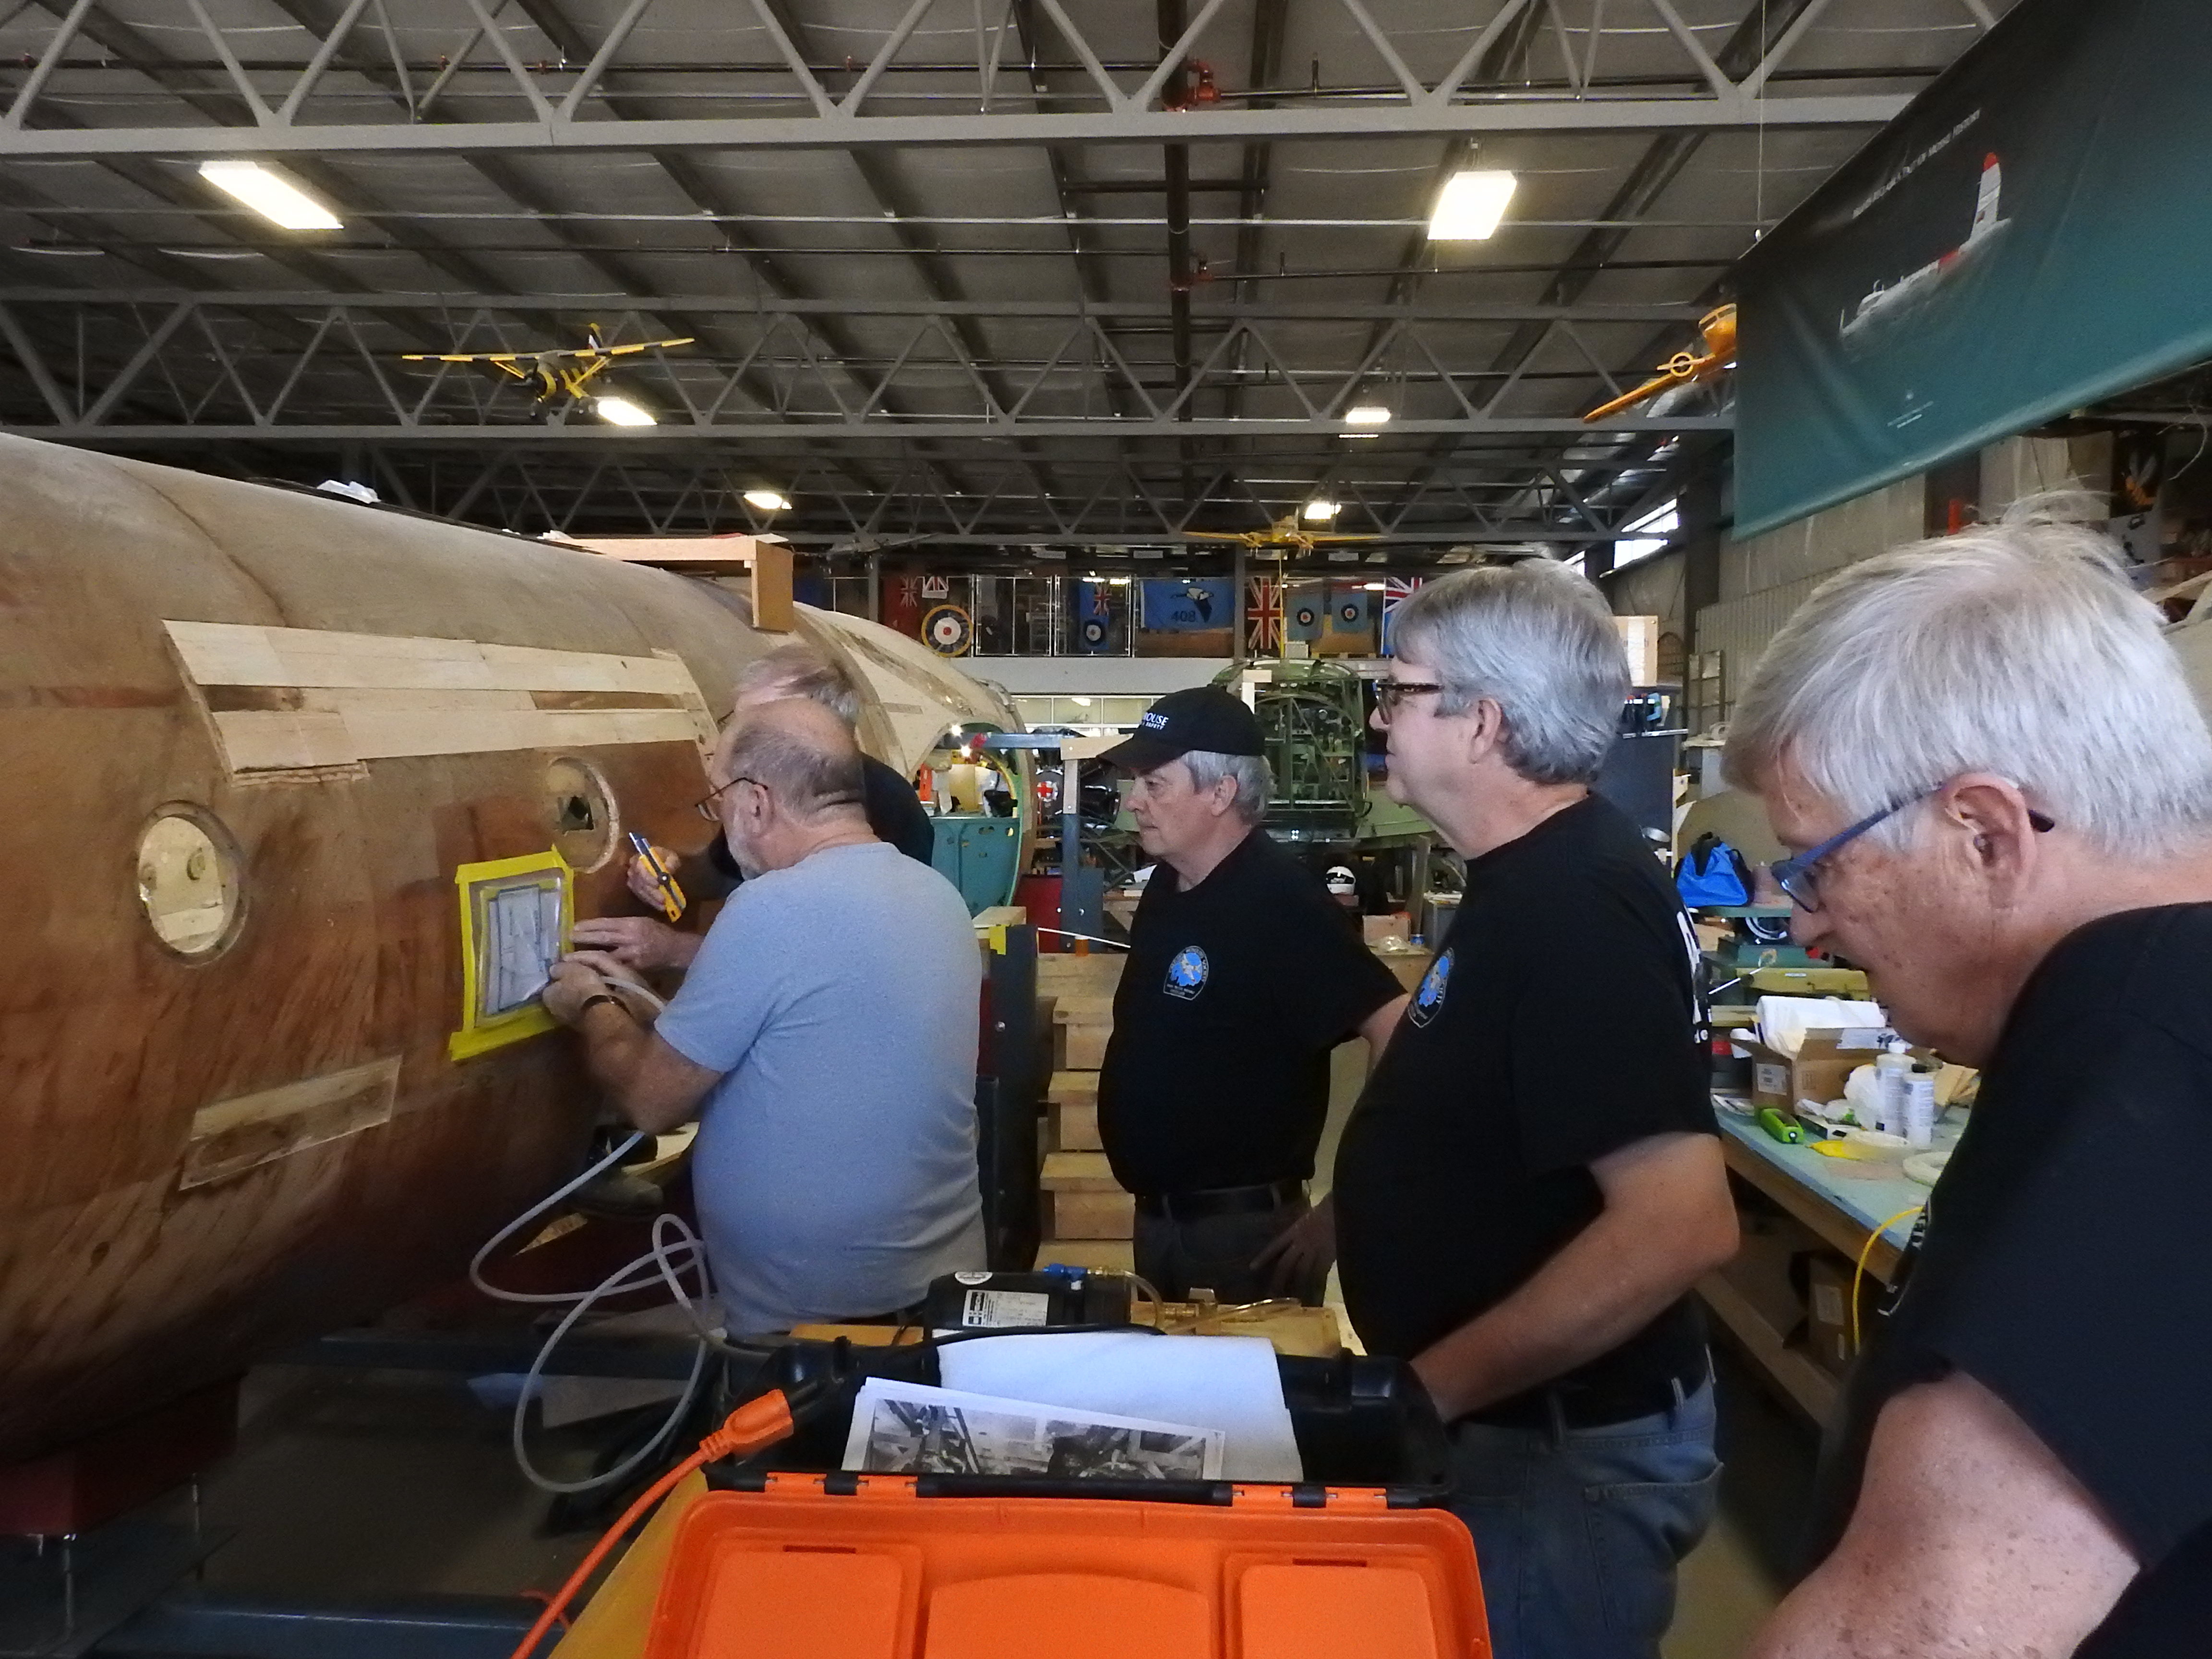
At a ratio of 'two working' to 'three watching', Jack M. and Roger D. test the vacuum bagging technique on a skin patch while Don H., Brian C. and Cam B., learn, watch and laugh offer helpful insights.
I am confident it will work, but we are trying to determine what size pump will be needed for the large exterior plywood skins. We hope it will be small enough so that we don't dim the lights in town when we turn on the motor. Don H. has been constructing a manifold to help control the vacuum as well as a method to measure our results.
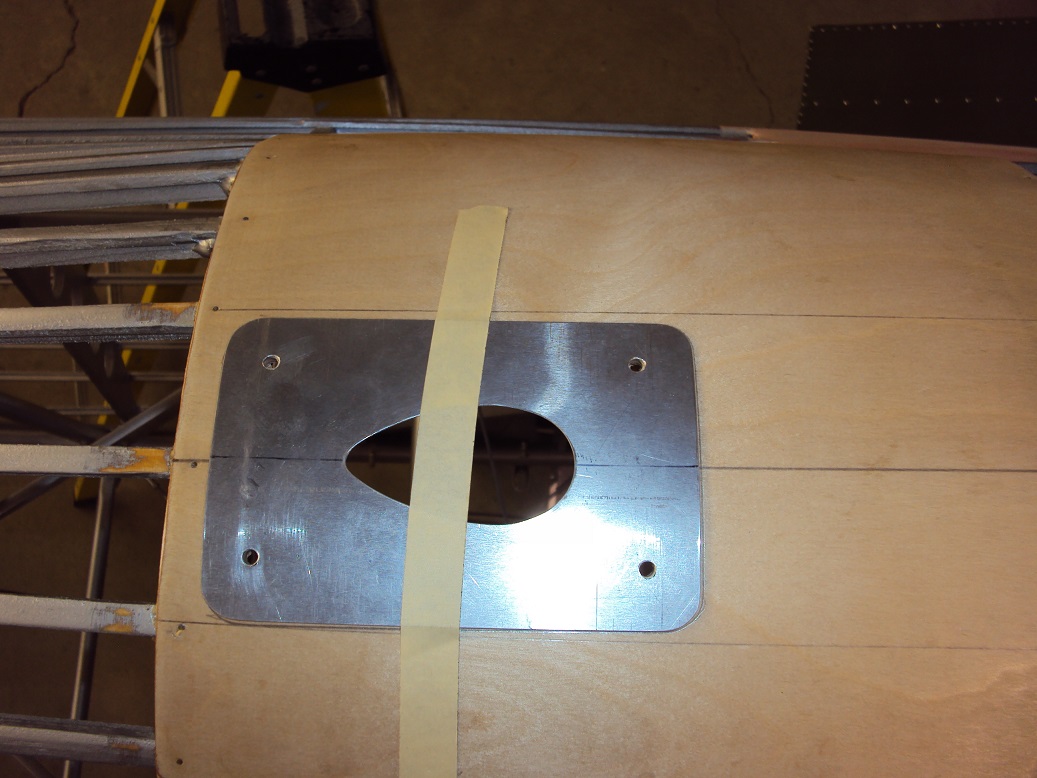
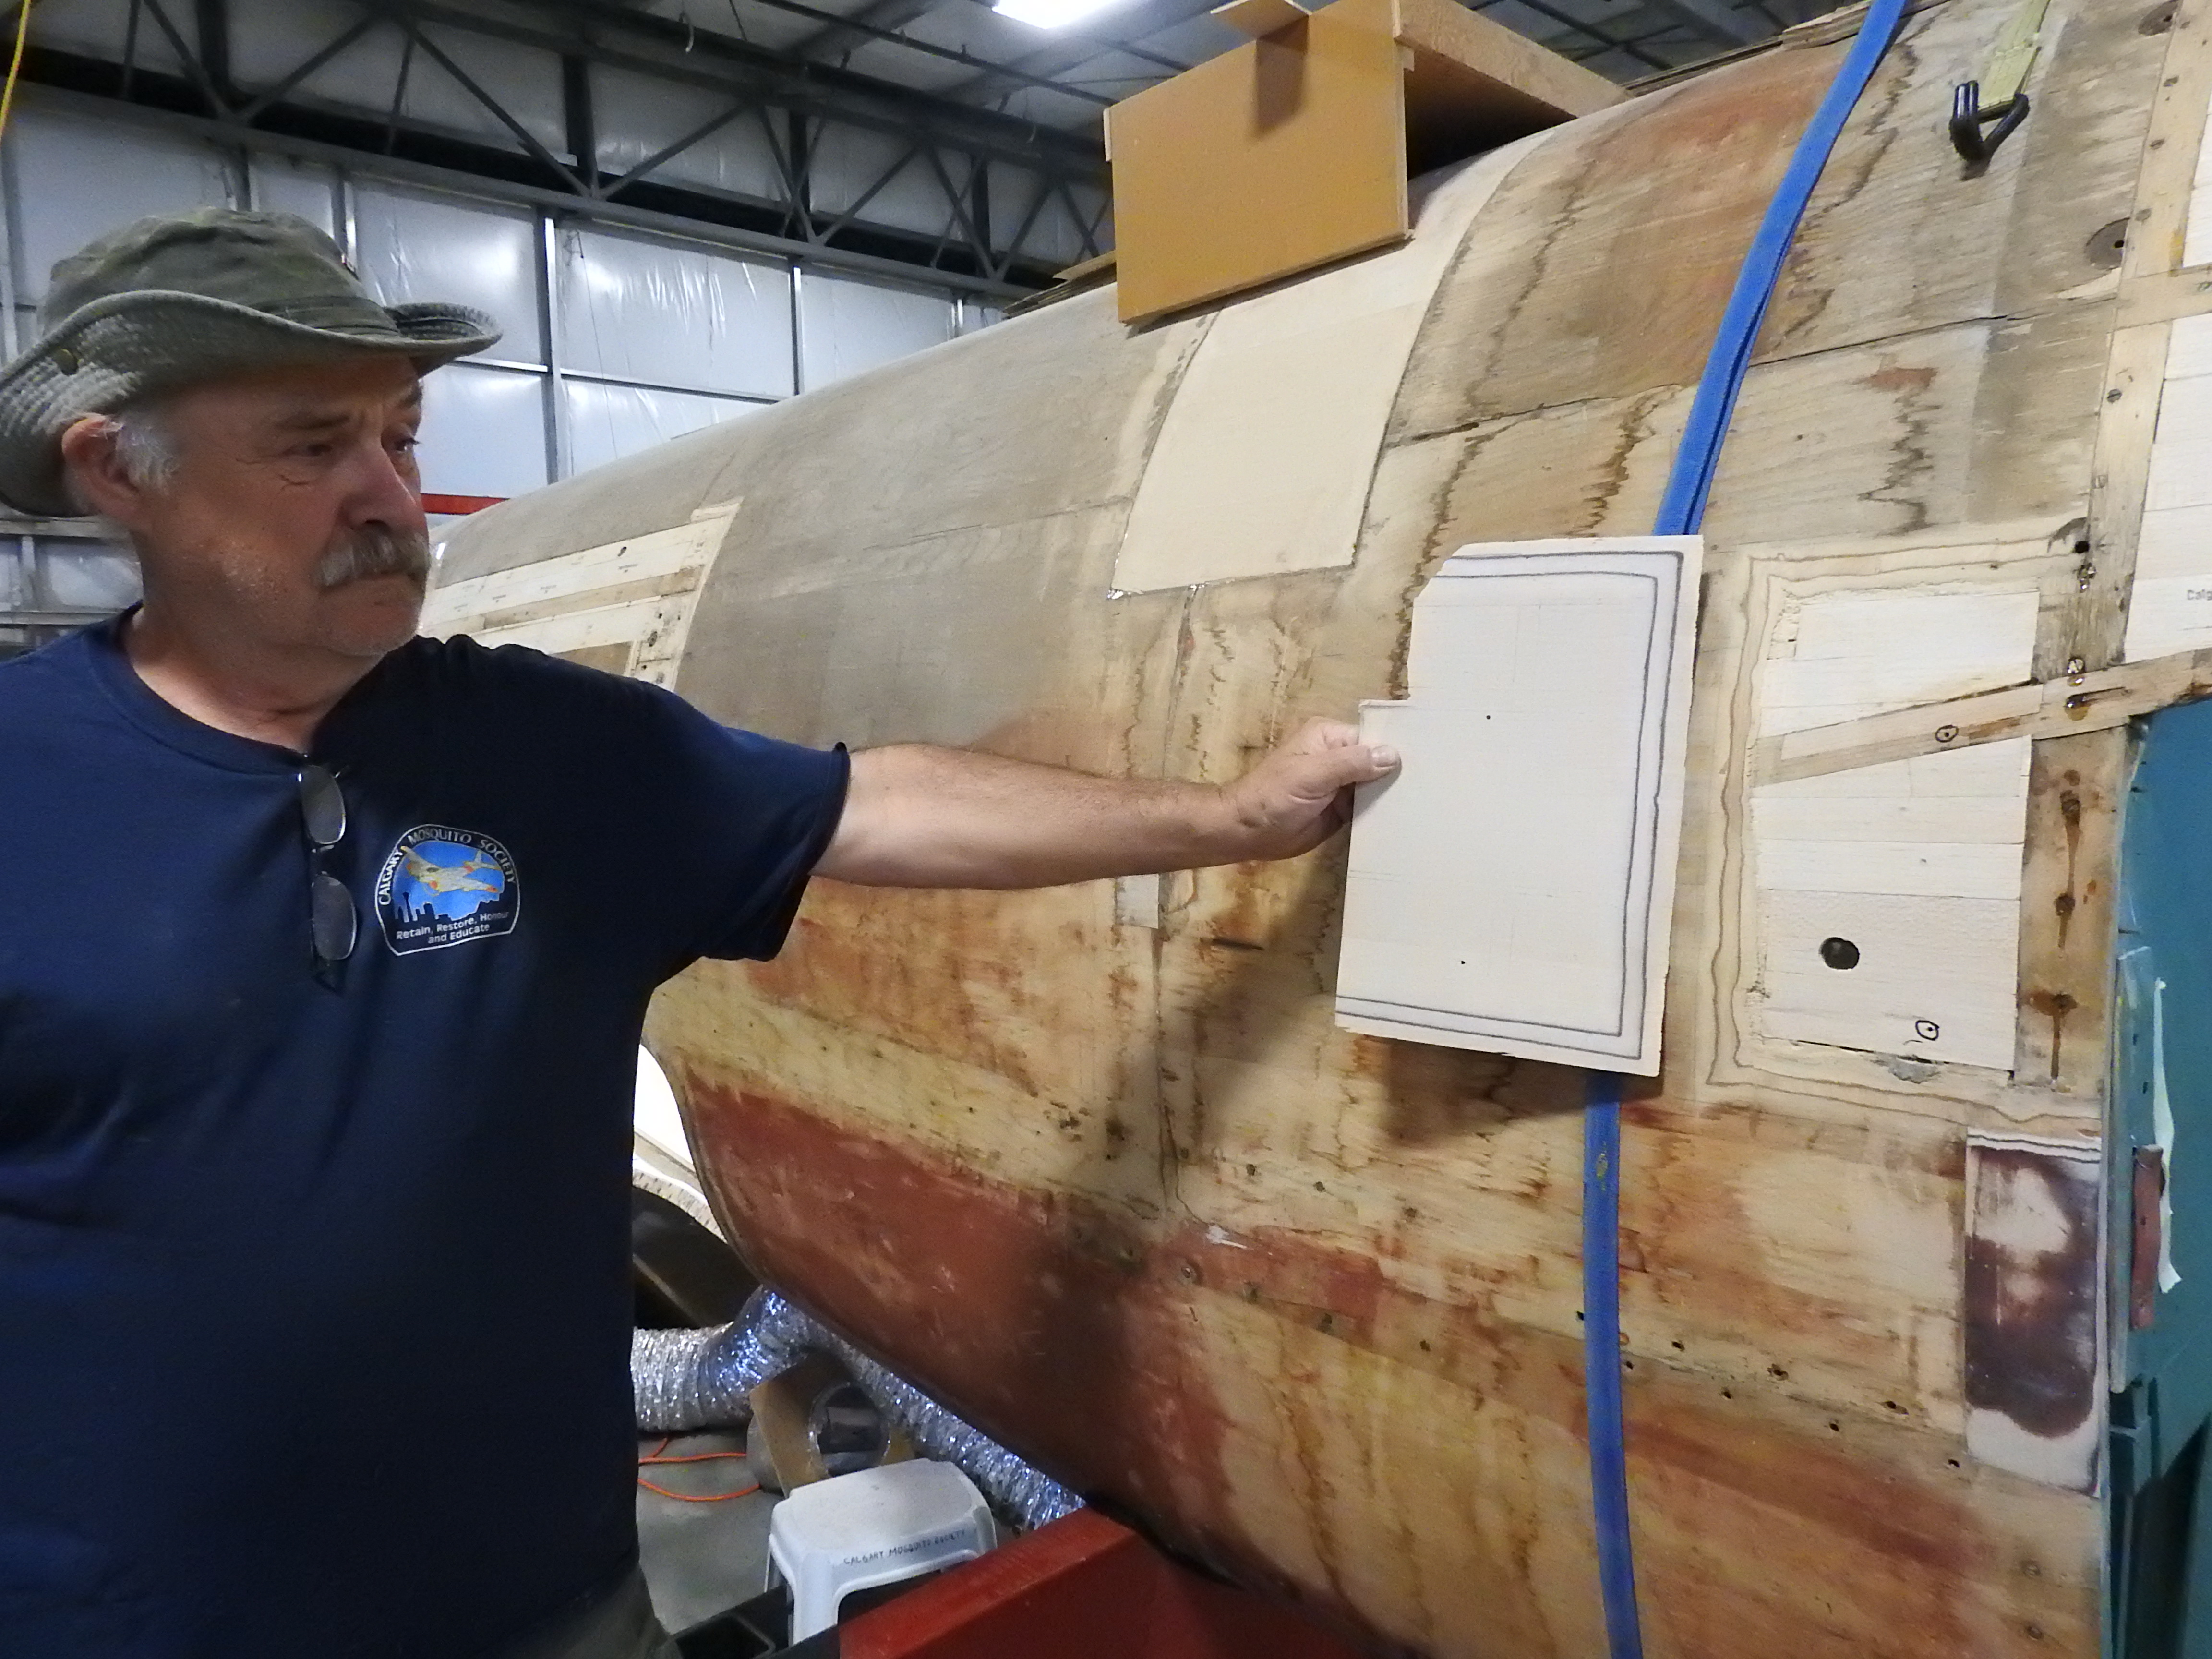
Roger D. and Peter V. worked on patching the hole made for the oxygen fill fitting installed by Spartan, for the long range oxygen bottle. This area had delaminated after lengthy exposure to the elements, with significant wood rot in the area, so an insert was made with a doubler to overlay the insert.
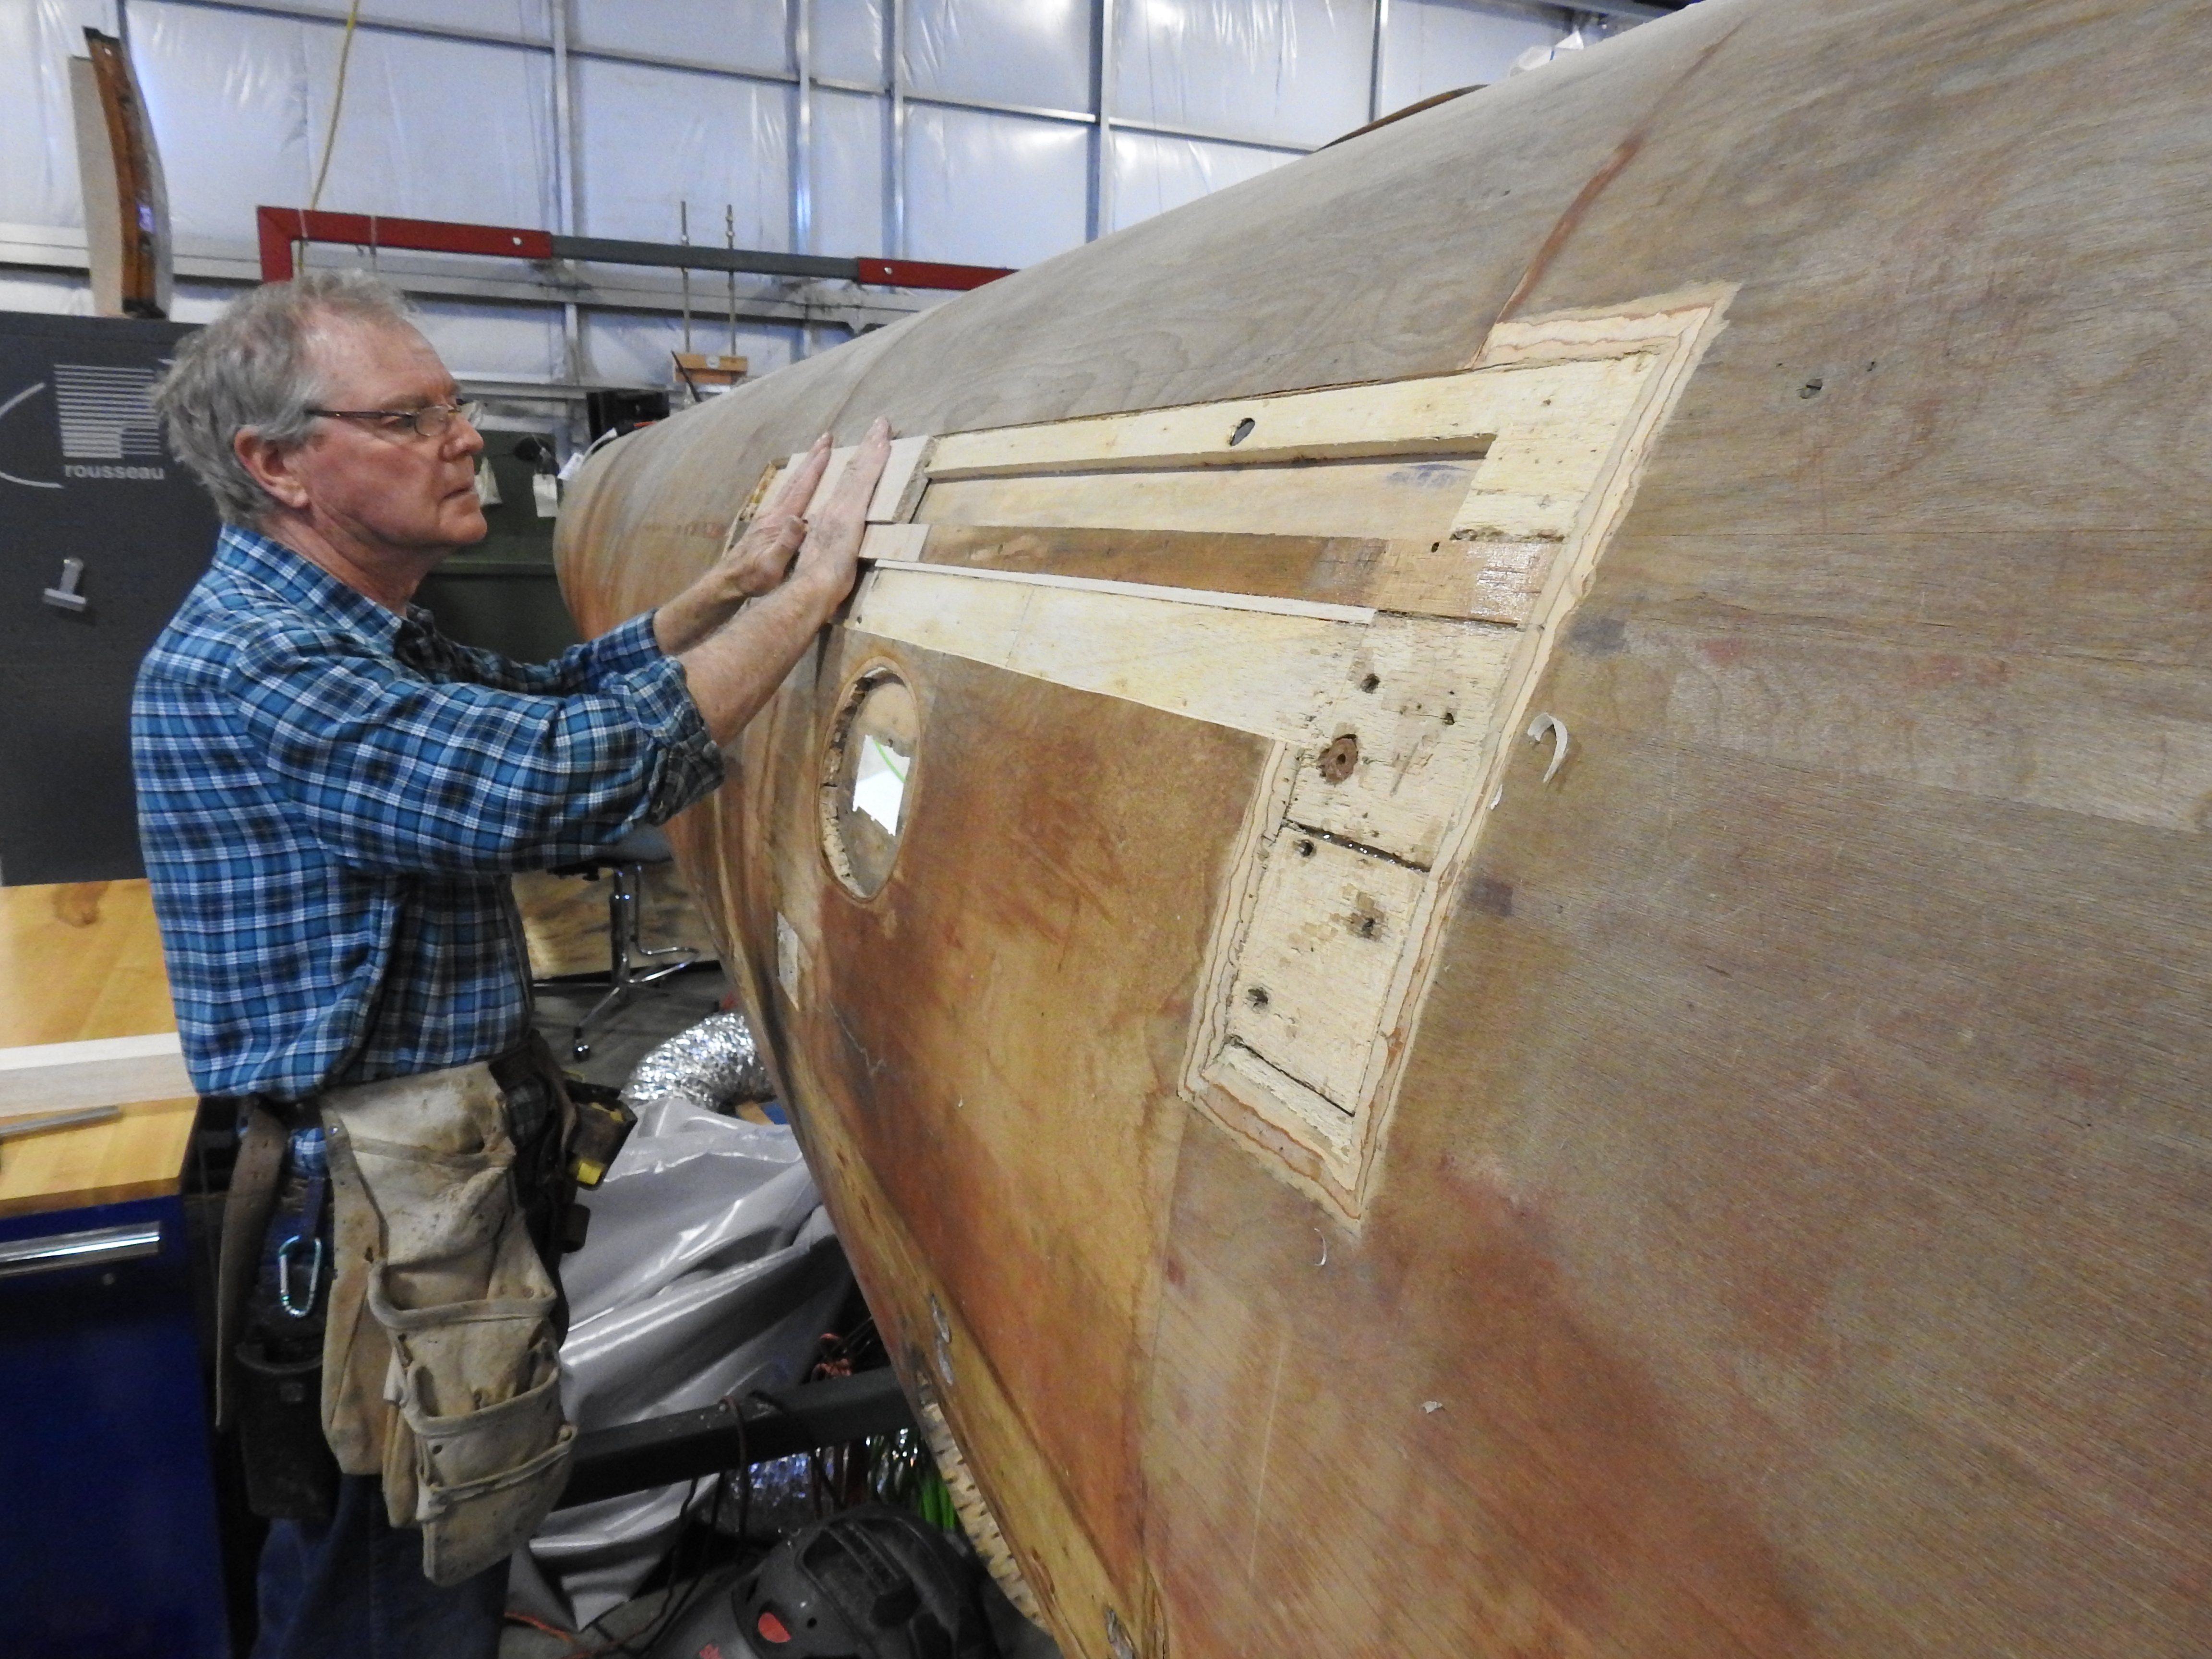
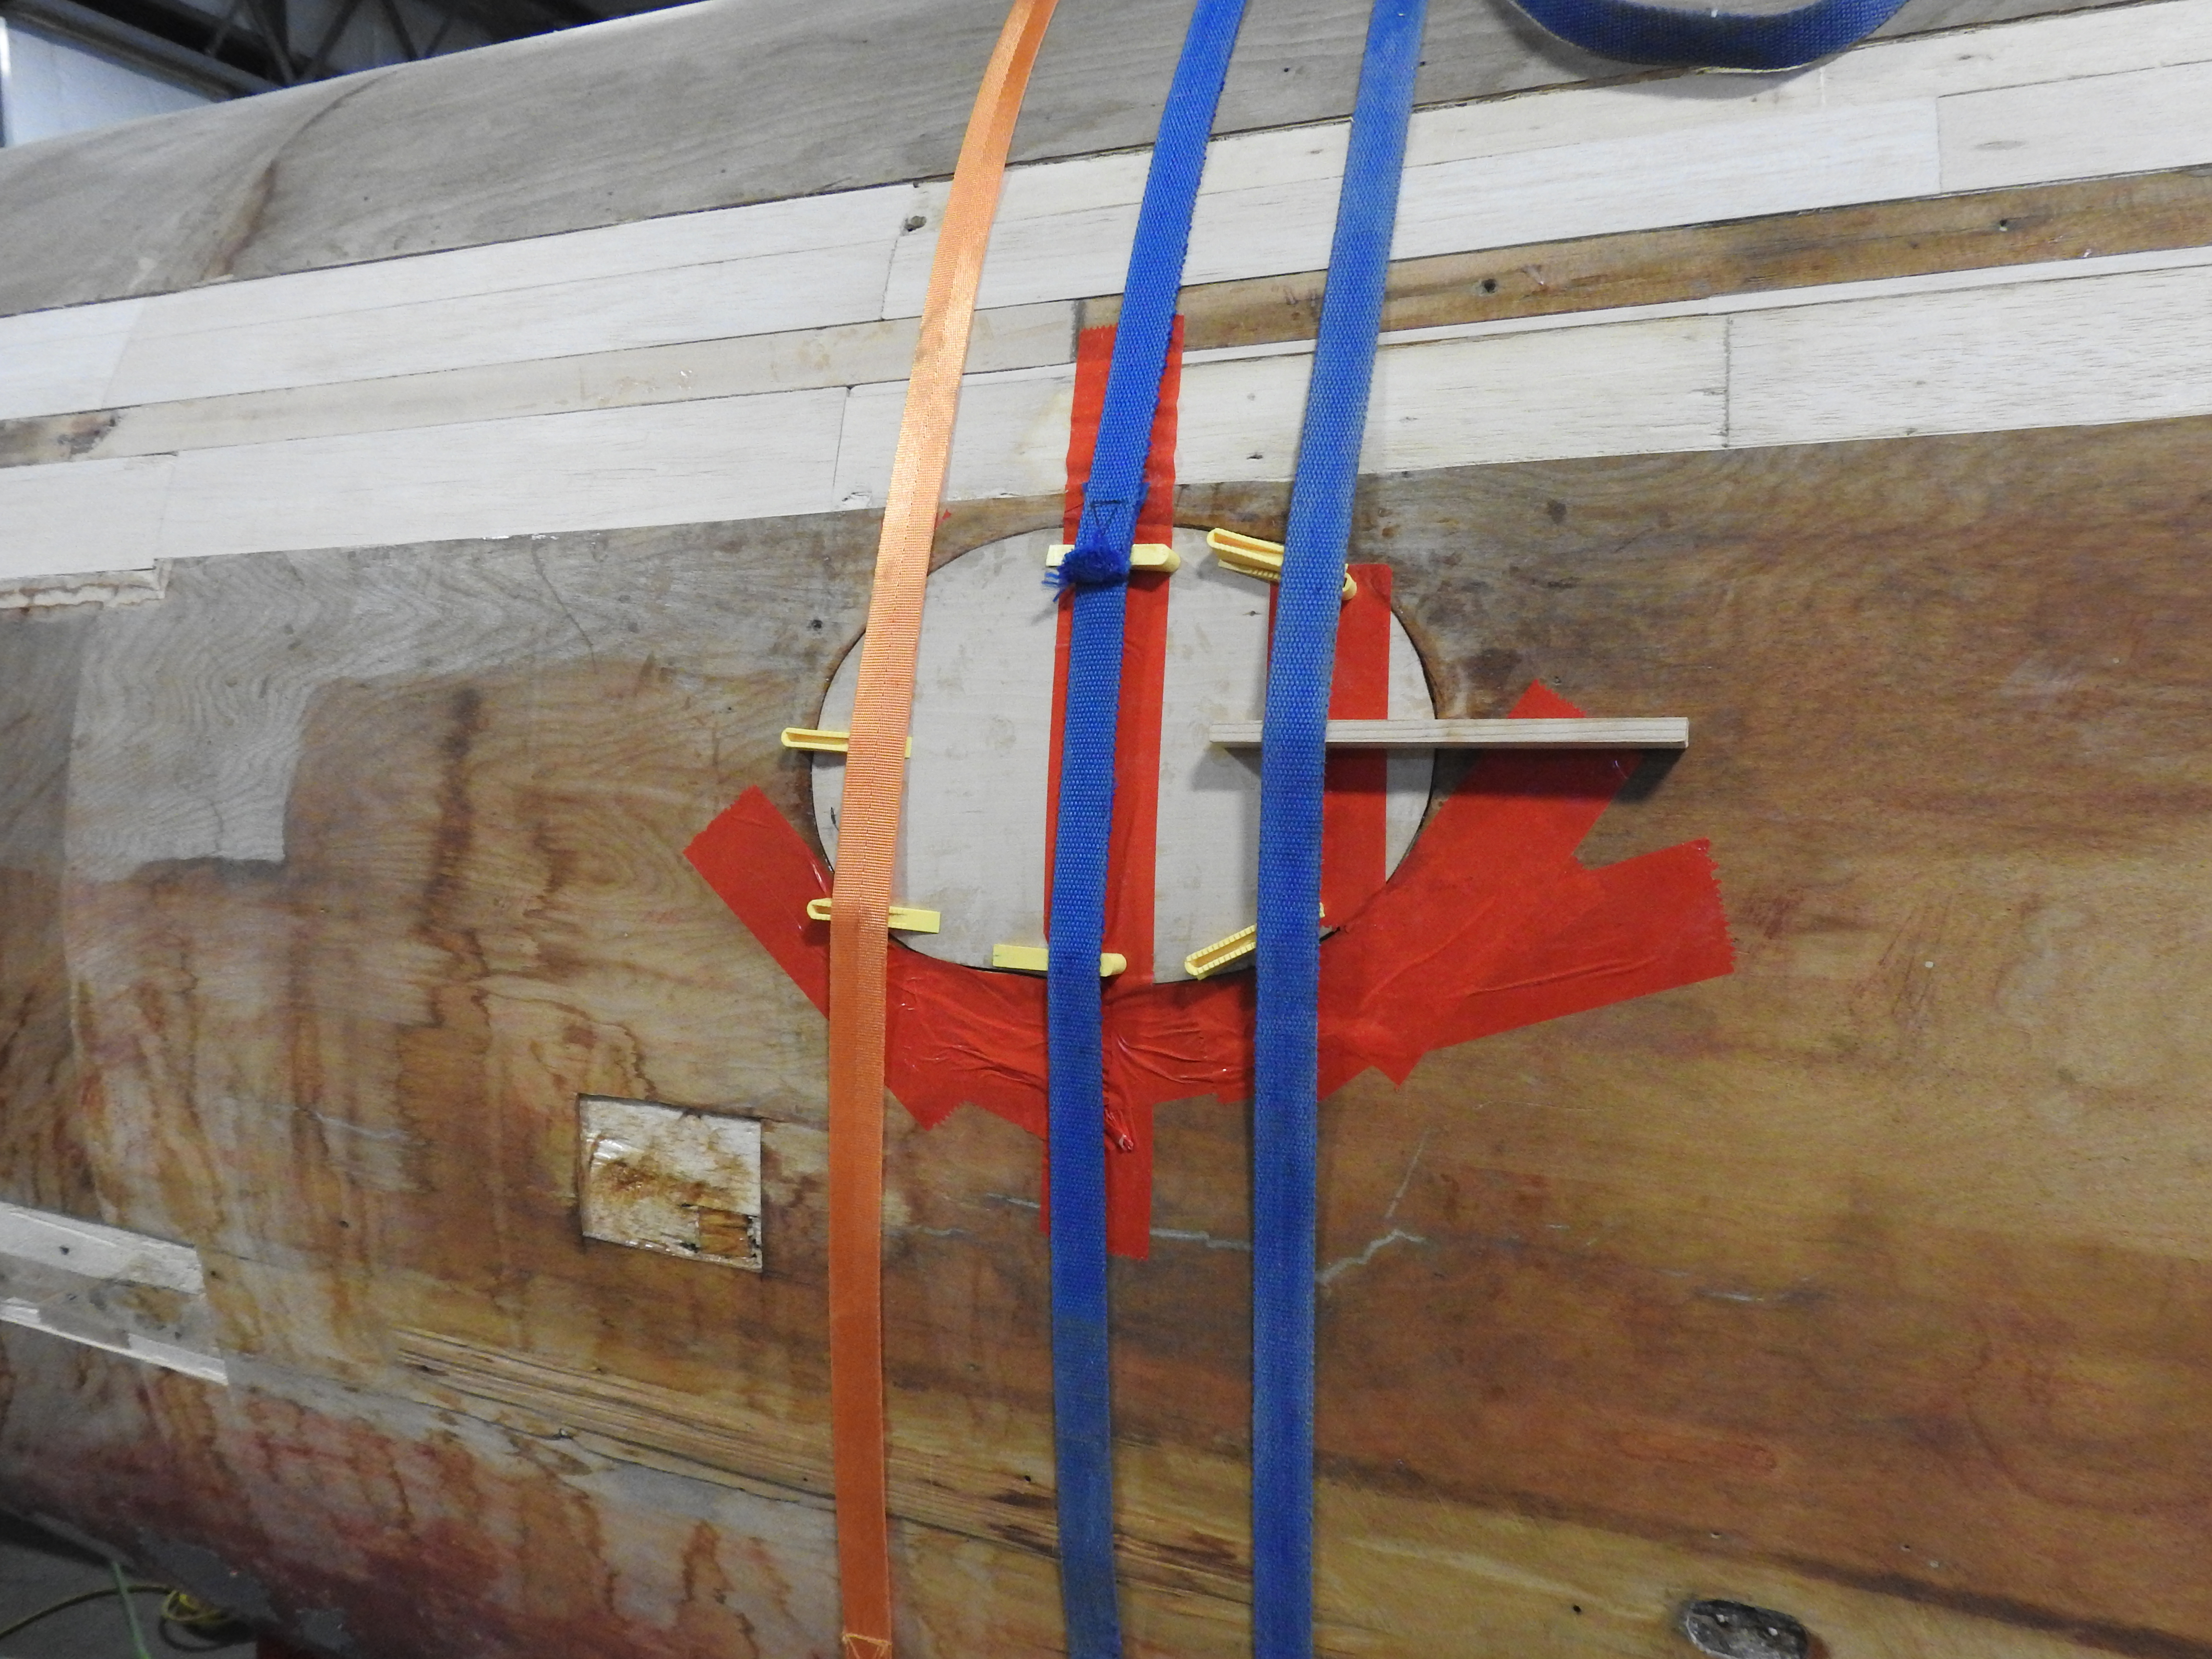
Roger D. working on the oxygen fill port on the starboard rear fusleage. This was a Spartan modification for a long range oxygen bottle in the rear fuselage. Lower: the new insert with a doubler. The red tape is a temporary protective measure to keep the epoxy from where it is not wanted. The straps circle the fuselage to provide pressure while the adhesive cures and the yellow wedges provide aditional pressure on the edges of the doubler. After it dries the actual fill port will be cut into the patch. Is there an easier way? Of course; but we don't know a better way.
Because of extraordinary work demands I have had limited time to devote to the project this quarter, but the team continues to come up with solutions to problems that seem to be never ending. Though the project advances slowly, the standards are extremely high with individuals who watch our progress from afar, happy with the quality.
(Note: In late June, Chris Terry, former Director General of the Canada Aviation and Space Museum spend most of a day visiting the project and assessing our progress. Before leaving, he suggested in all seriousness that there was easily a PhD to be had should one of our group care to document, through a university, the restoration work being done on the Mosquito. RdeB.)
I encourage you to come down to check out the team's progress, to truly understand the time consuming detail that has gone into the fuselage repairs and restoration.
Events and Miscellaneous
This year's open house and special event days kicked off at the Bomber Command Museum with the annual spring clean up, aided by Air Cadet Squadrons from S.E. British Columbia and the Crowsnest Pass area. As usual, the weekend was highlighted by Lancaster engine runs and an abundance of blue smoke from the Bristol Hercules.

Air Cadets overnight in the museum and then spend a day receiving aeronautical instruction, touring the museum and participating in spring cleaning efforts, after which they are treated to the first engine run events of the season.
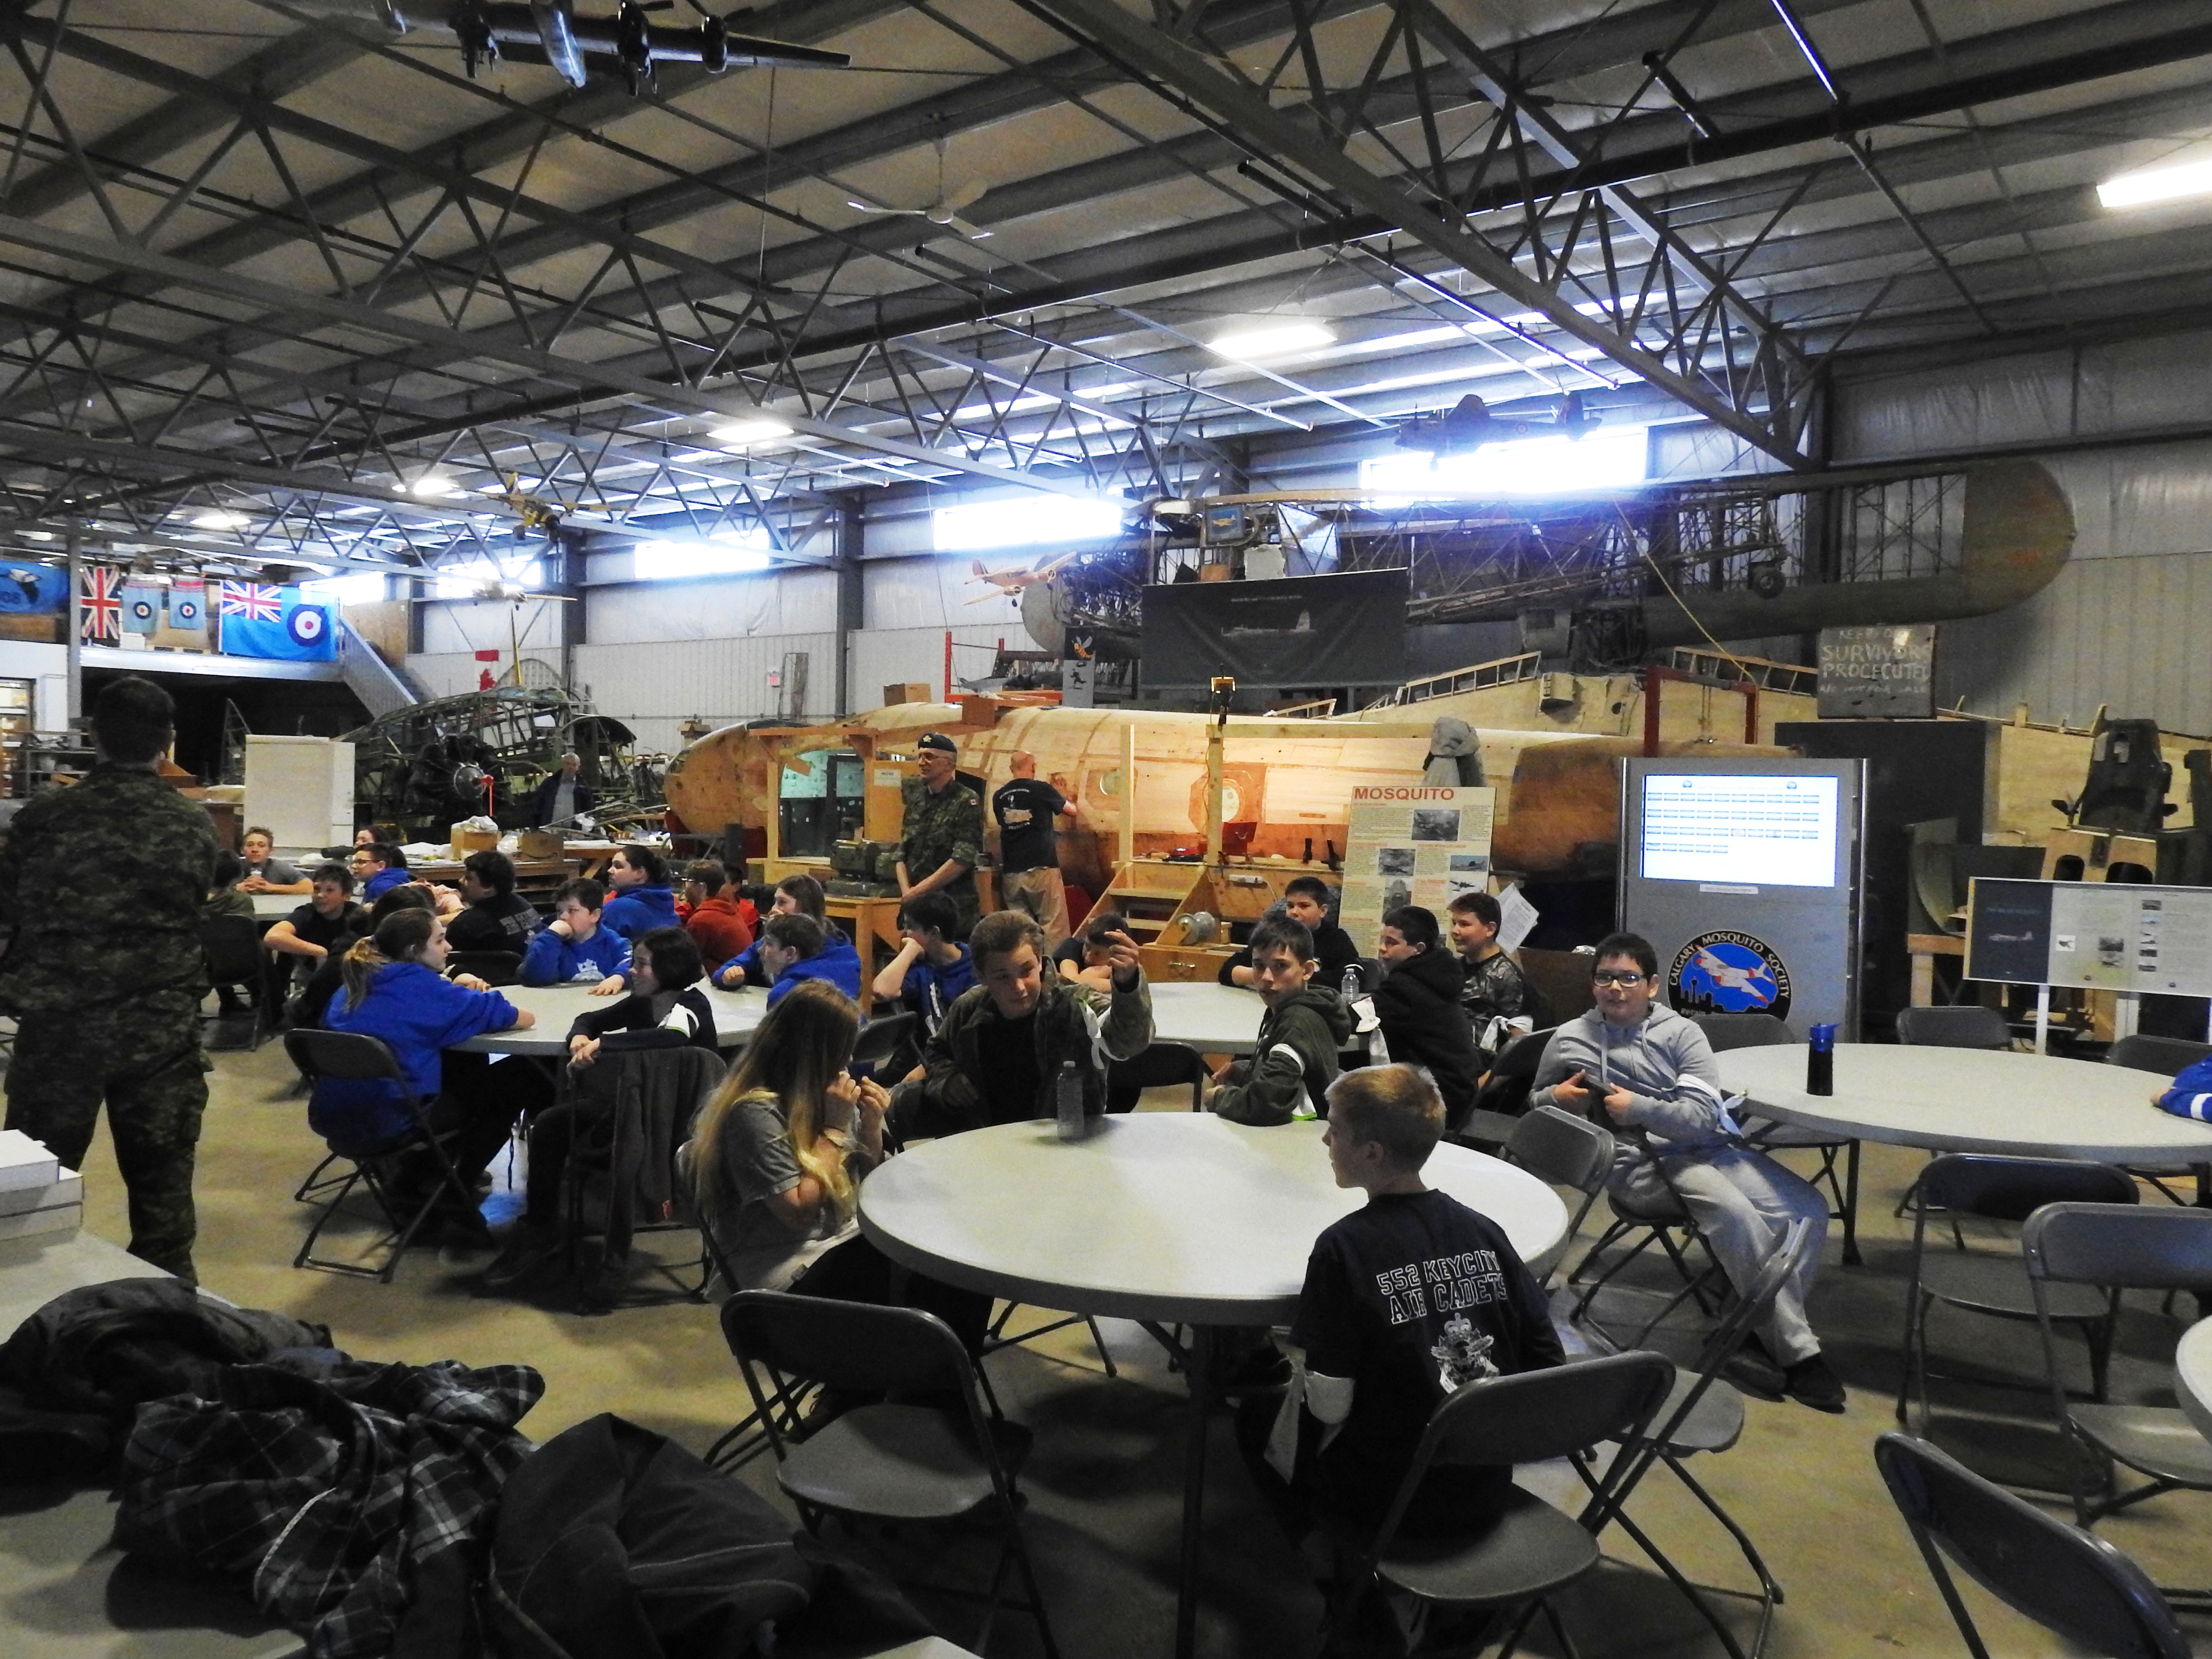
These events always mean that volunteers with the Calgary Mosquito Society spend a significant portion of the day talking to visitors about the Mosquito and about our restoration progress.
On June 2, in partnership with the Bomber Command Museum, we hosted the national convention of the Canadian Aviation Historical Society with over 80 members coming from across Canada. CMS board member Andy Woerle did an excellent presentation on the restoration of the Mosquito and I did a talk on the history of our airplane and how it came to be in our hands. The day was highlighted by tours and Lancaster and Hercules engine runs.
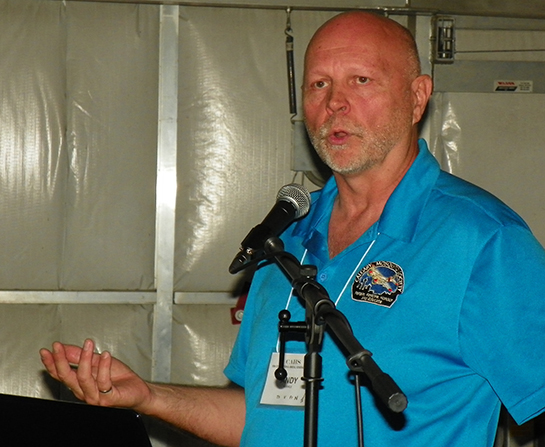
CMS board member and devoted Mosquito restoration volunteer Andy Woerle giving a presentation to the national convention of the Canadian Aviation Historical Society at the Bomber Command Museum on June 2. Andy's talk covered the restoration of the Mosquito.
Approximately 80 people attended the five day CAHS convention, based in Calgary. Their day trip to Nanton allowed us to host the group, give tours, presentations and sell a lot of second hand books. CMS volunteers Cam B. and Roger D. look on.
In previous reports over the past year, we have featured photos and captions of two young ladies who joined our volunteer crew. Janelle F. and Kerona M. were students at SAIT's Aircraft Structures program. One of their instructors suggested that they might up some of their basic skills by putting in some time on our project. Restoration boss Jack McWilliam was only too happy to mentor and guide our budding young engineers. We are pleased to report that both young ladies graduated from their program this spring and were immediately snapped up by local aircraft maintenance and overhaul shops which offered them full time employment. Our congratulations go out to both of them. We are pleased and proud to have been a part of their learning process.

Kerona M. and Janelle F. with Jack McWilliam, at their graduation from SAIT's Aircraft Structures program in June. Our congratulations to both, though their entry into the working world means that we likely won't be seeing them down at Nanton too often.
International interest in our projects remains high with the American magazine Air Classics having just published a two page story on our restoration work in their July 2018 issue. We were not contacted to supply material for their story as they simply lifted it from the most recent report on our website.
The American magazine Air Classics (July 2018) providing some coverage on our restoration work. They simply helped themselves to content from our website. Flattering, but would prefer that they ask.
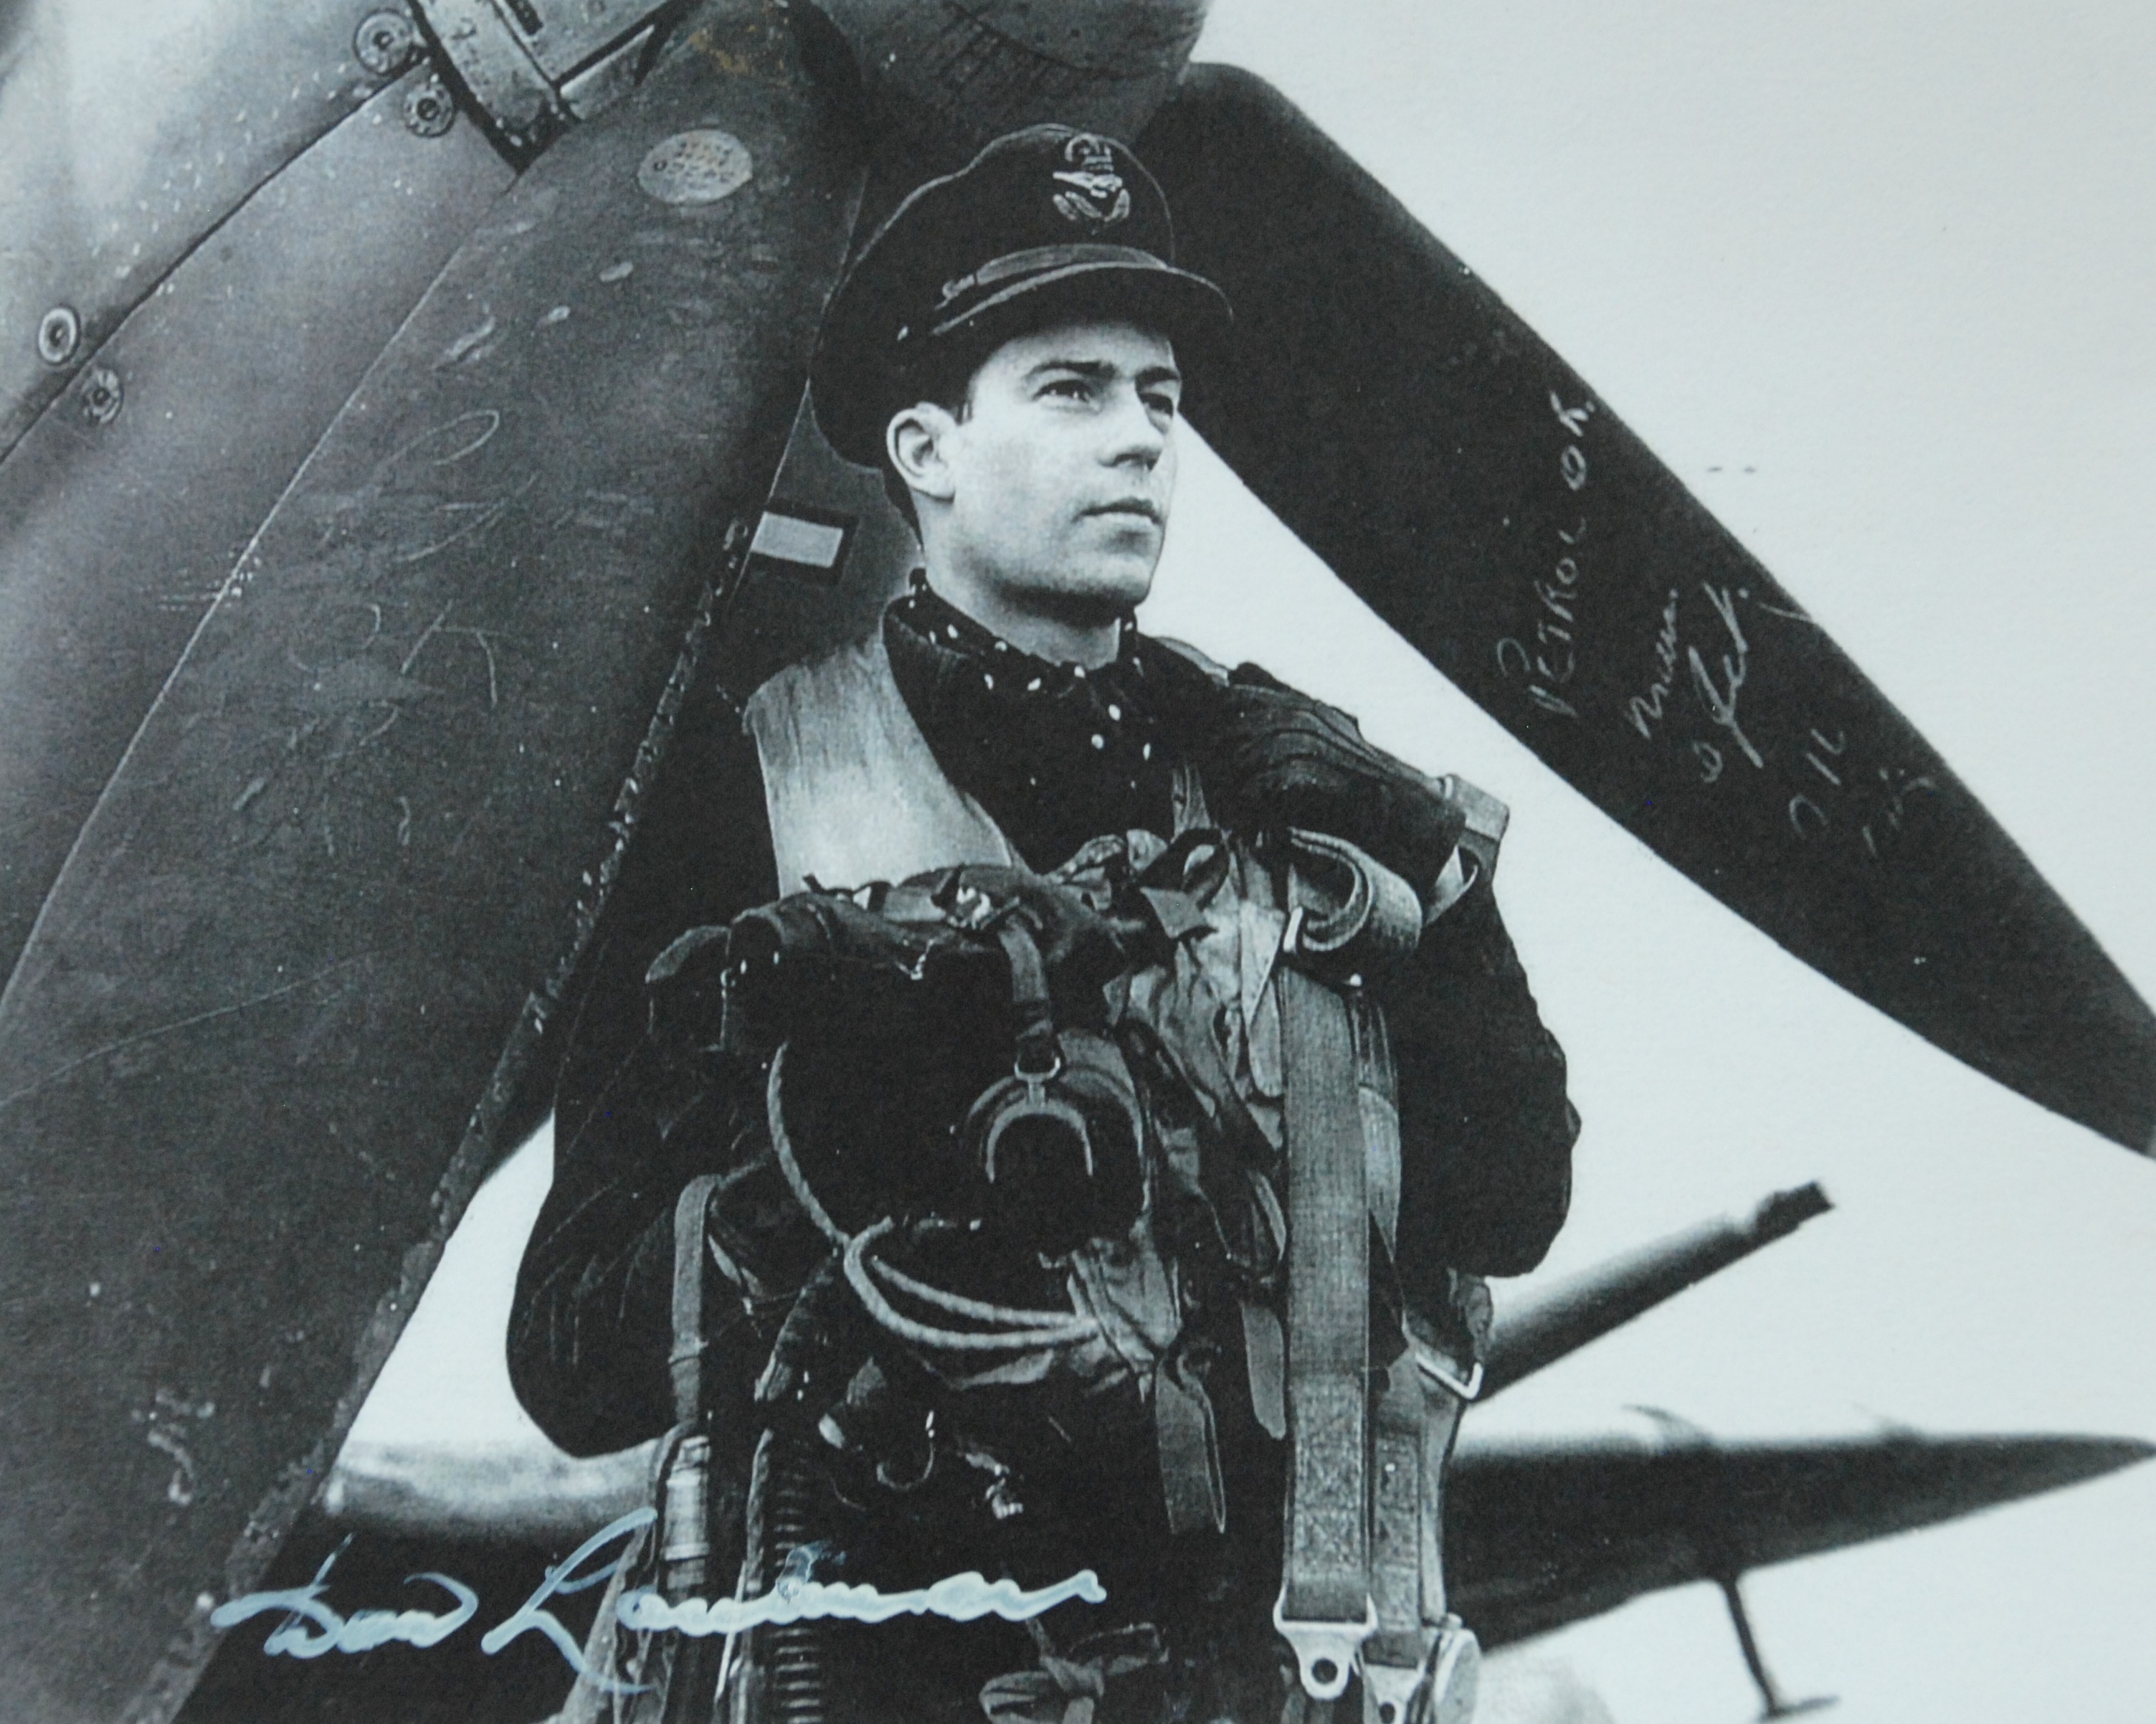
Looking every inch the part of the heroic fighter pilot, Don flew with 412 Squadron of the RCAF while overseas, earning two Distinguished Flying Cross medals for specific actions.
We again close on a sad note reporting on the death of Lt. Gen. (Ret) Don Laubman. Don holds a special place in our hearts as he cut his combat teeth with 133 Squadron of the RCAF and flew our beloved Hurricane 5389 on several occasions in late 1942 and early 1943 while posted to Boundary Bay, BC.
One page of Don's logbook for May 1943 has two entries on the 3rd where he flew Hurricane 5389 twice: once for a 'Scramble' and again the same day for a flight from Patricia Bay to Boundary Bay, BC.
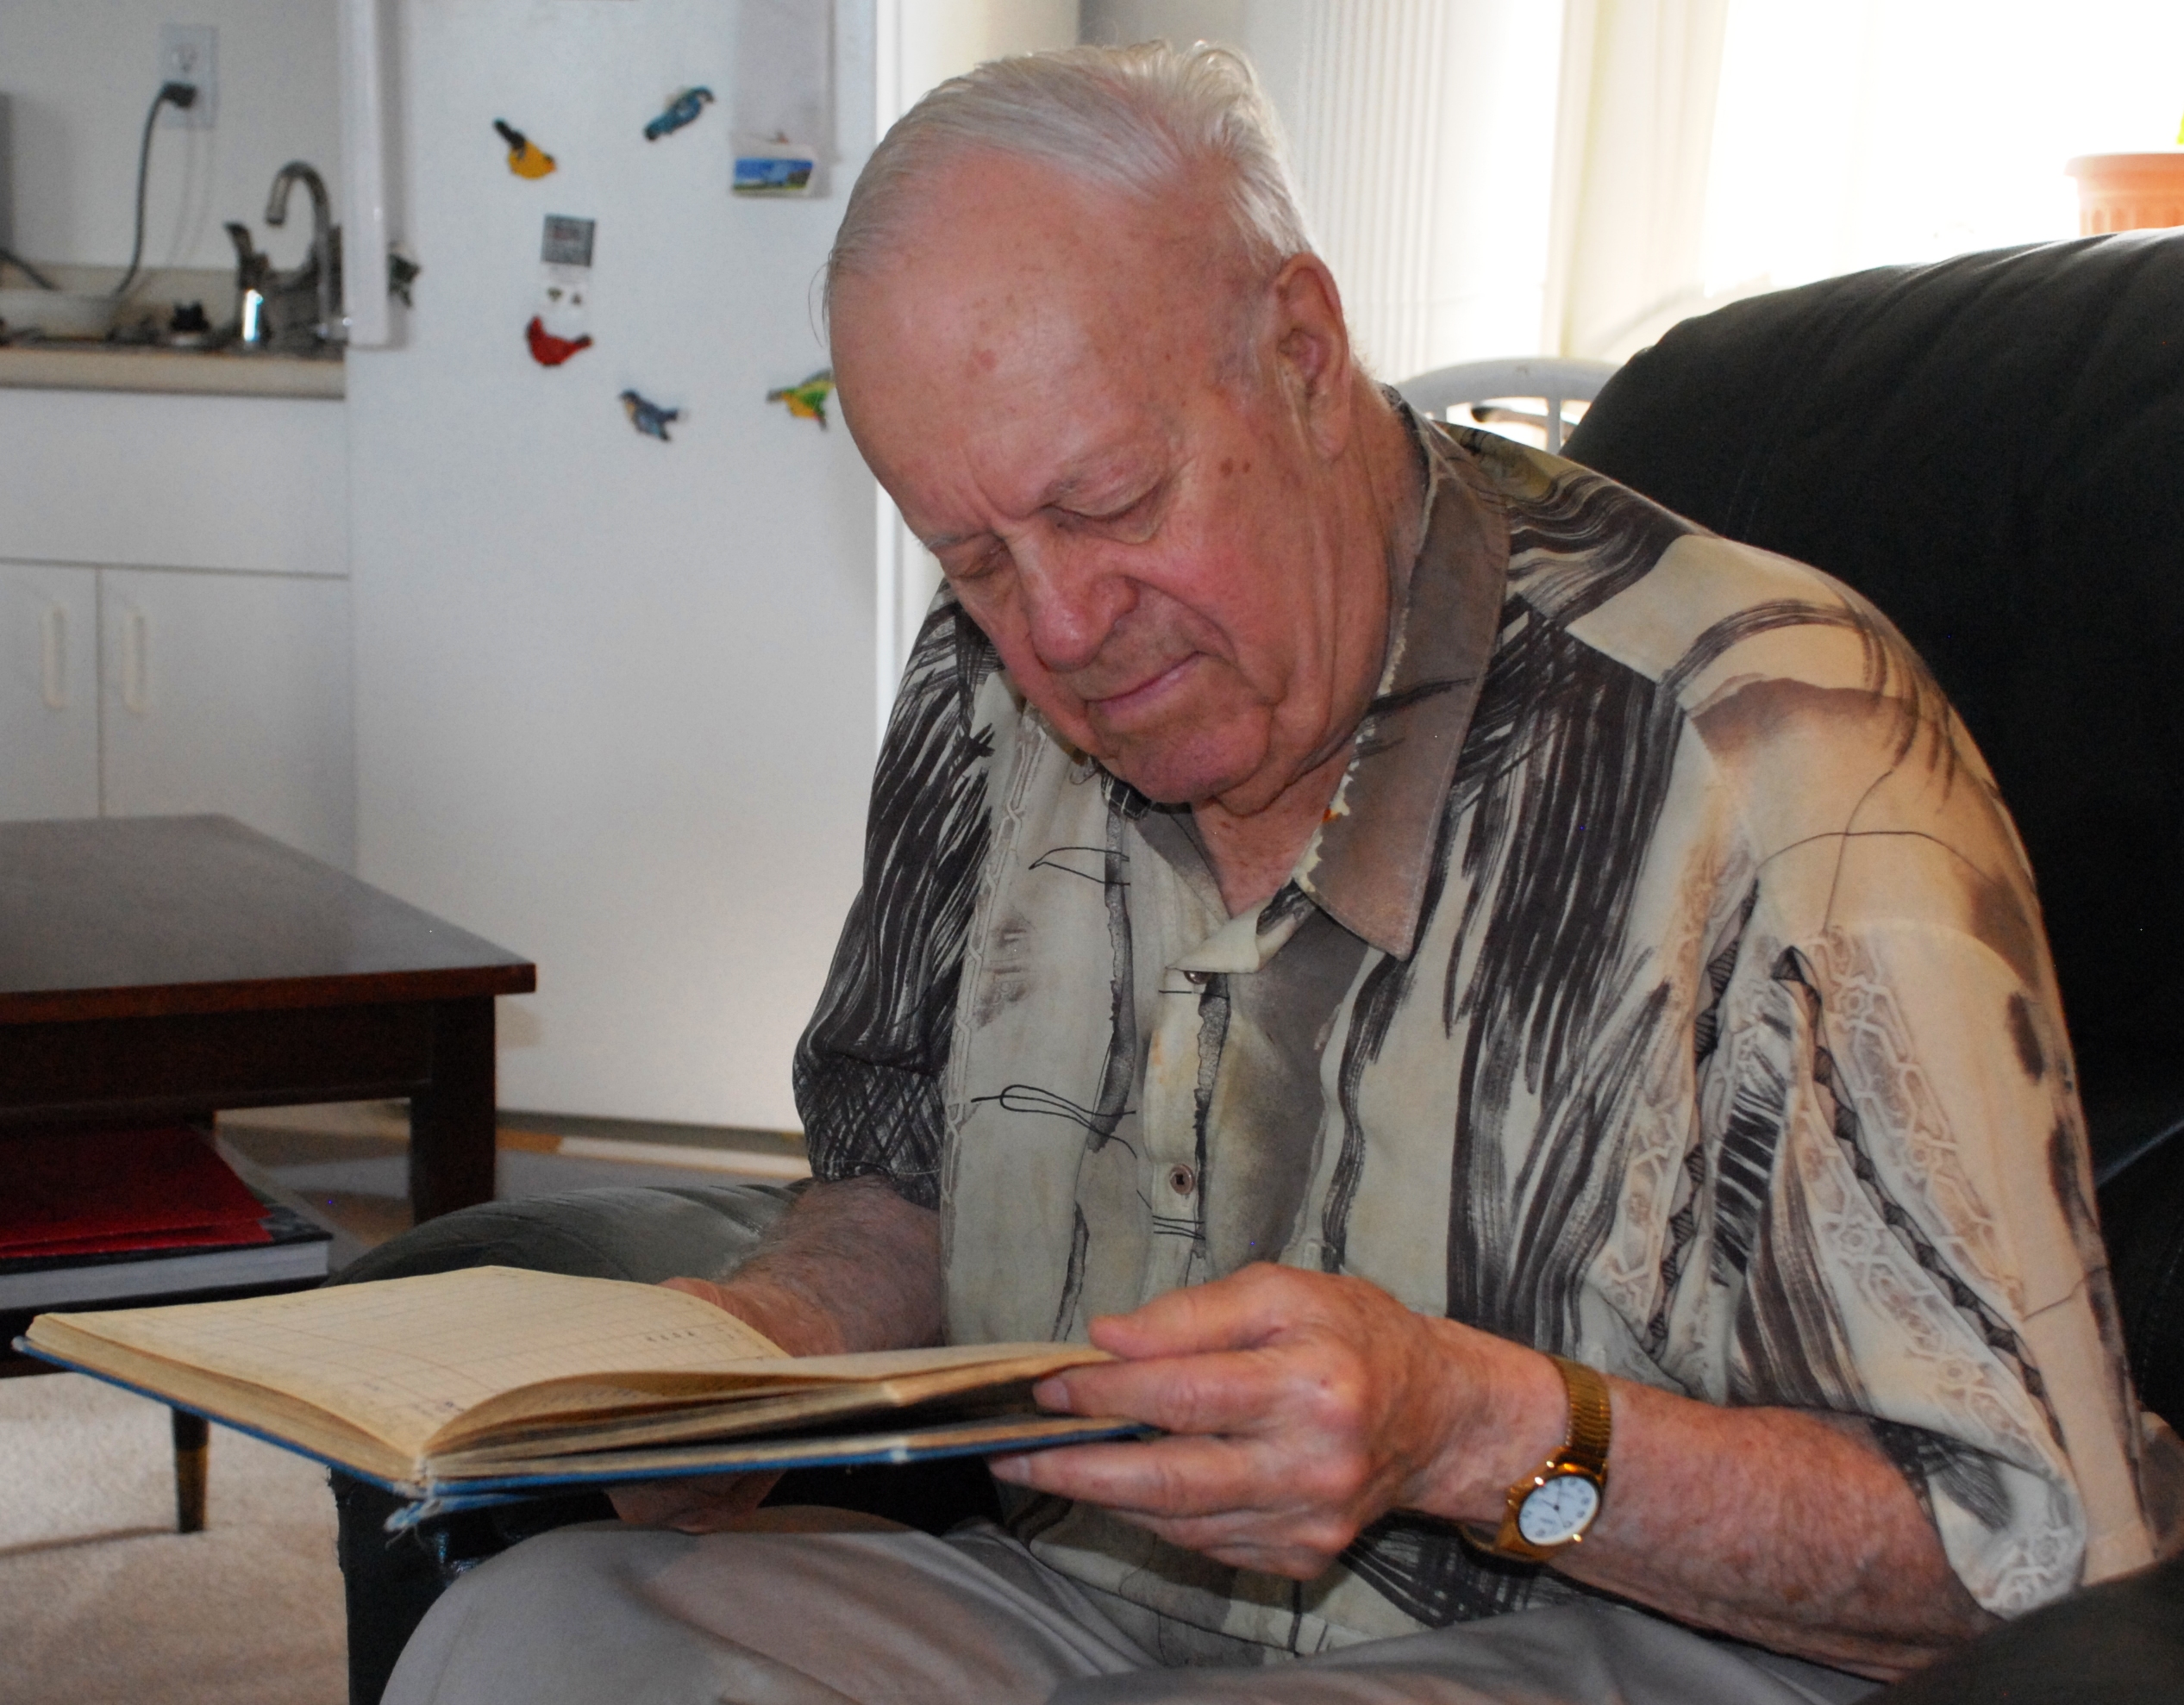
Don rejoined the RCAF in 1949 and rose to the rank of Lt. General. He retired in 1972 as an active pilot on the CF-104 Starfighter, which he says he flew to 'relax' from his command duties in Europe.
Don finished the war as the RCAF's fourth highest scoring ace and was the leading RCAF ace from D-Day to VE Day. While supporting Operation Market-Garden in the Netherlands in September 1944, Don shot down four German aircraft in one day and had a three day total of eight kills. He finished the war with a total of 15 destroyed with an additional 3 damaged.
We had the opportunity to meet and interview Don in August 2013. He is also featured in a number of our 'Honour and Educate' videos. Don Laubman 'Honour and Educate' video.
<
Richard de Boer, President
July 16, 2018