Click on any image for a slideshow!

Hey, We're Still Working!
We'll call this a special edition report.
With most everyone shut down or shut in, I wanted to give you a little picture of things we continue to work on through these difficult times.
As our province started to shutdown, I removed a couple of components from the museum to work on in the shop back in Calgary.
The shop for me is the hangar I work out of for my paying job, where we are in standby mode.
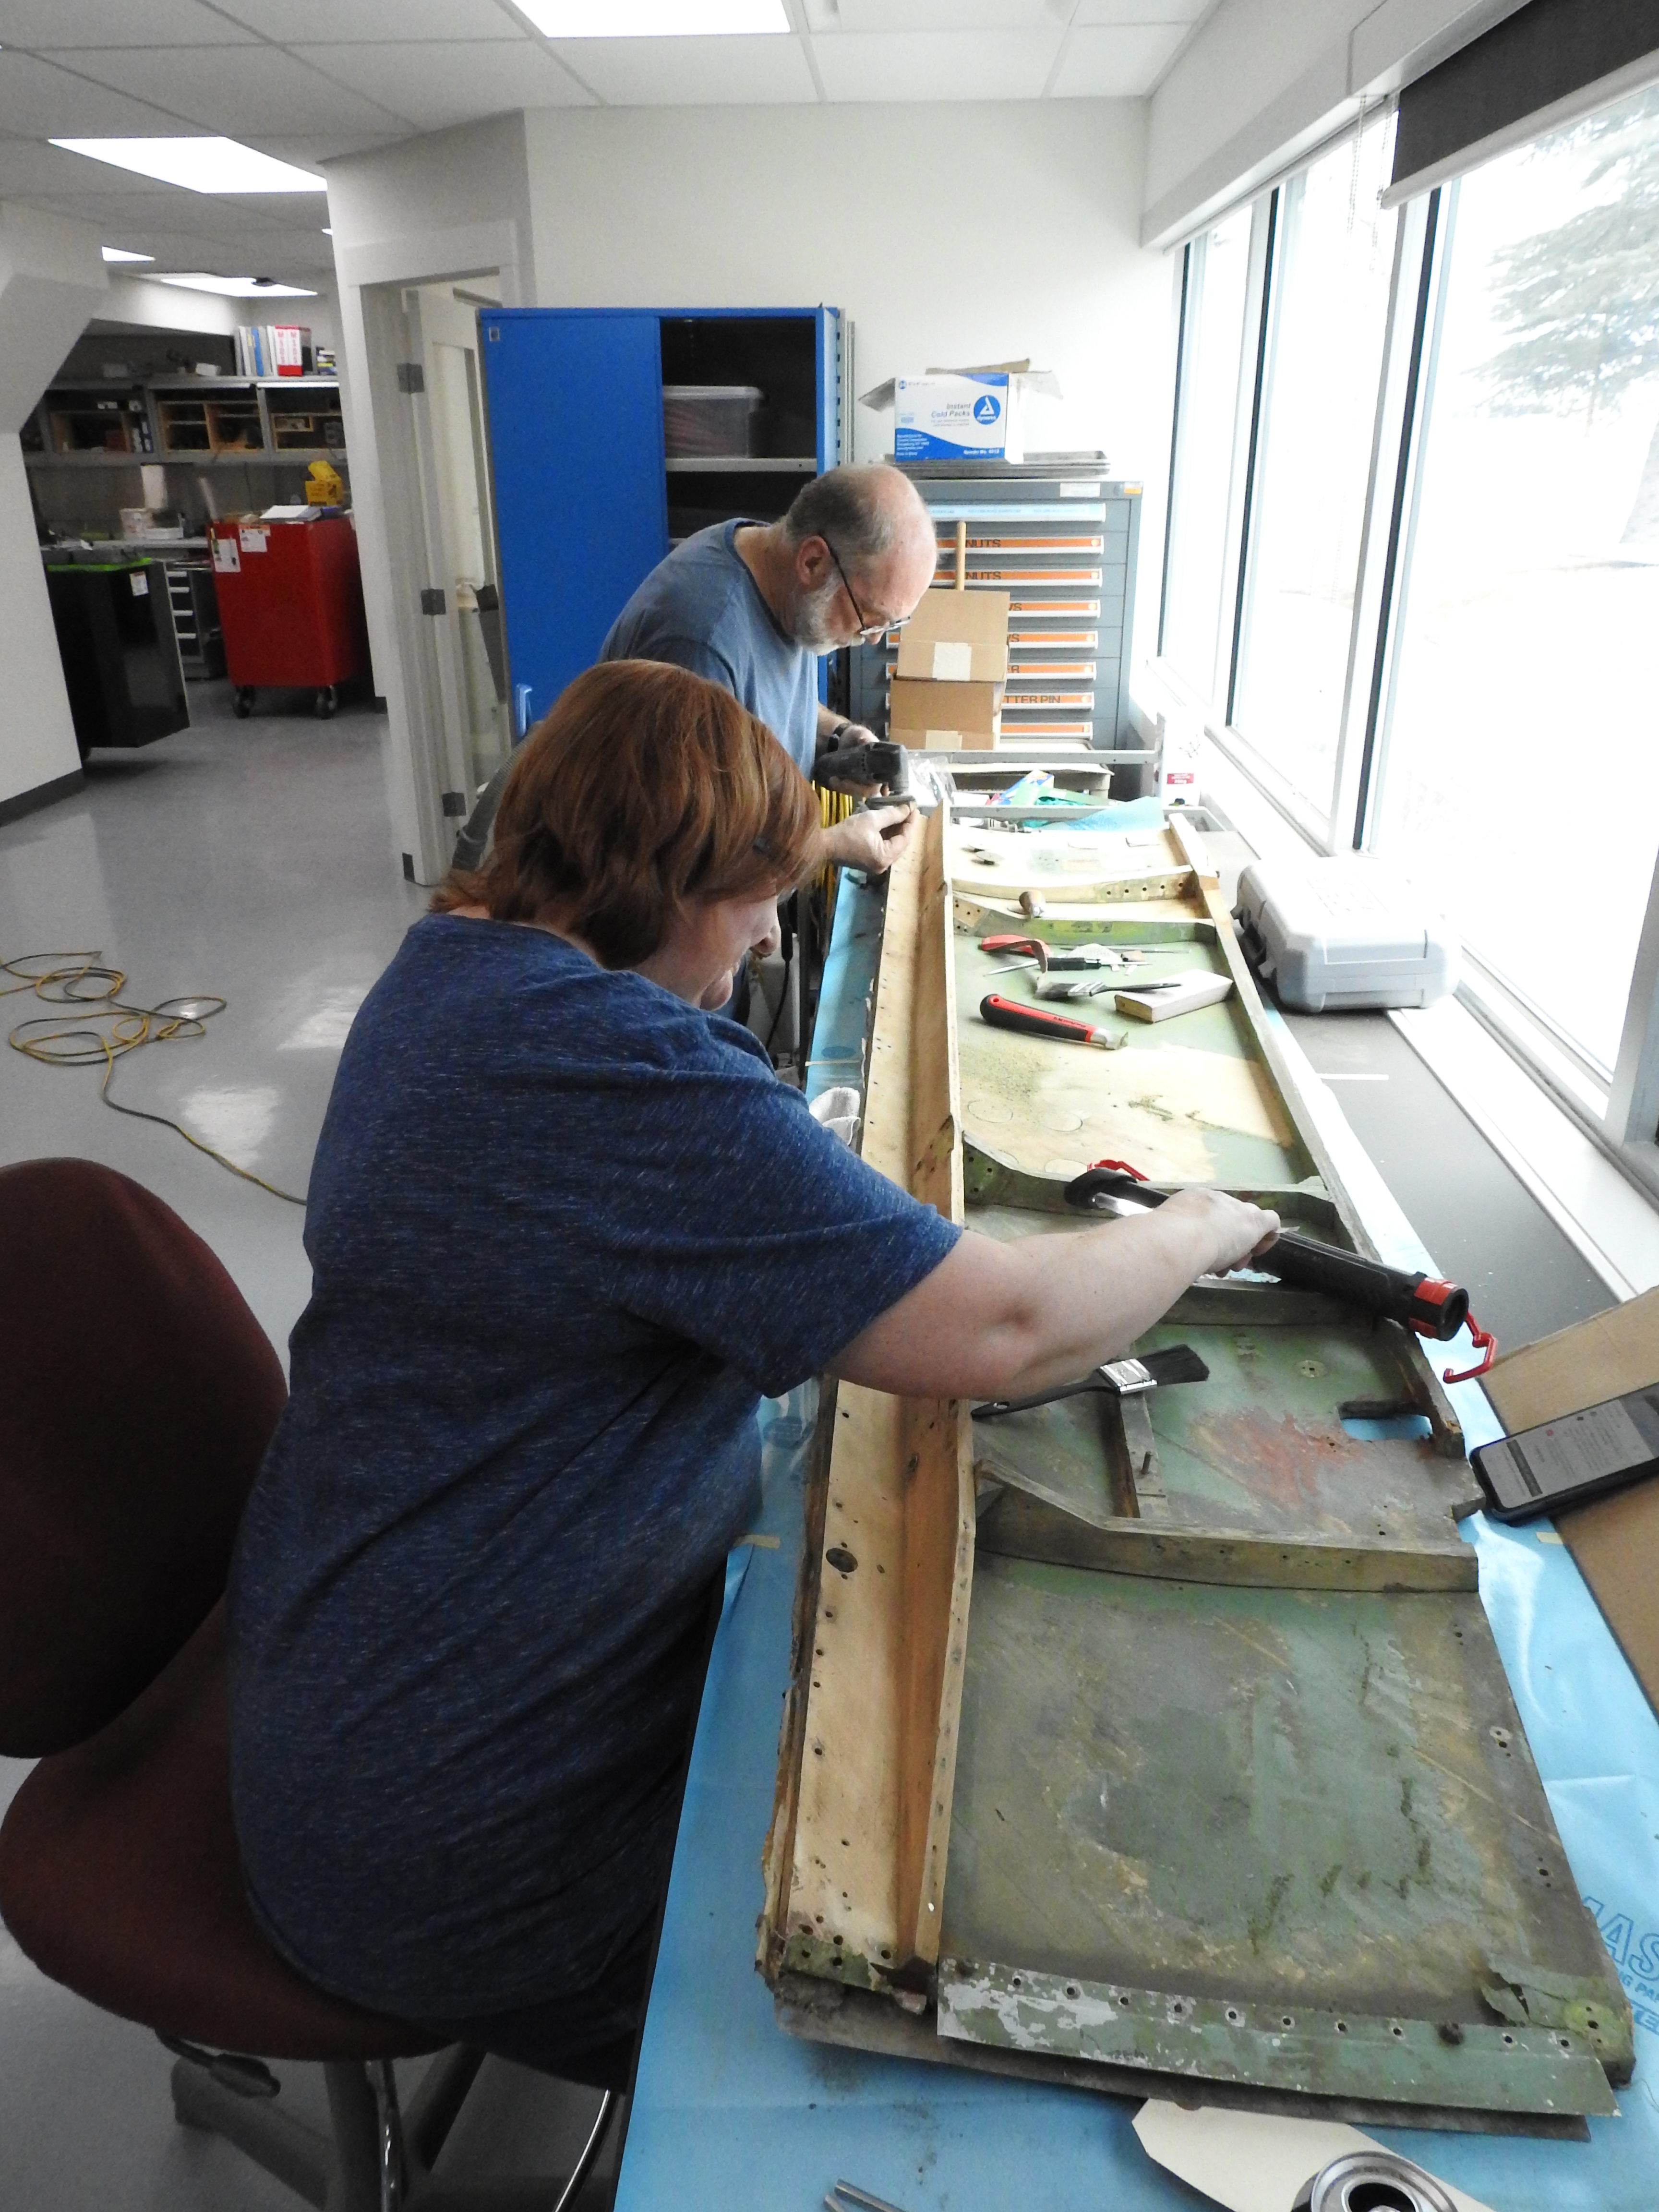
The parts Colette and I have been working on are the side panels to the fuselage that fit under the wing.

Jack and Colette in Jack’s shop with a fuselage side panel. The inside has at least three layers of paint with the outside being covered in fabric and many layers of aircraft dope, all of which have to be removed to get down to the bare wood structure.
These panels carry everything from the control cables to fluid systems, with the latter leaving us a number of issues. Some parts had already been removed over the past years, so we removed the remaining parts in order to strip, repair and restore the wood structure.
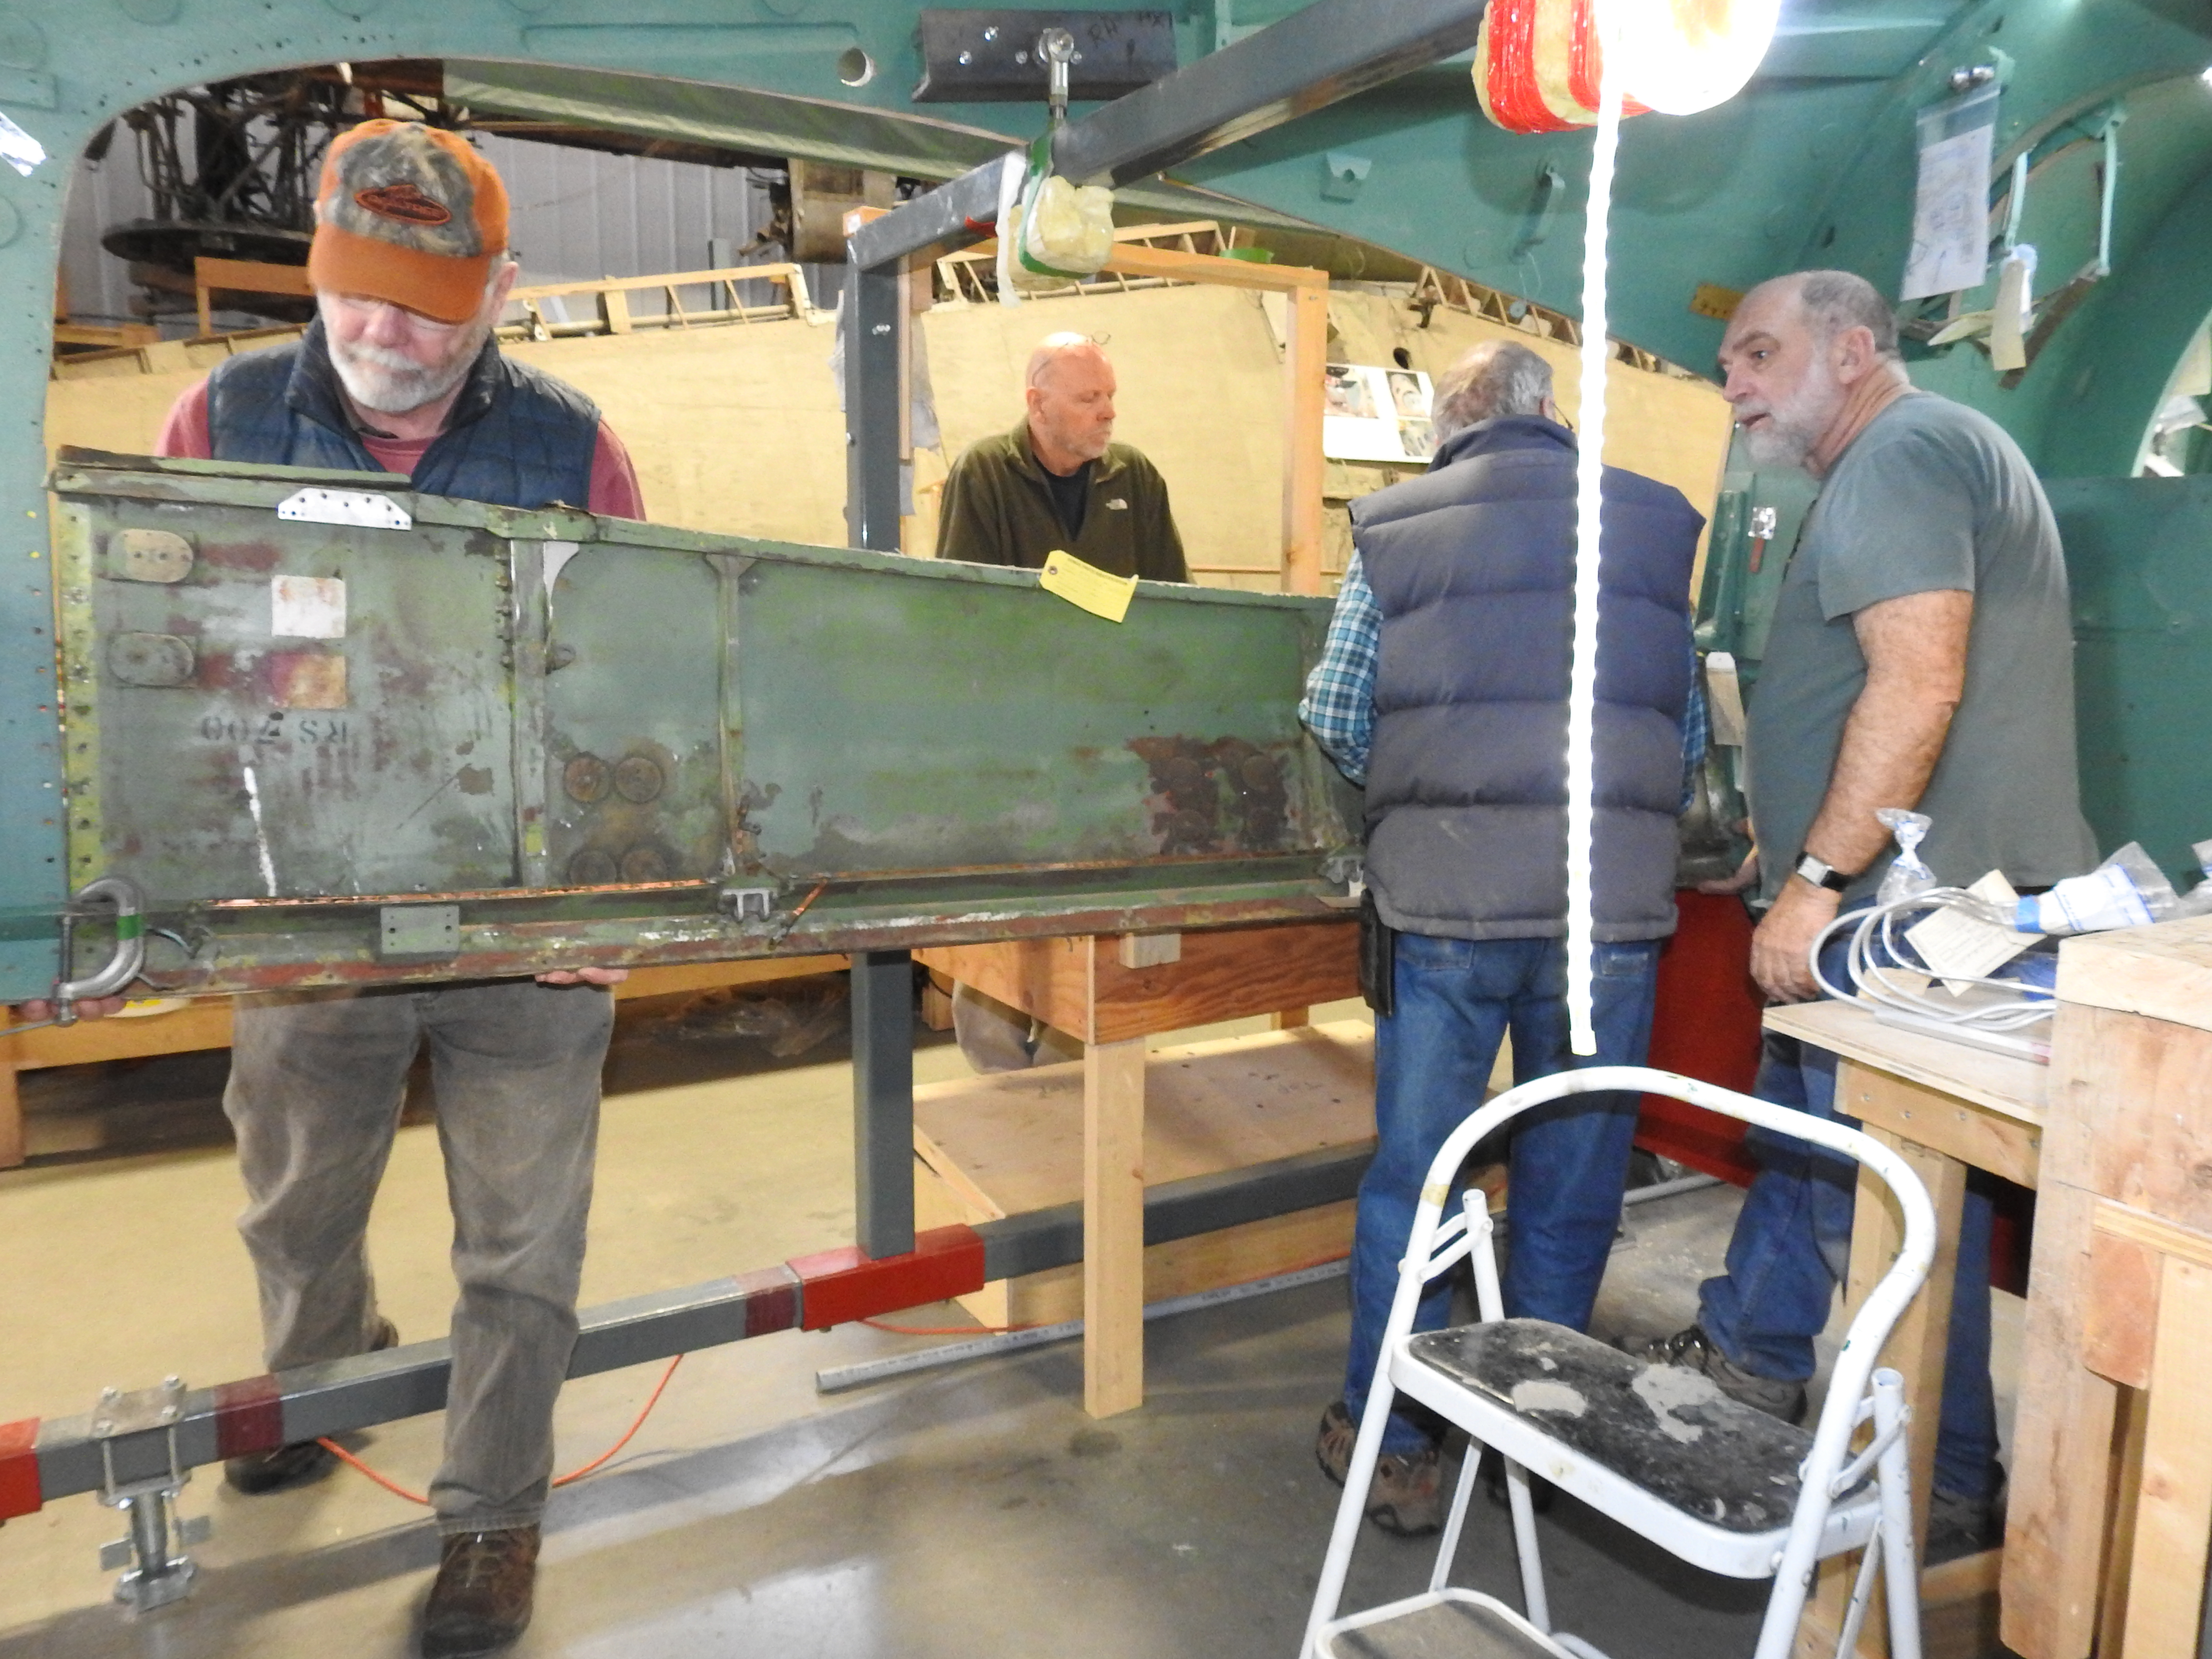
Don, Andy, Roger and Jack dry fitting the starboard panel to see how well it fits and to find out whether the fuselage or the panel have warped over time prior to stripping it down to its bare wood structure.
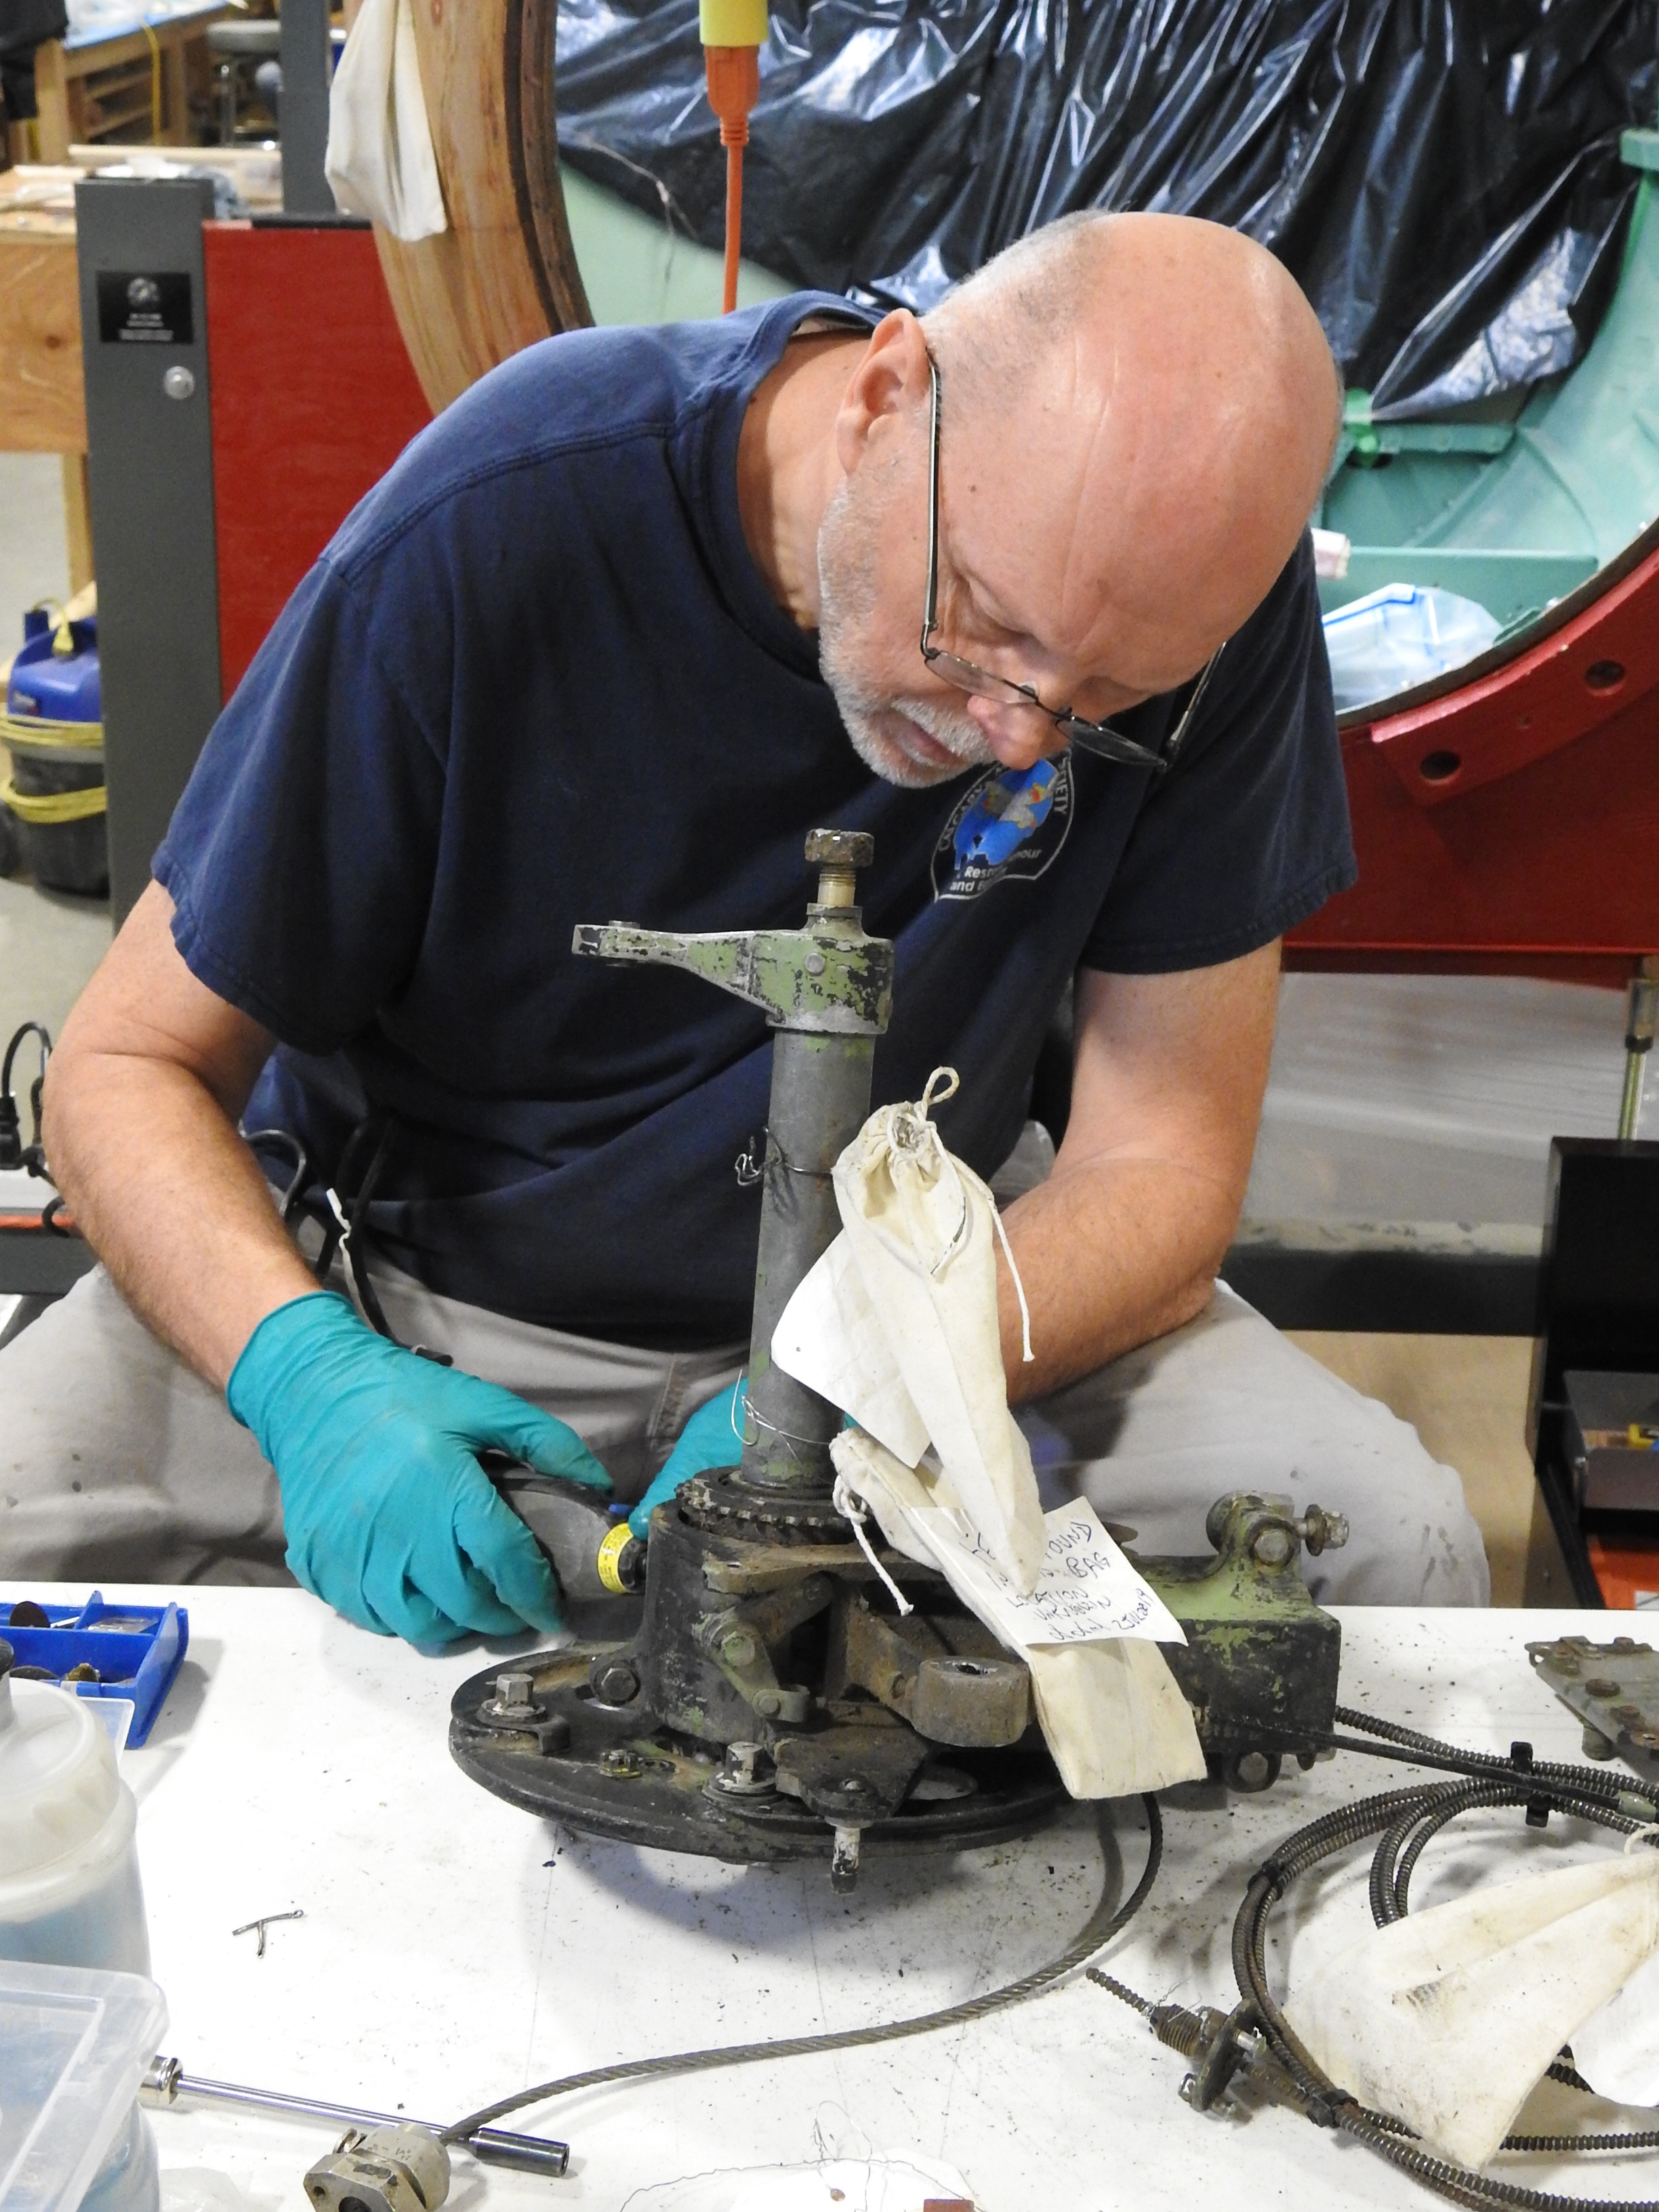
One area that necessitated another trip to Nanton was the hinge points for the bomb bay doors (which we don't use since Spartan replaced the doors with a single belly panel). The bolts were secured by the usual methods, which meant hitting them with a hammer. Picking up the tap and dies from the museum, I ran a die onto the bolts before I attempted to dismantle the assembly. The die was run on the flat side first to get the threads clear as close to the nut as possible. This was the only mechanical issue in removing any of the parts from the panel.
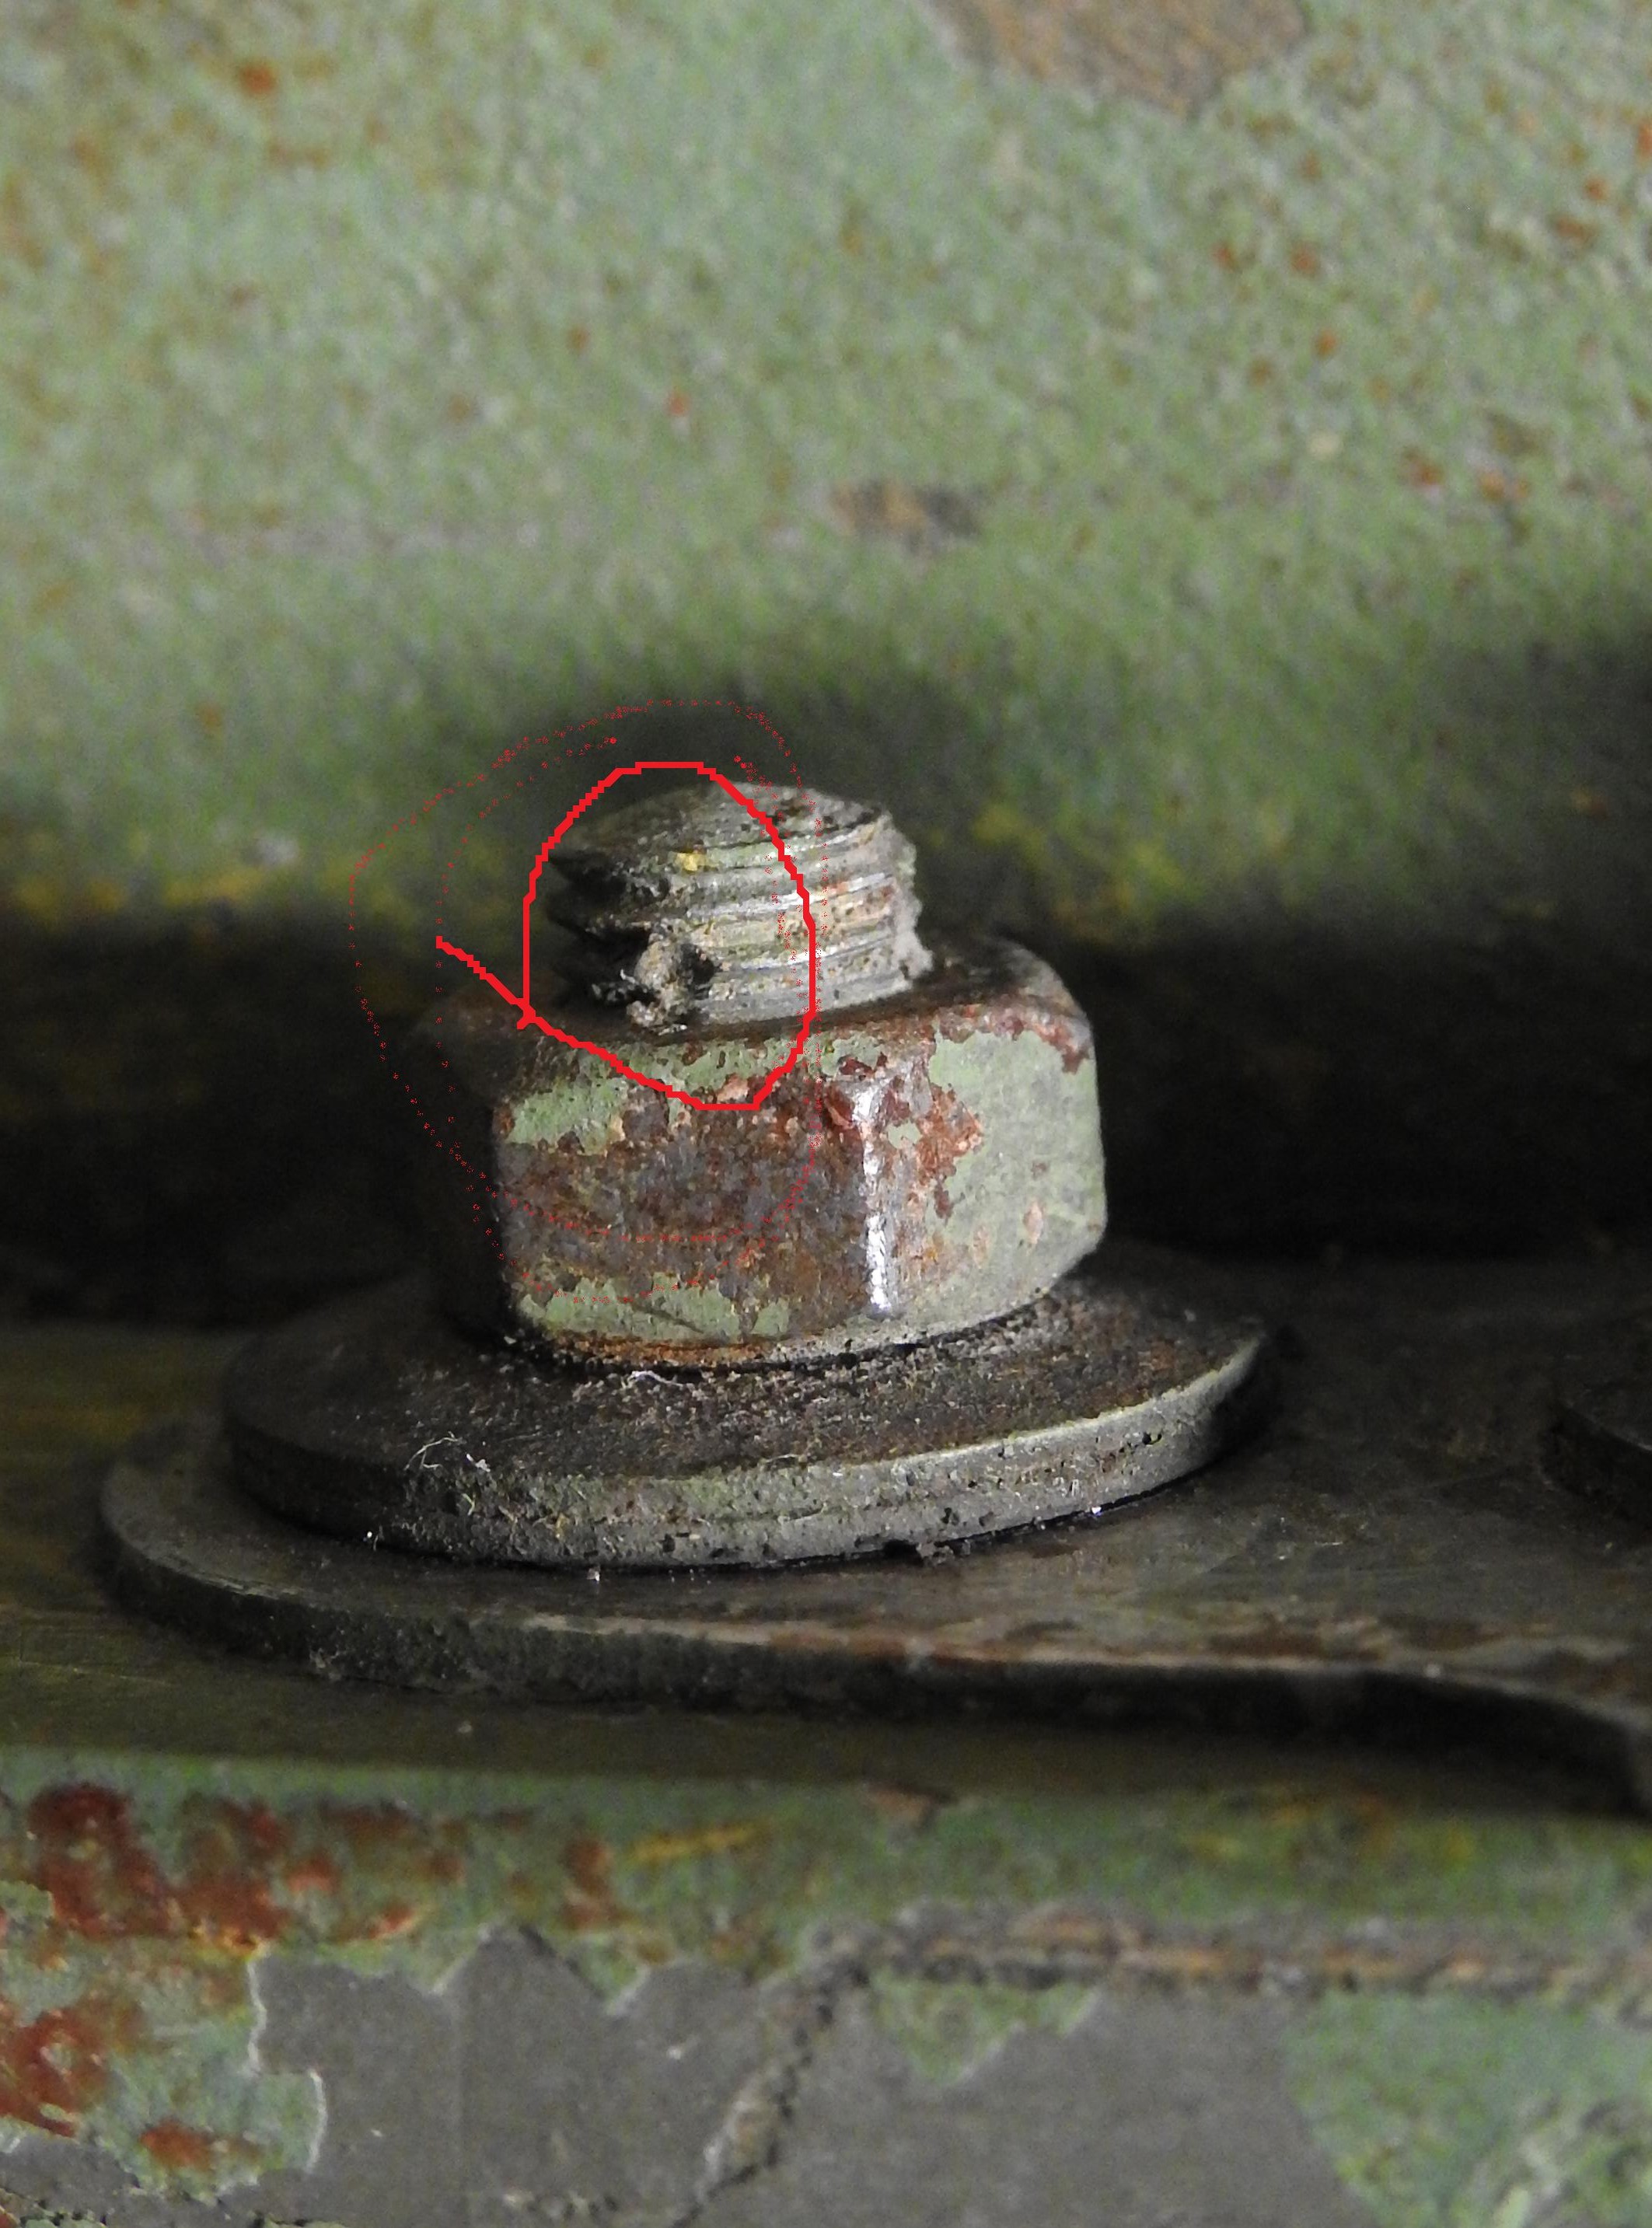

In addition to hammering over the end of the bolts, another favourite technique to secure a nut was to hammer a sharp pointy thing into the bolt threads as pictured above. Was it effective? Ask Davey, D. who tried to spin a nut off just such a bolt. The result, above.
Starting from the inside the scraping, scratching and sanding commenced for Colette and I. We spent long hours cleaning material from nooks and crannies to expose various levels of damage. (By the way I am here to tell you that Alexa has a very limited selection of music.)
This is one of the first areas I have worked on by myself for some time so I will go into a little more detail.
The stringers and corners needed to be cleaned first as the glue was caulked along the edges. I found that the glue comes out like broken glass and once on the loose, it acts like glass. The sharp corners and small pieces cause cuts in the wood if it gets under your tooling.
Then it was time for the Italian scrapers and jewelry tools to remove large areas of paint.
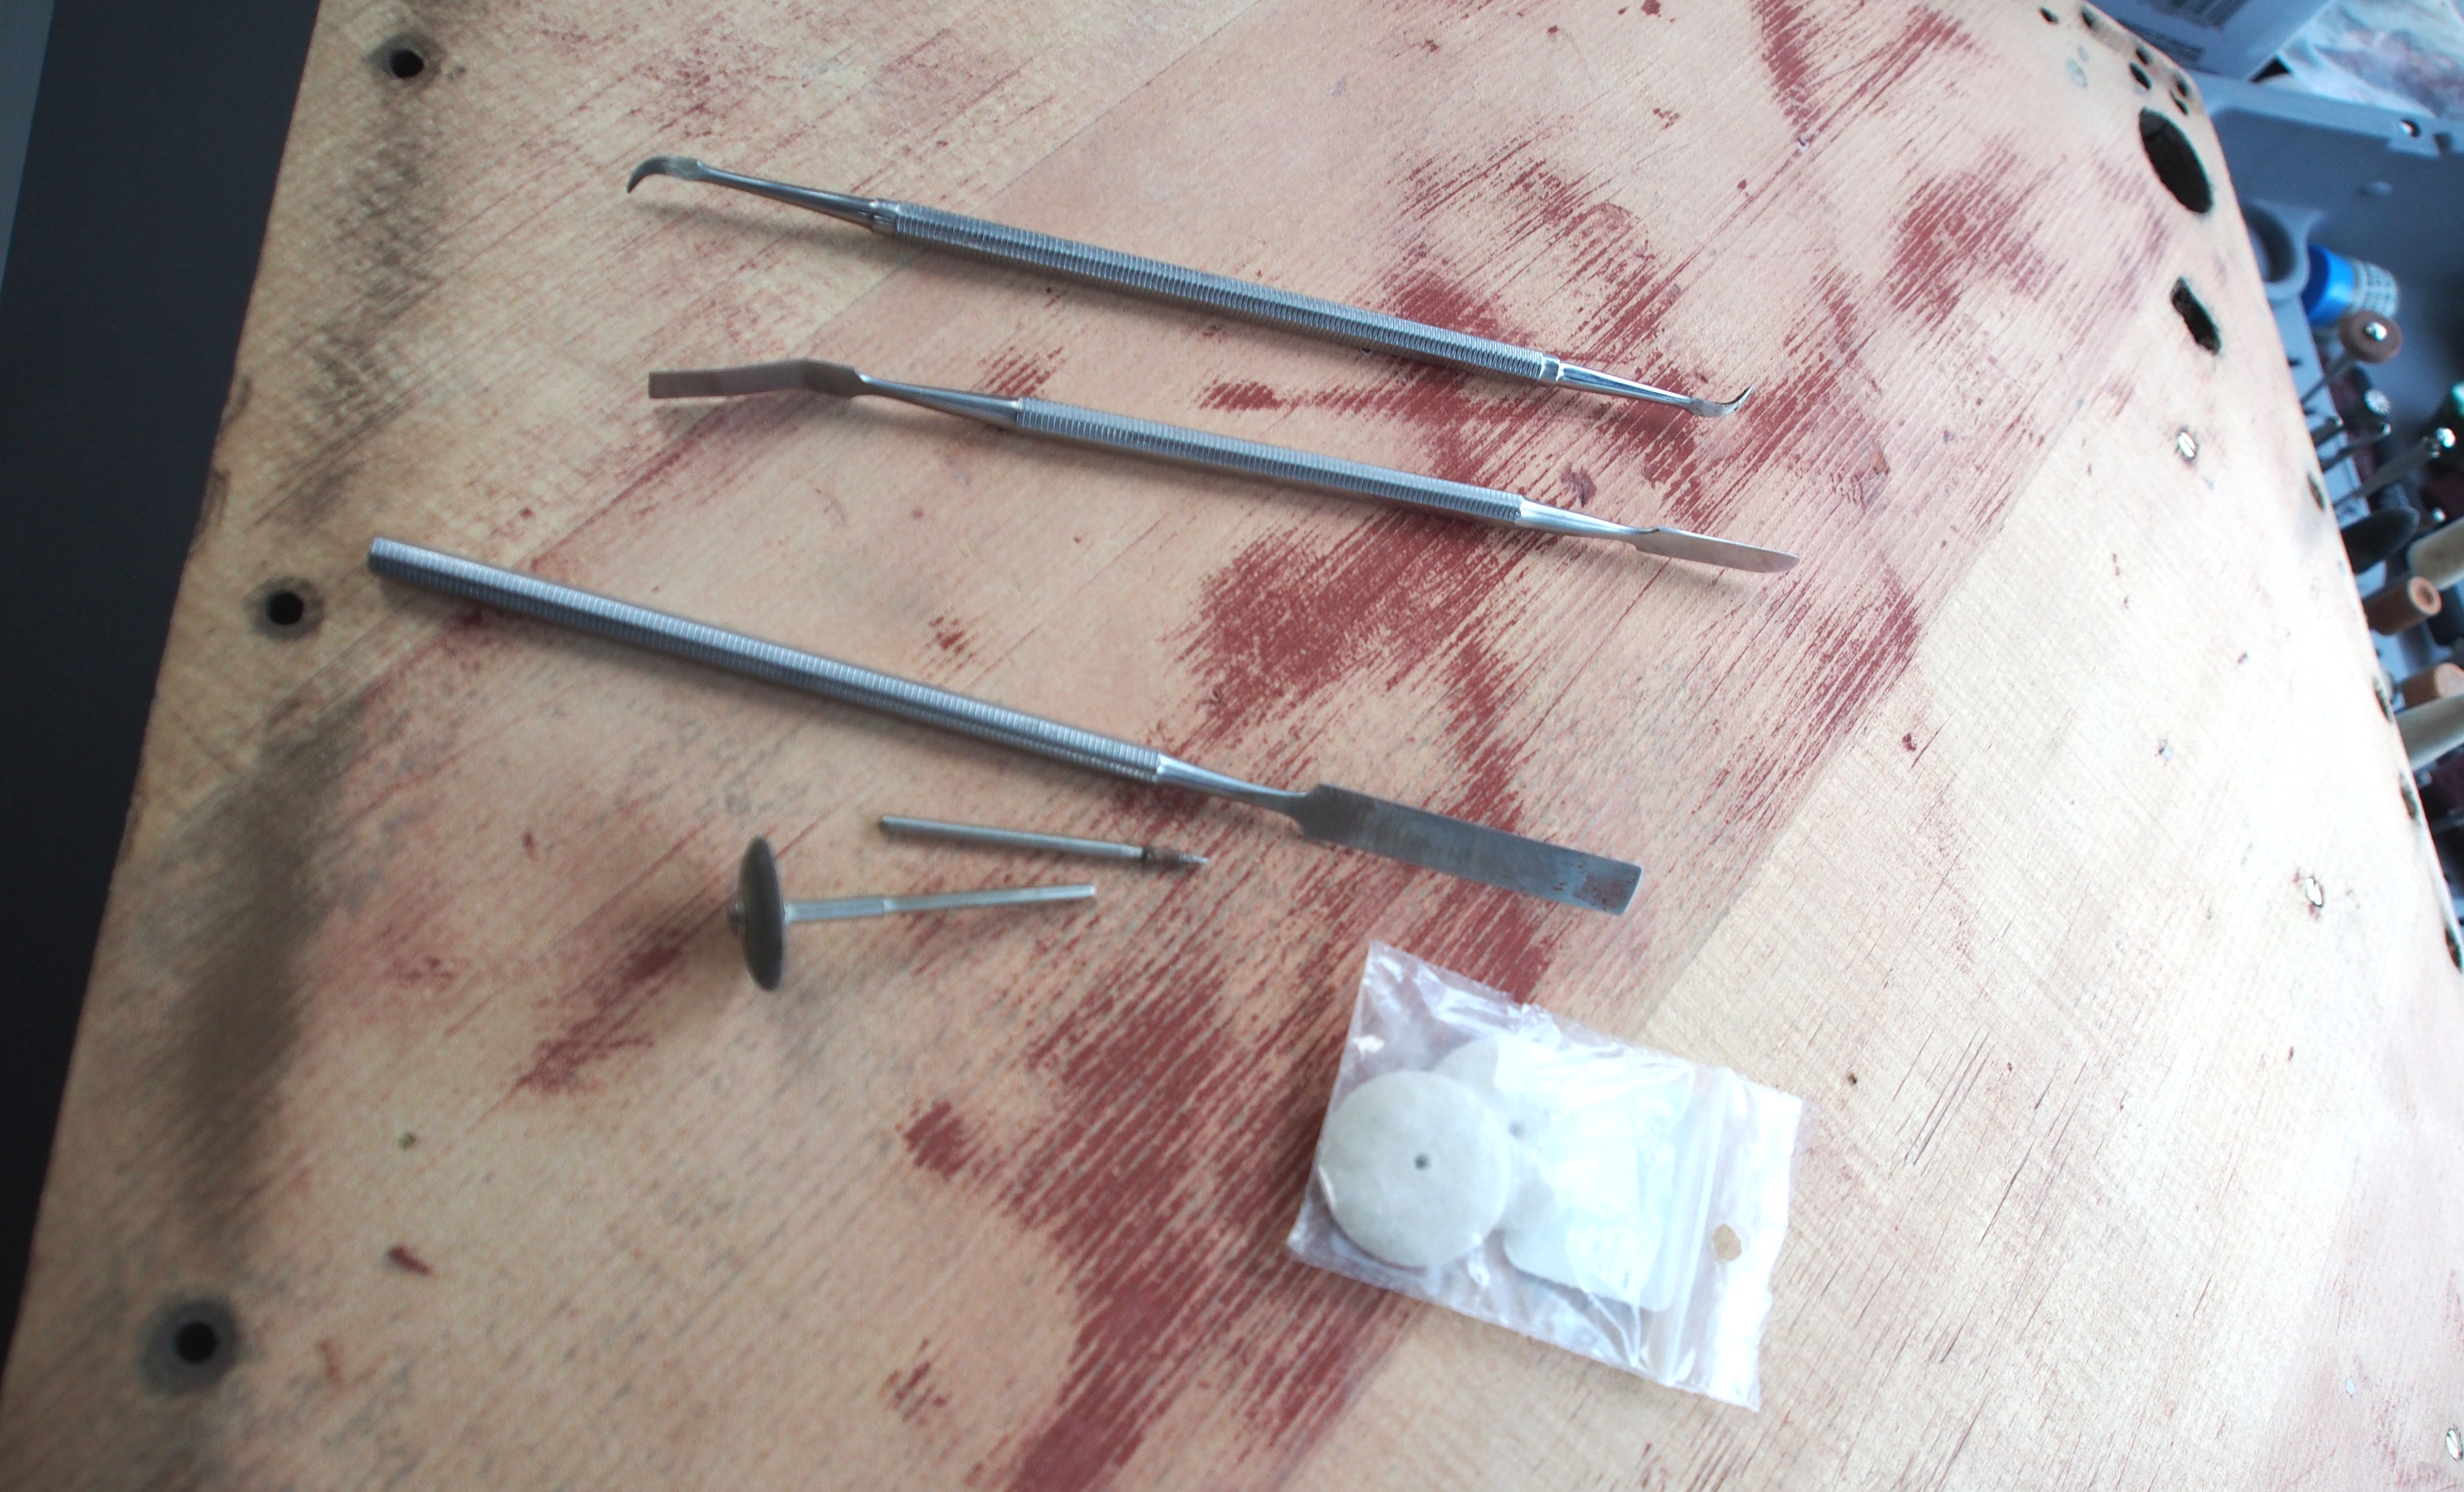
Some of the tools of the trade; fine picks and scrapers and a few Dremel rotary tools. Removing the fittings, peeling the fabric and scraping the layers of paint and dope from just one panel is a +50 hour process.
I would like to throw a plug in for a little company in Calgary I use extensively for supplies called "Ken's Gems". Ken provides supplies for the stone and jewelry makers, I could get lost in his little shop for days. I have been using jewelry tools pretty much from the start. The team now finds itself in there replacing worn tools.
The inside of the panel provided some interesting features like carved initials, fasteners imbedded in the wood and mechanical damage to the wood where someone used a screwdriver to pry the panel from the fuselage.
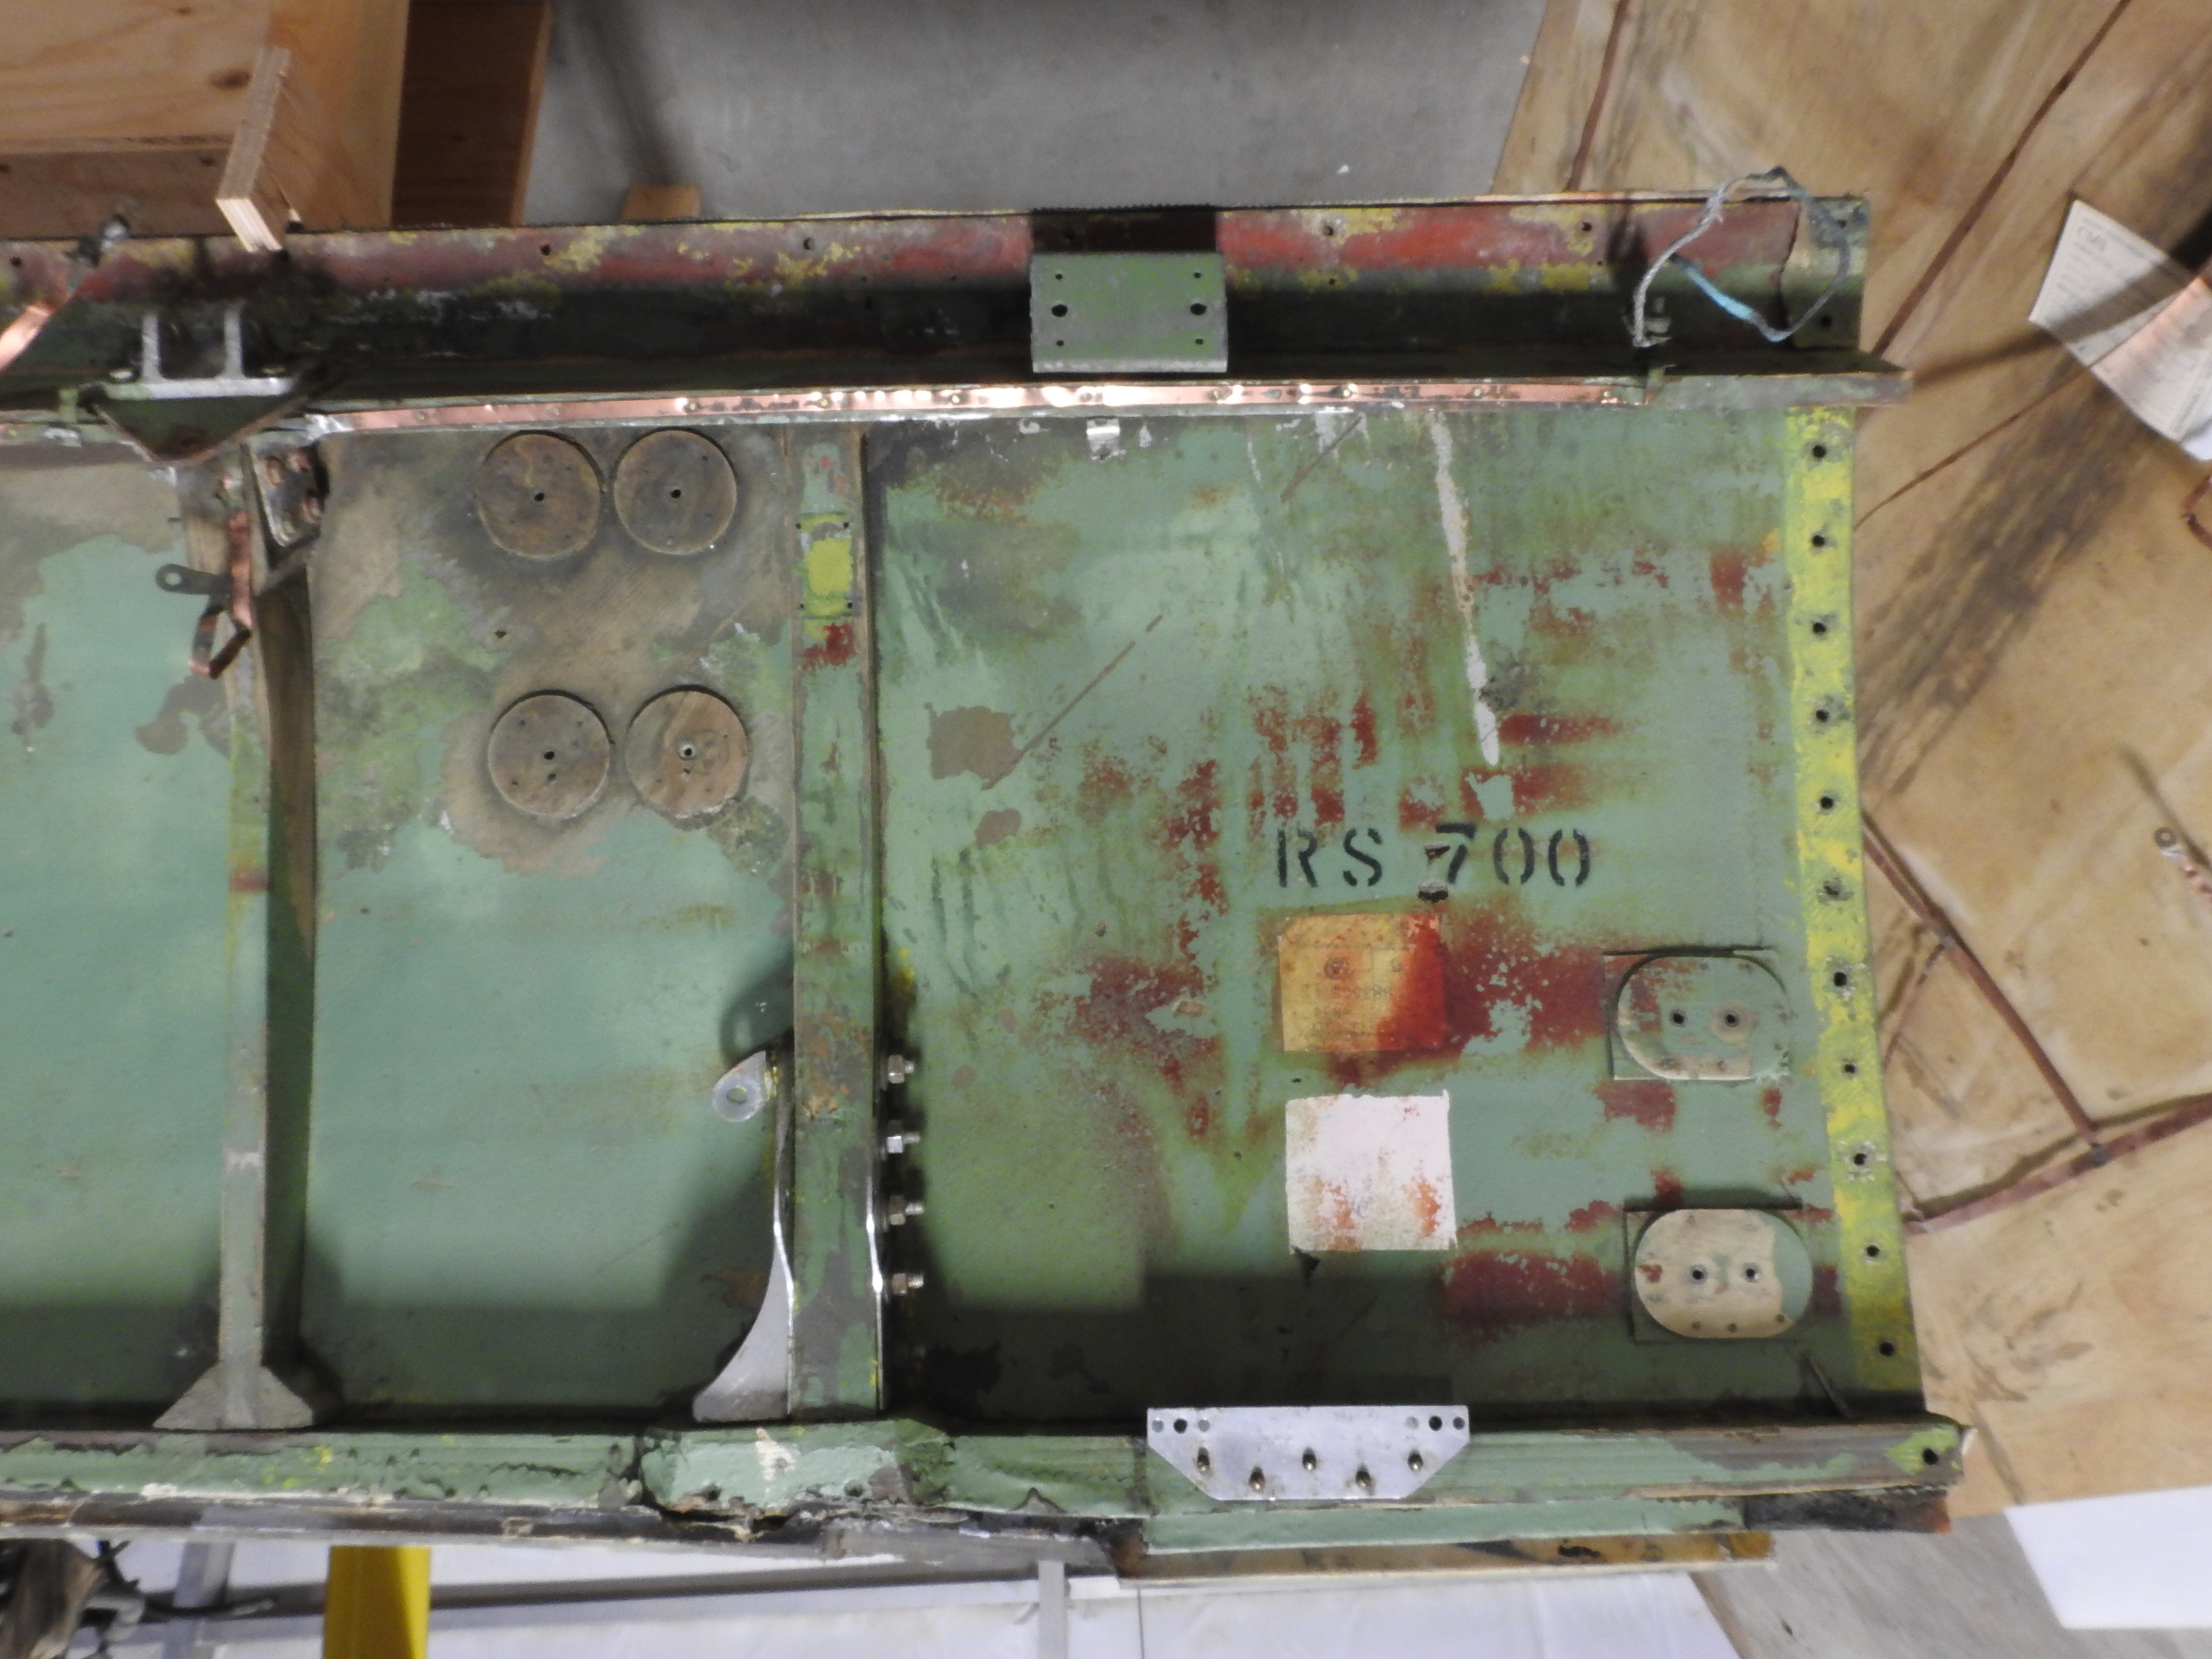
The inside of the panel is marked with the serial number of our Mosquito: RS700, along with two identification patches. We have left these intact and will protect them with a clear coat rather than stripping them off the panel.
Moving to the outside, it was my hope to remove the fabric skin in one piece. Boy was I out to lunch. What appeared to be straightforward turned out to be the Achilles heel of this part. The outside areas came off well but the buck stops there.
Colette worked tools under the fabric but it too was like glass, with brittle dope chips flying in all directions. We found that reinforcing tapes came off easy. Some areas of the fabric could be worked off by sliding tools under the skin, but the feel and sound were similar to getting into the wood itself.
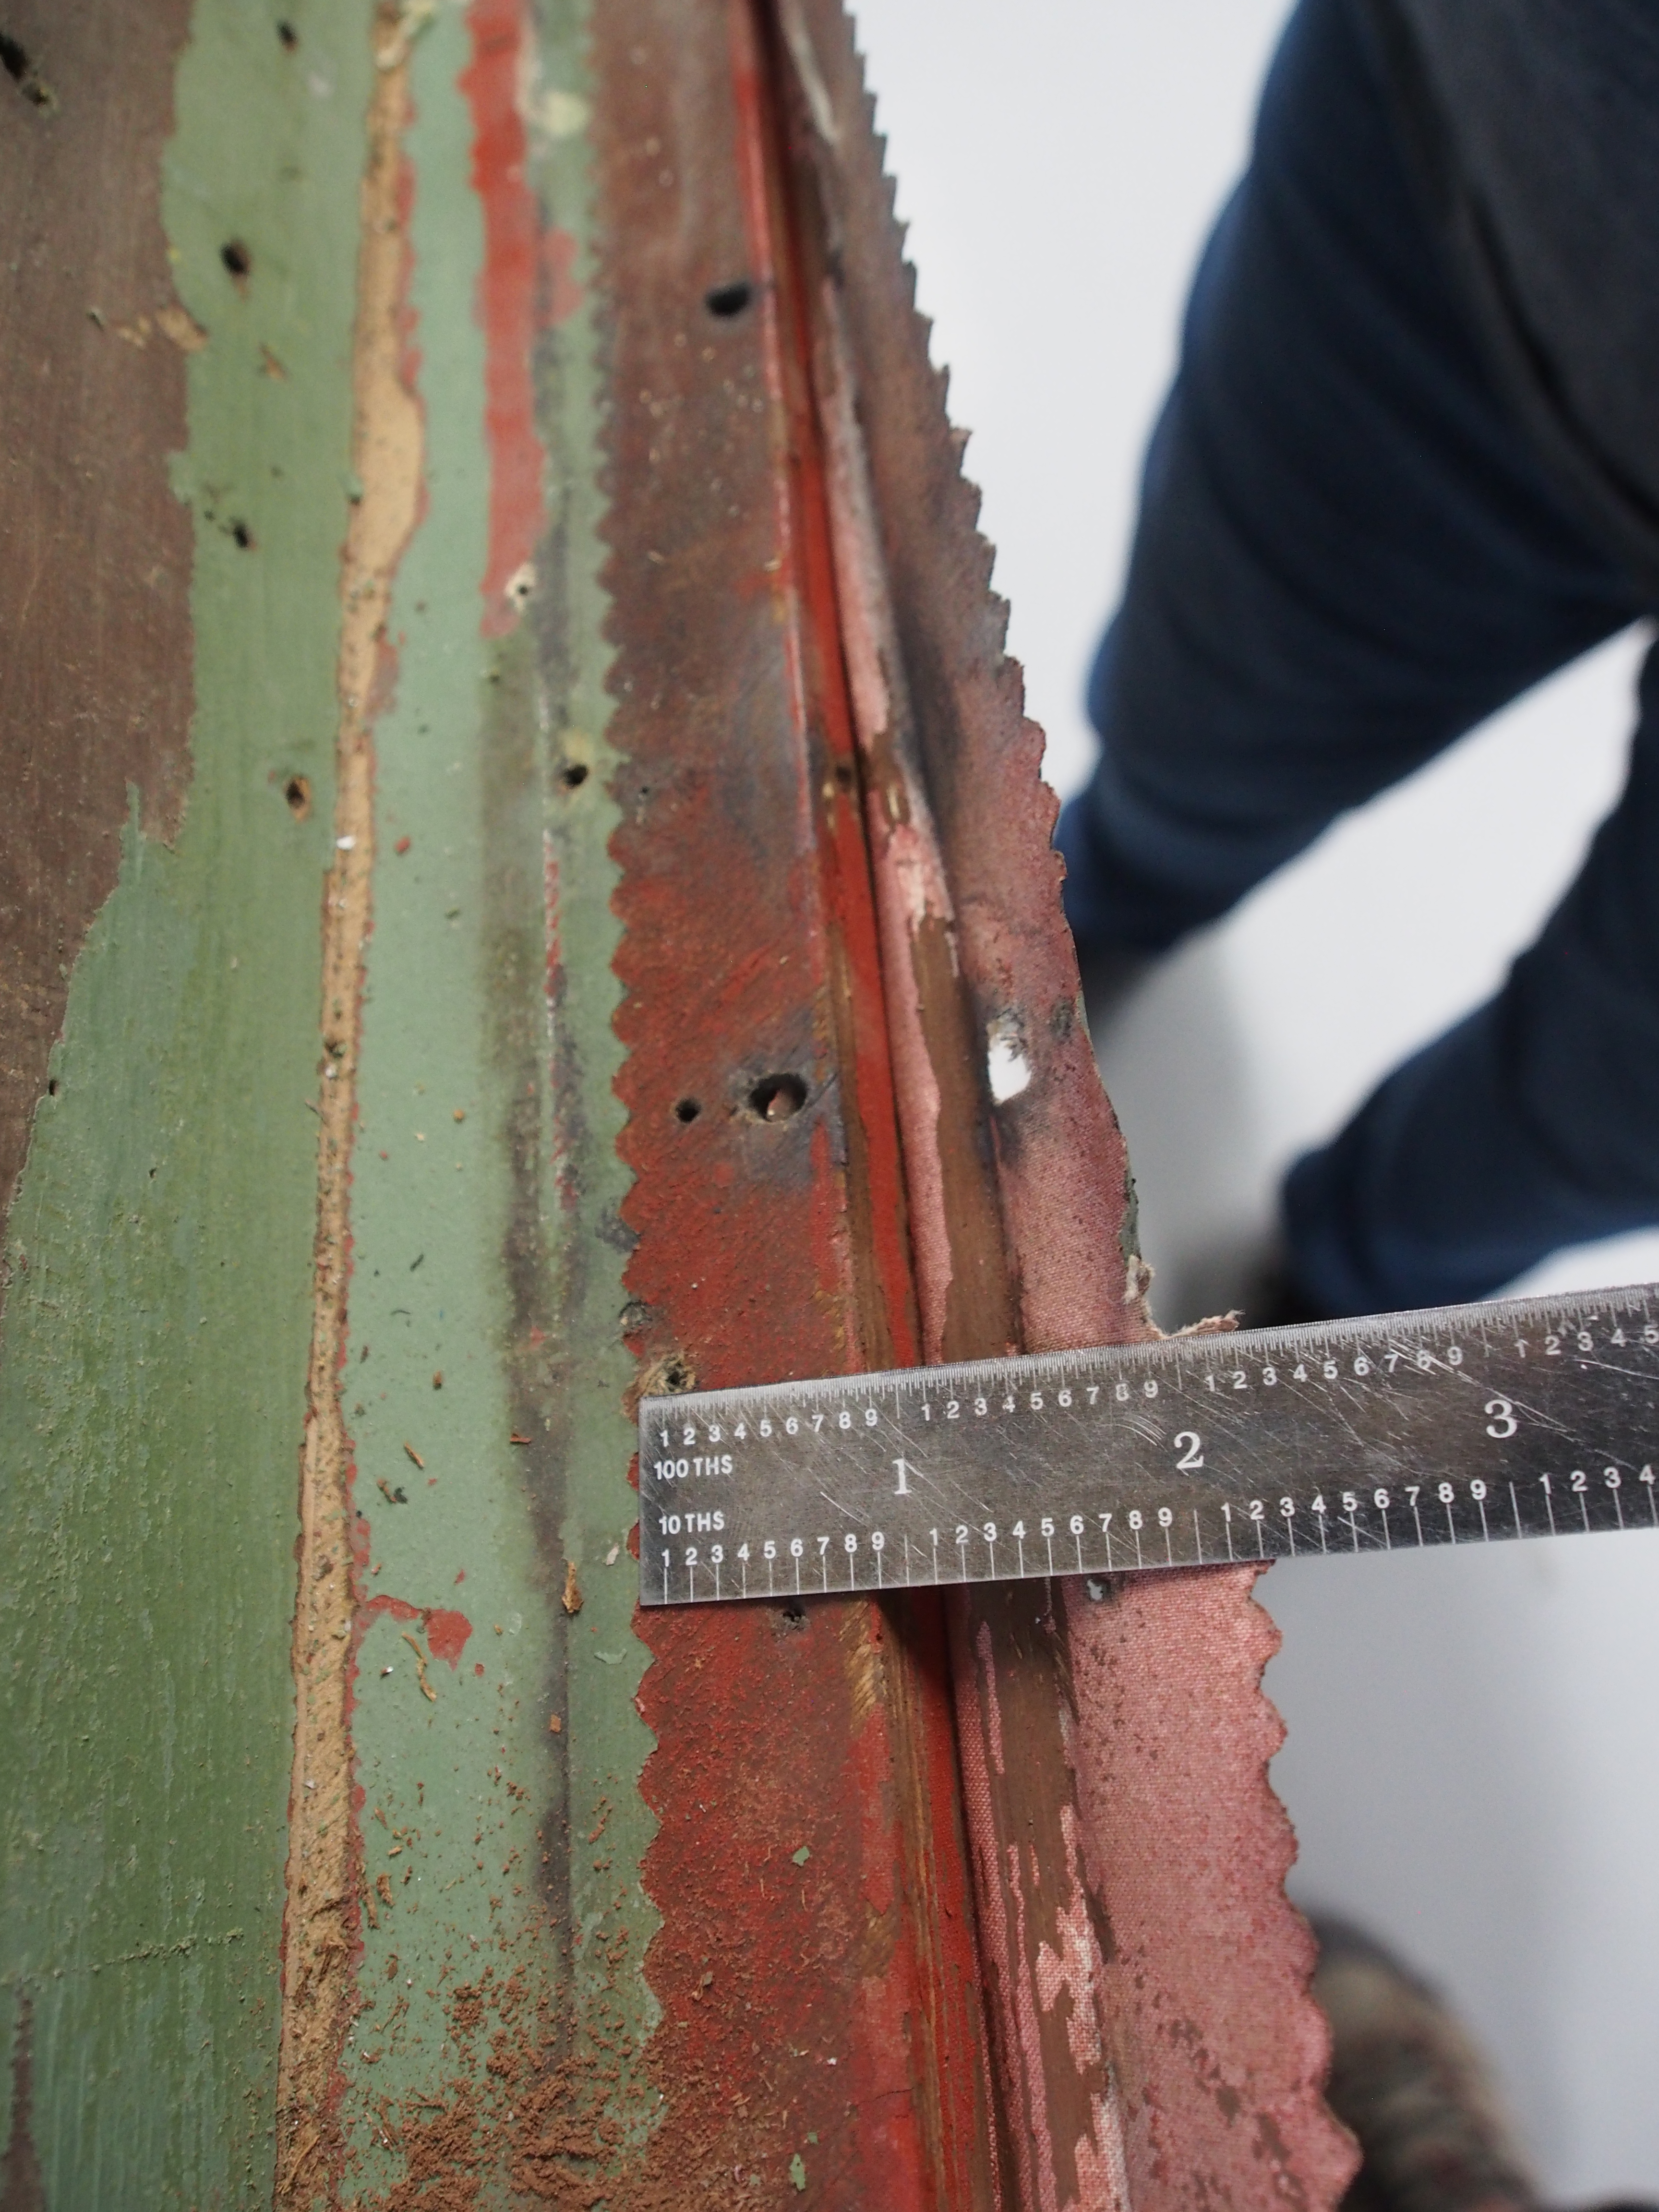
Only the outside surface of the panel is covered with fabric, but to finish it off, it is wrapped over to the inside by about an inch. Some of comes away easily; most does not.
I tried ketone solvents both to soften and pull the fabric, with poor results. I then settled on sanding until the fabric was exposed. Next I used MEK (methy lethyl ketone) to soften the dack proofing (the red) and ended up scraping the surface to basically get a mud pile.
Once the fabric had been removed, we then took the diamond cutters and silicone wheels to remove the old glue and debris. That gets us to the point where we can pass the panel to our wood repair crew to remove the rot and address the debonding and mechanical damage.

With all of the fittings removed, the fabric stripped and the many layers of paint scraped off, the panel is now ready to go to our wood repair specialists to deal with delamination, impact damage and some minor areas of rot.
Then it's on to the next panel...
While we have been tackling these panels, Andy has been busy with the elevator trim mechanism and the trim indicator, both of which are mounted on the port side of the cockpit.
Before the world went into lockdown, Andy began the job of restoring the elevator trim mechanism down at the Bomber Command Museum.
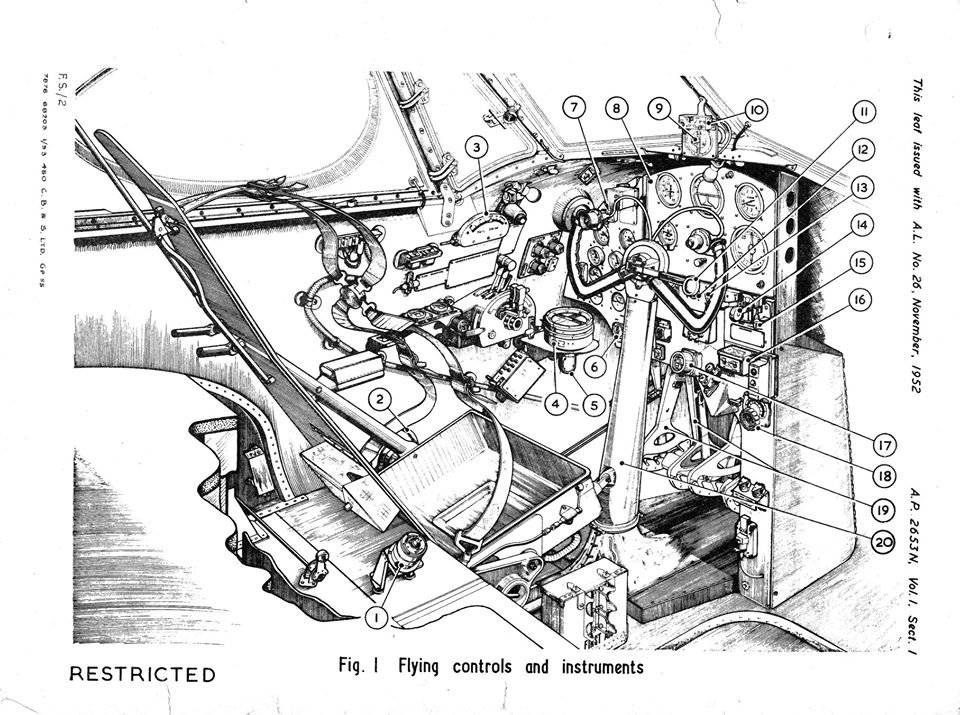
In this diagram for the PR.35 cockpit you can just see the trim mechanism to the left of the pilot’s seat, indicated as item #2. The trim indicator is mounted just above the throttle, also to the pilot’s left and is identified as item #3.
For its excellent durability we have been powder coating some components that are likely to get a lot of handling. But as Andy discovered the coating can be thicker than the original paint and may not belong on all surfaces.
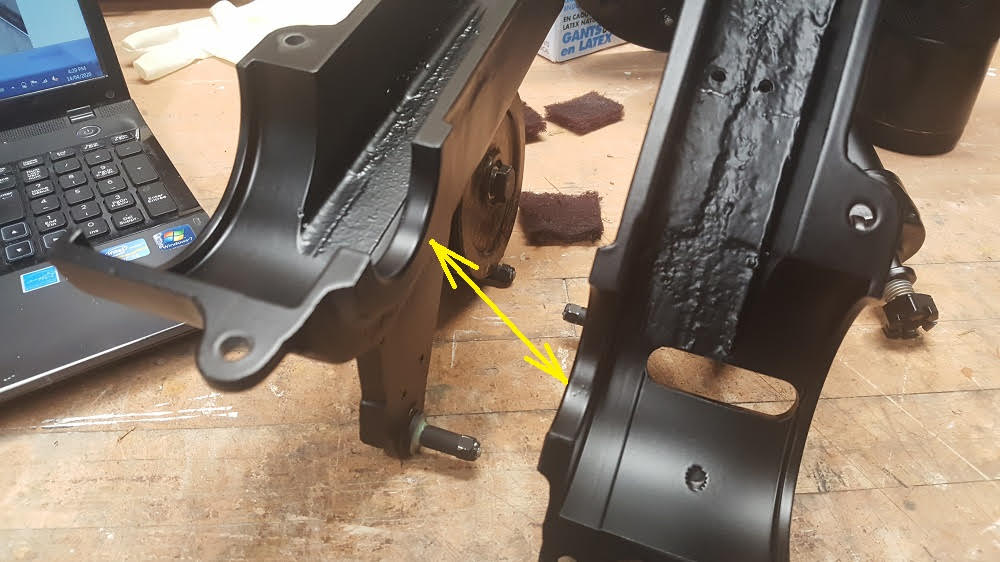
The arrows point to the surfaces through which the elevator crank runs. Though it's not a bearing surface, it's a snug fit and the thick powder coating has made it too tight.
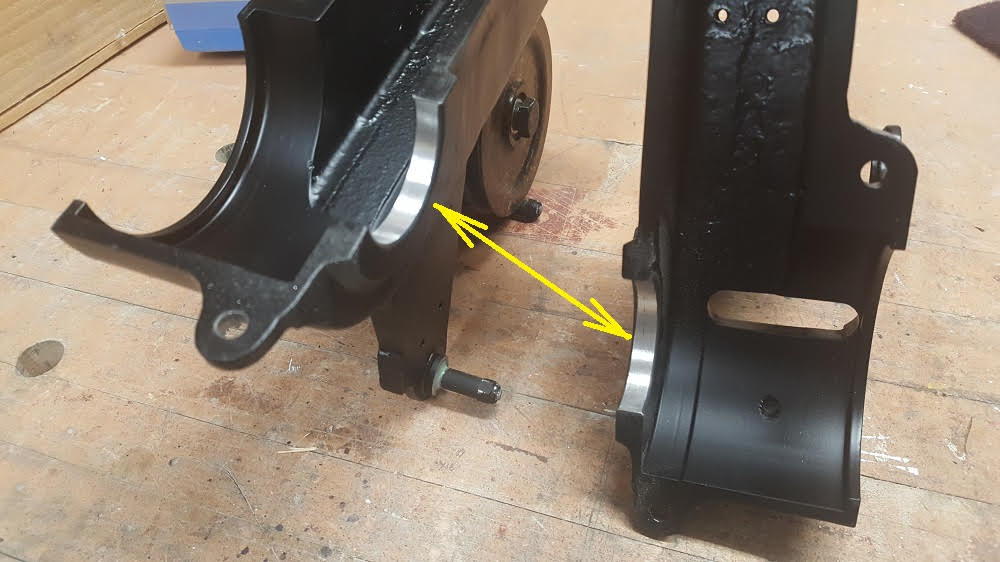
A can of elbow grease, a Dremel tool and some Scotchbrite later, the same surfaces less their powder coating. This process had to be repeated elsewhere after reassembly when it was discovered that some of the moving parts would not do so.
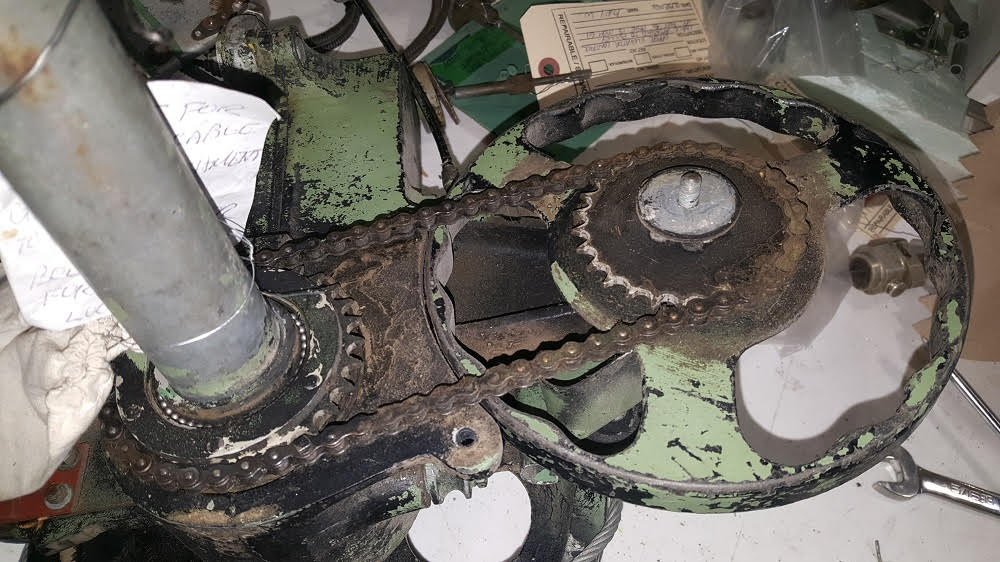
This is the whole elevator trim mechanism 'Before'.
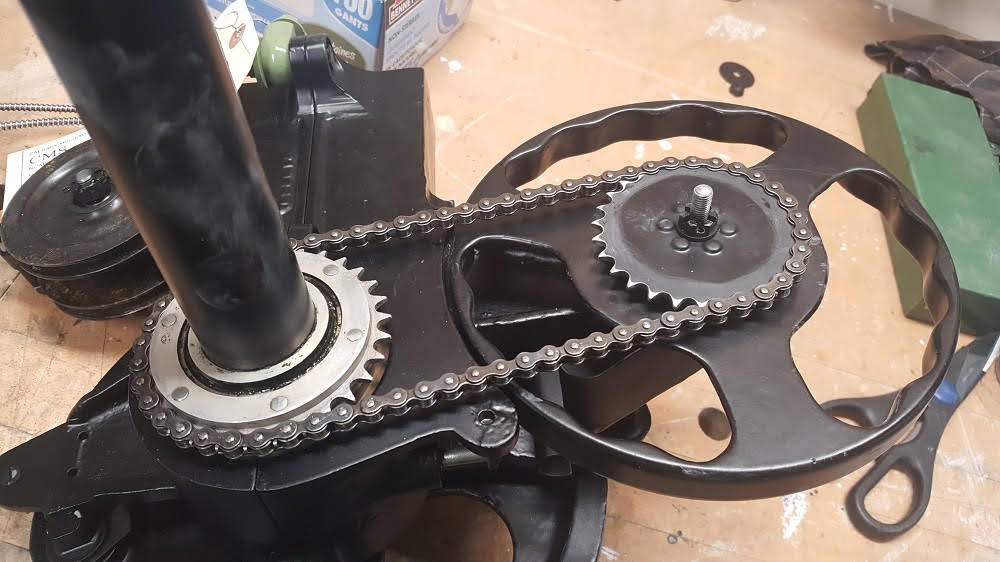
And in Andy's terrific matching shot, 'After'. (And that is 'after' the expenditure of a lot of BS&T).
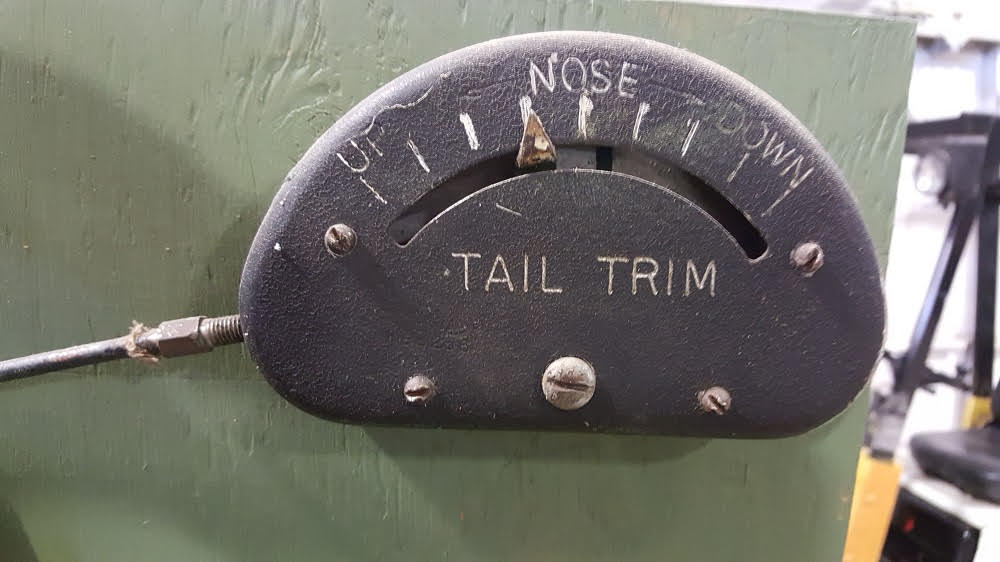
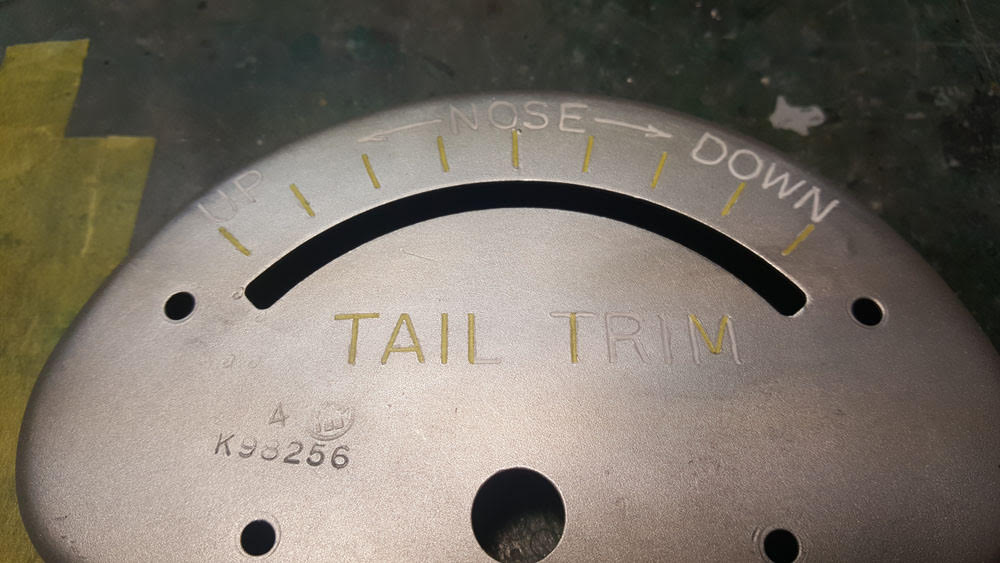
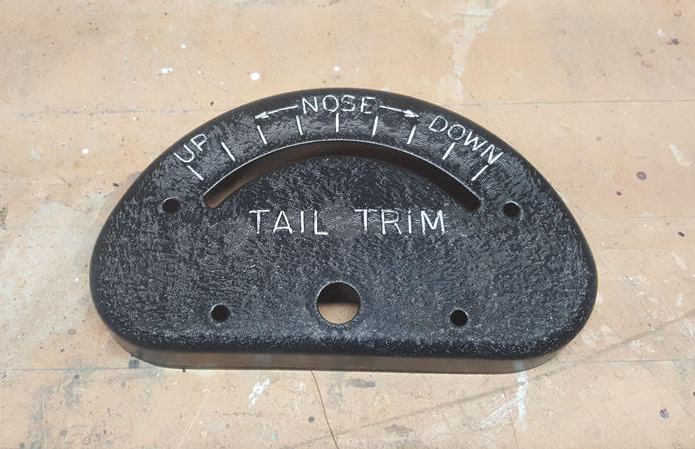
Above are the Before, During and After shots of the Elevator Trim Indicator.
It should be noted that a number of our regular volunteers have also been working from home and we will continue to make trips to Nanton to pick up parts and tools to support their efforts and to keep the work going as best we can.
Thanks for your support and interest.
Jack McWilliam
Website - Calgary Mosquito Aircraft Society